
How to Cut Natural Stone Tile: A Step-by-Step Guide

Cutting natural stone tile can seem intimidating, but with the right approach, it’s entirely manageable. Whether you’re working with marble, travertine, or granite, knowing how to cut natural stone tile correctly will help you get the cleanest lines and the best fit for your project. This guide will walk you through the basics, from picking the right tools to finishing up your cuts, so your installation looks as good as possible. If you’re looking for high-quality marble or travertine, Surfaces Galore ships nationwide and offers bulk discounts, making it easy to get the materials you need for any job.
Key Takeaways
- Use a wet saw with a diamond blade for the best results when cutting natural stone tile.
- Always wear safety gear, including eye protection and gloves, to avoid injury during cutting.
- Mark your cut lines carefully and double-check measurements before making any cuts.
- Cut slowly and let the saw do the work—forcing the blade can cause chips and uneven edges.
- Keep the blade and tile cool with a steady water feed to reduce dust and prevent overheating.
- Plan your cuts so that rough or unfinished edges are hidden against walls or under trim.
- Sand or polish exposed cut edges for a smoother, more finished appearance.
- Order extra material to account for waste and unexpected breakage during installation.
Understanding the essentials of cutting natural stone tile
Why Precision Matters When Cutting Natural Stone
Cutting natural stone tile isn't like cutting, say, a piece of wood. This material has a history, a story etched into its very being. When you cut it, you're not just making a shape; you're working with nature's art. Precision is paramount because a clean cut respects the stone's integrity and ensures a flawless finish. A poorly cut tile can throw off your entire layout, leading to gaps, unevenness, and a less-than-perfect final look. For those looking to buy marble tiles online in the USA, knowing that each cut will be exact is a huge part of the appeal. It’s about achieving that seamless, high-end look you’re after.
The Unique Challenges of Cutting Marble and Travertine
Marble and travertine are beautiful, yes, but they come with their own set of quirks. Marble, with its delicate veining, can be prone to chipping if you’re not careful. Travertine, often featuring natural holes, requires a bit more finesse to ensure those features remain intact and attractive. These aren't materials you can just hack at. They demand respect and the right approach. Understanding these nuances is key to a successful project, whether you're working with marble tiles or travertine.
Assessing the Right Stone for Your Project Needs
Before you even think about cutting, you need to know your stone. Is it going on the floor in a high-traffic area? Is it a backsplash in a busy kitchen? Different stones have different hardness levels and porosity. Granite is tough, marble is elegant but softer, and slate offers a unique texture. Choosing the right stone means considering its durability, its look, and how it will perform in its intended environment. This upfront assessment saves a lot of headaches later on.
Recognizing the Inherent Beauty of Natural Stone Variations
One of the biggest draws of natural stone is its uniqueness. No two pieces are exactly alike. You'll see variations in color, veining, and texture. This isn't a flaw; it's the stone's signature. Embrace it! Planning your cuts and layout to highlight these natural variations can turn a good installation into a spectacular one. It’s about working with the stone, not against it.
The Importance of Planning Your Cuts Effectively
Think of your tile layout like a puzzle. Before you start cutting, lay out your tiles dry. This lets you visualize the pattern, identify where cuts will be needed, and figure out the best way to place them. You want to minimize awkward cuts, especially in visible areas. Often, you can plan cuts so they're hidden by cabinets or against walls. Good planning means fewer cuts, less waste, and a much cleaner final appearance. It’s a step that many skip, but it makes a world of difference.
Considering the Finish and Edge of Your Stone Tiles
The finish (like polished, honed, or tumbled) and the edge type (straight, beveled, or chiseled) of your stone tiles play a role in how they're cut and how they look. A polished finish might show chips more readily than a tumbled one. A straight cut tile needs to be precise for a groutless look, while a beveled edge can be more forgiving. Always consider how the finish and edge will interact with your cuts and the overall design.
Understanding the Role of Stone Origin and Characteristics
Where your stone comes from can tell you a lot about its properties. Stones mined from different regions might have slightly different densities or mineral compositions. For example, some marbles are known for their dramatic veining, while others are more uniform. Understanding these characteristics helps you anticipate how the stone will behave during cutting and what kind of look you can expect. It’s all part of appreciating the natural material you’re working with.
Gathering your tools for cutting natural stone tile
Before you even think about making a cut, let's talk tools. Getting the right gear is half the battle when it comes to cutting natural stone. You wouldn't try to build a house with just a hammer, right? Same goes for stone. Investing in quality tools means cleaner cuts, less frustration, and a much better final product. Plus, it keeps you safer. Let's get you set up.
Selecting the Ideal Wet Saw for Stone Cutting
This is your workhorse. A good wet saw is non-negotiable for natural stone. Forget those cheap tile cutters; they just can't handle the density and hardness of materials like marble or granite. A wet saw uses a diamond blade and a water system to keep things cool and minimize dust. This means cleaner cuts and a longer life for your blade. When you're looking to buy marble tiles online in the USA, make sure you've got the right saw ready to go.
- Power: Look for at least a 1.5 HP motor for most natural stones.
- Blade Capacity: Ensure it can accommodate the thickness of your tiles.
- Portability: Consider if you need a smaller, portable unit or a larger, stationary one.
Choosing the Correct Diamond Blade for Your Stone Type
This is where precision meets material. Not all diamond blades are created equal, and using the wrong one can lead to chipped edges or a blade that wears out way too fast. You need a blade specifically designed for cutting natural stone. Think of it like using the right knife for the job – a steak knife for a tomato? No thanks.
- Continuous Rim Blades: Best for very smooth cuts on delicate stones like marble or polished porcelain.
- Segmented Blades: More aggressive, good for harder stones like granite or slate, and general-purpose cutting.
- Turbo Blades: A good middle ground, offering speed and a decent finish.
Always match your blade to the stone you're cutting.
Essential Safety Gear for a Secure Cutting Experience
Safety first, always. Natural stone cutting can create dust and debris, and the saws themselves are powerful machines. Don't skip this part – your eyes, ears, and hands will thank you.
- Safety Glasses: Non-negotiable. Protect your eyes from flying chips.
- Work Gloves: Good grip and protection from sharp edges.
- Hearing Protection: Wet saws can be loud.
- Dust Mask/Respirator: Especially important if you're cutting dry or if the water system isn't perfect.
The Necessity of a Reliable Water Feed System
This is what makes a wet saw a wet saw. The water does two critical jobs: it cools the diamond blade, preventing it from overheating and dulling, and it suppresses the dust, making the process much healthier and cleaner. A consistent water flow is key. Make sure your saw's reservoir is clean and filled, and the pump is working correctly before you start.
Gathering Measuring and Marking Tools
Accuracy is everything. You can have the best saw in the world, but if your measurements are off, your cuts will be too. Simple tools, but vital for success.
- Tape Measure: A good quality, sturdy tape measure.
- Pencil or Marker: A grease pencil or a permanent marker that shows up on your stone.
- Straight Edge or Ruler: For drawing those perfect cut lines.
Preparing Your Workspace for Efficient Cutting
Don't try to cut stone in the middle of your living room. You need a stable, well-lit area with good drainage and ventilation. Think about where the water will go and how you'll manage the slurry byproduct. A dedicated space makes the whole process smoother and safer.
Having Spare Blades and Maintenance Supplies Ready
Things happen. Blades wear out, water pumps can clog. Having a spare blade on hand means you won't be stopped mid-project. Regular cleaning and maintenance of your saw will also save you headaches down the line. A little upkeep goes a long way.
Case Study: The Marble Countertop Mishap
Sarah wanted a stunning marble countertop for her kitchen. She bought beautiful slabs online, but decided to save money by cutting them herself with an old angle grinder. She didn't have a proper blade, no water feed, and definitely no safety gear. The result? Chipped edges, a dull blade, and a cloud of dust that made her sneeze for days. The countertop looked terrible, and she ended up having to pay a professional fabricator to fix it – costing her more than if she'd hired them from the start. Lesson learned: the right tools are an investment, not an expense.
Case Study: The Travertine Tile Triumph
Mark was tiling his patio with travertine. He invested in a decent wet saw with a diamond blade specifically for stone and made sure he had all his safety gear. He meticulously measured and marked each tile, using the water feed system consistently. His cuts were clean, the edges were smooth, and the patio turned out beautifully. He even used some of the off-cuts for a small decorative border. His careful preparation and tool selection made a challenging job manageable and the results were professional-grade.
Preparing your natural stone tiles for cutting
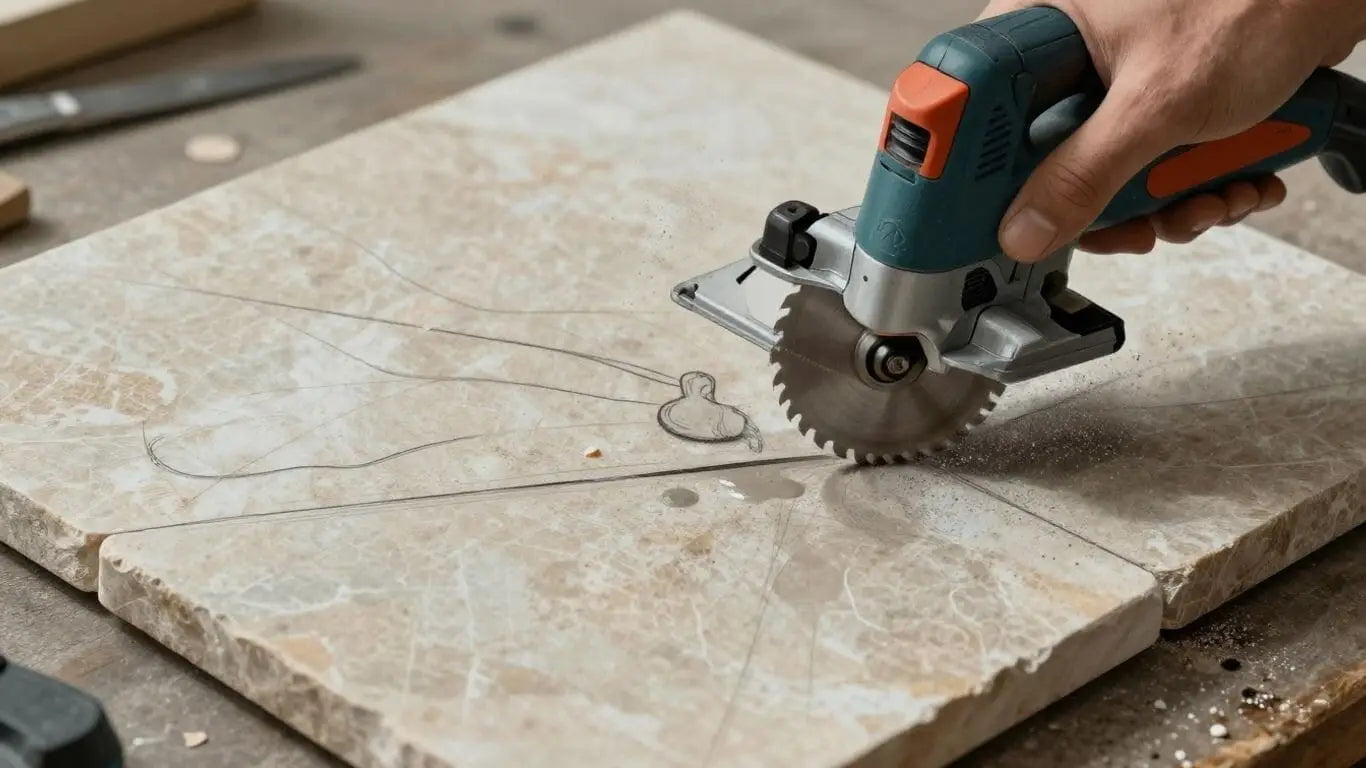
Before you even think about making a cut, getting your natural stone tiles ready is a big deal. It’s not just about grabbing the tile and hitting it with a saw. A little prep work goes a long way to making sure your cuts are clean and your tiles don't end up as expensive dust. Think of it like getting your ingredients ready before you start cooking a fancy meal – you wouldn't just toss everything into the pot at once, right?
Acclimating Your Stone to the Environment
Natural stone, like marble or travertine, is a product of nature. It reacts to its surroundings. Letting your tiles sit in the room where they'll be installed for a couple of days is super important. This lets them adjust to the room's temperature and humidity. Skipping this step can lead to issues down the road, like tiles expanding or contracting after they're installed, which nobody wants. It's a simple step that helps maintain the integrity of your beautiful stone.
Cleaning Tiles to Prevent Blade Contamination
Dust, dirt, or any grit on your tiles can get into your wet saw's water system or, worse, get ground into the blade. This can cause premature wear on your diamond blade and lead to rougher cuts. Give each tile a quick wipe-down. It doesn't need to be spotless, but removing loose debris is key. This also helps ensure the thin-set mortar adheres properly later on.
Marking Cut Lines with Precision
This is where accuracy really counts. You need a clear, visible line to follow. Use a sharp pencil or a fine-tip marker. For darker stones, a white or silver marker works best. Always measure twice and mark once. A slight error here can mean a tile that doesn't fit right, leading to more cuts and more waste. If you're looking for specific marble tiles or travertine tiles, precision in cutting ensures they look just as good as they do online.
Securing Tiles for a Stable Cutting Surface
When you're cutting, the tile needs to be stable. It shouldn't wobble or shift. Most wet saws have a table or a way to support the tile. Make sure the tile is flat against the saw's surface. If you're cutting a particularly large or heavy tile, consider using a support system to keep it steady. A wobbly tile is a recipe for a bad cut, or worse, a broken tile. We want those perfect cuts, not surprises.
Planning for Cuts That Hide Edges
This is a smart installer's trick. Whenever possible, plan your cuts so that the cut edge will be against a wall, behind a cabinet, or under trim. This way, any minor chipping or imperfections from the cut are hidden. It saves you the trouble of trying to get a perfectly clean edge on every single cut. For example, if you're tiling a bathroom, try to have cuts along the back wall where the tub meets the tile.
Understanding the Waste Factor in Stone Cutting
Natural stone isn't cheap, and you don't want to waste it. Every cut you make creates some waste. Complex cuts, like those around outlets or in corners, will naturally produce more scrap. It's a good idea to understand that some waste is inevitable. This is why ordering extra material is so important. You can't just run back to the store for one tile if you mess up a critical cut.
Calculating the Amount of Extra Material Needed
So, how much extra? A general rule of thumb is to add 10-15% to your total square footage. This accounts for cuts, potential breakage, and future repairs. For intricate patterns or rooms with lots of angles, lean towards the higher end of that percentage. It's better to have a few extra tiles than to run short on a project. If you're buying marble or travertine, getting that extra bit ensures you have matching material if a repair is needed years down the line. You can always find great deals when you buy marble tiles online USA, but having spares is peace of mind.
Case Study: The Kitchen Backsplash Project
Sarah was redoing her kitchen backsplash with beautiful, imported marble tiles. She meticulously measured her space, calculated the square footage, and added 10% for waste. During the cutting process, she encountered a few tricky cuts around her electrical outlets. One tile chipped slightly on a corner cut, and another had a small crack develop near the edge due to a slight wobble on the saw. Because she had ordered that extra 10%, she had replacements readily available. This saved her from a trip to the store and kept her project on schedule. Her final backsplash looked stunning, with perfectly placed tiles and minimal visible cuts.
Case Study: The Bathroom Floor Renovation
Mark was installing travertine tiles on his bathroom floor. He planned his layout carefully, ensuring most cuts would be hidden against the walls and vanity. He dry-laid the tiles first to visualize the pattern and mark his cut lines. He also made sure to let the tiles acclimate to the bathroom's humidity for 48 hours before cutting. When it came time to cut, he used a sharp diamond blade and took slow, steady passes. He only needed to make a few cuts, and thanks to his planning, the cut edges were mostly concealed. The floor turned out beautifully, with a consistent look and minimal waste. He even had a few tiles left over for future repairs.
Proper preparation is the foundation of a successful natural stone tile installation. Taking the time to acclimate, clean, and accurately mark your tiles before cutting will save you time, frustration, and money in the long run. It ensures a professional finish that showcases the natural beauty of your chosen stone.
Mastering the wet saw technique for stone
Cutting natural stone tile right is about more than just passing a slab through a blade—it's an investment in your time, money, and the overall appeal of your space. If you want flawless results, mastering your wet saw technique is a must. Here’s how to get the best out of every cut.
Setting up Your Wet Saw for Optimal Performance
Start by giving your wet saw a quick check:
- Attach the correct diamond blade based on your tile type.
- Confirm all the bolts and guards are secure.
- Make sure the water feed is running clear and steady.
A well-set-up saw means you get smooth, accurate cuts and avoid overheating the blade—key for tough jobs like when you buy marble tiles online USA and want showroom-level results at home.
Ensuring the Water Reservoir is Adequately Filled
If the water runs low, your blade (and stone) can heat up fast and cause cracks, chips, or worse—broken pieces. Fill the reservoir before you begin cutting, and keep an eye on the level as you go. Clean, cool water is your best friend here.
Making Slow and Steady Passes Through the Stone
Rushing the cut leads to jagged edges and wasted material.
Here’s the drill:
- Let the saw spin up to full speed before you lower the tile.
- Guide the tile gently, allowing the blade—not your hands—to do the work.
- Pause briefly before pulling the tile away, so the blade finishes cleanly.
Guiding the Tile Smoothly Through the Blade
Support the whole tile as it glides through. Larger pieces can flex and snap if not handled with care. Always keep your hands out of the blade’s path.
When you're focused on a smooth push-through, you’ll see fewer chips and less breakage—especially with pricier stones. It’s worth the extra patience.
Avoiding Excessive Pressure During the Cut
Pushing too hard causes friction and cracks. Think of the wet saw like a chef’s knife through ripe fruit—it should glide, not struggle. If you hit resistance or hear the saw strain, ease up.
Cooling the Blade and Tile Effectively
Beyond a well-filled reservoir, occasionally pause during long or thick cuts to let things cool off. You’ll get crisper lines and reduce dust.
Dealing with Intricate Cuts and Curves
Trickier shapes demand a softer touch:
- Use a series of small straight cuts to outline curves
- Snap off edges carefully, then finish with a tile nipper or sanding stone
- For mosaics, a slow, shallow pass avoids breakage
Real-World Case Studies
Bathroom Tile Makeover in Chicago:
Lisa ordered premium marble tiles online and cut each piece with slow, methodical passes using her wet saw. Her results? Hotel-worthy edges and perfect fit, even around tricky plumbing.
Backsplash Installation in Florida:
Tom worked with travertine mosaics and faced multiple tight curves. He marked each shape and relied on steady water feed, plus extra patience. The final effect: custom, high-end results that looked professionally done.
For a professional finish every time—and fewer mistakes—take time to properly set up and maintain your saw. Invest in quality blades and slow, steady movements. Your finished floor or backsplash will thank you, and you’ll see why it's worth the effort. For more on getting precise, chip-free results, check out tips on achieving professional-looking edges with your next project.
Achieving clean edges and smooth finishes
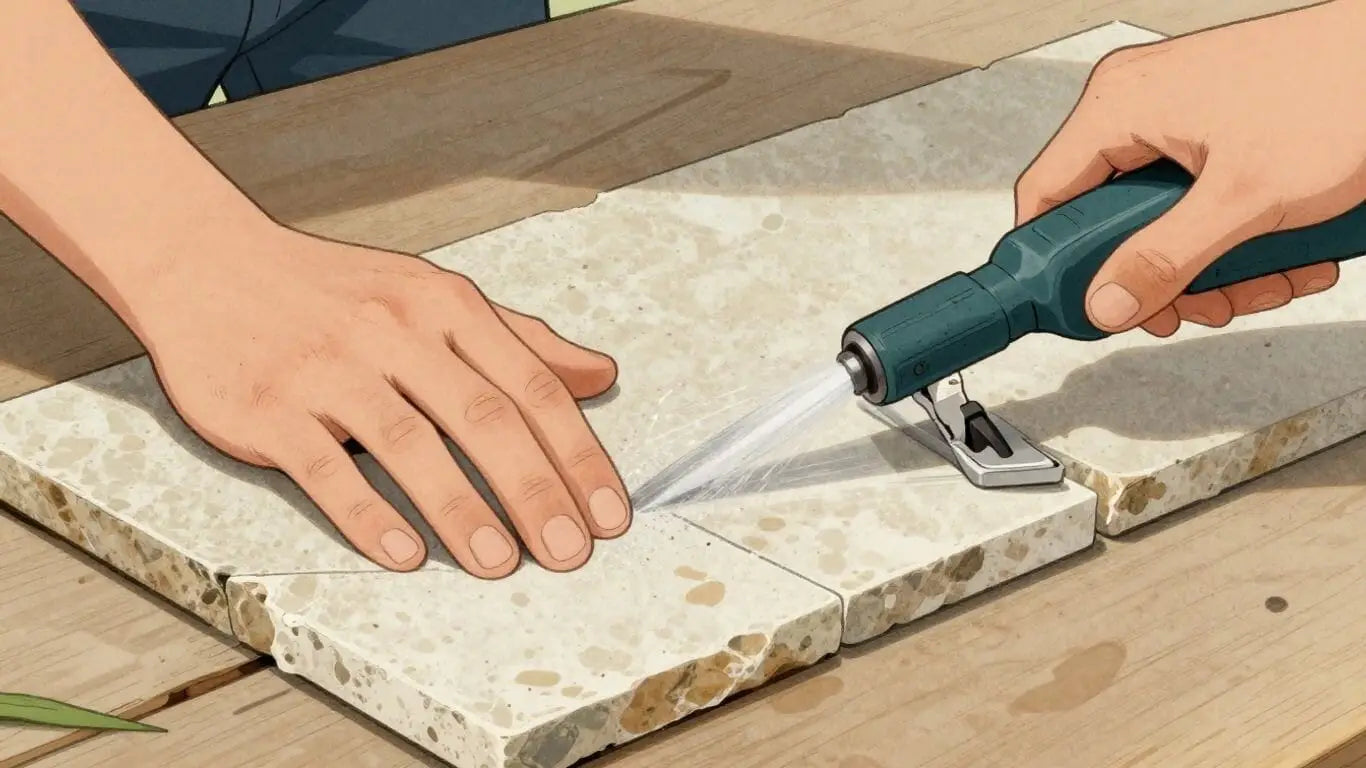
Minimizing Chipping During the Cutting Process
Getting those perfect edges on your natural stone tiles is key to a professional look. Nobody wants a chipped tile ruining the whole vibe. The secret? It’s all about technique and the right tools. Slow and steady wins the race when cutting stone. Rushing the cut is the quickest way to end up with jagged edges, especially on delicate stones like marble. Always support your tile fully on the wet saw. This prevents vibrations that can lead to chips. Think of it like giving the stone a stable platform to be cut on. If you're looking for beautiful marble tiles for your next project, consider exploring options like buy marble tiles online USA. A sharp, clean diamond blade is your best friend here. A dull blade will snag and tear at the stone, causing chips. Keep your blade in top condition, and you’ll see a world of difference.
The Importance of a Sharp, Well-Maintained Blade
A sharp diamond blade isn't just about making the cut easier; it's about the quality of the cut itself. A blade that's seen better days will struggle, leading to uneven cuts and, you guessed it, more chipping. For natural stones, especially harder ones like granite, a blade specifically designed for stone is a must. These blades have a denser diamond concentration and a more robust bond to handle the abrasive nature of stone. Regularly cleaning your blade, removing any built-up residue, also helps it perform at its best. A well-maintained blade means cleaner cuts and less frustration for you. It’s a small investment that pays off big time in the final look of your project.
Using a Steady Hand for Precise Cuts
Even with the best tools, your own hands play a big role. Keeping a steady hand as you guide the tile through the wet saw is crucial. Avoid jerky movements. Think of it as a smooth, controlled glide. If you find your hand shaking, take a deep breath and pause for a moment. It’s better to take a few extra seconds than to ruin a tile. For intricate cuts or curves, some people find it helpful to use a pencil grip on the tile, applying gentle, consistent pressure. Remember, practice makes perfect. The more you cut, the more comfortable and steady your hands will become.
Understanding How Different Stones React to Cutting
Not all natural stones are created equal when it comes to cutting. Marble, for instance, is softer and more prone to chipping than granite. Travertine, with its natural holes, requires a bit more care to avoid breaking off pieces. Slate can sometimes flake or split unevenly. Knowing the characteristics of the stone you're working with is half the battle. For example, when cutting travertine, you might want to fill the natural holes with a compatible epoxy or resin before cutting if you want a perfectly smooth edge. Always research your specific stone type before you start cutting. This knowledge will help you adjust your technique and prevent unexpected issues. For example, if you're working with travertine tiles, understanding its porosity is key.
Sanding Cut Edges for a Polished Look
Sometimes, even with the best cutting, an edge might not be perfectly smooth. That's where sanding comes in. A simple sanding block with a medium-grit sandpaper (around 100-150 grit) can work wonders for minor imperfections. For a smoother finish, you can move to a finer grit (200-400 grit). Always sand in one direction to avoid creating visible scratches. If you're aiming for a truly polished edge, you might need specialized diamond sanding pads or even professional polishing equipment. This step is especially important if your cut edges will be visible in the final installation, like on a countertop or a backsplash.
Using Specialized Tools for Edge Finishing
Beyond basic sanding, there are tools designed specifically for edge finishing. Diamond hand pads are great for smoothing and slightly polishing edges by hand. For more complex profiles or a perfectly consistent finish, a router with a diamond profiling bit can create beveled or bullnose edges. These tools require a bit more skill and practice, but they can achieve a professional, factory-like finish. If you're working on a high-end project or want that extra polish, investing in or renting these specialized tools can be worthwhile. It’s about achieving that perfect final touch that makes your tile installation stand out.
When to Consider Professional Fabrication for Edges
Let's be honest, some cuts and edge finishes are just plain difficult. Intricate patterns, precise miters, or a perfectly polished edge on very hard stone can be challenging for a DIYer. If you're not comfortable with advanced techniques or don't have the right equipment, it's always best to call in the pros. Professional fabricators have the specialized machinery and the years of experience to handle complex cuts and achieve flawless finishes. They can save you time, frustration, and potentially costly mistakes. For projects where perfection is paramount, like a custom marble countertop, professional fabrication is often the smartest choice. It's about knowing when to tackle it yourself and when to seek expert help for that perfect stone tile finish.
Cutting specific natural stone tiles
Techniques for cutting marble tiles
Marble is beautiful, but it can be tricky to cut. It's softer than granite, which means it can chip or crack if you're not careful. Always use a sharp diamond blade designed for stone. A dull blade will just make things harder and increase the risk of damage. When you cut, go slow and steady. Don't force the tile through the saw. Let the saw do the work. For intricate cuts, consider using a smaller wet saw or even an angle grinder with a diamond blade. If you're looking to buy marble tiles online in the USA, make sure you get a few extra pieces for practice cuts and potential mistakes. It's better to have too many than not enough.
Best practices for cutting travertine tiles
Travertine is another popular choice, known for its earthy tones and natural holes. These holes can sometimes be a challenge when cutting. If the holes are filled, you might get a cleaner cut. If they're unfilled, you'll need to be extra careful around them. A good quality wet saw with a diamond blade is your best friend here. Just like with marble, slow and steady wins the race. Rushing can lead to chipping, especially around those natural voids. Planning your cuts to hide any rough edges against walls or cabinets is always a smart move.
Handling the unique properties of granite tiles
Granite is tough stuff. It's dense and hard, which is great for durability but means it can be harder to cut. You'll definitely need a powerful wet saw for granite. Make sure the blade is specifically rated for granite. The water feed is super important here to keep the blade cool and reduce dust. Don't try to rush granite; it's unforgiving. A steady hand and patience are key. If you're cutting thick granite, you might need to make multiple passes. Remember, cutting granite tiles requires the right setup.
Cutting slate tiles with care
Slate is unique because it's a layered stone. This means it can sometimes split or delaminate if you cut it incorrectly. When cutting slate, try to cut along the natural grain or cleavage lines if possible. A wet saw is still the best tool, but be gentle. Avoid excessive pressure. Some people find that scoring the line first with a carbide scribe can help guide the cut and reduce chipping. Always wear your safety gear – slate dust isn't good to breathe.
Working with limestone and sandstone tiles
Limestone and sandstone are generally softer stones, similar to marble in their cutting needs. They can be prone to chipping, so a sharp blade and a slow, controlled cut are essential. Be mindful of the stone's porosity; it can absorb water, which is fine with a wet saw, but it also means they can stain more easily if not sealed properly after cutting and installation. Planning your cuts to minimize exposed edges is a good idea, as these softer stones can be more susceptible to wear and tear.
Adapting techniques for different stone thicknesses
Cutting thicker tiles requires a bit more attention. For stones over 1/2 inch thick, you might need to make two passes with your wet saw. The first pass can cut about halfway through, and the second pass can complete the cut. This helps prevent the blade from binding and reduces the risk of the tile breaking. Always ensure your saw is stable and the tile is well-supported. If you're dealing with very thick slabs, professional fabrication might be a better option.
Addressing natural holes and imperfections in stone
Natural stones, especially travertine, often have holes or fissures. Before cutting, inspect your tiles. If you plan to fill these holes (often done with epoxy or grout during installation), cutting might be easier. If you want to keep them unfilled for a rustic look, be extra cautious around these areas. Sometimes, a natural hole can cause a tile to break during cutting if the stress is too high. Planning your cuts so that any imperfections are in less visible areas or can be worked around is a smart strategy. Remember, these variations are part of the stone's natural beauty.
Case Study: The Marble Fireplace Surround
Sarah wanted a luxurious marble fireplace surround. She chose a beautiful white marble with subtle gray veining. The project involved several intricate cuts, including a curved top edge and precise angles to fit around the existing hearth. Initially, she tried cutting the marble herself with a standard wet saw. However, she quickly found that the marble was chipping along the curved cuts, and the straight cuts weren't as clean as she'd hoped. After consulting with a local stone fabricator, she learned that a more specialized blade and a slower, more deliberate cutting technique were needed. The fabricator also suggested using a diamond hand grinder for the final shaping of the curved edge. With the right tools and techniques, Sarah was able to achieve a stunning, professional finish for her fireplace surround, transforming her living room into a cozy, elegant space. She learned that while DIY is possible, understanding the material's properties and using the correct equipment makes all the difference.
Advanced cutting techniques and considerations
Step up your natural stone project with cutting strategies made for results that turn heads, not break tiles. Below, we’ll cover specific advanced tips, practical steps, and real-world case studies, helping you master intricate work, minimize waste, and understand when it’s smart to consult the pros. Whether you want to buy marble tiles online USA or handle tough granite, the right technique makes a real difference.
Creating Precise Angles and Miter Cuts
Miter cuts and angled edges are not just about looks—they’re the secret to a custom, flawless fit. A miter cut brings two stone edges together, often at 45°, for uninterrupted corners on countertops and feature walls.
- Always use a diamond blade rated for stone.
- Adjust the saw fence to your exact angle—just a degree off can show in the finished piece.
- Use painter’s tape on the stone surface to minimize chipping during the cut.
- For a professional finish, sand the exposed mitered edge with diamond hand pads.
Precise angles elevate a space from basic to bespoke. Even DIYers can tackle miters with patience and the right tools, but practice on scrap before committing to your final stone piece.
Cutting for Intricate Patterns and Mosaics
Mosaic designs and special inlays set your project apart but also increase difficulty. Here’s a three-step approach:
- Template First: Trace your intricate pattern onto a cardboard template and transfer to your stone tile.
- Multiple Light Passes: Don’t force the blade. Several shallow passes work better than one deep one when shaping curves or fine details.
- Finishing Tools: Use tile nippers or an angle grinder for tight radii and small adjustments. Clean up edges with sanding blocks.
Intricate mosaics make kitchens and bathrooms pop. Customers often request specialty layouts after seeing examples in showrooms—preparation and proper tooling smooth the learning curve. For more on when to use each tool, see tile cutting tools.
The Role of Custom Fabrication Services
Some designs call for tools beyond those found in the average garage. Custom fabrication shops offer:
- Waterjet or CNC cutting for precision shapes and curves
- Detailed edge profiling—chiseled or decorative
- Polishing and sealing for a flawless finish
Case Study: When a boutique hotel in Los Angeles wanted a chevron-pattern lobby floor using vein-cut travertine, only a fabricator with digital waterjet technology delivered the clean interlocking pieces. The extra investment paid off with a truly standout installation.
Using Off-Cuts for Smaller Areas or Accents
Reduce waste—and costs—by repurposing off-cuts. Here’s how you can use leftover stone:
- Borders around floors or fireplace surrounds
- Small mosaic inserts
- Shelf pieces in showers
It’s practical and sustainable. One residential project turned cut-off bits from a kitchen remodel into a set of custom window sills, saving money and matching the main installation.
Minimizing Dust and Maintaining a Clean Work Area
Even with wet saws, dust happens. Maintain order by:
- Preparing tarps and drop cloths
- Running a shop vacuum alongside saw work
- Using a wet saw with a working water feed—this cools the blade and catches debris
- Wearing a dust mask for dry cutting or cleanup
A tidy workspace means safer, better results and easier end-of-day clean up.
Troubleshooting Common Cutting Issues
You will encounter at least one snag:
| Problem | Cause | Solution |
|---|---|---|
| Chipped edges | Worn blade, cutting too quick | Replace blade, slow the cut |
| Uneven cut | Poor fence setup, tile movement | Clamp tile, check saw alignment |
| Excess dust | Low water supply or dry cutting | Refill reservoir, only dry cut if safe |
Knowing how to fix these mistakes on the fly can save both material and your nerves.
When to Seek Expert Advice for Complex Cuts
Not every cut should be DIY. If your job requires:
- Massive slabs or tight pattern matches
- Cuts on rare or super-hard stone (like quartzite)
- Polished bevels or intricate inlays
Call a stone professional—especially for projects involving premium stones. This avoids costly mishaps and ensures professional results.
Quick Recap — Why Use Advanced Cutting Tactics?
- Precision cuts = less waste and better fit
- Complex patterns add real value to your space
- Professional tools and expertise can often save time and materials on big or detailed work
Use these strategies to take your stone project further, whether installing a backsplash, custom floor, or working with exotic stone. Want to go further with specialty finishes or difficult cuts? Connect with a local shop or find inspiration in our detailed mosaics and advanced layouts!
Ensuring safety throughout the cutting process
Cutting natural stone tile can be a rewarding part of your project, but safety must always come first. We want you to have a beautiful finished product, and that starts with a secure work environment. Think of safety gear not as an extra step, but as your most important tool. It protects you, allowing you to focus on the precision needed for stunning results. When you buy marble tiles online in the USA, remember that proper handling is key to their longevity and your well-being.
The Critical Need for Eye Protection
Your eyes are irreplaceable. Flying debris from stone cutting is a real danger. Always wear safety glasses or goggles that meet ANSI Z87.1 standards. A full face shield offers even better protection, especially when making multiple cuts. Don't risk it – protect your vision for years of enjoying your beautiful stone floors and surfaces.
Wearing Appropriate Gloves for Grip and Protection
Sharp edges and rough surfaces are common when working with stone. Good quality work gloves provide a secure grip on slippery tiles and protect your hands from cuts and abrasions. Look for gloves made from durable materials like leather or synthetic leather. This simple step can prevent painful injuries and keep your hands ready for the next part of your project.
Protecting Your Hearing from Saw Noise
Wet saws can be loud. Prolonged exposure to high noise levels can cause permanent hearing damage. Always use earplugs or earmuffs when operating a wet saw. It might seem like a small detail, but protecting your hearing is vital for long-term health. You'll thank yourself later for taking this precaution.
Using Dust Masks to Avoid Inhaling Particles
Cutting stone creates fine dust, including silica dust, which can be harmful if inhaled. A properly fitted N95 respirator or dust mask is non-negotiable. This protects your lungs from microscopic particles. Remember, a clean work area also means a safer work area, reducing airborne dust.
Maintaining a Clear and Stable Work Area
Tripping hazards are a major concern. Keep your workspace clean, dry, and well-lit. Ensure the ground is stable and free of clutter. Secure your wet saw on a sturdy surface. A well-organized space not only prevents accidents but also makes your cutting process more efficient. Think of it as setting the stage for success, just like planning your tile layout [5064].
Understanding Your Wet Saw's Safety Features
Modern wet saws come with built-in safety mechanisms. Familiarize yourself with your saw's features, such as blade guards and emergency shut-off switches. Always follow the manufacturer's operating instructions. Knowing your equipment inside and out is a key part of safe operation.
Proper Handling and Storage of Cutting Tools
When you're done cutting, store your tools properly. Keep blades covered and tools out of reach of children or pets. Proper storage prevents accidental injuries and keeps your equipment in good condition for your next project. Safe handling extends beyond the cutting itself.
Case Study: The Near Miss
Sarah was excited to install her new marble tiles. She had a beautiful vision for her bathroom. She set up her wet saw, put on some music, and started cutting. She skipped the safety glasses, thinking, "It's just a quick cut." Suddenly, a small chip flew off the tile, narrowly missing her eye. Shaken, she immediately stopped and put on her safety glasses and gloves. "That was too close," she admitted. "I almost ruined my eyesight over a few minutes of convenience." She learned that day that safety gear isn't optional; it's a necessity for any DIY project involving stone.
Case Study: The Dust Dilemma
Mark was installing travertine tiles in his kitchen. He worked for hours, cutting piece after piece, without a dust mask. A few days later, he developed a persistent cough and felt generally unwell. His doctor advised him about the dangers of silica dust. Mark realized his oversight had serious health consequences. He invested in a good respirator for the rest of the project and learned the hard way about protecting his respiratory system. Now, he never cuts stone without one.
Post-cut preparation and integration
Cleaning cut tiles before installation
Before you even think about setting those freshly cut tiles, give them a good clean. This isn't just about looks; it's about a solid bond. Any dust, grit, or residue from cutting can mess with your adhesive. A simple wipe-down with a damp cloth usually does the trick. For tougher stuff, a mild stone cleaner works wonders. A clean tile means a strong, lasting installation.
Checking cut edges for smoothness and fit
Now, let's talk edges. You've worked hard to get those cuts precise, so take a moment to inspect them. Run your fingers along the cut edges. Are there any small chips or rough spots? These can snag, look bad, and even affect how the tile sits. A quick pass with some fine-grit sandpaper or a rubbing stone can smooth these out beautifully. This step is key for that professional finish. You want those edges to fit snugly and look clean, especially if they'll be visible. If you're working with something like marble, you might want to check out sanding cut edges for a polished look.
Preparing cut tiles for mortar application
Once your tiles are clean and the edges are smooth, they're ready for mortar. Remember, natural stone is porous. This means it can absorb moisture from the thin-set. To get the best bond, make sure your thin-set is mixed correctly – not too wet, not too dry. Apply it evenly to the subfloor or wall using a notched trowel. This creates ridges that help the tile adhere properly. For cut pieces, especially those going on edges or corners, ensure you have good coverage on the back of the tile too. This prevents hollow spots.
Ensuring consistent grout lines with cut pieces
Consistency is everything in tile work, and that includes your grout lines. When you're integrating cut tiles, especially around borders or in complex layouts, it's easy for those gaps to get a bit wonky. Use your tile spacers diligently. Even for those tricky cut pieces, make sure they're spaced just right. This ensures that when you grout, you get those clean, uniform lines that make the whole installation look polished and professional. It's these small details that really make a difference.
Integrating cut tiles seamlessly into the layout
This is where your planning really pays off. As you lay your tiles, those cut pieces need to fit in like they were always meant to be there. Work from your main layout lines, and bring in the cut pieces as needed. If you planned well, they should slot right into place. Sometimes, a slight adjustment might be needed, but avoid forcing them. A good fit means the grout lines will align, and the overall pattern will flow without any awkward transitions. It’s about making those cuts disappear into the design.
Addressing any minor imperfections after cutting
Even with the best tools and techniques, sometimes little imperfections pop up. Maybe a tiny chip you missed, or a cut that's just a hair off. Don't panic. Most minor issues can be fixed. Small chips can often be smoothed with sandpaper. If a tile is slightly off, a bit of careful adjustment during the mortar setting might help. For more significant issues, it might be worth having a few extra tiles on hand, just in case. Remember, natural stone has its own character, and minor variations are part of its charm.
Planning for future repairs with extra cut pieces
It's always a smart move to keep some of your cut-offs. These pieces are perfect for future repairs. If a tile gets damaged down the line, you'll have a matching piece ready to go. This is especially important with natural stone, as dye lots and quarrying can change over time. Having these pre-cut pieces means you won't have to try and cut a new one in a tight spot later, or worse, find out you can't match the stone. Store them carefully, perhaps labeled with the project name and date.
Choosing the right stone for your project
Selecting the perfect natural stone is the first step toward a beautiful and lasting installation. It’s not just about looks; it’s about finding a material that fits your lifestyle, your space, and your vision. Let's explore what makes each stone unique and how to pick the one that’s just right for you.
Understanding the Durability of Various Natural Stones
Durability is key, especially for high-traffic areas. Think about how the space will be used. Granite, for instance, is incredibly hard and resistant to scratches and heat, making it a top choice for busy kitchens. Slate offers excellent slip resistance and durability, perfect for bathrooms or outdoor patios. Marble, while stunning, is softer and more prone to etching and scratching, so it shines best in areas with less wear, like a master bathroom or a decorative fireplace surround. Travertine, a type of limestone, offers a good balance of beauty and resilience, often used for flooring and walls. Choosing a stone that can handle the demands of its location means a longer-lasting, more beautiful result.
Matching Stone Aesthetics to Your Design Vision
Every natural stone tells a story with its color, veining, and texture. Do you dream of the classic, luxurious look of marble with its dramatic swirls? Or perhaps the earthy, rustic charm of travertine? Granite offers a wide spectrum, from deep, uniform colors to intricate patterns. Consider your existing decor and the mood you want to create. A polished finish can add modern glamour, while a honed or tumbled finish brings a softer, more natural feel. The right stone doesn't just fill a space; it defines it.
Considering the Installation Location and Its Demands
Where will your stone be installed? This is a critical question. For kitchens and bathrooms, consider stain and moisture resistance. Granite and certain types of slate are excellent choices here. For flooring in entryways or hallways that see a lot of foot traffic, you'll want something exceptionally durable like granite or a well-sealed travertine. Outdoor applications require stones that can withstand temperature fluctuations and weather. Always check the specific properties of the stone you're considering to ensure it’s suited for its intended environment. For example, buy marble tiles online USA might be a great option for a bathroom, but perhaps not the best for a busy outdoor patio.
Assessing Maintenance Requirements for Different Stones
Natural stone is beautiful, but it does require some care. Marble and limestone are more porous and may need more frequent sealing to prevent stains and etching. Granite is generally low-maintenance, but sealing is still recommended. Travertine also benefits from regular sealing. Understand the cleaning products that are safe for your chosen stone – typically, pH-neutral cleaners are best. If you prefer a low-maintenance option, harder stones like granite or denser slates might be more suitable.
The Impact of Stone Finish on Cutting and Appearance
The finish of your stone tile significantly affects both its look and how it cuts. Polished stones have a high shine and a smooth surface, which can sometimes make them more prone to chipping during cutting if not handled carefully. Honed finishes are matte and can be more forgiving. Tumbled or antiqued finishes have a worn, textured look, which can help disguise minor imperfections from cutting. When you're planning your cuts, remember that the finish will be present on the visible edges, so consider how it will complement the overall design.
Exploring the Unique Characteristics of Marble and Travertine
Marble and travertine are perennial favorites for a reason. Marble offers unparalleled elegance, with each slab boasting unique veining and color variations that make every installation a work of art. It’s perfect for creating a luxurious atmosphere. Travertine, on the other hand, provides a warm, natural aesthetic with its characteristic pits and natural holes, which can be filled or left open for a more rustic look. It’s often more budget-friendly than marble and works beautifully in both classic and contemporary settings. Both stones require proper sealing to maintain their beauty.
Making an Informed Decision for Lasting Beauty
Choosing your natural stone is an investment in your home's beauty and value. By understanding the durability, aesthetics, installation needs, and maintenance of different stones, you can make a choice you'll love for years to come. Don't hesitate to ask questions and, if possible, get samples to see how the stone looks in your own space. The perfect stone is out there, waiting to transform your project.
Case Study: The Kitchen Transformation
A homeowner wanted to update their kitchen with a durable yet elegant countertop. After considering granite for its toughness and marble for its luxury, they settled on a honed black granite. It offered the scratch and heat resistance needed for a busy kitchen, while the honed finish provided a sophisticated, matte look that complemented their modern cabinetry. The installation was straightforward, and the homeowner was thrilled with the blend of practicality and high-end style. This choice meant they didn't have to compromise on either aesthetics or performance for their high-use area.
Case Study: The Bathroom Oasis
For a master bathroom renovation, the goal was a spa-like retreat. The homeowner chose a soft, creamy travertine for the floor and shower walls, opting for a honed finish to prevent slipperiness. They also selected a complementary marble for the vanity countertop. While the marble required careful sealing and maintenance, its luxurious veining added a touch of opulence. The travertine provided a warm, natural foundation, creating a cohesive and serene environment. This project highlighted how combining different natural stones can achieve a balanced and beautiful design.
Selecting the right natural stone involves balancing beauty with practicality. Consider the stone's inherent characteristics against the demands of its intended use and your personal maintenance preferences. This thoughtful approach guarantees a stunning and enduring result.
Calculating material needs and waste
Getting your calculations right from the start saves time, money, and a whole lot of headaches. When you're working with natural stone, precision in ordering is key. You don't want to run out mid-project, and you certainly don't want to be left with a mountain of unused tile.
Accurately Measuring Your Project Area
First things first: measure your space. Grab your tape measure and get the length and width of each area you'll be tiling. Multiply these numbers to get the square footage for each section. Sum up all those square footages. If there are any openings like doorways or built-in cabinets, subtract those areas. This gives you your base square footage. It's a straightforward process, but accuracy here is everything. For a detailed breakdown, check out how to calculate the correct quantity of tiles needed for your project here.
Understanding the Concept of the Waste Factor
Now, let's talk about the 'waste factor.' This isn't about throwing good tile away; it's about accounting for the reality of cutting and fitting. Every cut, every trim, every piece that doesn't quite fit perfectly contributes to this factor. Natural stones, with their unique veining and patterns, often require more thoughtful cuts to maintain the desired look. This means you'll inevitably have some material that can't be used in its original form. The waste factor is your buffer against running short.
Estimating Waste Percentages for Different Cuts
The percentage you add for waste isn't a one-size-fits-all number. It depends on a few things:
- Complexity of the Layout: Simple, straight runs need less extra material than intricate patterns or rooms with many angles and corners.
- Stone Type: Some stones are more brittle or have more pronounced veining that requires careful alignment, increasing potential waste.
- Installer Skill: While we're all aiming for perfection, even experienced installers account for a small percentage of waste.
Generally, a 10-15% waste factor is a good starting point for most projects. For more complex jobs or if you're buying marble tiles online in the USA and want extra peace of mind, consider bumping that up to 20%.
The Importance of Ordering Extra Material
Why is ordering extra so important? Imagine finishing your beautiful new floor, only to find you're a single tile short for that last visible edge. Or, a few years down the line, you need to replace a damaged tile, but the batch you originally bought is no longer available, and the new ones don't quite match. Ordering extra upfront prevents these headaches. It ensures you have matching material for future repairs and allows for those necessary cuts without stress. It's a small investment that pays off in the long run.
Calculating Total Square Footage Needed
Let's put it all together. Take your base square footage (calculated in step one) and multiply it by your chosen waste factor percentage (e.g., 1.10 for 10% waste, 1.15 for 15%).
Example:
- Project Area: 200 sq ft
- Waste Factor: 15%
- Calculation: 200 sq ft * 1.15 = 230 sq ft
You would need to order 230 square feet of tile.
Tips for Minimizing Waste During Installation
While you need to order extra, you can also be smart during installation:
- Plan Your Cuts: Before you cut, measure twice (or even three times!). Think about where the cut edge will be visible and try to place cuts in less conspicuous areas.
- Use Off-Cuts: Smaller cut pieces can often be used in tight spots or for accent details. Don't discard them too quickly.
- Dry Lay: Laying out tiles without adhesive first can help you visualize the layout and identify potential cutting challenges before you commit.
Planning for Future Repairs and Replacements
Natural stone is durable, but accidents happen. Having a few extra tiles on hand is invaluable for replacing any that might get chipped, cracked, or stained over time. This ensures your installation remains looking its best for years to come. Remember, stone batches can vary, so keeping some original material is the best way to guarantee a perfect match for any future fixes.
Ordering the right amount of material upfront is a critical step in any natural stone project. It prevents costly delays, ensures aesthetic consistency, and provides peace of mind for future maintenance. Don't underestimate the importance of the waste factor – it's your insurance policy for a flawless finish.
The role of finishes and edges in stone cutting
When it comes to cutting natural stone tile, getting the right finish and edge makes all the difference in your project's final look. Whether you’re looking to buy marble tiles online USA or planning the next renovation, understanding the options available for stone finishes and edges will transform the quality and style of your installation.
How finishes affect the cutting process
Finishes directly impact how stone responds to cutting and how it performs once installed. A polished finish, for example, results in a silky, mirror-like surface, but it also shows imperfections if your edges chip during cuts. Honed and tumbled finishes, on the other hand, naturally disguise minor flaws and create a matte or aged look that can help hide any less-than-perfect edges.
The finish determines not just the look, but also how easy your stone is to cut and maintain—choose wisely to balance style and practicality.
Working with polished versus honed surfaces
A polished stone tile demands a steady hand and the sharpest diamond blade. Any slip can result in obvious chips that will stand out against the high shine. Honed stones are a bit more forgiving—scratches and nicks blend into the matte texture, making this finish popular in high-traffic or family spaces. When deciding between these finishes, keep in mind both the functional demands of your area and your tolerance for visible imperfections.
Understanding tumbled and antiqued finishes
Tumbled and antiqued tiles are treated to create rounded edges and a weathered appearance. These finishes pair nicely with chiseled or irregular edges, so any cuts you make can blend right in. Homeowners and designers often choose this finish for rustic kitchens or Mediterranean-inspired baths. Even if your cuts are slightly rough, the overall effect remains harmonious and intentional.
The impact of split face and natural bed cuts
Split face tiles showcase the actual layers within the stone, offering natural irregular surfaces perfect for accent walls and outdoor features. Natural bed cuts echo the original striations from the quarry, giving each piece a unique fingerprint. Both finishes allow for a bit of creative freedom—perfection isn’t the goal, character is. When working with these finishes, plan your cuts where the stone’s layers or grain look most appealing.
Cutting for straight and beveled edges
Your edge choice is as important as the finish. Straight edges (or squared edges) provide a clean, modern profile ideal for minimal grout lines. On the other hand, a beveled edge slightly softens the transition between tiles, making installation easier and reducing the sharpness of edges. If you want a seamless, groutless look, opt for straight-edge stone and cut with a steady pace, using full support to prevent chipping (clean, smooth edges tips).
Edge Comparison Table
| Edge Style | Look | Best For |
|---|---|---|
| Straight (Square) | Sleek, modern, seamless | Floors, large walls |
| Beveled | Subtle transition | Standard installations |
| Chiseled | Rustic, aged | Accent areas, rustic homes |
Achieving a chiseled edge effect
Chiseled edges deliver a handcrafted vibe, almost as if the stone was just pulled from the earth. While you can buy tiles pre-chiseled, many DIYers or pros finish edges with a masonry hammer and then lightly sand for touch-up. This edge is less about sharp accuracy and more about genuine, organic feel.
- Perfect for rustic kitchens, fireplaces, and outdoor spaces
- Minor chips enhance, rather than detract from, the effect
- Easy to make mistakes fade into the overall design
Planning cuts to complement stone edges
Great projects start with smart planning. Before making any cuts, lay out your tiles so that factory edges are at the most visible places (corners, thresholds) and your hand-cut or finished edges are in less prominent spots.
Case Study: A client chose vein-cut travertine in a luxury master bath. They requested beveled edges for easier cleaning but also had a tumbled finish on the accent border. This combination made the high-use floor seamless, while the shower surround embraced the rustic look. The result? Low maintenance without sacrificing style—proof you can mix and match edges and finishes for custom results.
Want to avoid visible chips? Practice on sample tiles and always double-check where your cuts will land. If you’re not comfortable with edge finishing, professional fabricators can deliver near-perfect results every time.
Key Takeaways
- Choose your finish based on both design and function.
- Match your edge style to the overall vibe of your room.
- Always plan out visible and hidden edges before you start cutting.
The right combination of finish and edge will make your natural stone tile project stand out—and last. For more tips, check out advice on getting smooth, professional results (smooth cuts on natural stone).
If you’re ready to select the best finish or edge—or if you need advice on buying marble tiles online in the USA—let an experienced supplier guide you through options that truly fit your vision.
Maintaining your cutting equipment
Keeping your tools in top shape is just as important as picking the right stone. Think of it like this: you wouldn't try to cook a gourmet meal with dull knives, right? The same goes for cutting natural stone. Well-maintained equipment means cleaner cuts, less frustration, and a better final product. Plus, it’s safer!
Keeping Your Diamond Blade Clean and Sharp
Your diamond blade is the workhorse for cutting stone. Over time, dust and debris can build up, dulling its edge and making it less effective. A dirty blade can lead to chipping and slow cuts. Regularly cleaning your blade after each use is a simple step that makes a big difference. You can use a specialized blade cleaner or even just some water and a stiff brush. For sharpening, there are specific sharpening stones designed for diamond blades. A sharp blade cuts through stone like butter, saving you time and effort. If you're looking to buy marble tiles online in the USA, remember that even the most beautiful stone needs the right tools to be cut properly.
Ensuring the Wet Saw's Water Pump is Functioning
The water system on your wet saw isn't just for show; it's critical. It cools the blade, which prevents it from overheating and warping, and it suppresses dust, keeping your work area safer and cleaner. Before you start cutting, always check that the pump is working correctly and that water is flowing freely to the blade. A clogged or malfunctioning pump can quickly ruin a blade and make for a dusty, unpleasant cutting experience. If you notice reduced water flow, check the intake for debris and clean the reservoir. A consistent water supply is key to a smooth cut, especially when working with harder stones like granite.
Regularly Cleaning the Saw's Debris Tray
Wet saws collect a lot of slurry – a mixture of water and stone particles. This slurry can clog the pump and make the saw less efficient. It’s a good habit to empty and clean the debris tray after every significant cutting session. This prevents buildup that can cause problems down the line. A clean saw is a happy saw, and it will perform much better for you. It also makes the saw easier to store and maintain.
Lubricating Moving Parts of the Saw
Like any machine, your wet saw has moving parts that benefit from occasional lubrication. Check your saw's manual for recommendations on which parts to lubricate and with what type of lubricant. This helps prevent rust and ensures that components like the blade carriage move smoothly. Smooth movement is vital for making controlled, precise cuts. Without it, you risk jerky movements that can lead to chipped tiles or inaccurate cuts. This is especially important if you're working on a large project or plan to use the saw frequently.
Storing Your Wet Saw Properly
When you're done cutting, don't just leave your wet saw out in the elements. Store it in a dry, protected area. If possible, cover it to keep dust and moisture away. Proper storage helps prevent rust and corrosion, extending the life of your equipment. Before storing, make sure it's clean and dry to avoid any issues later on. This simple step ensures your saw is ready to go the next time you need it, whether you're cutting marble or travertine.
When to Replace a Worn-Out Diamond Blade
Diamond blades don't last forever. You'll know it's time to replace yours when you notice a significant decrease in cutting speed, increased chipping, or if the blade starts to make unusual noises. Pushing a worn-out blade can damage your stone and put extra strain on your saw. It's better to invest in a new, high-quality blade – especially if you're working with premium materials. For instance, if you've been cutting a lot of granite, your blade will wear faster than if you were just cutting softer stones. Always have a spare blade on hand, just in case. You can find excellent options for cutting stone at places that sell marble tiles online USA.
Maintaining Your Other Cutting Accessories
Don't forget about the other tools you use! This includes things like your measuring tape, marking pencils, and any jigs or guides you might employ. Keep them clean and in good working order. A dirty measuring tape can lead to inaccurate measurements, and a dull marking pencil can make it hard to see your cut lines. Even simple tools need a little care to perform their best. Remember, precision is key when working with natural stone, and every tool plays a part.
Understanding natural stone characteristics
Natural stone isn’t just another flooring or wall option—it’s a foundation for signature style, unstoppable strength, and real-world value. But every type of natural stone brings different quirks to the table. Understanding these can help you make smarter decisions, whether you plan to install marble foyer tiles or rugged slate pavers. Below, we break down what makes each piece of stone truly unique—making your investment last and your project shine.
The impact of veining on cutting patterns
You’ll notice most stones, especially marble, show beautiful veins running across every slab. These veins aren’t just for show. When cutting, veining will dictate both aesthetics and structural stability. Cuts along veins might look stunning, but can leave the stone more fragile. Planning your cut lines in harmony with the veining means your finished layout looks intentional—and it stands up to tough use longer.
- For dramatic, sweeping looks, align all cut tiles in the same direction as the main veining.
- To boost strength, avoid cuts that cross several large veins.
- Big projects? Mock up before you cut to check how your pattern flows.
Dealing with natural inclusions and mineral deposits
Ever spot tiny flecks of metal in granite, or crystal pockets in travertine? Those are inclusions and deposits—totally natural, and totally unpredictable. They can cause trouble during cutting. It’s worth choosing your tiles piece by piece, especially if you’re aiming for a high-traffic zone or a seamless look.
Watch out for areas with lots of mineral specks. They may chip more easily—either shift your cuts, or set those pieces aside for less visible spots.
How porosity affects stone cutting and sealing
Porosity—basically, how many tiny holes the stone has—changes everything. Highly porous stones like limestone or unfilled travertine absorb water fast, making them trickier to cut (water = more mess) and easier to stain after installation. That’s why most pros recommend sealing those surfaces as soon as the cuts are made.
| Stone Type | Porosity Level | Sealing Required |
|---|---|---|
| Marble | Medium | Yes |
| Granite | Low | Optional |
| Travertine | High | Yes |
| Slate | Medium | Yes |
| Limestone | High | Yes |
Recognizing variations in stone density
Density measures how tough the stone is. Denser stones—think granite—are hard to cut but extremely resistant to damage. Softer stones like marble are easier on saw blades, but more likely to chip. Don’t expect all your tiles to behave the same way. This difference changes how you prep your equipment and choose your blade.
- Granite: slow, steady cuts, frequent cooling breaks
- Marble: lighter pressure, careful handling for clean edges
- Slate: support it well while cutting to avoid split layers
The influence of stone origin on its properties
Think all travertine is the same? Not quite. Stones from Italy, Turkey, or the USA each offer slightly different mineral makeup. These differences change color, texture, porosity, and even how tiles react to cutting. If you want the purest white marble tiles, or deep gold travertine, look up the quarry source before your purchase. Sourcing from reputable places also means fewer flaws and surprises in the box—always a good thing.
You can read more on the versatility and unique appeal of natural stone tiles, which are cut directly from real stone, for more context on origin and characteristics.
Identifying potential flaws before cutting
Carefully inspect every tile you plan to cut. Look for cracks, cloudy spots, or soft veins that could break apart when the blade touches them. You don’t want to ruin your project (or a pricey tile) with one poor cut. Set aside questionable pieces—they’ll work better for small fill-ins or cuts in hidden areas.
Appreciating the uniqueness of each stone piece
No two pieces of natural stone are identical. That one-of-a-kind appeal is why more homeowners shop for unique materials when they buy marble tiles online USA. Celebrate the variety! Mix lighter and darker shades, use wild veining as a statement, or create an intentionally random pattern. Where mass-produced tiles blend, natural stone stands out—and adds lasting value to any environment.
Case Study: Maximizing Visual Impact with Stone Variation
A design team in Dallas recently completed a luxury kitchen using marble tiles from three different quarry batches. By carefully arranging the most dramatic pieces in high-visibility areas and saving less striking tiles for inside corners, they achieved a bold, custom pattern. The key: understanding stone characteristics and using variation as a design advantage, not a flaw.
Each natural stone tile tells its own story—so select wisely, cut thoughtfully, and take pride in a result that no synthetic option can match.
Planning your tile layout for efficient cutting
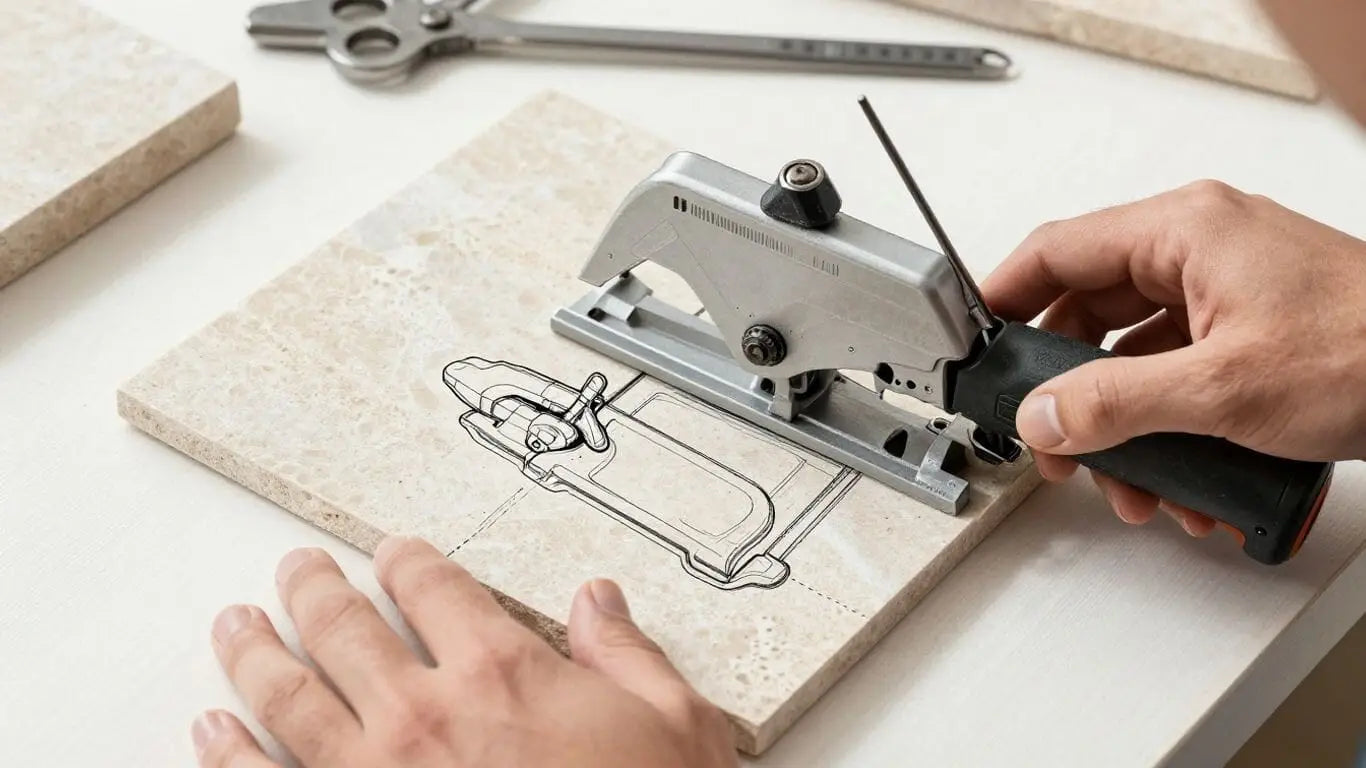
Dry Laying Tiles to Visualize the Pattern
Before you even think about cutting, take the time to lay out your tiles without any adhesive. This is called dry laying. It’s your chance to see exactly how the pattern will look. You can move tiles around, experiment with different arrangements, and spot potential issues before they become problems. This step is super important for getting a layout you’ll love. It helps you see how the natural variations in stones like marble or travertine will play together. You might find that a certain piece looks better in a different spot, or that a particular arrangement creates an unexpected visual effect. Don't skip this; it's your blueprint for success.
Marking Guidelines for Straight Installations
Once you're happy with your dry layout, it's time to mark your guidelines. For straight installations, a chalk line is your best friend. Snap a line down the center of your room and then perpendicular lines to create a grid. These lines will be your reference points for laying the first row of tiles. Accurate guidelines mean your entire installation will be straight and true. This is especially important if you're working with large format tiles or if you want a very clean, modern look. For those looking to buy marble tiles online in the USA, getting the layout right from the start ensures your beautiful new tiles look their absolute best.
Strategizing Cuts for Wall Edges and Corners
Cutting is where many projects hit a snag. The trick is to plan your cuts strategically. Whenever possible, try to position cut edges against walls or in corners where they won't be as visible. This hides any minor imperfections from the cutting process. Think about where your main focal points are and try to have full tiles there. This might mean adjusting your starting point slightly. It’s all about making the cuts work for you, not against you. For example, if you're installing in a bathroom, plan cuts so they fall behind the vanity or toilet where possible.
Incorporating Cut Tiles into the Overall Design
Don't think of cut tiles as just filler. They are an integral part of your design. Sometimes, a carefully placed cut tile can actually enhance the pattern or flow of your layout. Consider how the cut edge will meet the next tile or the wall. If you’re working with intricate patterns, like a checkerboard layout, planning where your cuts will fall is even more critical to maintain the visual balance. You want the pattern to look intentional, not like an afterthought. This is where a bit of creativity can really pay off.
Minimizing the Number of Cuts Needed
Fewer cuts mean less work, less potential for error, and less waste. The best way to minimize cuts is to start your layout from the center of the room and work outwards. This way, you'll likely end up with symmetrical cuts on opposite sides, rather than a lot of awkward, small cuts along one wall. If your room isn't perfectly square, this method helps distribute any necessary cuts more evenly. It’s a simple strategy that makes a big difference in the overall efficiency of your project. Remember, every cut you avoid saves you time and effort.
Planning for Complex Room Shapes
Irregularly shaped rooms or areas with lots of obstacles (like doorways, cabinets, or angled walls) require extra planning. Before you start, sketch out the room and mark all the fixed elements. Then, dry lay your tiles, paying close attention to how they fit around these features. You might need to make more complex cuts, like notches for door frames or angled cuts for bay windows. Taking the time to map this out on paper first will save you a lot of headaches when you're actually on the floor with the saw. It’s better to have a detailed plan than to be guessing as you go.
Ensuring Symmetry and Balance with Cut Pieces
Symmetry is often key to a professional-looking installation. When planning your layout, think about balance. If you have a cut tile on one side of a room, try to have a corresponding cut tile on the opposite side, or a full tile that balances it visually. This creates a sense of order and harmony. For example, if you have a narrow cut piece along a wall, consider if a wider cut piece or a full tile on the opposite side would create a more pleasing aesthetic. This attention to detail makes a huge difference in the final appearance of your tiled space. When you buy marble tiles online USA, planning for this symmetry ensures your investment looks its best.
Sarah wanted a stunning marble backsplash for her kitchen. She had a standard U-shaped kitchen with a window above the sink and a corner range. Initially, she thought she'd just start tiling from the center and cut as needed. However, after a quick dry lay, she realized that starting dead center would result in a very small, awkward cut piece right next to the window frame on one side, and a large cut piece on the other. She decided to shift her starting point slightly, so that the cuts on either side of the window were more symmetrical and a full tile was centered behind the sink. This minor adjustment meant a few more precise cuts around the range corner, but the overall visual balance was dramatically improved. The final result? A backsplash that looked professionally designed, with no jarring cut pieces disrupting the flow.
Troubleshooting common cutting challenges
Every stoneworker runs into trouble when it comes time to cut natural stone tiles. Even if you buy the highest quality products or buy marble tiles online USA, it's easy to hit a snag. Let’s zero in on those frustrating problems—and conquer them with smart, practical solutions. Below you'll find common issues, real-world cases, and proven tactics for clean, pro-level results.
Addressing Chipped Edges During Cuts
Nobody wants chips on a freshly cut edge. Unfortunately, marble and travertine are prone to this when your blade is dull or the feed speed is too rushed.
- Use a fresh, sharp diamond blade every time.
- Mark your cut and use painter’s tape right alongside—it helps absorb vibration and contains micro-chips.
- Slow and steady wins here. Let the saw and blade do the work; heavy pressure means more chips!
Takeaway: "Clean edges start with a quality blade, patience, and the right technique. Never rush—take the time to tape, support, and go slow!"
Case Study:
A homeowner from Arizona replaced a bathroom floor with Calacatta marble sourced from an online retailer. They faced excessive edge chipping using an old blade and fast feed rate. Switching to a premium blade and halving the feed speed reduced visible chips by 90%.
Resolving Issues With Uneven Cuts
Uneven cuts can make installation a nightmare, causing gaps or fitting problems. This typically happens if:
- The tile isn’t properly secured on the cutting tray.
- The wet saw’s guide fence is misaligned.
- You’re applying uneven pressure by handling both sides instead of pushing smoothly from behind.
A quick table for checking your setup:
| Symptom | Likely Cause | Fix |
|---|---|---|
| Wavy cut lines | Blade is worn or wobbly | Replace blade; check for runout |
| Tapered or angled cuts | Fence out of square | Recalibrate and square the fence |
| Ragged/split ends | Too much pressure, poor support | Use gentle feed; use back support |
For more insights, read about uneven cuts while cutting natural stone.
Case Study:
A local contractor struggled with slate tiles producing tapered edges. They found their wet saw’s fence was off by 2 mm along 12 inches. After squaring the saw and shifting to gentle, steady feed pressure, cuts improved dramatically.
Dealing With Blades That Skip or Wander
Sometimes your blade decides to drift, giving you a wonky cut instead of a straight line. Common reasons:
- Dull or incompatible blade for your stone type.
- Tile is moving during the cut.
- Water feed is low, causing overheating and warping.
Quick Solutions:
- Double-check that you’re using the correct diamond blade for the stone's hardness.
- Keep a constant, light pressure along the cut line.
- Ensure water flows freely around the blade to cool it.
Managing Excessive Dust and Water Spray
Stone saws create dust, but if you’re seeing a cloud or a puddle, it’s time to adjust.
- Clean the water jets and keep the reservoir full.
- Position shields or barriers to catch spray.
- Always wear a dust mask and eye protection.
In some cases, setting up your saw outdoors or in a well-ventilated space will make cleanup and breathing easier.
Correcting Mistakes in Measurement or Marking
Measured twice but still cut wrong? It happens. Here’s how to avoid it:
- Use a visible, permanent marker for dark stones; wax pencils work well for lighter ones.
- Mark both faces of the tile whenever possible.
If you cut the wrong side:
- Save miscut tiles for smaller edge pieces or creative accents.
- If budget allows, order extra tiles when you buy marble tiles online USA to cover mishaps.
When a Tile Breaks During Cutting
Breakage is sadly common, especially with narrow cuts near the edge of brittle stones.
- Support both sides heavily—even sliding foam under the tile stops vibration.
- Cut halfway through; then flip and finish from the other side.
- If a tile is cracked or weakened at the start, set it aside.
Seeking Solutions for Difficult-to-Cut Stones
Some stones (granite, quartzite) need special handling.
- Choose high-quality blades rated for ultra-hard stones.
- Adjust saw RPM if possible and increase water flow.
- If cuts must be flawless—especially visible edge work—consider hiring a professional fabricator for best results.
Remember, each stone is unique, and tackling its quirks with the right prep makes all the difference.
Final Word: Cutting natural stone is a test of patience and planning. Most problems trace back to setup, tool choice, or technique. Invest in the right gear, don’t rush, and don’t be afraid to reach out to a professional if your stone proves stubborn. Clean cuts make for flawless installations—so take that extra minute, and your project will shine long after the last tile is laid.
The benefits of professional stone cutting
Cutting natural stone tile can be tricky. You might think, 'How hard can it be? I've got a wet saw.' But let me tell you, it's not always as straightforward as it looks. Natural stone, especially marble and travertine, can be brittle. One wrong move, and you've got a chipped edge or a tile that's split right down the middle. That's where professional stone cutting services come in. They're the pros for a reason.
When to Consider Custom Fabrication Services
If you're working with intricate patterns, complex layouts, or just want that perfect, flawless finish, professional fabrication is your best bet. They have the specialized equipment and the know-how to handle delicate cuts that a DIYer might struggle with. Think about those fancy mitered edges or precise curves – a pro can nail it every time. It's about getting that high-end look without the headache. For those looking to buy marble tiles online in the USA, ensuring they're cut perfectly is key to the final aesthetic.
Leveraging Expertise for Intricate Designs
Got a design that's a bit out there? Maybe a mosaic with tiny, custom-shaped pieces or a backsplash that needs a specific curve to fit around a window? Professionals excel at this. They can take your vision and translate it into reality with precision. They understand how different stones react and can adapt their techniques to get the best result. It's not just about cutting; it's about artistry.
Accessing Specialized Cutting Equipment
While a standard wet saw is great for basic cuts, professionals often have access to more advanced machinery. This can include large-format saws, bridge saws, or even CNC machines for incredibly complex shapes and perfect repeatability. This specialized gear means they can handle thicker slabs, achieve tighter tolerances, and produce cleaner cuts than what's typically possible with a home setup. This is especially important when you're working with premium materials like granite or onyx.
Ensuring Precision for Complex Projects
Precision is everything in tile work. A professional fabricator ensures that every cut is exact, every angle is perfect, and every piece fits together like a puzzle. This is vital for large projects, custom installations, or when you're aiming for a seamless look with minimal grout lines. They understand the importance of accuracy, especially when dealing with materials that have natural variations, like marble or travertine. Getting it right the first time saves time and money in the long run.
Saving Time and Effort on Challenging Cuts
Let's be honest, cutting stone tile can be time-consuming and physically demanding. If you're on a tight schedule or simply don't want to spend hours wrestling with stone, hiring a professional is a smart move. They can process large quantities of tile quickly and efficiently, freeing you up to focus on other aspects of your project. It's a practical solution for busy homeowners and contractors alike.
Achieving Flawless Results for High-End Installations
For projects where only the best will do, professional cutting is non-negotiable. Whether it's a luxury bathroom, a statement kitchen countertop, or a high-traffic commercial space, the quality of the cuts directly impacts the final appearance. Professionals deliver that polished, perfect finish that elevates the entire installation. They can also handle edge treatments, like beveling or polishing, to match your design needs.
Understanding the Value of Professional Services
While there's a cost associated with professional fabrication, it's an investment in quality and peace of mind. You're paying for their skill, their equipment, and their guarantee of a job well done. This can prevent costly mistakes, save you from buying extra material due to breakage, and ultimately lead to a more beautiful and durable final product. For many, the results are well worth the expense.
Case Study: The Custom Kitchen Backsplash
A homeowner wanted a unique backsplash using a delicate marble tile with intricate veining. They attempted to cut the tiles themselves with a standard wet saw, resulting in several chipped and broken pieces. Frustrated, they contacted a professional stone fabricator. The fabricator used a specialized bridge saw with a fine-grit diamond blade, carefully cutting each piece to size and even creating a custom curve to fit around a decorative range hood. The final result was a stunning, seamless backsplash that perfectly complemented the kitchen's design, a feat that would have been difficult and time-consuming to achieve otherwise.
Case Study: Large Format Floor Installation
A contractor was tasked with installing large format (24x24 inch) travertine tiles in a high-end entryway. Achieving perfectly straight cuts and ensuring no lippage (uneven edges between tiles) was critical. The contractor hired a professional cutting service that used a large-format wet saw with a laser guide and a specialized leveling system. This ensured all cuts were precise and the tiles laid perfectly flat, creating a luxurious and professional finish that impressed the client and avoided costly rework.
Post-installation care for cut stone tiles
The journey doesn't end once your natural stone tiles are on the wall or floor. Proper care after installation is what keeps stone surfaces at their best for years. Let’s get into what it takes.
Sealing cut edges to prevent staining
Cut edges are more absorbent, making them targets for stains. Apply a high-quality stone sealer using a brush or fleece pad, letting it soak into those exposed edges.
- Focus on every exposed, freshly cut edge
- Always let the sealer cure fully before grouting or cleaning
- Follow manufacturer instructions for the right application
Want your tiles to stay flawless? Re-seal as part of regular maintenance, at least once a year, especially in kitchens or bathrooms. For step-by-step tips, read up on the full process of properly sealing your tiles.
Cleaning grout lines around cut tiles
Even after sealing, grout lines can collect grime. Use a pH-neutral cleaner and a soft sponge to avoid scratching the stone. Never use harsh chemicals—they’ll ruin the finish.
- Wipe gently with diluted cleaner
- Avoid letting dirty water dry on the stone
- Rinse with clean water, then pat dry
A recent client in New York installed a stunning marble backsplash. By cleaning up grout residue immediately after installation and using only neutral cleaners, they avoided the yellowing that often plagues white marble grout.
Maintaining the overall appearance of cut stone
Stone is tough, but it still needs routine care to look new. Regularly sweep or dust, and mop with pH-balanced cleaners. Don’t let spills linger, especially with marble—wipe them up fast to prevent stains. For a quick daily routine, explore best practices for natural stone care.
Protecting cut edges from damage
Those sharp, fresh edges chipped during installation? It happens. You can minimize future chips by:
- Rounding edges gently with a sanding block before final sealing
- Using soft pads or rugs in high-traffic areas
- Quickly fixing any newly chipped corners with a repair kit
A smooth, well-sealed edge is less likely to stain, chip, or show wear—it's a must for busy spaces.
Understanding the long-term care of natural stone
Long-term care means consistency. Sealing regularly, using gentle cleaners, and watching for damage will extend the life of your project. Consider these quick reminders:
- Reapply sealer annually or as needed.
- Repair minor chips before moisture sets in.
- Avoid abrasive pads and vacuum wheels on stone.
Addressing wear and tear on cut sections
Cut sections see the most use and often show wear first. If you spot dullness or tiny chips:
- Buff gently with a stone-safe polishing pad
- Re-seal after repairs
- Call a pro for serious cracks—don’t risk DIY fixes on deep damage
Ensuring the longevity of your installation
It’s not just about cleaning. Regular inspection saves headaches. Check for grout cracks, loose tiles, and worn sealant. Address problems right away to avoid expensive repairs. If you want marble to keep shining, treat it with respect—or buy marble tiles online USA for a refresh and start over.
Case Study: A Houston homeowner installed travertine in their entry. By sealing their cut edges yearly and using entry mats, their stone still looks new five years later—even with heavy foot traffic and pets.
Tables can help you track when to reseal and what to inspect each season:
| Maintenance Task | Frequency | Key Product |
|---|---|---|
| Seal cut edges & surfaces | 12 months | Stone sealer |
| Deep clean tile and grout | 6 months | Neutral cleaner |
| Inspect edges for chips/cracks | Each season | Visual check |
| Repair minor chips | As needed | Stone repair kit |
Take post-installation steps seriously. You’ll protect your investment, keep your tiles beautiful, and make that initial effort totally worth it. Your stone can last a lifetime—if you treat it right from day one.
Taking care of your new cut stone tiles after they're installed is super important. A little bit of attention now means they'll look great for a long, long time. Want to keep them shining? Check out our website for the best tips and products to make sure your stone stays beautiful.
Conclusion
Cutting natural stone tile might seem a bit intimidating at first, but with the right tools and a steady approach, it’s definitely something you can handle. Taking your time with each step—measuring, marking, and making careful cuts—will help you get a clean, professional look. Remember, safety comes first, so don’t skip the goggles and gloves. Once your tiles are cut and installed, you’ll see how marble or travertine can really transform a space, adding both beauty and long-term value to your home. If you’re looking for premium natural stone, Surfaces Galore has you covered. We ship nationwide, offer bulk discounts, and are always happy to answer questions or help you find the perfect tile for your project. Ready to get started? Check out our current stock or request a quote today.
Frequently Asked Questions
What tools do I absolutely need to cut natural stone tiles?
To cut natural stone tiles like marble or travertine, you'll definitely need a wet saw. This special saw uses water to keep the blade cool and reduce dust. You'll also need the right diamond blade made for cutting stone, safety gear like goggles and gloves, and tools to measure and mark your lines accurately.
Why is it important to cut natural stone tiles carefully?
Natural stones, especially marble and travertine, can be brittle. Cutting them too fast or with the wrong blade can cause them to chip or break. Taking your time and using the correct tools ensures clean cuts and helps you avoid wasting expensive material.
How do I prevent chipping when cutting marble or travertine?
To minimize chipping, always use a sharp diamond blade designed for stone. Make sure your wet saw has a good water supply to keep everything cool. Cut slowly and steadily, letting the saw do the work without forcing the tile. Planning your cuts so that edges needing to be hidden are cut is also a good idea.
What's the best way to mark cut lines on stone tiles?
You can use a pencil or a permanent marker to draw your cut lines directly onto the tile. For very dark stones, a white chalk pencil might show up better. Make sure your marks are clear and precise, as this will guide your cutting.
Do I need to let the stone tiles get used to the room's temperature before cutting?
Yes, it's a good practice to let your natural stone tiles sit in the room where you'll be installing them for a day or two. This helps them adjust to the temperature and humidity, which can prevent them from cracking or changing shape when you cut them.
What is the 'waste factor' when cutting stone tiles?
The waste factor is the extra amount of tile you need to buy to account for pieces that will be cut away, trimmed, or possibly broken during installation. It's smart to order about 10-15% more tile than your measurements show to cover these potential losses.
Can I use a regular tile cutter for marble and travertine?
While some very thin and specific types of marble might be cut with a manual tile cutter, it's generally not recommended for most marble and travertine. These stones are often too hard and brittle. A wet saw with a diamond blade is the safest and most effective tool for cutting them cleanly.
How do I deal with natural holes in travertine tiles when cutting?
Travertine often has natural holes. When cutting, you can either cut around them if they are in an awkward spot, or embrace them as part of the stone's natural beauty. Some people choose to fill these holes with grout or a special filler before or after installation for a smoother look.
What should I do with the cut edges after cutting the stone?
After cutting, the edges might be a bit rough. You can smooth them down by sanding them with sandpaper or using a specialized edge-finishing tool. If the cut edges will be visible, making them smooth and clean is important for the final look.
How can I make sure my cuts are straight?
Using a wet saw with a good guide or fence is key. Make sure the tile is lined up correctly against the guide before you start cutting. Cutting slowly and steadily, and not forcing the tile, also helps keep your cuts straight and true.
Is it safe to cut stone tiles indoors?
Cutting stone tiles indoors can create a lot of dust and water spray. A wet saw helps control this by using water, but it's still best to have good ventilation or do the cutting in a well-protected area, possibly outdoors or in a garage, to keep your living space clean and safe.
When should I consider hiring a professional for cutting stone tiles?
If you're dealing with very intricate cuts, complex patterns, or expensive stone, and you're not confident in your cutting skills, it's wise to hire a professional. They have specialized equipment and experience to ensure perfect cuts, especially for things like mitered edges or detailed designs.


Leave a comment