
Creative Layout Ideas for Natural Stone That Last

If you want a layout that actually holds up, match the pattern to the room first, then the material. Running bond suits almost any rectangular tile and forgives minor size variation, straight stack delivers a clean architectural grid but demands rectified tiles and a dead-flat substrate, herringbone and chevron bring movement and formality to entries and floors, and diagonal layouts make a small bathroom or foyer read larger. Mosaic accents handle curves, niches, and shower floors where full-size stone can’t bend.
Here’s when each one earns its place:
- Running bond (half-offset, one-third, or random): the safest choice for kitchens, hallways, and large floors where you want forgiveness for natural stone’s size and shade variation.
- Straight stack: best for modern kitchens and feature walls when you’ve specified rectified tiles and confirmed a flat substrate.
- Herringbone or chevron: ideal for entryways, backsplashes, and floors where you want visual energy and a sense of motion.
- Diagonal layout: a smart pick for small bathrooms, mudrooms, or narrow hallways that need to feel more open.
- Mosaic bands or medallions: reserved for accent moments, shower floors, and niches where full-format tile can’t follow the shape.
Before you fall in love with a pattern, plan the substrate, expansion joints, and grout color. Those three decisions determine whether your layout still looks sharp in ten years or starts showing hairline cracks in two.
Key Takeaways
The right natural stone layout pairs a pattern suited to the room’s scale with rectified tiles, planned expansion joints, and a sealing schedule that protects the stone long term.
| Point | Details |
|---|---|
| Match pattern to room scale | Use diagonal or mosaic accents in small rooms; herringbone or chevron in large, high-visibility spaces. |
| Always dry-lay first | Lay the full pattern from center outward before any adhesive touches the substrate. |
| Plan expansion joints early | Place joints at perimeters and transitions to prevent cracking from natural stone movement. |
| Specify rectified tiles for straight stack | Non-rectified edges cannot hold a tight, consistent grout joint. |
| Seal and test before full installation | Run a test patch and confirm grout and sealer compatibility before committing the whole room. |
| Consult Surfacesgalore for samples | Surfacesgalore supplies marble, travertine, and limestone samples and pattern planning consultation nationwide. |
Table of Contents
- Creative Layout Ideas: A Pattern Primer for Natural Stone
- How to Choose the Right Layout for Your Room and Stone
- Planning Your Layout Before a Single Tile Is Set
- Substrate, Joints, and Grout: The Non-Negotiables
- Creative Accents That Elevate a Standard Layout
- Which Layouts Work Best in Which Rooms?
- What Changes With Marble, Travertine, and Limestone
- Tools and Materials You Need Before Installation Starts
- Common Layout Mistakes and Warning Signs
- The Surfaces Galore Take on Designing With Natural Stone
- Ready to Bring Your Layout to Life?
- Sources
- FAQ
Creative Layout Ideas: A Pattern Primer for Natural Stone
Every pattern carries its own visual mood, and matching that mood to the room is half the design job. Running bond, still the most widely used stone tile layout, staggers each row by a fraction of the tile length. A half-offset feels orderly and traditional. A one-third offset softens repetition without looking random. Full random offset works best on slate or rustic-finish stone, where you want an organic, quarried look rather than a manufactured grid.
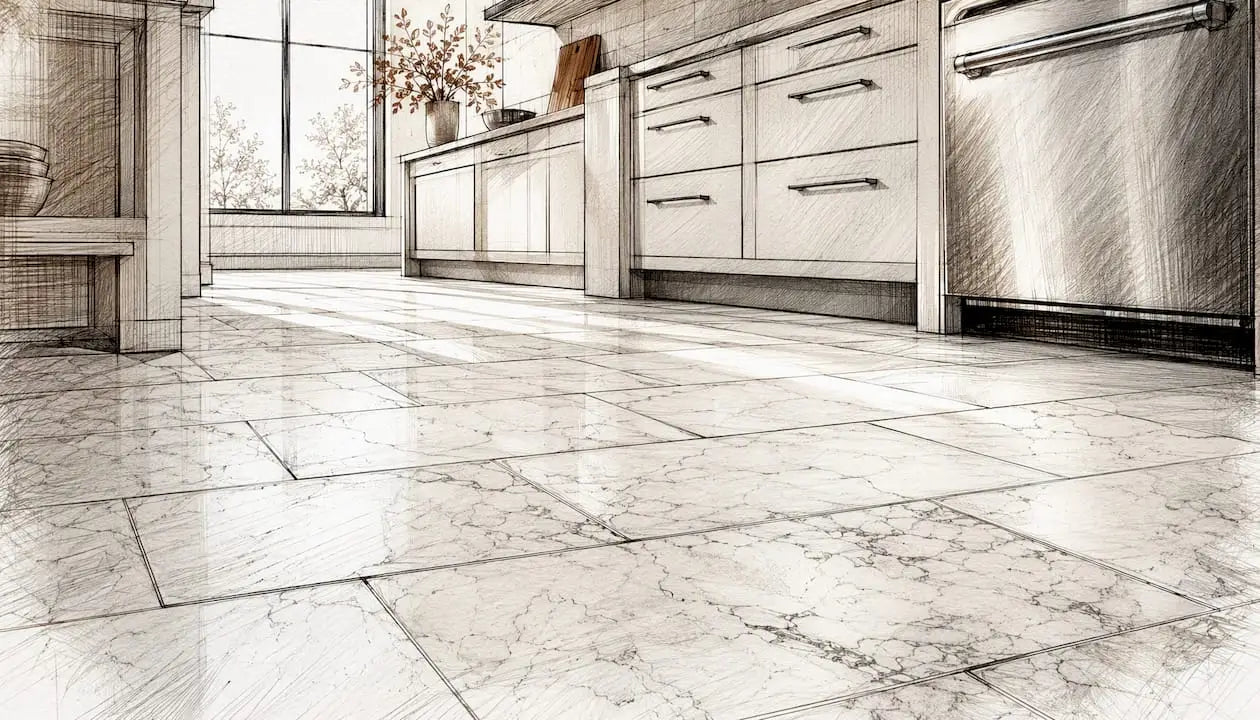
Straight stack lines every joint up in a strict grid, which reads modern and architectural but exposes every imperfection in tile size. That’s why it requires rectified tiles and a flat substrate to achieve narrow, consistent grout lines. Herringbone arranges rectangular tiles in a zigzag “V,” creating strong directional movement, and works best with tiles cut to 2:1 or 3:1 length-to-width ratios. Chevron takes that concept further: it uses purpose-cut parallelogram tiles that meet at a sharp point, producing a continuous arrow line that reads as formal and custom in luxury installations. Diagonal simply rotates a standard grid 45 degrees, a small change that visually stretches a room’s proportions.
| Pattern | Visual mood | Best tile shapes/sizes | Skill/installation notes |
|---|---|---|---|
| Running bond | Relaxed, familiar, forgiving | Rectangular planks, subway formats | Low to moderate skill; hides size variation well |
| Straight stack | Crisp, architectural, modern | Large-format squares or rectangles | Requires rectified tiles and a flat substrate |
| Herringbone | Energetic, textured, directional | Rectangular tiles at 2:1 or 3:1 ratio | Moderate to high skill; more cuts at edges |
| Chevron | Formal, continuous, luxurious | Pre-cut parallelogram tiles | High skill; factory-cut angles required |
| Diagonal | Expansive, dynamic | Squares, standard field tile | Moderate skill; more waste from corner cuts |
| Mosaic accents | Custom, detailed, textural | Sheet-mounted mosaics, hexagon, penny round | Moderate skill; needs careful sheet alignment |
A few quick reads on mood: straight stack and diagonal both feel architectural, but diagonal adds energy while straight stack stays still. Herringbone and chevron both create motion, though chevron is the more formal, tailored version. Running bond stays neutral enough to pair with almost any stone finish, which is why it remains the default for large floors.
How to Choose the Right Layout for Your Room and Stone
Picking a pattern isn’t just an aesthetic call. Tile format, stone type, and how the space gets used all narrow your realistic options. Run through this checklist before committing:
- Room scale: small rooms favor diagonal or fine mosaic detail; large open floors can support bold herringbone or chevron without feeling busy.
- Tile dimensions: herringbone and chevron need rectangular or parallelogram formats cut to specific ratios, not square tile.
- Rectified vs. non-rectified: tight straight-stack joints only work with rectified edges; non-rectified stone needs a wider grout joint to hide size variation.
- Grout visibility: a contrasting grout color makes the pattern read from across the room; a matching grout color lets the stone’s veining take center stage.
- Traffic and slip resistance: honed or textured finishes belong in high-traffic and wet areas; polished finishes work better in low-traffic, dry spaces.
Room by room, the priorities shift:
- Kitchens favor running bond or straight stack on the floor, with herringbone or a mosaic band reserved for the backsplash where the scale reads better up close.
- Bathrooms benefit from diagonal layouts to open up tight footprints, plus mosaic tile on any curved or sloped surface.
- Showers need pattern choices that respect slope-to-drain, which usually means smaller-format mosaic on the floor and larger field tile on the walls.
- Foyers and entryways are a natural home for herringbone or chevron since guests see the floor from a standing angle where the movement really shows.
- Hallways do well with running bond laid lengthwise, which visually stretches a narrow corridor.
- Outdoor transitions call for slip-resistant, honed stone in simple running bond or straight patterns, since intricate layouts complicate slope and drainage.
Grout color and natural shade variation both affect how large or small a pattern reads. A busy stone with heavy veining paired with a bold pattern like chevron can look chaotic; save chevron for calmer, more consistent stone lots.
Planning Your Layout Before a Single Tile Is Set
The single biggest factor separating a professional-looking floor from an amateur one is what happens before any adhesive touches the substrate. Skipping this stage is where most creative layout ideas fall apart in execution.
- Measure the room and find the true center point, not just the midpoint of one wall.
- Snap chalk lines or set a laser level along both axes to establish your reference lines.
- Dry-lay the entire pattern from the center outward, using the actual tiles you plan to install, since dry-laying before adhesive goes down is what catches awkward cuts before they become permanent.
- Mark where perimeter cuts fall and adjust the starting point if you’re left with slivers under two inches wide at any wall.
- Photograph the dry-lay from above before you commit, so you have a reference during installation.
Perimeter strategy matters more than most homeowners expect. A pattern that looks perfect in the center of the room can end in a strip of quarter-inch tile slices along one wall, which reads as a mistake even when the math is technically correct. Shifting your starting point by a few inches often eliminates that problem entirely. Planning your center point and calculating 5 to 10 percent extra material for cuts and future repairs also protects you from running short mid-project.
Pro Tip: Take dry-lay photos from a ladder or upstairs window, then pull tiles from multiple boxes and shuffle them across the layout. Natural stone ships with shade variation between lots, and blending it evenly prevents obvious light or dark patches once the grout sets.
Substrate, Joints, and Grout: The Non-Negotiables
Creative patterns only survive if the technical fundamentals underneath them are right. Substrate flatness comes first: most natural stone installations require minimal deviation across a 10-foot span, and anything beyond that needs a self-leveling compound before you set a single tile. Skipping this step is the fastest way to end up with lippage that catches light and shadow across every joint in a straight-stack or herringbone layout.
Mortar coverage matters just as much. Industry guidance calls for a minimum of 95 percent mortar coverage on natural stone installations, achieved through proper trowel sizing and back-buttering each tile. Voids under the stone are invisible until a heavy load or seasonal shift cracks the tile from beneath.
- Expansion joints are not optional trim detail. Natural stone moves with temperature and moisture, and skipping joints at perimeters, transitions, and every 20 to 25 feet in the field can lead to cracking that no amount of careful pattern planning will fix.
- Epoxy grout resists staining and works well for kitchens and shower floors; cementitious grout is easier to work with on large floors but needs more frequent sealing.
- Seal marble, travertine, and limestone on a schedule, generally every 12 to 24 months depending on traffic, since all three are porous stones that absorb liquids if left unprotected.
- Specify rectified tiles whenever you want a tight straight-stack joint; non-rectified edges simply cannot hold a consistent quarter-inch line without visible waviness.
A 95 percent mortar coverage target isn’t a suggestion. It’s the difference between a floor that lasts decades and one that hollow-sounds under your feet within a year.
Creative Accents That Elevate a Standard Layout
Borders, insets, and mixed materials turn a competent installation into a memorable one, but each carries its own scale rules. A perimeter border in a contrasting stone frames a room without overwhelming it. An inset medallion works beautifully in a large foyer or dining room floor, but the same medallion crammed into a small powder room reads as clutter rather than design.
- Border frames in a darker or lighter stone define the edges of a kitchen island or entry landing.
- Inset medallions work best at a minimum 4 to 6 foot diameter, scaled to the room.
- Mixed tile sizes, such as pairing 12x24 field tile with a 2x2 mosaic band, add texture without full pattern complexity.
- Bookmatched slabs, where two adjacent pieces mirror each other’s veining, make a striking shower wall or kitchen backsplash focal panel.
- Tonal gradients, running from lighter to darker stone across a floor, add depth that a single-tone installation can’t achieve.
“Sheet-mounted mosaics speed up installation while keeping design control intact, but waterjet-cut custom mosaics give a project a genuinely one-of-a-kind identity when the extra cutting and alignment quality control is worth it,” according to guidance on designing marble mosaic layouts.
Mixing finishes, like a honed field tile against a polished mosaic band, adds contrast without adding installation risk, since both are still working with the same base stone.
Which Layouts Work Best in Which Rooms?
Room function drives pattern choice more than personal taste alone. A pattern that photographs beautifully in a foyer might create real problems in a shower.

| Room | Recommended patterns | Practical notes |
|---|---|---|
| Kitchen floor | Running bond, straight stack | Coordinate scale with cabinetry and countertop veining |
| Kitchen backsplash | Herringbone, mosaic band | Smaller scale reads better at eye level |
| Bathroom floor | Diagonal, running bond | Diagonal opens up tight footprints visually |
| Shower floor | Small-format mosaic | Needs slope-to-drain and dense grout for waterproofing |
| Entryway | Herringbone, chevron | Durable finish since foot traffic and grit concentrate here |
| Outdoor transition | Straight, simple running bond | Slip resistance and drainage outrank pattern complexity |
Kitchens benefit from a backsplash that contrasts in scale with the floor, so a bold herringbone strip above the range doesn’t compete with a quiet running-bond floor below. Bathrooms and showers carry the tightest constraints: complex floor patterns increase grout lines, which raises both maintenance and slip risk in wet areas, so slope and waterproofing always come before pattern ambition in a shower pan. Entryways need a durable, slip-resistant finish since grit and moisture concentrate right at the door, and outdoor transitions should prioritize a honed or textured surface over an intricate layout.
What Changes With Marble, Travertine, and Limestone
The stone you choose shapes which patterns actually work. Marble’s dramatic veining makes bookmatched panels and straight-stack layouts particularly striking, since the pattern doesn’t compete with the movement in the stone. Polished marble shows scratches and etching more readily than honed, so honed finishes suit high-traffic floors while polished marble works better on walls or low-traffic accent areas. Marble is also the most stain-sensitive of the three, so sealing before grouting and choosing a grout that won’t leach into the stone’s pores both matter more here than with denser materials.
Travertine comes filled or unfilled, and that choice affects both look and layout. Filled travertine gives a smoother, more formal surface suited to running bond or diagonal layouts, while unfilled travertine’s natural pitting suits a more rustic, random-offset installation. Its slightly textured surface also gives it better slip resistance than polished marble, which makes it a common choice for outdoor transitions and pool surrounds.
Limestone tends to have more consistent, subtle tone variation than marble, which makes it a strong candidate for large straight-stack floors where you want a calm, monochromatic field. Because its surface is generally more porous and matte, a grout color with slightly more contrast helps define the pattern without needing bold veining to do the work. Limestone performs best in interior, low-moisture spaces rather than showers or exterior applications, where its higher porosity becomes a liability.
Tools and Materials You Need Before Installation Starts
A creative layout only comes together if the crew has the right tools on site before the first tile goes down. Missing one piece of equipment mid-project is how corners get cut on precision.
- Laser level for establishing true reference lines across the room.
- Chalk line for quick, low-tech reference marks on the substrate.
- Notched trowels sized specifically to your tile format, since the wrong notch size undermines mortar coverage.
- Wet saw with diamond blades rated for natural stone cutting.
- Tile spacers matched to your target grout joint width.
- Grout floats and margin trowels for finishing work.
- Suction cup lifters for handling large-format slabs and panels safely.
On the materials side, moisture-sensitive stones like marble and limestone typically need a different mortar formulation than denser materials, and installation systems should be matched to stone and condition, including epoxy adhesive for continuously wet areas like steam showers. Keep grout, sealer, and color-matched caulk on hand for movement joints at the perimeter.
Before the crew mixes a bucket of mortar, confirm:
- The dry-lay is complete and photographed.
- The substrate has been checked and accepted for flatness.
- Slope has been verified in any wet area.
- The expansion joint plan is approved and marked on the floor.
Common Layout Mistakes and Warning Signs
Most installation failures trace back to a handful of repeat offenders, and they’re avoidable if you know to look for them before the project starts.
- Thin sliver cuts running continuously along one wall usually mean the starting point was never adjusted for perimeter balance.
- Missing or improperly placed expansion joints are the leading cause of cracked natural stone floors within the first two years.
- Insufficient mortar coverage, often from using the wrong trowel notch, leaves voids that crack under point loads like furniture legs or dropped cookware.
- Attempting a tight straight-stack joint with non-rectified stone almost always produces visible lippage and uneven grout lines.
The fix for each is straightforward: run a test patch on a small section before committing the whole room, insist on rectified tiles whenever the design calls for narrow joints, follow the mortar manufacturer’s specific recommendations for your stone type, and confirm your grout and sealer are chemically compatible before either goes on the stone. A repaired floor almost never matches the original installation’s veining and shade, which is the real cost of skipping these checks: not just labor, but a mismatch you’ll see every day afterward.
The Surfaces Galore Take on Designing With Natural Stone
Working with marble, travertine, and limestone daily, at Surfacesgalore, we’ve found that the layouts clients love most in photos aren’t always the ones that hold up best in daily use. A dramatic chevron floor is stunning in a foyer with light traffic, but the same pattern in a busy mudroom multiplies the number of vulnerable edge cuts underfoot. Our approach starts with the room’s real function, then works backward to the pattern, rather than picking a pattern first and forcing the space to accommodate it.
We also push clients toward sample approvals and mockups before ordering full quantities, because screen colors and small chips rarely match how a stone reads across an entire floor. A dry-lay mockup with actual material catches shade mismatches that no photo can predict. If you’re weighing pattern options against your substrate, budget, or timeline, our team is available to consult on which stone and layout combination fits your project’s structural and design requirements.
Ready to Bring Your Layout to Life?
Once you’ve settled on a pattern, the material you choose determines whether it photographs the way you imagine. Surfacesgalore ships genuine marble, travertine, and limestone directly from source, which means you’re working with authentic veining and consistent stone lots instead of a synthetic reproduction that never quite matches the sample.

If you’re still comparing herringbone against straight stack, or trying to figure out whether your bathroom can handle a bold mosaic band, ordering physical samples solves that faster than any online gallery. You can lay real material against your cabinetry, your grout choice, and your actual lighting before committing to a full order. Discover marble collections built for exactly this kind of side-by-side comparison, request a project consultation, and get sample pieces sent to your door so your next layout decision is based on stone you’ve actually held, not a screen rendering.
Sources
- Laticrete technical documentation (expansion joint guidance)
- Stone tile patterns: Herringbone, Chevron & Running Bond – Dynamic Stone Tools
- Stone tile installation guidelines (Stone Partnership)
- How to install marble tile — Rubi blog
- How to design marble mosaic walls and flooring — MQ Marble
- How to install a marble floor — SF Marble and Granite
On site, contractors and installers should also keep TCNA installation handbook references and ANSI A108 tile-setting standards on hand, since they govern acceptable substrate tolerances and setting materials beyond what any single product data sheet covers.
FAQ
What is the easiest layout pattern for a DIY project?
Running bond is the most forgiving option since it hides minor size variation in natural stone and doesn’t require rectified tiles or precise angle cuts.
Can I use straight stack with any natural stone tile?
No. Straight stack requires rectified tiles with perfectly square edges and a flat substrate; non-rectified stone will show uneven, wavy grout lines.
How often should I seal marble, travertine, or limestone?
Generally every 12 to 24 months depending on traffic and moisture exposure, since all three stones are porous and absorb liquids without sealer.
Where should expansion joints go in a stone floor?
Expansion joints belong at the perimeter, at transitions to other materials, and roughly every 20 to 25 feet across the field to accommodate natural stone’s movement with temperature and moisture.
Does Surfacesgalore offer samples before I commit to a full order?
Yes, Surfacesgalore provides sample pieces and project consultation so you can confirm veining, color, and pattern fit before ordering full quantities.
Is herringbone or chevron better for a small entryway?
Herringbone generally works better in a small entryway since chevron’s precise parallelogram cuts need more room to read as a continuous pattern.


Leave a comment