
How to Install a Shower Pan: DIY Guide for 2026

TL;DR:
- Installing a shower pan creates a waterproof, sloped foundation that ensures proper drainage and prevents water damage. Proper prep, careful installation of the liner and mortar layers, and thorough testing are essential for a durable, code-compliant shower. Patience during curing and adherence to all steps prevent costly failures and ensure a long-lasting shower.
Installing a shower pan is the process of building a waterproof, properly sloped shower floor foundation that ensures effective drainage and prevents water from reaching the subfloor. A correctly installed shower pan follows the 2026 International Residential Code (IRC), which requires a floor slope of 1/4 to 1/2 inch per foot and a minimum curb height of 2 inches. Skipping any step in this process leads to water pooling, wood rot, and expensive repairs. This guide walks you through every stage of a DIY shower pan installation, from gathering materials to verifying waterproof integrity before you lay a single tile.
How to install a shower pan: tools, materials, and prerequisites
Getting your materials and workspace ready before you start is the single most important thing you can do for a successful installation. A missing tool or wrong material mid-project forces you to stop, and stopping at the wrong moment can compromise a fresh mortar layer.
Tools you will need
- Margin trowel and float for mixing and spreading mortar
- Level (4-foot preferred) for checking slope accuracy
- Utility knife for cutting the liner
- Staple gun for securing the liner above the flood line
- Tape measure and pencil
- Bucket and mixing paddle for mortar
- Rubber mallet for tapping the drain assembly
- Caulk gun for sealant application
Materials and their specifications
The two primary liner materials are CPE (chlorinated polyethylene) and PVC (polyvinyl chloride). Both are code-acceptable, but CPE is more flexible in cold temperatures and easier to fold at corners. Standard liner thickness is 40 mil for residential showers.
For the mortar bed, use a dry-pack mortar mix, also called deck mud. This is a stiff blend of Portland cement and sand (typically a 1:5 ratio) that holds its shape when packed. Pre-mixed bags are available, but mixing your own gives you better control over consistency.
Your subfloor must be structurally sound plywood, at minimum 3/4 inch thick, with no soft spots or flex. Any movement in the subfloor will crack the mortar bed over time. Add blocking between joists if the floor feels springy underfoot.
Code requirements to know before you start
The IRC minimum floor area for a shower receptor is 900 square inches, which equals a 30-inch by 30-inch footprint. Smaller enclosures do not meet code. The curb must be at least 2 inches high and no more than 9 inches above the drain. Experienced contractors often build the curb to about 3 inches from the finished floor, which balances water containment with ease of entry.
Pro Tip: Buy 6 to 8 extra inches of liner on every side. You need enough material to fold up the walls and over the curb without stretching or tearing.
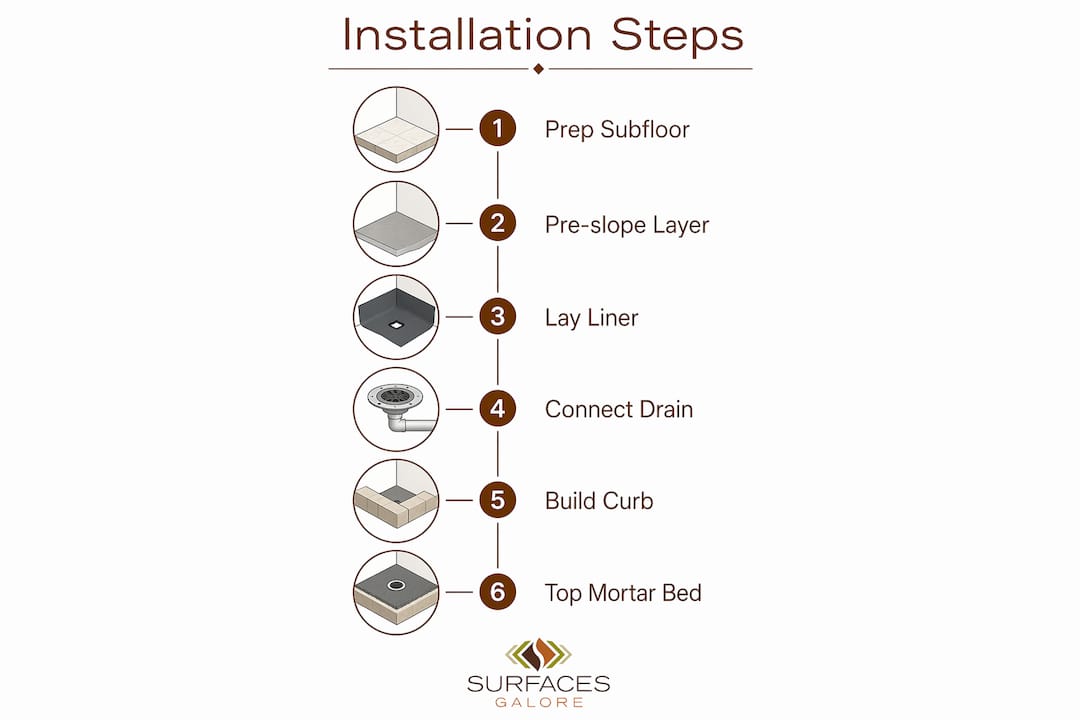
Step-by-step shower pan installation: from pre-slope to mortar bed
This is the core of the installation process. Work through each stage in order and do not rush the curing steps.
Step 1: Prepare the subfloor and install the drain base
Start by positioning the drain body at the center of your shower floor. The drain base screws into the floor and connects to your drain pipe below. Apply plumber’s putty or silicone sealant under the drain flange before setting it. Confirm the drain sits flush with the subfloor surface, not raised above it.
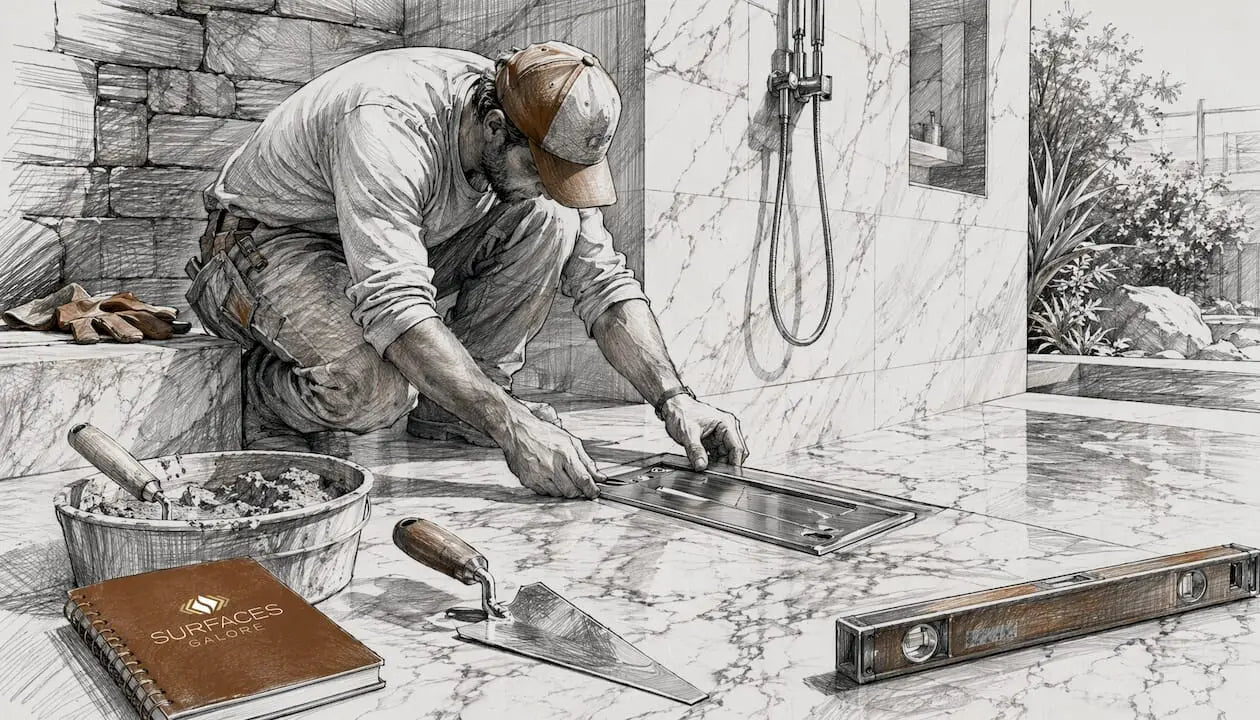
Check the subfloor for level in all directions. A subfloor that tilts in one direction will fight your slope calculations later. Shim low spots with thin plywood before proceeding.
Step 2: Build the pre-slope mortar layer
The pre-slope is the first mortar layer, applied directly to the subfloor before the liner goes down. Skipping the pre-slope is the leading cause of water pooling under a shower pan liner, which leads to wood rot beneath the floor. This layer creates a path for any water that gets under the liner to travel toward the drain’s weep holes.
Mix your deck mud to a consistency that holds a ball when squeezed but crumbles when dropped. Pack it firmly from the walls toward the drain, maintaining a slope of 1/4 inch per foot. Use your level frequently to check the pitch as you work. The pre-slope layer is typically 3/4 inch thick at the walls and tapers to about 1/4 inch at the drain.
Let the pre-slope cure for at least 24 hours before laying the liner. Walking on it too soon will disturb the slope you just built.
Step 3: Lay and secure the shower pan liner
Cut the liner to size, leaving enough material to run up each wall by at least 3 inches above the planned flood line, and to wrap over the curb. Lay the liner flat over the cured pre-slope, starting from the center and working outward.
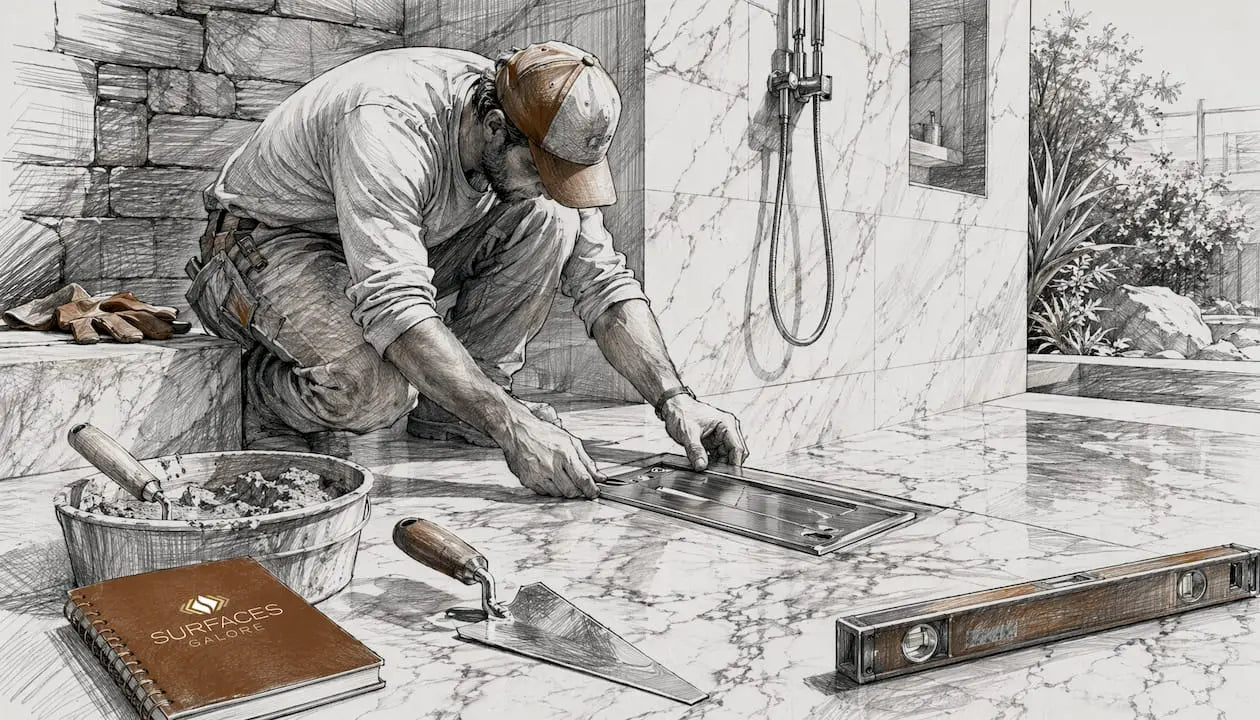
At the corners, fold the liner in a hospital fold: a neat, flat fold that lies tight against the wall without bunching. Bunched corners create stress points that crack over time. Press the liner firmly into the corner where the floor meets the wall.
Secure the liner to the wall studs using a staple gun, but only in the top inch of the liner above the flood line. Never use fasteners through the bottom 6 inches of the liner. Every staple below that zone creates a potential leak path directly through your waterproofing layer.
Pro Tip: Before cutting the liner for the drain, dry-fit the drain clamping ring over the liner to mark the exact bolt hole positions. A misaligned cut here is one of the most common and costly errors in a DIY shower pan installation.
Step 4: Connect the drain assembly through the liner
The drain assembly for a mortar bed shower pan has three parts: the base (already installed), the clamping ring, and the top strainer. The liner gets sandwiched between the base and the clamping ring.
Cut a small X in the liner directly over the drain bolt holes. Do not cut a large circle. The clamping ring bolts compress the liner against the drain base, creating a watertight seal. Apply a bead of silicone sealant around the drain base before clamping. Tighten the bolts evenly in a cross pattern to avoid warping the ring.
Leave the weep holes in the drain base open. These small holes allow any water that seeps under the liner to drain out rather than pool. Covering them with mortar is one of the most common mistakes in shower pan installation.
Step 5: Build and waterproof the curb
The curb is typically built from three stacked 2x4 boards, which gives a rough height of about 4.5 inches before tile. Wrap the liner up and over the curb, folding it neatly at the corners. Staple the liner to the outside face of the curb only in the top inch above the flood line.
Apply a liquid waterproofing membrane or fabric-reinforced tape over the liner at the curb corners. Mixing incompatible waterproofing systems voids warranties and causes failures. Use products from the same manufacturer or verify compatibility before combining them.
Step 6: Apply the top mortar bed
The top mortar bed is the layer your tile sits on. Mix deck mud to the same consistency as the pre-slope layer. Pack it over the liner, starting at the walls and working toward the drain. Maintain the same 1/4 to 1/2 inch per foot slope throughout.
As you pack mortar around the drain, keep the weep holes clear. Press a small piece of gravel or a weep hole protector over each hole before packing mortar around the drain body. This prevents mortar from blocking the drainage path.
The top mortar bed should be at least 1.5 inches thick at the drain and thicker at the walls to achieve the correct slope. Screed the surface flat with a straight board, checking slope with your level as you go.
Mortar beds need 24 to 48 hours to cure before you apply waterproofing or tile. Tiling too soon causes tile failure as the mortar continues to shrink and harden beneath the adhesive. This is the step most homeowners rush, and it is the step that causes the most callbacks for professional installers.
For a complete look at how the mortar bed fits into the broader workflow, the marble shower installation guide at Surfacesgalore covers material sequencing in detail.
What are the most common shower pan installation mistakes?
Most shower pan failures trace back to a small number of repeatable errors. Knowing them in advance saves you from tearing out a finished shower.
-
Skipping the pre-slope. Water that gets under the liner has nowhere to go without a pre-slope. It pools, sits, and rots the subfloor over months or years before you notice any visible damage.
-
Stapling below the flood line. Every fastener below the top inch of the liner above the flood line is a hole in your waterproofing. Use only the minimum number of staples needed to hold the liner in place while you work.
-
Blocking the weep holes. Packing mortar directly over the drain weep holes traps water under the mortar bed. Always protect the weep holes before applying the top mortar layer.
-
Using the wrong mortar. Standard thinset is not a substitute for deck mud in a mortar bed shower pan. Thinset does not have the structural density to hold a slope under foot traffic. Use dry-pack mortar for both the pre-slope and the top bed.
-
Mixing incompatible waterproofing products. A sheet membrane from one manufacturer paired with a drain from another often voids both warranties. Stick to a single system or verify compatibility in writing before purchasing.
-
Rushing the cure. Applying waterproofing or tile before the mortar fully cures is the most common cause of tile delamination in shower floors. Wait the full 24 to 48 hours, even if the surface feels dry.
Pro Tip: After laying the liner and before applying the top mortar bed, plug the drain and fill the pan with water to the flood line. Let it sit for a few hours. Any drop in water level tells you the liner has a leak before you bury it under mortar.
For more on avoiding tile installation errors, the bathroom tile design guide at Surfacesgalore covers common pitfalls across all bathroom surfaces.
How do you verify a shower pan is waterproof before tiling?
Testing before tiling is the only way to confirm your installation is sound. A leak found after tile is set means tearing out the entire floor.
- Plug the drain. Use an expandable test plug that fits into the drain opening and seals it completely.
- Fill the pan to the flood line. The flood line is the top of the liner where it meets the wall. Fill with water to that level.
- Mark the water level. Use a pencil or tape to mark the exact water surface on the wall.
- Wait 24 hours. A 24-hour flood test is the standard method for verifying waterproof integrity before tiling. Do not check it after 2 hours and call it done.
- Inspect the water level. Any drop in water level indicates a leak in the liner or drain seal. Find and fix the source before proceeding.
After passing the flood test, check slope uniformity one more time with your 4-foot level. Place it in multiple directions across the pan surface. The bubble should consistently show a pitch toward the drain.
When the pan passes both tests, it is ready for tile. Natural stone tiles, including marble and travertine, are excellent choices for shower floors because of their density and durability. Choosing slip-resistant stone options is particularly important for shower floors, where wet surfaces are constant. Use a polymer-modified thinset rated for wet areas and a sanded grout or epoxy grout for joints 1/8 inch or wider.
Key Takeaways
A properly installed shower pan requires a pre-slope, a correctly secured liner, a clear drain assembly, and full mortar cure time before any tile goes down.
| Point | Details |
|---|---|
| Pre-slope is non-negotiable | Build the mortar pre-slope before laying the liner to direct water to drain weep holes. |
| Liner fastener placement matters | Staple only in the top inch above the flood line to avoid creating leak paths. |
| Protect the weep holes | Keep drain weep holes clear when applying the top mortar bed to prevent water pooling. |
| Cure time prevents tile failure | Allow 24–48 hours for each mortar layer to cure before waterproofing or tiling. |
| Always flood test before tiling | A 24-hour flood test confirms liner and drain integrity before tile covers the pan. |
Why patience is the real skill in shower pan work
Shower pan installation looks straightforward on paper. The steps are logical and the materials are not exotic. What separates a pan that lasts 20 years from one that fails in 18 months is almost always patience, not technique.
The pre-slope step is where I see most DIYers cut corners. They reason that the top mortar bed will compensate for a flat or uneven pre-slope. It does not. Water under the liner follows gravity, and without a proper pre-slope, it finds the lowest point and stays there. The subfloor rots silently while the tile above looks perfect.
The other place patience pays off is curing time. I understand the temptation to tile after 12 hours when the mortar feels solid. But mortar continues to cure chemically for days, and tiling too early traps moisture that weakens the bond. The 24 to 48 hour window is not a conservative estimate. It is the minimum.
My honest advice for homeowners attempting this for the first time: do not start the liner step on a Friday afternoon. Give yourself a full weekend with no deadline pressure. The flood test alone takes 24 hours, and rushing it means you will be tearing out tile within a year.
If you plan to finish the floor with natural stone, the investment in a correctly built pan is even more important. Marble and travertine tiles are dense and beautiful, but they amplify any movement in the substrate beneath them. A pan built to code, cured fully, and flood tested is the only foundation worth putting quality stone on.
— cihan
Natural stone tile for your shower pan from Surfacesgalore
Once your shower pan is built, tested, and ready for tile, the material you choose for the floor defines the look and longevity of the entire space.

Surfacesgalore is a direct importer of premium marble, limestone, and travertine tiles, shipping nationwide from Anaheim, California. The collections include formats suited for shower floors, from small mosaic sheets that follow the pan’s slope naturally to larger field tiles cut for wet applications. Every piece is authentic natural stone, sourced for density and durability in high-moisture environments. Browse the natural stone tile collections at Surfacesgalore and find the right material to complete your shower renovation with confidence.
FAQ
What is the correct slope for a shower pan floor?
The IRC requires a shower floor slope of 1/4 to 1/2 inch per foot toward the drain. This range ensures water drains without making the floor feel uneven underfoot.
How high does a shower curb need to be?
The minimum curb height is 2 inches above the drain, with a maximum of 9 inches. A finished height of about 3 inches is the most practical balance between code compliance and ease of entry.
Can I tile directly over a mortar bed shower pan?
Yes, but only after the mortar has cured for 24–48 hours and the pan has passed a 24-hour flood test. Tiling before full cure causes adhesive failure and tile delamination.
What type of liner is best for a DIY shower pan?
Both CPE and PVC liners at 40 mil thickness meet residential code requirements. CPE is more flexible in cold conditions and easier to fold at corners, making it a practical choice for most DIY installations.
Do I need a professional to install a shower pan?
A homeowner with basic carpentry skills can complete a shower pan installation by following code requirements and curing schedules. Consulting a licensed plumber for the drain connection is recommended if you are not confident in the rough plumbing.


Leave a comment