
4 Phase Marble Design Checklist for Homeowners and Design Pros

A ready-to-install marble project comes down to four checkpoints: plan the specification, choose and inspect the material, install it by the technical rules, then verify and maintain it. Skip any one of those phases and you get seam ghosting, hollow tiles, or a sealer that never should have waited. This checklist walks through what to bring to your first appointment, how to inspect slabs before you buy, the installation rules that prevent call-backs, and the maintenance routine that keeps marble looking new for decades. Surfaces Galore supplies samples and technical data at each of these stages, but the checklist itself works no matter who supplies your stone.
TL;DR:
- Measure openings and plan for waste allowance of 10% for straight layouts or up to 20% for angled or complex patterns to avoid material shortages.
- Inspect slabs in person for fissures, pits, and cracks, and perform a water-drop test to assess porosity and sealing needs before purchase.
- Use white adhesive under light-colored marble and apply full coverage bonding to prevent hollow spots and cracking during installation.
- Verify substrate flatness and moisture levels before setting marble, and install movement joints every 3 to 5 meters to accommodate expansion.
- Seal marble before grouting and reseal annually with a penetrating sealer, checking the sealant’s effectiveness with water repellency tests.
Table of Contents
- Marble Design Checklist: Planning Before You Order
- How to Choose Marble: Material Selection and Slab Inspection
- Marble Installation Checklist: Substrate, Adhesive, and Grout Rules
- Post-Installation Checklist: Inspection, Sealing, and Maintenance
- Supplier Tips: Ordering Samples and Requesting Technical Data
- Practitioner Note: The Call-Backs That Keep Repeating
- Get Marble Samples and Technical Data From Surfaces Galore
- Sources
- FAQ
Marble Design Checklist: Planning Before You Order
Nothing derails a marble project faster than showing up to a showroom or fabricator without the right documentation. Bring these to your first appointment:
- A layout drawing with room dimensions and fixture locations.
- Full-size photos of the space in current lighting conditions.
- Cabinet door samples and paint chips, if marble will sit near painted surfaces.
- Appliance specs, especially for kitchen islands or backsplashes with cutouts.
Once you have a supplier engaged, precise measurements matter more than most people expect. Openings, overhangs, edge profiles, cutouts for sinks or outlets, and exact backsplash heights all need to be recorded before templating begins. A quarter inch off on an overhang can mean a redo.
Waste allowance depends entirely on your pattern choice:
- Straight-lay layouts: budget 10% extra material.
- Diagonal or herringbone patterns: budget 15% to 20% extra, since angled cuts generate more offcuts.
Timeline planning deserves its own line item. Slab lead times vary by quarry and stock availability, fabrication typically takes one to two weeks once templates are approved, and concrete substrates need sufficient curing time before installation can start, according to guidance from the Future Stone Group installation standard. Build your budget around checkpoints, not just the sticker price: seams, edge profiling, reinforcement for large spans, and transportation and protection for the slabs themselves all add cost that a per-square-foot quote often leaves out.
How to Choose Marble: Material Selection and Slab Inspection
Marble selection comes down to four variables: color family, quarry origin, finish, and porosity, according to Pulycort’s marble guide. Get those four right and everything else, including maintenance and long-term appearance, tends to follow.
Start with color and origin. Two slabs labeled the same marble variety can look noticeably different if they come from different quarry lots, so ask your supplier to confirm batch consistency before you commit to a full order. If you want a sense of how veining and color families read in finished rooms, our guide to choosing marble colors is worth a look before you visit a showroom.
At the slab stage, inspect in person whenever possible:
- Check for fissures, pits, or hairline cracks across the full face.
- Compare multiple slabs side-by-side under consistent lighting to confirm vein continuity, since small samples can mislead, according to Chandan Marbles’ inspection checklist.
- Run a water-drop test: if water darkens the surface or absorbs within about ten minutes, the stone is more porous and needs sealing attention.
- Decide honed versus polished based on use. Honed finishes hide etching better in kitchens; polished finishes show more scratches but read more formal.
A quality-control checklist from Process Street also recommends verifying size, weight, texture, and packaging integrity against your order sheet before signing off.
Pro Tip: Reserve 10% to 15% extra slab material from the same batch and write down the batch number on your invoice. If a piece cracks during install or you add a project later, matching veining from a different batch is nearly impossible.
Before you finalize, ask your supplier for a technical data sheet listing porosity class, recommended sealer, and hardness rating. A supplier that can’t produce one is a red flag worth taking seriously.
Marble Installation Checklist: Substrate, Adhesive, and Grout Rules
Installation is where most marble projects succeed or fail, and the rules here are less flexible than people assume.
Substrate prep comes first. Flatness should stay within a few millimeters over a few meters span to avoid lippage between tiles, and moisture readings on concrete need to stay below certain thresholds before setting stone, per the Future Stone Group installation guide. Structural checks matter too, particularly for large-format slabs on upper floors where deflection can crack stone that a tile floor would tolerate.
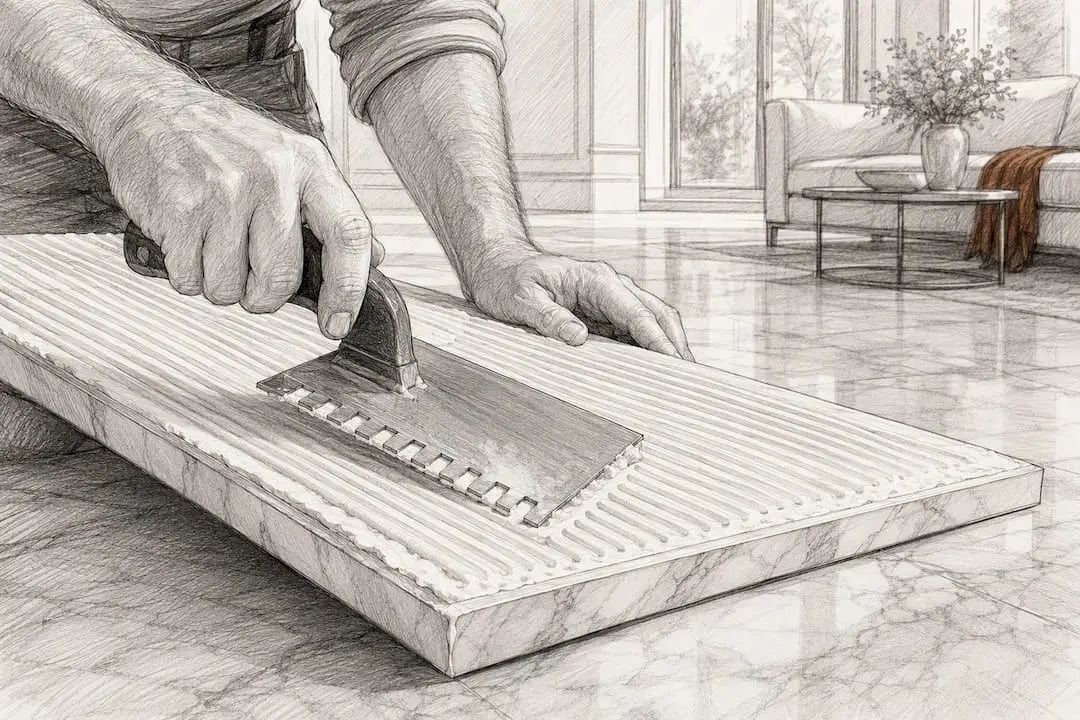
Adhesive selection is non-negotiable for light marbles. Always use white adhesive under white, cream, or light-veined marble to prevent shadowing through thin or honed stone that can ruin the finished look permanently. For large-format tiles, back-butter the slab and comb the substrate to guarantee full contact. Spot bonding, applying adhesive in dabs rather than full coverage, is never acceptable for marble; it leaves hollow spots that crack under point loads.
That back-butter-plus-comb approach, sometimes called double-buttering for moderately large slabs, applies adhesive to both surfaces and achieves close to full coverage, which meaningfully cuts the risk of cracking or hollow spots later.
Grout comes down to two safe choices: unsanded cementitious grout or epoxy grout. Sanded grout scratches polished marble on contact and should never touch a polished surface, per the same installation guide.
Here’s the installation sequence in order:
- Confirm substrate flatness and moisture readings meet threshold.
- Dry-fit the entire layout and photograph it for records.
- Get written sign-off on adhesive type and grout selection before bonding.
- Set movement joints every 3 to 5 meters and at all wall or fixture junctions.
- Apply adhesive per format (back-butter for large format), then set and level.
- Grout only after full sealing (covered in the next section).
Joint width depends on tile size and location, generally tighter for polished floor tiles and slightly wider for large-format slab work where thermal movement is a bigger factor.
Post-Installation Checklist: Inspection, Sealing, and Maintenance
Once the marble is set, a proper acceptance walk-through catches problems while they’re still fixable.
- Check lippage between adjacent tiles by running a hand or straightedge across every joint.
- Confirm joint width uniformity throughout the room.
- Tap or walk the surface listening for hollow spots that signal incomplete adhesive coverage.
- Inspect the finish under both daylight and artificial light, since some scratches and haze only show under raking light.
Sealing should happen before grouting, using an impregnating sealer that penetrates the stone rather than coating it. Reseal frequency depends on use: food-contact surfaces like kitchen counters benefit from annual resealing, while floors and low-contact walls can go longer between applications. The water-drop test from the selection phase works again here as a simple diagnostic: if water beads on the surface, the sealer is still doing its job.
For protection during the rest of the renovation, keep temporary covering on marble floors until other trades finish, and don’t reconnect plumbing or return furniture until the sealer has cured per the manufacturer’s timeline.
Pro Tip: Stick to pH-neutral cleaners for daily marble care and skip anything with vinegar, lemon, or other acids, they etch the surface almost instantly. Never set a hot pan directly on a marble counter; thermal shock can cause hairline cracking even in dense stone.
Supplier Tips: Ordering Samples and Requesting Technical Data
Getting the right marble starts with asking suppliers the right questions before you order.
- Request full-slab photos, not just a small sample chip, since a 4 by 4 inch sample can’t show vein movement across a full countertop or floor run.
- Ask for the batch number tied to any sample or quote, so you can confirm it matches what actually ships.
- Confirm the supplier can provide porosity data, a recommended sealer, expected lead times, and packaging standards for transit protection.
A supplier that hesitates on any of those four points is worth a second look elsewhere. Samples and full documentation are shipped nationwide specifically so architects and contractors can verify these details before committing to a bulk order.
Practitioner Note: The Call-Backs That Keep Repeating
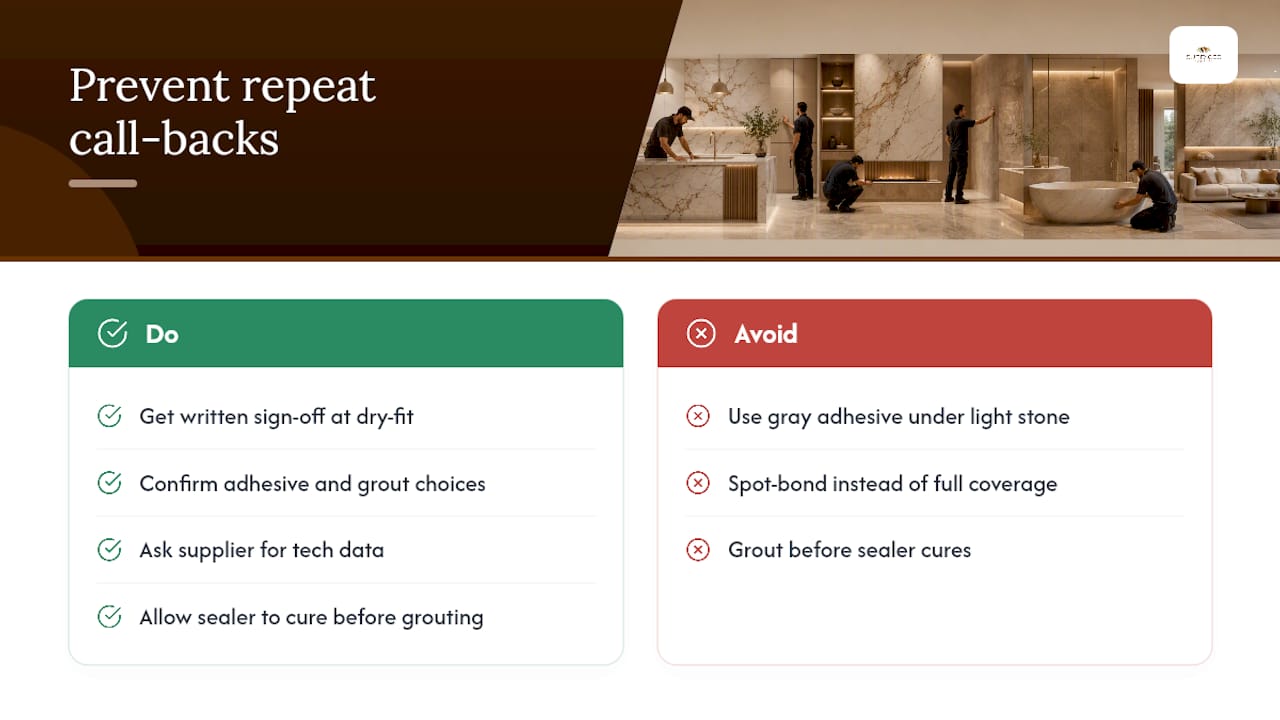
Most marble call-backs trace back to three repeat mistakes: gray adhesive under light-colored stone, spot bonding instead of full coverage, and grouting before the sealer has had time to cure. Every one of those is preventable with a single habit: get written sign-off on adhesive type and grout selection during the dry-fit stage, before anything touches the substrate permanently. It takes ten extra minutes and it catches the decisions that are expensive to reverse once stone is set.
If you’re unsure which adhesive or sealer fits your specific marble, that’s a fair question to ask before ordering, not after installation starts. The supplier can walk through technical data sheets and sample options with contractors and homeowners working through exactly this stage.
— cihan
Get Marble Samples and Technical Data From Surfaces Galore
Surfaces Galore ships genuine marble, limestone, and travertine tiles, mosaics, and decorative trim nationwide, with sample orders and technical data sheets available before you commit to a full project. That means you can run the water-drop test, check veining under your own lighting, and confirm porosity class against your installer’s plan before a single slab ships.

If your project also touches other surfaces, our partner resource on kitchen countertop material options is a useful comparison point while you finalize your specification. For marble specifically, browse our marble collections to compare color families and finishes, and reach out directly to request samples or a bulk quote for your next project.
Sources
- Marble Installation Guide: Substrate, Adhesive, Grouting & Common Mistakes (2026)
- Types of Marble: The Complete Guide (2026) - Pulycort
- Quality Control Inspection Checklist for Marble | Process Street
- Marble Quality Inspection Checklist | Chandan Marbles
FAQ
What interior design style uses marble most?
Marble shows up most in traditional, modern minimalist, and transitional interiors, where its veining works either as a quiet backdrop or a dramatic focal point depending on the finish and slab selection. Bookmatched slabs with strong veining tend to anchor contemporary spaces, while honed neutral marble fits traditional and farmhouse kitchens.
How do I choose a marble pattern for my project?
For bookmatched or continuous veining across a countertop, order slabs from the same batch and confirm vein direction before fabrication.
How do I choose the right marble for my space?
Base the decision on color family, quarry origin, finish, and porosity, the four variables that determine both appearance and how the stone will perform over time, per Pulycort’s marble guide. Run a water-drop test on a sample before buying to gauge how much sealing maintenance the stone will need.
What’s the safe grout choice for polished marble?
Use unsanded cementitious grout or epoxy grout. Sanded grout scratches polished marble surfaces and should be avoided entirely on polished finishes.
How often should marble be resealed?
Kitchen counters and other food-contact surfaces generally need resealing annually, while floors and walls with less exposure to spills can go longer between applications. The water-drop test is a reliable way to check whether the current sealer is still working.


Leave a comment