

Marble Fireplace Wall Upgrade Explained for Homeowners

The fastest, highest-impact upgrade for a marble fireplace wall is large-format slab refacing for a seamless, floor-to-ceiling look; thin-veneer panels or tile refacing for a mid-budget refresh; and paint or refinish for a low-cost, low-commitment change. Here is how to pick your path quickly:
- Large-format slab or bookmatched marble: Best when you want a dramatic, architectural result and have a higher budget to spend. Hire a fabricator. Timeline: 2–4 weeks including templating and cure.
- Thin-veneer panels or marble tile refacing: Best for mid-budget projects where you want real stone without full-slab complexity. Skilled DIY or pro install. Timeline: 1–2 weeks.
- Paint or refinish: Best for renters, tight budgets, or temporary refreshes. Under $300 DIY. Timeline: 2–3 days. Limits apply near heat zones.
- Mantel removal or addition, wood/plaster cladding: Best as a complement to stone work, not a standalone upgrade. Adds or removes visual weight; always check clearance codes first.
Table of Contents
- Why marble still works for fireplace surrounds
- What are your main upgrade options?
- How to safely paint or refresh polished marble
- How to reface with marble tile, veneer panels, or large-format slabs
- What does a marble fireplace upgrade actually cost?
- Safety, code compliance, and red flags
- Maintenance and long-term care after a marble upgrade
- DIY or hire a stone fabricator?
- Why stone pros favor full-slab walls in 2026
- Key Takeaways
- The case for doing this right the first time
- Where to source authentic marble for your fireplace project
- Useful sources and further reading
- FAQ
Why marble still works for fireplace surrounds
Marble is non-combustible, which is the baseline requirement for any material used in a fireplace surround. That alone earns it a place in the conversation. The visual payoff, especially with large veined slabs, is hard to match with any other material at a comparable price point.
The key is understanding heat zones. The firebox interior and the immediate surround at the masonry opening edge are the hottest areas. Marble is a calcite-based stone, and in heavy-use wood-burning fireplaces, it can be prone to thermal-stress cracking if placed directly at the firebox edge. For that innermost zone, quartzite or granite handles the heat better. Marble shines on the mantel face, the overmantel wall, and the surround panels away from direct flame contact.
Common marble types for fireplace surrounds:
- Carrara: Classic white-gray veining, widely available, works with both traditional and modern interiors
- Calacatta: Bolder veining, whiter base, more dramatic; popular for floor-to-ceiling accent walls
- Nero Marquina (honed black): High contrast, pairs well with minimalist or industrial design
- Statuario: Striking gray veining on bright white; often used in bookmatched slab installations
On finish: honed marble hides fingerprints and minor scratches better than polished, and it reads as more contemporary. Polished marble amplifies light and veining but shows wear faster near a fireplace where soot and cleaning are regular events.
What are your main upgrade options?
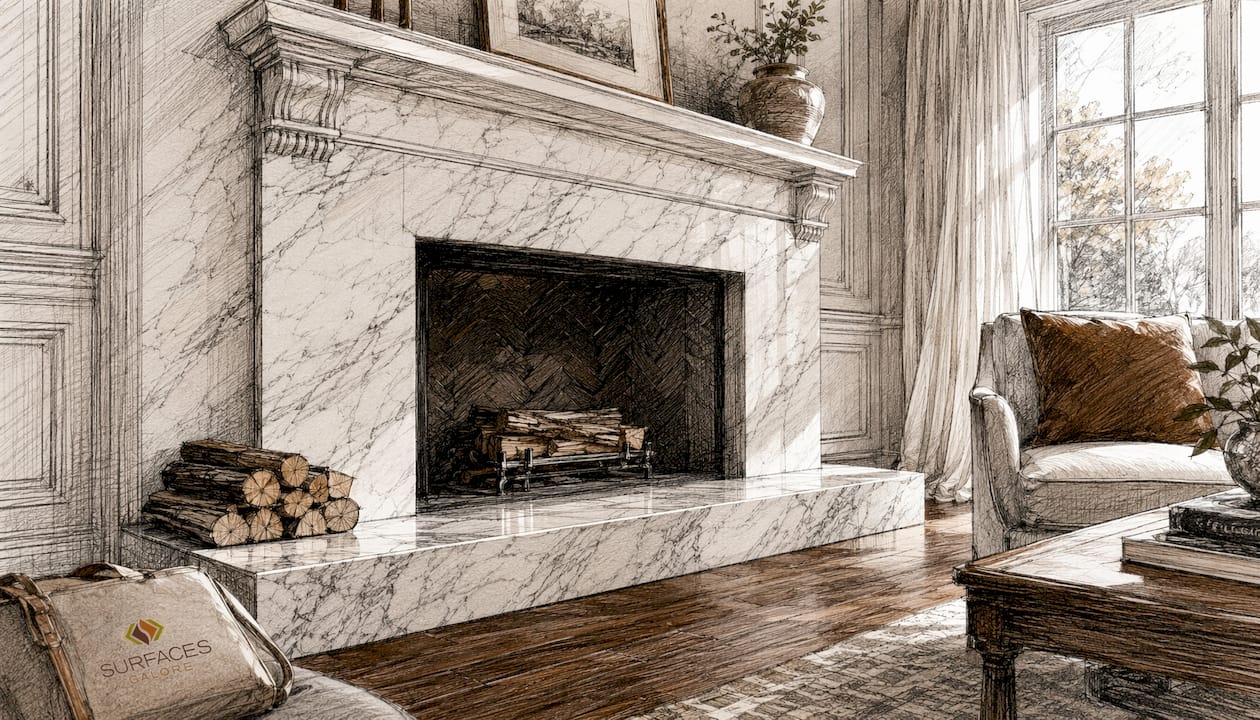
The practical upgrade paths for a marble fireplace wall fall into five categories: paint or refinish, tile or thin-veneer refacing, large-format slab cladding or bookmatching, mantel removal or addition, and mixed-material surrounds using wood or plaster alongside stone.
Paint or refinish
Pros: Lowest cost, no demolition, reversible. Cons: Not suitable near direct heat; paint can yellow or peel. Best for: Overmantel walls, decorative stone away from the firebox.
Tile or thin-veneer refacing
Pros: Real stone look, DIY-friendly in smaller areas, wide style range. Cons: Visible grout lines, more seams than slab. Best for: Mid-budget projects, rental properties, partial updates.
Large-format slab cladding or bookmatching
Pros: Seamless look, continuous veining, highest visual impact. Cons: Requires professional fabrication and anchoring; higher cost. Best for: Full-wall or floor-to-ceiling marble accent wall projects.
Mantel removal or addition
Pros: Changes the entire proportion of the fireplace; removing a heavy mantel creates a cleaner, more modern look. Cons: Structural considerations; clearance codes apply to any combustible mantel. Best for: Modernizing a dated traditional fireplace.
Mixed-material surrounds
Pros: Adds texture and warmth; wood or plaster flanking marble creates depth. Cons: More complex installation; material transitions need careful detailing. Best for: Eclectic or transitional interiors.
Pro Tip: Match your stone finish to the room’s dominant light source. North-facing rooms with cool, flat light benefit from polished marble, which bounces light back into the space. South-facing rooms with strong direct sun are better served by honed finishes, which reduce glare and keep the veining readable throughout the day.
How to safely paint or refresh polished marble
Yes, you can change the look of existing marble in place with careful preparation, but limits apply near high-heat zones. Never paint marble within 6 inches of the masonry firebox opening, and never use standard latex paint on any surface that will experience direct radiant heat.
Materials and PPE you need
- Etching primer or bonding primer rated for stone/tile surfaces
- Heat-resistant paint (rated to at least 500°F for any area near the firebox)
- pH-neutral stone cleaner for prep
- Fine-grit sandpaper (220-grit) or a scuff pad
- Painter’s tape and drop cloths
- Respirator (N95 minimum), nitrile gloves, safety glasses
- Stone sealer compatible with painted surfaces
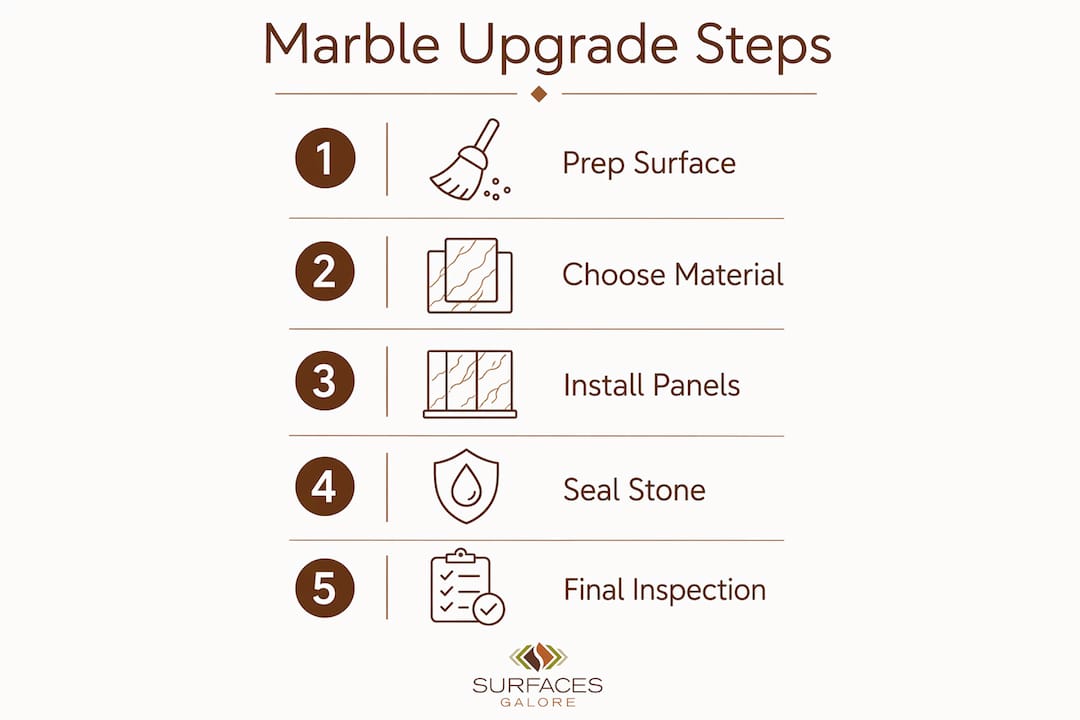
Step-by-step workflow
- Protect the area. Tape off the firebox opening, hearth, and adjacent walls. Lay drop cloths over the floor.
- Clean thoroughly. Use a pH-neutral cleaner to remove soot, grease, and residue. Let it dry completely, at least 24 hours.
- Scuff or etch the surface. Lightly sand polished marble with 220-grit paper or apply a chemical etching primer to give the paint something to grip. Wipe away dust with a tack cloth.
- Apply bonding primer. Two thin coats, allowing full dry time between coats. Ventilate the room; open windows and run a fan.
- Apply paint. Two to three thin coats of your chosen finish. For a faux-marble effect, use a feathering brush and a second contrasting tone while the base coat is still slightly tacky.
- Seal. Apply a stone-compatible sealer once paint has fully cured (typically 72 hours). This protects the finish from soot and cleaning products.
- Cure time. Avoid using the fireplace for at least 7 days after the final coat.
Timeline: 2–3 days for a DIY refresh. Cost: Generally low materials cost for DIY. A contractor-assisted touch-up on a larger surround varies depending on region.
Safety note: Painting marble near the firebox can void manufacturer warranties on gas inserts and may conflict with local code if it introduces combustible coatings in a restricted heat zone. Check with your local building department before painting any surface within 12 inches of the firebox opening.
Pro Tip: To preserve the sense of depth in veined marble while painting over it, apply a translucent glaze coat over the base color before sealing. The glaze catches light differently than flat paint and keeps the surface from looking like a painted wall rather than stone.
How to reface with marble tile, veneer panels, or large-format slabs
The installation complexity scales directly with material size. Marble tile is the most DIY-accessible; thin-veneer preassembled panels sit in the middle; large-format slabs require professional fabrication and anchoring.
| Feature | Marble Tile | Thin-Veneer Panels | Large-Format Slabs |
|---|---|---|---|
| Typical thickness | 3/8"–1/2" | 1/2"–3/4" | 3/4"–1-1/4" |
| Substrate required | Cement backer board | Cement backer board or masonry | Masonry or steel-anchored frame |
| Adhesive type | Heat-rated tile mortar | Heat-rated epoxy or mortar | Epoxy + mechanical anchors |
| Weight handling | DIY manageable | DIY with helper | Professional required |
| Visible seams | Grout lines throughout | Minimal (panel joints) | Near-seamless |
| Skill level | Intermediate DIY | Intermediate–advanced | Professional only |
Heat-rated adhesives are non-negotiable in any fireplace surround application. Standard construction adhesives degrade under sustained heat, leading to stone detachment. Use Type S mortar or a refractory-rated epoxy for all zones within the heat envelope.
Materials and tools checklist
- Cement backer board and screws
- Heat-rated tile mortar or epoxy adhesive
- Notched trowel, level, and rubber mallet
- Tile saw or wet saw with diamond blade
- Grout (unsanded for joints under 1/8") or caulk for expansion joints
- Sponge, grout float, and bucket
- Sealer appropriate for marble
Key installation steps
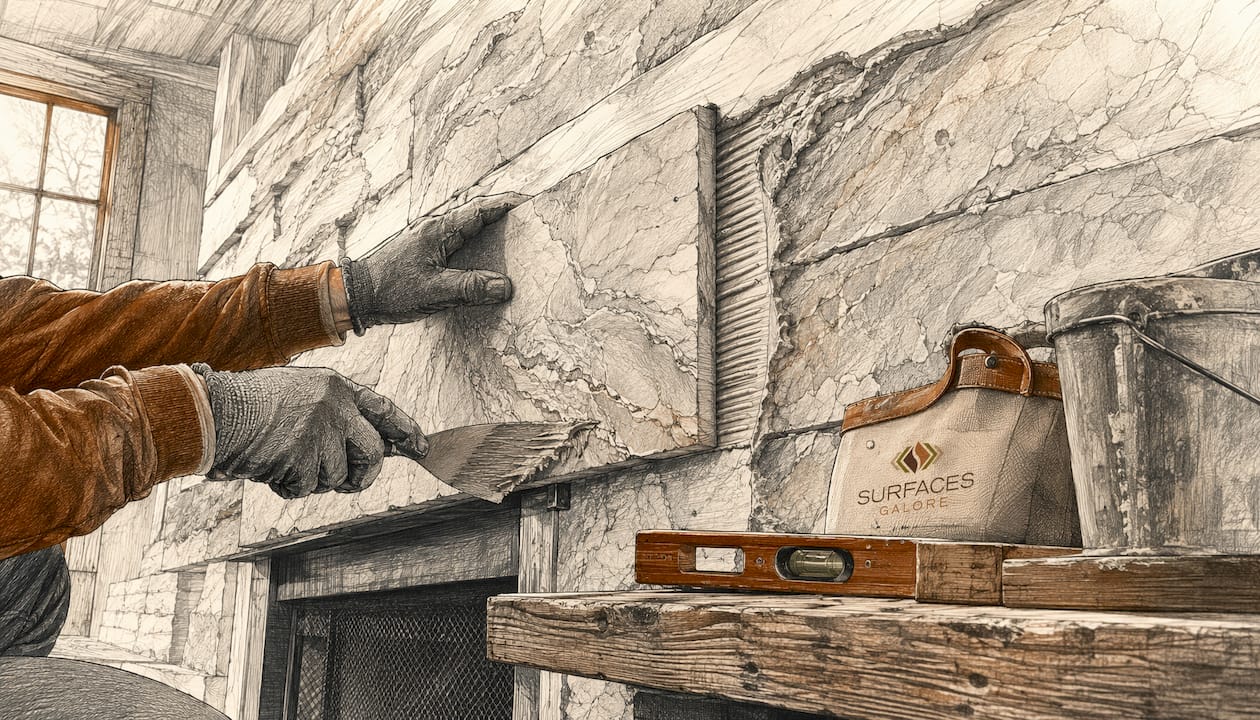
- Demo and substrate prep. Remove existing tile, drywall, or loose material. Install cement backer board over the framing in the heat zone. Tape and thinset the seams.
- Dry-fit first. Lay out your tile or panels on the floor before any adhesive touches the wall. This is where you catch alignment and cut issues without wasting material.
- Set from center. Find the vertical centerline of the fireplace opening and work outward. This keeps the layout symmetrical even if the opening is not perfectly square.
- Apply adhesive and set. Butter the back of each tile or panel and comb the substrate. Press firmly, check level constantly.
- Allow cure time. Most heat-rated mortars need 24–48 hours before grouting. Epoxy systems vary; follow the manufacturer’s spec.
- Grout or caulk. Use caulk (not grout) at inside corners and at the joint between the surround and the hearth to allow for thermal expansion.
- Seal. Apply a penetrating stone sealer once grout has cured.
For stone mantels and headers, through-wall anchoring is required. A stone mantel shelf is heavy enough that adhesive alone is not a safe long-term solution.
Pro Tip: Have your fabricator do a shop template before cutting large slabs. A cardboard or foam template of the exact fireplace opening, including any irregularities in the masonry, eliminates costly on-site adjustments and wasted stone.
What does a marble fireplace upgrade actually cost?
Budget ranges vary significantly by approach, region, and whether you hire out the labor.
| Approach | Low | Median | High | Timeline |
|---|---|---|---|---|
| Paint/refinish (DIY) | Low cost | Moderate cost | Higher cost | 2–3 days |
| Tile/veneer refacing (DIY labor) | Lower cost | Moderate cost | Higher cost | Several days to a couple weeks |
| Tile/veneer refacing (pro install) | Moderate cost | Mid-range cost | Higher cost | About one to two weeks |
| Mid-range marble surround (pro) | Moderate to higher cost | Mid to high cost | Higher cost | Several weeks |
| Custom bookmatched slab (pro) | High cost | Higher cost | Premium cost | Several weeks |
Cost ranges for stone fireplace installations reflect material grade, slab size, and regional labor rates. The figures above are U.S. national estimates; coastal markets (Los Angeles, New York, Seattle) typically run 20–40% higher.
Hidden cost items to budget for:
- Substrate repair or replacement (cement backer board, framing fixes): $200–$800
- Hearth reinforcement if the existing slab is undersized: $500–$2,000
- Permit and inspection fees: $75–$300 depending on municipality
- Templating fee for custom slab work: $150–$400 (often credited toward the final job)
Permits are not always required for cosmetic tile work, but any structural change to the mantel or hearth extension typically triggers a permit in most U.S. jurisdictions. Call your local building department before starting.
Safety, code compliance, and red flags
The governing rule for combustible clearances around masonry fireplaces is IRC Section R1001.11. Non-combustible materials like natural stone, ceramic tile, and metal can extend to the edge of the masonry opening. Combustible materials, including wood mantels and trim, must stay at least 6 inches from the sides and top of the opening.
The projection formula matters: For every 1/8 inch a combustible mantel projects beyond 1.5 inches from the fireplace face, the required clearance above the opening increases by 1 inch. A mantel projecting 3.5 inches from the face needs at least 22 inches of clearance above the opening top. Many popular mantel designs fail this test.
Code-critical checklist
- Non-combustible substrate (cement backer board, masonry) in all heat zones
- Heat-rated adhesive throughout; no standard construction adhesive within the heat envelope
- Hearth extension: minimum 16 inches in front of the opening for fireboxes under 6 square feet; 20 inches for larger openings (per IRC Chapter 10)
- Combustible mantel clearance: 6 inches minimum from sides and top; more if the mantel projects
- No combustible framing, nailers, or blocking within 6 inches of the opening edge
- Expansion joints (caulk, not grout) at all inside corners and stone-to-hearth transitions
Red flags that mean stop and call a pro
- Visible hairline cracks radiating from the firebox corners (can indicate thermal cycling stress or structural movement)
- Smoke condensation or staining on the wall above the firebox (draft or flue issue; fix before any cosmetic work)
- Unusual thermal cracking in existing stone (may indicate the wrong stone type was used in a high-heat zone)
- Any combustible material currently within 6 inches of the opening that was not flagged in a prior inspection
Pro Tip: Before ordering any stone, photograph the existing surround and measure the firebox opening dimensions, the mantel height, and the projection depth of any existing shelf. Bring those numbers to your fabricator or building department. A 10-minute measurement session prevents weeks of rework.
Maintenance and long-term care after a marble upgrade
Sealed and installed correctly, a marble fireplace surround is lower maintenance than most homeowners expect. The routine is simple: pH-neutral cleaner, periodic resealing, and prompt soot removal.
Routine care checklist:
- Weekly or after each use: Wipe the surround with a damp cloth. Use a pH-neutral stone cleaner, not vinegar, bleach, or ammonia-based products, which etch calcite stone.
- Soot removal: Apply a small amount of pH-neutral cleaner to a soft cloth and work in circular motions. For stubborn soot, a paste of baking soda and water left for 10 minutes before wiping is safe on honed marble.
- Resealing: Honed marble near a fireplace should be resealed every 12–18 months. Polished marble every 18–24 months. Use a penetrating impregnating sealer, not a topical coating, which can yellow under heat.
- Professional restoration: If etching, deep staining, or surface scratches accumulate after several years, a stone restoration professional can hone and reseal the surface. This is far less expensive than replacement.
For detailed marble maintenance guidance, including product recommendations by stone type, Surfacesgalore has a full care workflow worth bookmarking.
Pro Tip: Apply sealer to the surround before the first fire of the season, not after. Heat from the first use drives any residual moisture out of the stone, and an unsealed surface is most vulnerable at that moment. Sealing cold stone before heating it gives the impregnator time to cure properly.
DIY or hire a stone fabricator?
Three quick rules for DIY suitability: the project involves tile or thin-veneer panels (not full slabs), no structural changes to the mantel or hearth are needed, and the work stays outside the immediate firebox heat zone.
Questions to ask any fabricator or installer
- How many fireplace surround projects have you completed in the past two years?
- Are you licensed and insured for stone fabrication and installation in this state?
- Do you use heat-rated adhesives and cement backer board as standard practice?
- Do you offer shop templating before cutting slabs?
- What warranty do you provide on the adhesive bond and installation?
- Can you provide photos of previous fireplace surround projects?
Red flags in contractor bids
- No mention of substrate prep or backer board replacement
- Adhesive listed generically as “construction adhesive” with no heat rating specified
- No templating step included in the scope of work
- Unusually low bid that skips demolition or substrate work
- No permit pull included for structural mantel changes
For custom marble fabrication on high-value projects, the fabricator’s process matters as much as the stone itself. A shop that templates, pre-fits, and pre-finishes slabs before arriving on site will produce a cleaner result with fewer surprises.
Why stone pros favor full-slab walls in 2026
Floor-to-ceiling marble slab cladding and bookmatched large-format slabs are the dominant trend for modern fireplace walls right now. The reason is straightforward: continuous veining from floor to ceiling reads as a single architectural element rather than a tiled surface, and it visually increases ceiling height without any structural change.
Large-format slabs reduce visible seams and produce a finish that is genuinely difficult to replicate with tile, regardless of grout color or joint width. Design professionals also favor the minimal-mantel or no-mantel look alongside full-slab walls, removing the visual interruption that a traditional shelf creates.
From a fabrication standpoint, the full-slab approach requires shop templating, precision CNC cutting, and mechanical anchoring rather than mortar alone. The backer board and adhesive selection are critical: failures in full-slab installations almost always trace back to improper substrate or non-heat-rated adhesives, not the stone itself.
Pro Tip: For bookmatched slabs, ask your fabricator to orient the veining so it mirrors across the fireplace centerline. Then consider a narrow LED strip recessed into the ceiling above the slab. Backlit marble with continuous veining is one of the most dramatic effects achievable in a residential living room, and it costs far less than the impression it creates.
For architectural trend context, full-wall stone treatments are part of a broader 2025–2026 shift toward statement architectural surfaces that replace decorative accessories with material itself.
Key Takeaways
A marble fireplace wall upgrade succeeds when you match the approach to your budget, choose heat-rated materials for every zone near the firebox, and verify IRC clearance rules before any combustible element goes up.
| Point | Details |
|---|---|
| Match approach to budget | Paint/refinish: generally low cost for DIY; tile/veneer —; full slab —. |
| Heat-rated materials only | Use cement backer board and heat-rated adhesive in all zones near the firebox opening. |
| IRC clearance is mandatory | Combustible mantels need at least 6 inches of clearance; more if the shelf projects beyond 1.5 inches. |
| Marble type matters by zone | Use quartzite or granite at the firebox edge; marble excels on the surround, mantel face, and overmantel wall. |
| Surfacesgalore for authentic stone | Surfacesgalore supplies authentic marble slabs, tiles, and mosaics nationwide, with options suited to both tile refacing and full-slab fireplace projects. |
The case for doing this right the first time
The most common mistake in a marble fireplace upgrade is treating the surround as a purely cosmetic project. It is not. The heat zone, the substrate, and the clearance rules are real constraints, and cutting corners on any of them creates problems that are expensive to fix and occasionally dangerous.
That said, the range of what is achievable here is genuinely wide. A homeowner with a weekend and $200 in materials can meaningfully refresh an overmantel wall. A fabricator with a good slab and a shop template can produce a floor-to-ceiling bookmatched wall that looks like it belongs in an architectural magazine. The gap between those two outcomes is mostly planning, not money.
If you are in the middle, considering tile refacing or a veneer panel project, the advice is simple: do not skip the substrate. Cement backer board and a heat-rated adhesive are the two decisions that determine whether the project holds up for 20 years or starts showing problems in 3. Everything else is aesthetic.
Where to source authentic marble for your fireplace project
Surfacesgalore is a direct importer of premium natural stone, including marble slabs, tiles, mosaics, and decorative pieces, shipped nationwide from Anaheim, California. For fireplace projects specifically, that means access to authentic Carrara, Calacatta, and honed black marble in formats ranging from standard tile to large-format slabs suitable for floor-to-ceiling installations.
When ordering stone online for a fireplace upgrade, look for these details before placing an order: finish type (honed vs. polished), nominal thickness (3/4" is standard for surrounds), bookmatching availability for slab pairs, and shipping packaging that protects against edge chipping on large pieces. Surfacesgalore provides all of this information and can advise on which products are best suited to fireplace applications.
Browse the marble tile collections or contact Surfacesgalore directly for project guidance, material recommendations, and fabrication referrals. The team works with homeowners, designers, and contractors across the country.
Useful sources and further reading
- IRC Chapter 10: Chimneys and Fireplaces (2024) — The primary U.S. building code reference for fireplace construction, clearances, and hearth extension dimensions.
- IRC R1001.11 Combustible Clearance Explained (Jaspector) — Plain-language breakdown of the clearance formula for mantels and combustible trim; useful for any homeowner planning a mantel addition.
- Stone Fireplace Surrounds: Materials, Design & Care (Dynamic Stone Tools) — Practical guidance on stone selection by heat zone, substrate requirements, and installed cost ranges.
- Fireplace Stone Heat Safety and Clearance Standards (Top Source Slate) — Technical overview of heat-rated adhesives, thermal expansion, and delamination prevention.
- Marble Accent Wall Ideas (Surfacesgalore) — Visual guidance and installation notes for full-wall marble applications.
- Marble Maintenance for Lasting Luxury (Surfacesgalore) — Sealer selection, cleaning schedules, and long-term care for marble surfaces.
FAQ
How do you modernize a marble fireplace?
Remove or slim down the mantel, reface the surround with large-format marble tile or a full slab, and extend the stone to the ceiling for a seamless architectural look. The 2026 trend favors floor-to-ceiling marble with no mantel shelf or a minimal floating ledge.
Is marble a good choice for a fireplace surround?
Yes, with one caveat: keep marble away from the innermost firebox edge in wood-burning fireplaces, where thermal stress can cause cracking. On the mantel face, surround panels, and overmantel wall, marble is non-combustible, durable, and visually hard to beat.
Should a fireplace surround be lighter or darker than the walls?
Lighter marble on a darker wall creates contrast and draws the eye to the fireplace as a focal point. Darker marble on light walls achieves the same effect. The choice depends on the room’s light levels; in low-light rooms, lighter stone keeps the space from feeling heavy.
What is the new trend for fireplaces in 2026?
Floor-to-ceiling marble slab cladding with bookmatched veining and no traditional mantel is the dominant 2026 direction. The fireplace becomes a full architectural wall feature rather than a framed opening with decorative trim around it.
Can you DIY a marble fireplace surround?
Tile and thin-veneer panel installations are within reach for an intermediate DIYer with the right substrate prep and heat-rated adhesive. Full-slab work requires professional fabrication and anchoring. Any project involving structural mantel changes or work within 6 inches of the firebox opening should involve a licensed contractor.
Leave a comment