
How to Grout a Backsplash: A Step-by-Step Guide

So, you're thinking about tackling a backsplash project, maybe with some nice marble or travertine? That's awesome. Natural stone can really make a kitchen or bathroom pop. But when it comes to actually getting it done, especially the grouting part, it can feel a little daunting. Don't worry, though. We've put together a straightforward guide to walk you through how to grout a backsplash, step-by-step. We'll cover everything from picking your materials to cleaning up, so you can get that professional look without all the stress. Let's get started.
Key Takeaways
- Choosing the right marble or travertine tile involves considering the room (kitchen vs. bath), desired finish (polished, honed, tumbled), and tile style (mosaic, subway, pattern).
- Proper preparation is key: protect surfaces, ensure good ventilation, and confirm the wall substrate is clean, dry, and level before starting.
- Inspect each stone tile before installation for chips, cracks, or color inconsistencies to avoid issues later on.
- Mix your grout carefully to the correct consistency, allowing it to 'slake' for optimal performance, and use the right type (sanded or unsanded) for your stone.
- Apply grout with a float at a proper angle, pressing it firmly into the joints and working in small sections to prevent it from drying on the tile faces.
- Clean excess grout promptly using a damp sponge, rinsing frequently and working in circular motions to minimize haze, being careful not to remove grout from the joints.
- Allow grout to cure fully (typically 48-72 hours) before applying a stone-specific sealer to protect against stains and moisture.
- Regular maintenance with pH-neutral cleaners and prompt spill cleanup will help keep your natural stone backsplash looking its best for years to come.
Understanding why natural stone is ideal for backsplashes
Benefits of marble and travertine in backsplash design
Marble and travertine tiles turn ordinary kitchens and baths into statement spaces. You get a finish that says luxury—without being loud. Their natural beauty always stands out, whether you’re doing a total remodel or just a backsplash makeover. What’s even better? Today, you can buy marble tiles online USA and have them quickly delivered to your door, making them more accessible than ever.
Natural stone in the backsplash isn’t just about looks; it’s about feeling good in your home. Clients report that even small rooms look bigger and brighter with light marble or creamy travertine tiles. Plus, when you want something personal, those one-of-a-kind patterns can’t be found in factory-made tiles.
Durability and elegance in kitchen or bath environments
Spaghetti sauce, steam from a boiling kettle, daily dishwashing splashes—natural stone handles it with ease. Marble and travertine backsplashes, when sealed correctly, resist stains and stay looking sharp for years. Unlike cheap surfaces, these stones won’t peel or fade. They’re built for busy rooms, so you can wipe down spills fast, without worry. It really comes down to real-world durability paired with enduring elegance.
How natural stone enhances property value
It surprises some homeowners, but a quality stone backsplash actually increases a property’s market value.
- Houses with real stone features sell faster
- Appraisers recognize marble and travertine as upgrades over basic ceramic
- Buyers remember kitchens with stone finishes
A recent case: After installing White Carrara marble from Surfaces Galore, a Chicago family saw three competing offers on their home within days—every buyer mentioned the striking stone kitchen walls.
Common misconceptions about natural stone
- “Natural stone is too high-maintenance.” In reality, once sealed, marble and travertine clean up with mild soap and a damp cloth.
- “Stone looks cold or sterile.” The truth: travertine’s warm tones and marble’s dramatic veins give rooms a welcoming, lived-in touch.
- “Too expensive for a backsplash.” Many styles, like tumbled travertine, are surprisingly budget-friendly, especially when buying online in bulk.
Unique veining and color variation appeal
Every piece of natural stone is a one-off. Variations in shade, vein, or fossil mark mean your backsplash won't look like anyone else’s. If anything, tile-to-tile variation creates movement and depth you’ll never see in mass-produced, printed ceramics. Homeowners who mix boxes of tile get the most natural, blended results.
Health and safety benefits of stone surfaces
Sealed natural stone doesn’t harbor bacteria the way grout or laminate sometimes can. Marble and travertine are easy to clean, so kitchens stay healthier with less fuss. Plus, many stone surfaces meet low-VOC and strict emission standards, which means better air quality indoors—key for families with allergies or sensitivities.
Limitations to consider with natural stone installations
Let’s be real: stone isn’t without quirks. Some marbles can stain if lemon juice or tomato sits too long. Travertine has small natural pits that need filling. And stone—especially marble—can scratch if you’re not careful with pots and knives. You’ll also need to keep up with periodic sealing.
A little extra care, though, is a small trade-off for a backsplash that will outlast every design trend, add real value, and make your space feel truly custom.
Key Takeaway: When it comes to transforming kitchens and baths, natural stone rises above imitation. Real marble and travertine bring beauty, resilience, and value that stand up to everyday life and impress for decades—and with modern online suppliers, starting your project has never been easier.
Planning your backsplash project for lasting results
Before you even think about mixing grout, a little planning goes a long way. Getting this right means your beautiful marble or travertine backsplash will look great for years, not just weeks. It’s about setting yourself up for success from the start.
Determining the Optimal Backsplash Height and Width
Think about how you use your kitchen or bathroom. Do you splash a lot of water when washing dishes? Do you often cook with sauces that tend to splatter? Measuring your space is key. Standard heights work for most, but sometimes you need more coverage. Consider extending your backsplash higher if you have a high-powered stove or a deep sink. This simple step protects your walls and makes cleaning a breeze. We can help you figure out the perfect dimensions for your unique space. If you're looking to buy marble tiles online in the USA, getting the measurements right is the first step to a perfect fit.
Aligning Layout with Cabinets and Countertops
Your backsplash isn't an island; it needs to work with everything else. The layout should flow visually from your countertops up to your cabinets. Think about where your cabinets end and where your countertop begins. This line is where your backsplash starts. We want it to look intentional, not like an afterthought. A well-aligned backsplash ties the whole room together. For example, a classic subway tile pattern can look stunning when its horizontal lines echo the lines of your cabinets.
Visualizing Grout Joint Widths and Tile Pattern
Those tiny gaps between tiles, the grout lines, make a big difference. Wider joints can give a more rustic feel, especially with tumbled travertine, while narrow joints create a sleek, modern look, perfect for polished marble. And the pattern? Herringbone, subway, basketweave – each has its own vibe. Dry-laying your tiles first is a game-changer. It lets you see exactly how the pattern will look and how the grout lines will frame it. This is your chance to experiment before committing. We have a wide selection of tiles, from intricate mosaics to classic patterns, that can help you achieve your desired look.
Blending Color and Veining with Existing Décor
This is where the magic happens. Your backsplash should complement, not compete with, your existing décor. Look at your countertops, cabinets, and wall colors. Do you want a backsplash that blends in or stands out? Marble offers subtle elegance with its veining, while travertine brings earthy tones. If you're unsure, consider a neutral stone that acts as a beautiful backdrop. Our team at Surfaces Galore can guide you through selecting the perfect color and veining to harmonize with your home's style. We have options like the warm hues of Scabos Travertine or the classic beauty of Carrara Marble.
Ordering Extra Material for Cutting and Waste
This is a non-negotiable step. You will need to cut tiles, especially around outlets, windows, and at the edges. Mistakes happen, and some tiles might have slight imperfections. It’s always better to have a little extra than to run out mid-project. A good rule of thumb is to order 10-15% more than your calculated square footage. This accounts for cuts, potential breakage, and future repairs. Running out of that perfect Calacatta Gold marble tile mid-installation is a headache nobody needs!
Mixing Tiles from Different Boxes for a Seamless Look
Natural stone is unique, and that's its charm! However, this means there can be slight variations in color and veining from one box to another. To get a consistent and beautiful final look, it’s best practice to pull tiles from several boxes at once. Mix and match them during your dry layout. This helps to blend any subtle differences and creates a more cohesive and natural appearance across your entire backsplash. It’s like shuffling a deck of cards to get the best distribution.
Avoiding Problematic Corner and Edge Cuts
Corners and edges are often the trickiest parts of any tile project. Planning ahead can save you a lot of frustration. Think about how your tile pattern will meet at corners. Will you use a special trim piece? Will you miter the edges for a clean finish? For exposed edges, consider the finish – a beveled edge can be more forgiving than a straight cut. Careful measurement and precise cuts are paramount here. If you’re working with intricate patterns like a Versailles pattern, planning these transitions is even more critical. We offer a variety of edge profiles and listellos to help you achieve a professional finish around these challenging areas.
Choosing the right type of marble and travertine tile
Selecting the perfect marble or travertine tile is where your backsplash project truly begins to take shape. These natural stones offer a unique blend of elegance and durability, making them fantastic choices for kitchens and bathrooms. But with so many options, how do you pick the right one?
Picking tiles for kitchen versus bathroom use
Think about where the tile will go. Kitchens often see more grease, heat, and heavy use. This means you might want a tile that’s a bit more forgiving. Bathrooms, on the other hand, deal with moisture. So, water resistance and slip-resistance become bigger factors. For kitchens, a polished marble can look stunning, but it might show water spots more easily. Travertine, with its natural texture, can be great for both, offering a slightly more rustic feel that hides minor wear and tear well. If you're looking to buy marble tiles online USA, consider the specific demands of each room.
Comparing finishes: polished, honed, tumbled
The finish of your tile dramatically changes its look and feel. A polished finish gives you that high-gloss, reflective surface that screams luxury. It’s beautiful but can show scratches and water spots more readily. A honed finish is smoother than tumbled but has a matte appearance, offering a more subdued elegance. It’s generally more forgiving than polished. Then there’s tumbled, which gives the tile an aged, worn look, often with softened edges. This is fantastic for a rustic or traditional vibe and is very durable. For a kitchen backsplash, honed or tumbled might be more practical day-to-day than a high-gloss polished finish.
Selecting between mosaic, subway, and pattern tiles
Your tile shape and size play a huge role in the final design. Subway tiles are classic, versatile, and easy to install, offering clean lines. Mosaic tiles, whether in sheets or individual pieces, allow for intricate patterns and can add a real “wow” factor, especially for backsplashes. Think about marble mosaic tiles or travertine mosaic tiles for unique designs. Pattern tiles, like herringbone or checkerboard, can make a bold statement. For a backsplash, mosaics are particularly popular because they can create a detailed focal point without requiring complex cuts. You can find a wide array of these styles when you buy marble tiles online USA.
Evaluating edge styles for design impact
Don't forget the edges! The edge of your tile affects how it meets other tiles or surfaces. A straight or squared edge gives a clean, modern look, often used with minimal grout lines for a very sleek appearance. A beveled edge can add a subtle decorative element and can make installation a bit easier by masking slight height differences. Chiseled edges offer a more rustic, handcrafted feel, perfect for travertine installations aiming for an old-world charm. For a backsplash, the edge style often matters less if it's butting up against cabinets, but it's important if it's exposed.
Understanding color variations in natural stone
This is key with marble and travertine: they are natural! This means no two tiles are exactly alike. You'll see variations in veining, color depth, and pattern. This is part of their charm, offering a unique, one-of-a-kind look. When you're planning, it's a good idea to dry-lay your tiles first. This means arranging them on the floor or counter without adhesive to see how the colors and patterns flow together. Mixing tiles from different boxes helps ensure a balanced look. If you're ordering online, look for suppliers who show multiple examples of the stone, like those found in the marble tiles collection.
Ensuring sufficient thickness for strength
While backsplashes don't bear the same weight as floors, tile thickness still matters. Thicker tiles are generally more durable and less prone to chipping during installation or use. For most backsplash applications, a standard thickness of around 3/8 inch to 1/2 inch is perfectly adequate. However, always check the manufacturer's recommendations. Thicker tiles can sometimes mean a higher cost, but they often provide better longevity and a more substantial feel.
Sourcing quality stone from reputable suppliers
This is perhaps the most important step. Buying from a reputable supplier means you're getting quality stone that has been properly quarried, cut, and finished. Look for companies that provide detailed product information, clear photos, and good customer reviews. At Surfaces Galore, we pride ourselves on offering premium marble and travertine, with options like Antico Onyx Travertine known for its unique blend of earthy tones and striking patterns. We offer a range of travertine tiles, slabs, and mosaics perfect for any project. When you're ready to explore our collection, you'll find quality you can trust.
Case Study: The Miller Kitchen Backsplash
The Millers wanted a kitchen backsplash that felt both luxurious and practical. They chose a honed Bianco Dolomite marble in a classic subway tile format. The honed finish provided a soft, elegant look that wouldn't be too slippery or show water spots as easily as a polished finish would. They dry-laid the tiles first, mixing pieces from several boxes to achieve a beautiful, consistent flow of subtle veining across the entire backsplash. The result was a timeless, sophisticated kitchen that felt both warm and inviting, proving that the right tile choice makes all the difference.
Selecting essential grouting tools and accessories
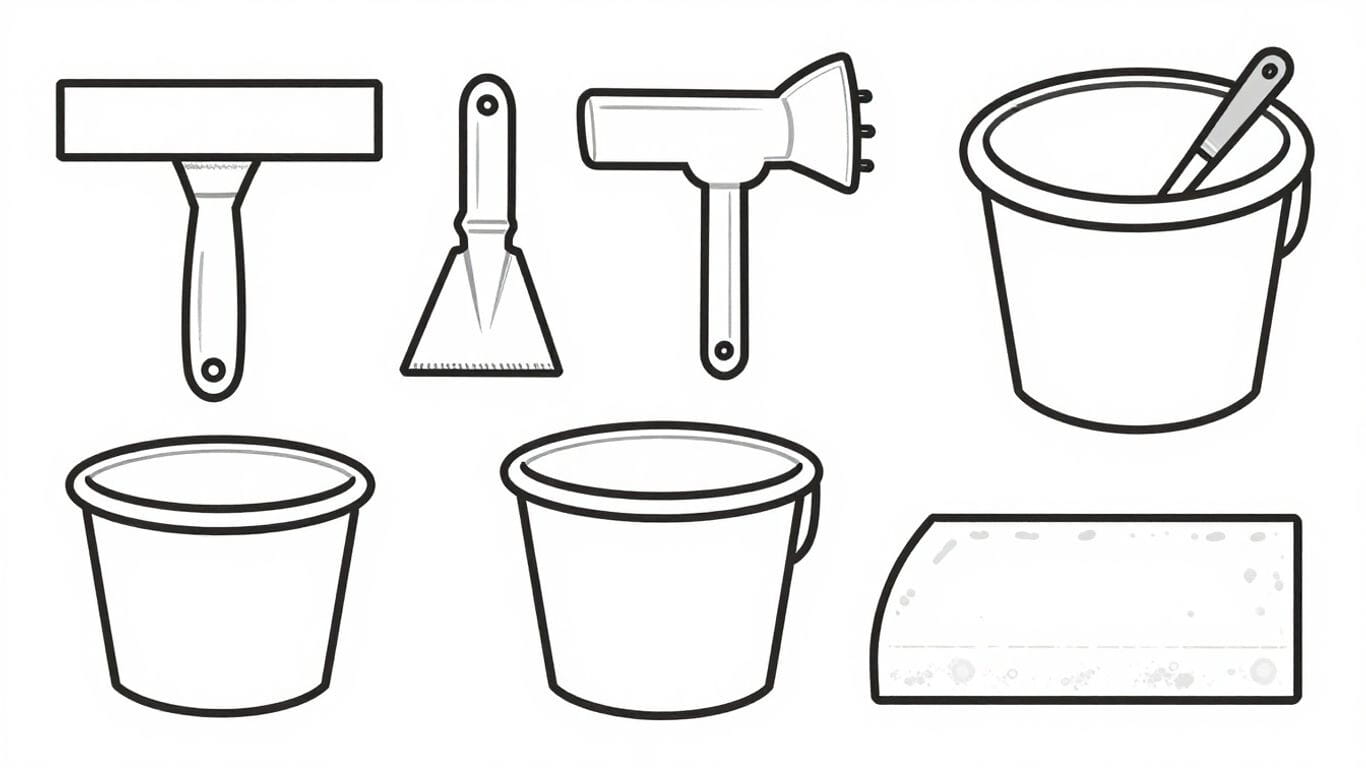
Getting your backsplash grout just right means having the right gear. It’s not just about the grout itself; the tools you use make a huge difference in the final look and how easy the job is. Think of it like a chef needing good knives – you need quality tools for a quality finish. We’ve put together a list of must-haves to make your marble or travertine backsplash project a success.
Why a Proper Grout Float Matters
A grout float is your primary tool for pressing grout into those tile joints. For natural stone like marble and travertine, you need a float that’s sturdy but won’t scratch the surface. Look for one with a firm, dense rubber base. A good grout float ensures the grout is packed in evenly, preventing future cracks and voids. This is key for a long-lasting installation. When you're ready to buy marble tiles online in the USA, make sure you're also stocking up on the right tools.
Selecting Non-Scratch Sponges for Clean-Up
Cleaning up excess grout is just as important as applying it. Soft, non-scratch sponges are your best friend here. You'll need a couple of them. One for the initial wipe-down to remove the bulk of the grout, and another for a more detailed clean. Rinse them frequently in clean water to avoid spreading grout haze. Using the wrong sponge can leave scratches on your beautiful stone, so choose wisely.
Choosing Grout Types Safe for Marble or Travertine
Not all grouts are created equal, especially when it comes to natural stone. For marble and travertine, it’s generally recommended to use unsanded grout for joints smaller than 1/8 inch. This type is finer and less likely to scratch the stone. For wider joints, sanded grout might be an option, but always check the grout manufacturer's recommendations for your specific stone type. We offer a wide selection of tiles, and our team can guide you on the best grout pairings.
Necessary Safety Equipment for Installation
Safety first, always! When working with grout, you'll want to protect yourself. This includes:
- Gloves: To protect your skin from the grout chemicals and keep your hands clean.
- Eye Protection: Grout can get airborne, so safety glasses are a must.
- Knee Pads: If you're working on a floor or need to kneel for extended periods.
Don't skip these; they make the job safer and more comfortable.
Types of Tile Spacers and Their Impact on Grout Lines
Tile spacers are small but mighty. They ensure consistent grout lines, which is critical for a professional look, especially with natural stone where uniformity is key. You can find them in various sizes, from tiny 1/16-inch spacers for tight joints to larger ones for a more pronounced grout line. Choosing the right size impacts the overall aesthetic and how much grout you'll need. For a clean look on your backsplash, consider using tight grout joints.
Advantages of a Premium Grout Sealer
Once your grout is applied and cured, sealing it is non-negotiable for marble and travertine. A good quality grout sealer penetrates the grout lines, protecting them from stains, moisture, and mildew. This is especially important in kitchen backsplashes where grease and food splatters are common. Investing in a premium sealer means your grout will stay looking fresh and clean for longer, preserving the beauty of your stone.
Organizing Your Workspace for Efficiency
Before you start, take a few minutes to organize your tools and materials. Have your grout mixed and ready, your sponges and buckets nearby, and your safety gear on. A clean, organized workspace not only makes the process smoother but also helps prevent mistakes. Think about using a tile adhesive mat to keep your work area clean and organized during the tile installation phase, which comes before grouting.
Case Study: The Miller Kitchen Backsplash
The Millers wanted a classic marble backsplash but were worried about maintenance. They chose a honed Carrara marble and opted for unsanded, light gray grout for a subtle look. By using high-quality grout and a premium sealer, and following our tool recommendations, their backsplash remains stunning years later, with no staining or discoloration. They found that having the right grout float and plenty of clean sponges made the clean-up process much easier than they anticipated.
Prepping your workspace for stone backsplash installation
Protecting surfaces and appliances with drop cloths
Before you even think about touching a tile, let's talk protection. Your kitchen or bathroom is a workspace now, and we need to treat it like one. That means covering up anything you don't want to get dusty or accidentally scratched. Think countertops, sinks, appliances – the works. A few well-placed drop cloths or old sheets can save you a lot of cleaning later. It’s a small step, but it makes a huge difference. We want your backsplash to look amazing, and we want the rest of your kitchen to stay that way too.
Ensuring good ventilation during the process
Working with tile adhesive and grout means dealing with fumes. It’s not just about comfort; it’s about safety. Open up windows, turn on exhaust fans, and make sure the air is moving. Good ventilation helps the materials cure properly and keeps the air you breathe clean. If you're sensitive to smells or working in a small space, consider a fan to really push the air around. This is key for a healthy installation environment.
Disconnecting electrical outlets and switches safely
Safety first, always. Before you get close to any electrical outlets or switches, make sure the power is off. Find your breaker box and flip the switch for the relevant area. It’s a good idea to put a piece of tape over the switch to remind everyone not to turn it back on. If you're not comfortable with this, it's best to call an electrician. We're aiming for a beautiful backsplash, not a shock hazard. Remember, you can always buy marble tiles online USA and have them delivered, but you can't get a new breaker box installed as easily.
Understanding substrate requirements for stone
Natural stone, like the beautiful marble or travertine you've chosen, needs a solid foundation. Unlike lighter ceramic tiles, stone has weight. Your wall substrate needs to be strong, stable, and perfectly flat. Any bumps or dips can lead to cracked tiles or uneven grout lines down the road. We recommend checking that your wall is sound and ready to support the stone. If you're unsure, it's worth reinforcing or preparing the substrate properly. A strong base means a lasting installation.
Confirming the wall is clean, dry, and level
This is non-negotiable. Before any adhesive touches the wall, it must be clean, dry, and level. Wipe down the surface to remove any dust, grease, or old residue. Make sure it's completely dry – moisture is the enemy of good adhesion. Use a level to check for flatness. If you find any unevenness, address it now. A little prep work here prevents big headaches later. Think of it as setting the stage for your stunning new backsplash.
Gathering all materials before you begin
Don't start this project without everything you need. Lay out your tiles, adhesive, grout, spacers, tools – everything. Having it all within reach means you can work efficiently without stopping to hunt for something. This prevents adhesive from drying out prematurely and keeps your workflow smooth. A well-organized workspace is the first step to a professional-looking finish. It’s like having all your ingredients prepped before you start cooking.
Setting up proper lighting for detailed work
Backsplashes involve a lot of detail work, especially around edges and cuts. Good lighting is your best friend. Make sure the area is well-lit so you can see exactly what you're doing. This helps prevent mistakes, ensures consistent grout lines, and lets you spot any imperfections before they become permanent. A bright, well-lit space makes all the difference for precision and a flawless final look.
Inspecting stone tiles before you grout a backsplash
Grouting a backsplash is the final step that locks in your design—and protects your investment—but how you inspect your marble or travertine tiles before this stage will make or break your project. Taking a few focused minutes now can save hours of headache later. When you buy marble tiles online USA, proper inspection is even more important, since you want every shipped tile to speak for your style and last for years. Let's break down what to look for and how tile inspection powers both beauty and durability.
Checking for Chips, Cracks, and Color Consistency
Every natural stone tile is one-of-a-kind, but consistent quality is the goal. Place each tile under good lighting and scan:
- Surface chips or worn corners
- Hairline cracks or deep fissures
- Color shifts not matching the batch
A quick side-by-side with other tiles in the box is usually enough to spot anything off. Setting aside flawed tiles, or mixing them into less-visible edges, keeps the look premium.
Sorting Out Tiles With Excessive Imperfections
Some small flaws add character—too many, and the effect is just messy. Pull aside any tile with multiple imperfections. For example, a repeat customer of ours, Lisa in Chicago, once shared how she caught several pitted and mottled travertine pieces before grouting her kitchen backsplash, swapping them for better ones in her next order. This extra five minutes of review made her whole project shine.
Matching Pattern Flow for Directional Stones
Marble especially can have directional veins. Lay out your tiles in their install order. Look for the natural flow of veining and color. Adjust the lineup so patterns transition smoothly; this mimics what designers do in top showrooms. Sometimes you’ll need to rotate a tile or move a row—think of it as piecing together a custom artwork right on your wall.
Handling Tiles Gently to Avoid Damage
Once checked and arranged, handle each stone gently. Marble and travertine can chip during handling, particularly at corners. Wear gloves and avoid knocking tiles together—especially if you’ve bought tiles online and had them shipped across the country. Proper care prevents damage right until grout goes in.
Pre-laying Tiles to Plan Joint Lines
Dry-fit your tiles on the backsplash area. This lets you preview grout joint widths and spot any unpleasant edge alignments. You’ll also see how color and movement distribute across your space. This step can even show you where a less-perfect tile might blend in better.
Deciding on Final Tile Placement by Dry-Fitting
After reviewing everything, finalize positions before any grout gets mixed. Trust your eye—if one tile grabs your attention because it’s too dark or veiny, swap it out.
- Lay out all tiles in planned order
- Step back and review from different angles
- Adjust until you’re happy with the pattern
What to Do If You Notice Defects After Installation
It happens: sometimes a tile’s flaw only pops up after install. Don’t panic. If it’s a minor chip or line, specialized fillers or tints can help. For more obvious defects, you may need to carefully remove and replace the tile. That’s why ordering a few extra pieces is smart—having a match on hand saves your timeline and sanity.
Getting your inspection right is what transforms a backsplash from just okay to truly high-end. Stone that’s reviewed before grouting means peace of mind after you step back and admire your sparkling new kitchen or bath.
Every step here points to a smoother install and a finish you’ll love long-term. At Surfaces Galore, we’re on standby with support and premium natural stone selections whenever you’re ready to make your mark. Don’t skip inspection—it’s the secret sauce for backsplashes that wow and last.
Preparing grout for a natural stone backsplash
Getting your grout ready is a key step for a backsplash that looks great and lasts. It’s not just about mixing powder and water; it’s about creating the perfect consistency for your beautiful marble or travertine tiles.
Selecting the Right Grout Color to Complement Stone
Choosing the right grout color is more important than you might think. It can either make your tiles pop or blend them in for a subtle look. For marble and travertine, you have options. A contrasting grout can highlight the unique veining of your stone, creating a bold statement. On the other hand, a grout color that closely matches your tile will give a more unified, serene appearance. Think about the overall style you want for your kitchen or bath. Do you want a dramatic effect or a calm, cohesive feel? Consider looking at samples of grout colors next to your chosen tiles. Many homeowners find that a light gray or a warm beige works well with a variety of natural stone tones. If you're unsure, a neutral shade is often a safe bet. For those looking to buy marble tiles online in the USA, we have a wide selection that pairs beautifully with many grout colors.
Mixing Grout to the Perfect Consistency
This is where the magic happens. You want a consistency that’s easy to work with but holds its shape. Too wet, and it'll run out of the joints. Too dry, and it won't fill them properly. Aim for a texture like smooth peanut butter or thick cake batter. It should be spreadable but not runny. Always follow the manufacturer's instructions on the grout packaging. They provide specific water-to-grout ratios, which are your best starting point. Remember, you can always add a tiny bit more water if it's too stiff, but it's hard to fix grout that's too watery.
Letting Grout Slake for Optimal Performance
Don't skip the "slaking" step! After you mix the grout, let it sit for about 5-10 minutes. This allows the chemicals in the grout to fully hydrate. You'll notice it thickens up a bit. After slaking, give it a final, brief mix. This process is vital for a strong, durable grout line that won't crack or shrink excessively. It ensures the grout performs as intended, giving you a lasting finish.
Preventing Air Bubbles During Mixing
Air bubbles in your grout mix can lead to weak spots and an uneven appearance. To avoid them, mix slowly and deliberately. Don't whip the grout like you're making meringue! Stir gently but thoroughly, making sure to scrape the sides and bottom of your mixing container. If you do see a few bubbles, try to gently work them out with your mixing tool before the grout starts to set.
Understanding the Difference Between Sanded and Unsanded Grout
This is a critical choice for your natural stone backsplash. Sanded grout contains fine sand particles, which add strength and prevent shrinkage. It's generally used for wider grout joints (1/8 inch or larger). Unsanded grout is smoother and finer, without the sand. It's best for narrower joints (less than 1/8 inch) and is often recommended for delicate materials like marble and travertine to prevent scratching. Always check the grout manufacturer's recommendation for your specific tile size and joint width. Using the wrong type can damage your beautiful stone.
Adjusting Mixture Based on Humidity Conditions
Humidity can play a role in how your grout mixes and dries. On a very humid day, you might find your grout mixture thickens faster. You may need to add a tiny bit more water than the package suggests, but do so sparingly. Conversely, in very dry conditions, the grout might seem to dry out too quickly. Be prepared to work in smaller sections and have a little extra water on hand for minor adjustments. Always mix only what you can use within the working time recommended by the manufacturer.
Tips for Keeping Grout Batch Sizes Manageable
It's tempting to mix a huge batch of grout to save time, but this can lead to problems. Grout has a limited working time before it starts to set. If you mix too much, it might harden in the bucket before you can even apply it, wasting material and time. It's much better to mix smaller batches that you can comfortably use within about 20-30 minutes. This ensures your grout is fresh and workable for every section of your backsplash. For example, if you're tiling a small area, a single quart-sized batch might be plenty. You can always mix more if needed. This approach helps prevent waste and ensures a consistent application across your entire project. We have a wide range of marble and travertine tiles available, perfect for any size project. Visit us online to explore your options!
Applying grout to marble and travertine surfaces correctly
Using a grout float at the correct angle
This is where the magic happens, folks. You've prepped your beautiful marble or travertine tiles, and now it's time to fill those gaps. Grab your grout float – a sturdy, rubber-faced tool designed for this very job. Hold it at a roughly 45-degree angle to the tile surface. This angle is key. It allows the float to press the grout deep into the joints without scraping too much off the tile face. Think of it like frosting a cake; you want to fill the gaps, not just smear it all over the top. Work in a consistent direction, usually diagonally across the tiles. This helps push the grout into the joints effectively and minimizes the chance of pulling it back out. Don't be shy; apply a little pressure to make sure every nook and cranny is filled. We want a solid, lasting bond, and that starts with getting the grout where it needs to be.
Techniques for pressing grout deep into joints
Getting grout deep into the joints is non-negotiable for a durable backsplash. If you only skim the surface, you'll end up with weak spots that can crumble later. After you've applied the grout with your float at that 45-degree angle, go back over the joints. Use firm, deliberate strokes with the float, again, working diagonally. This repeated action helps compact the grout, forcing out any air pockets and ensuring a dense, strong fill. Imagine you're packing snow into a snowball – you want it dense and solid. For smaller tiles or intricate mosaics, you might need to use the edge or corner of the float to really work the grout into those tight spaces. Patience here pays off big time. A well-packed joint means a backsplash that stands the test of time.
Avoiding scratching soft stone during application
Marble and travertine are natural beauties, but they can be softer than ceramic or porcelain. This means you need to be gentle. The biggest culprit for scratches? A dirty grout float or sponge. Always clean your tools frequently. After each pass with the float, scrape off the excess grout. When you move to cleaning with a sponge, make sure it's only damp, not soaking wet, and wring it out thoroughly. Use light, consistent pressure. If you feel like you're scrubbing hard, you're probably applying too much pressure or your sponge is too wet. A good rule of thumb: if you're worried about scratching, you're likely being careful enough. Remember, you can always go back for a second, lighter clean, but you can't un-scratch your beautiful stone. For those worried about their newly purchased marble tiles online USA, this gentle approach is paramount.
Preventing grout from drying on tile faces
This is a common headache, but totally avoidable. The key is working in small, manageable sections. Don't try to grout the entire backsplash at once. Grout sets relatively quickly, especially in warmer conditions. Aim to grout an area that you can comfortably clean within 10-15 minutes. As you apply the grout, keep an eye on the tile edges. If you see grout starting to dry on the surface, wipe it away immediately with your damp sponge. Don't let it harden – dried grout on the tile face is much harder to remove later and can leave a permanent haze. Think of it like washing dishes; you wouldn't let food dry on them, right? Same principle applies here. A little proactive wiping goes a long way.
Strategically working in small sections
We touched on this, but it bears repeating. Working in small sections is your best friend when grouting. How small? It depends on your pace, the temperature, and humidity. A good starting point is an area about 2-3 square feet. This allows you to apply the grout, press it into the joints, and do your initial wipe-down before the grout has a chance to set up too much. As you get a feel for the process, you might be able to expand your sections slightly. The goal is to maintain a wet edge, both for the grout in the joints and for cleaning the tile faces. This methodical approach ensures a uniform finish and prevents the dreaded dried-on grout haze. It’s a marathon, not a sprint, and small, consistent steps lead to the best results.
Managing grout lines in mosaics and listellos
Mosaics and listellos add incredible detail, but they can be tricky to grout. Mosaics, with their tiny tiles, require a bit more finesse. Use a grout float that's specifically designed for mosaics, or use the corner of a standard float to get into those tight spaces between the small tiles. Apply gentle pressure to avoid dislodging any of the small pieces. For listellos, which are often decorative strips, treat them with the same care as your main tiles. Ensure the grout fills the joints completely but doesn't overflow onto the decorative surface. A fine-tipped grout bag can sometimes be helpful for precisely filling joints in intricate mosaic patterns, giving you more control. Always remember to clean up carefully around these detailed areas to preserve their intended design.
Troubleshooting common grouting issues
What if things don't go perfectly? Don't panic. The most common issue is grout haze – that chalky film left on the tiles. If you catch it early, a damp sponge should do the trick. If it's dried on, you might need a specialized grout haze remover. Another issue is inconsistent grout color. This usually happens if the grout wasn't mixed thoroughly or if batches dried out differently. Sometimes, a second, light application of grout in the affected areas can help blend the color. If you find low spots or areas where the grout didn't fill properly, you can carefully scrape out the loose grout and reapply fresh, properly mixed grout. For any persistent issues, remember that Surfaces Galore offers expert advice and quality materials, like our premium grout sealers, to help you achieve a flawless finish. We also have a wide selection of marble tiles for sale that can be perfect for any project, big or small.
Case Study: The Kitchen Refresh
Sarah wanted to update her kitchen backsplash. She chose a beautiful Carrara marble subway tile from Surfaces Galore. Initially, she was nervous about grouting, especially with natural stone. She decided to work in small sections, about 2x2 feet at a time. She used a white, unsanded grout to complement the marble. By holding her grout float at the correct angle and cleaning her sponge frequently, she managed to avoid scratching the marble and kept the grout from drying on the tile faces. The result? A stunning, professional-looking backsplash that completely transformed her kitchen. She mentioned, "I was so worried about messing up my beautiful marble, but by taking it slow and following the steps, it turned out even better than I imagined!"
Case Study: The Bathroom Oasis
Mark was renovating his master bathroom and opted for a travertine tile shower surround. He knew travertine could be porous, so he was extra careful during the grouting process. He used a grey, sanded grout to add a bit of contrast. He focused on pressing the grout deep into the joints, using the edge of his float to ensure full coverage. He also made sure to clean off any excess grout from the travertine faces immediately. After the grout cured, he applied a high-quality stone sealer. The finished shower looks incredible, and Mark credits his success to careful application and the right materials. "The key was not rushing it and making sure every joint was packed solid," he said. "It makes all the difference."
Cleaning excess grout without damaging stone
Grouting is only half the battle—cleaning up after makes the real difference in the final look of your marble or travertine backsplash. If you want your investment to shine, learning how to clean excess grout without damaging the stone is a must. Here’s how to protect your backsplash and get those crisp, eye-catching grout lines every homeowner wants.
Timing Your First Sponge Wipe-Down
Act fast, but not too fast. Allow the grout to firm up in the joints for about 10-15 minutes, then gently wipe the tile faces with a damp (never dripping wet!) sponge. Waiting too long turns cleanup from easy to nearly impossible—especially with porous stones like travertine.
- Use a soft, non-scratch grout sponge
- Wipe in a circular motion to lift residue
- Rinse your sponge after every pass
A customer in Austin tried rushing the process for a premium kitchen backsplash and ended up with stubborn grout haze. After learning proper timing, their next project was spotless. Save yourself the headache—time your wipe-downs!
Best Practices for Wringing and Rinsing
Clean water is your best friend. Always wring out the sponge until just damp, not wet. Too much water can seep into the grout and weaken it, or—worse—cause water spots on the stone.
Quick Tip Table:
| Action | Good Practice | Bad Practice |
|---|---|---|
| Sponge Wetness | Damp, well-wrung | Soggy or dripping with water |
| Rinse Frequency | After every wipe | Only at the end |
| Wipe Technique | Gentle, no pressure | Scrubbing hard, pressing down |
Using Circular Motions to Minimize Haze
Don’t just wipe back and forth. Circular motions gently clean stone surfaces without forcing grout back out of the joints. This trick makes haze nearly vanish.
- Start from clean, middle areas and work toward the edges
- Switch out rinse water regularly
- Always finish with a light buff using a microfiber cloth once tiles are dry
Recognizing When Grout Needs a Second Clean-Up
Some grout, especially when working with textured marble tiles, leaves a stubborn layer of residue. Once grout sets (usually after an hour), go back and gently wipe with a clean, slightly damp sponge. If haze remains after drying, try a dry cheesecloth or a pH-neutral stone cleaner the next day (test in a small spot first).
Avoiding Over-Saturation of Stone Surfaces
Natural stone absorbs water quickly. Over-wetting is a big problem—it can lead to stains, water spots, or even damage to the grout lines. Only use just enough moisture to clean—never soak the stone. If you need step-by-step help, see these safe grout cleaning methods.
Adapting Cleaning Technique to Grout Type
Sanded grout versus unsanded? Marble and travertine nearly always require unsanded grout, which cleans off more easily. For ultra-smooth, polished marble, avoid any abrasive pads or cleaners entirely—this surface scratches far too easily.
Protecting Grout Joints During Final Cleaning
During that last wipe, keep your sponge corners away from the grout joints. Too much pressure pulls grout from the seams. Glide lightly over tile faces and let joints cure untouched.
Every successful backsplash project starts with patience. Take your time with cleaning, and the final result will be smooth and professional—worth every minute.
Want to guarantee your stone looks perfect for years? At Surfaces Galore, we help you choose, order, and install top-quality stone tile. Buy marble tiles online USA-wide with confidence, and get expert advice for every part of your installation. Safe cleaning leaves your new surfaces looking their best—your dream backsplash, done right!
Curing times and post-grout care essentials
How long to allow grout to cure before sealing
So, you’ve just finished grouting your beautiful marble or travertine backsplash. Great job! But hold on, don't rush to seal it just yet. Grout needs time to cure properly. This isn't just about drying; it's a chemical process where the grout hardens and gains its full strength. Rushing this step can lead to a weaker, less durable grout line, and that's the last thing you want. For most cement-based grouts, you're looking at a waiting period of at least 48 to 72 hours. Some manufacturers might recommend longer, especially in cooler or more humid conditions. Always check the grout manufacturer's instructions – they know their product best!
Maintaining ambient humidity for even drying
Humidity plays a bigger role than you might think in how your grout cures. Too dry, and it might cure too quickly on the surface, leading to cracks. Too wet, and it can weaken the grout. The sweet spot is consistent, moderate humidity. If you live in a very dry climate, you might consider lightly misting the grout lines with water a few times a day during the first 24-48 hours, then covering the area with plastic sheeting to trap moisture. Just be careful not to oversaturate it. For most homes, though, simply maintaining a comfortable indoor temperature and avoiding extreme drafts is usually enough. It’s all about letting that grout cure evenly and thoroughly.
When it's safe to use or clean your backsplash
Patience is key here. While the grout might feel hard to the touch after 24 hours, it's not fully cured. You'll want to wait at least 72 hours, and often up to a week, before you start using your backsplash normally or giving it a thorough cleaning. Light dusting is usually fine after 24-48 hours, but avoid any heavy scrubbing, direct water spray, or harsh cleaners. Think of it like letting a new paint job cure – you want it to be fully set before you start putting it to the test. This waiting period is critical for the longevity of your beautiful natural stone installation.
Spotting early signs of efflorescence
Sometimes, after grouting and curing, you might notice a white, powdery residue on the surface of your tiles or grout. This is called efflorescence, and it's usually caused by excess moisture within the grout or substrate that's migrating to the surface and leaving salts behind. Don't panic! It's often a cosmetic issue and can usually be wiped away with a dry cloth once the grout is fully cured. If it persists, a specialized efflorescence cleaner might be needed. Addressing it early prevents it from becoming a bigger problem. If you're buying marble tiles online in the USA, make sure to ask about common issues with specific grout types.
Minimizing temperature fluctuations
Just like humidity, extreme temperature swings can affect grout curing. Rapid temperature changes can cause the grout to expand and contract, potentially leading to hairline cracks. Try to keep the room temperature stable during the curing process. Avoid opening windows wide during cold weather or blasting the heat excessively. A consistent, moderate temperature is ideal for a strong, durable grout line. This attention to detail makes a big difference in the final outcome.
Avoiding direct water contact during cure time
This might seem obvious, but it's worth repeating: keep the newly grouted area as dry as possible during the initial curing phase. This means no splashing water from the sink, no leaning wet sponges against the wall, and definitely no vigorous cleaning. Any excess water can interfere with the curing process, weakening the grout. If you've just installed a kitchen backsplash, be extra mindful of cooking and cleaning around it. A little extra care now saves a lot of potential headaches later.
Safeguarding your work area from accidental stains
Even after the initial cure, your grout is still somewhat vulnerable. Protect your beautiful new backsplash from accidental spills, especially those that can stain, like coffee, wine, or tomato sauce. Wipe up spills immediately. This is also where sealing comes in, which we'll discuss next. But in the meantime, be mindful of your surroundings. Consider covering adjacent countertops or appliances if you're doing other work in the kitchen that might create dust or spills. A little foresight goes a long way in preserving that fresh, clean look. For example, a client in Chicago found that wiping up red wine spills within minutes prevented any staining on their newly sealed travertine backsplash.
Case Study: The Miller Residence
The Millers, a busy family in Austin, Texas, were thrilled with their new marble tile backsplash. However, they were eager to start using their kitchen fully. They waited the full 72 hours before doing any significant cleaning and then applied a high-quality sealer. Within a week, a cooking mishap involving spaghetti sauce occurred. Because they had wiped it up immediately and the sealer had properly cured, there was no staining. They credit their patience during the grout curing phase for saving their beautiful backsplash.
Selecting and applying sealer on backsplashes
Why sealing is vital for marble and travertine
Protecting your beautiful marble or travertine backsplash is key. These natural stones are porous, meaning they can soak up spills and stains. A good sealer acts like a shield, keeping your backsplash looking its best for years. It's a simple step that makes a big difference in the longevity and appearance of your stone. Think of it as insurance for your investment. You wouldn't buy a car without insurance, right? The same logic applies to protecting your stunning natural stone surfaces. It's about preserving that initial wow factor.
Choosing the correct sealer for stone type
Not all sealers are created equal, and neither are all stones. For marble and travertine, you'll want a penetrating sealer. These sealers soak into the stone, creating a barrier from within without changing the surface look too much. Some sealers can darken the stone, giving it a richer, 'wet' look, while others aim to keep the color exactly as it is. Always check the product label to ensure it's suitable for natural stone, especially marble and travertine. If you're unsure, it's always best to consult with your supplier. We have a wide selection of premium sealers available that are specifically formulated for natural stone, ensuring optimal protection and compatibility. You can even buy marble tiles online USA from us and get expert advice on the best sealer to pair with them.
Timing sealer application after grouting
Timing is everything, and that includes sealing your backsplash. You can't just seal it the moment you finish grouting. Grout needs time to cure properly. This usually takes about 48 to 72 hours, but always check the grout manufacturer's instructions. Applying sealer too early can trap moisture, which can lead to problems down the line. Once the grout is fully cured, your backsplash is ready for its protective coat. This waiting period ensures the sealer bonds correctly and provides the best possible protection.
Application techniques: brush, roller, or spray
How you apply the sealer matters. You have a few options:
- Brush: Great for precise application, especially around edges and intricate areas. You can control the amount of sealer easily.
- Roller: A small foam roller works well for larger, flat areas, allowing for quick and even coverage.
- Spray: Aerosol cans or pump sprayers can be fast, but you need to be careful about overspray and ensure you're working in a well-ventilated area. Masking off surrounding surfaces is crucial here.
No matter the method, the goal is a thin, even coat. Avoid puddling, as this can lead to an uneven finish. Work in manageable sections to ensure you don't miss any spots.
Number of coats for optimal protection
For most backsplashes, one good, even coat of penetrating sealer is sufficient. However, if your stone is particularly porous or in a high-splash zone (like behind a busy stovetop), a second coat might be beneficial. Apply the second coat after the first one has dried according to the manufacturer's instructions, usually within an hour or two. Don't overdo it; too many coats can build up and create a film on the surface.
Testing for complete coverage
How do you know if you've sealed it properly? A simple water test works wonders. After the sealer has had adequate time to cure (check the product details, but typically 24 hours), splash a little water onto the stone. If the water beads up and sits on the surface, you're good to go! If the water soaks in and darkens the stone, it means the sealer hasn't fully penetrated or coverage is uneven. In that case, you'll need to apply another coat to those areas.
How often to reseal for long-lasting beauty
Resealing isn't a one-and-done deal. The frequency depends on how much you use your kitchen and what kind of spills you typically encounter. A good rule of thumb is to reseal every six months to a year. You'll know it's time when the water test shows the stone is absorbing moisture again. Regular maintenance, including resealing, is the secret to keeping your marble or travertine backsplash looking stunning. For busy kitchens, consider resealing every six months. Sealing frequency depends on usage.
Case Study: The Miller Kitchen Renovation
The Miller family in Ohio decided to update their kitchen with a beautiful Scabos Travertine backsplash. They loved the warm, earthy tones and the unique texture it brought to their space. After carefully installing and grouting the tiles, they followed our advice and applied a high-quality penetrating sealer. Six months later, during a cooking mishap involving red wine, they were amazed. The wine beaded right up on the surface, and a quick wipe with a damp cloth removed it completely, leaving no stain behind. They've since resealed it annually, and their backsplash still looks as vibrant and protected as the day it was installed. This simple sealing step saved them from a potentially disastrous stain and kept their kitchen looking its best.
Protecting your investment with ongoing maintenance
Your beautiful marble or travertine backsplash is more than just a surface; it's an investment in your home's style and value. To keep it looking its best for years to come, a little ongoing care goes a long way. Think of it like tending to a fine piece of art – regular attention preserves its original splendor.
Daily cleaning best practices for stone
Keeping your backsplash pristine doesn't require a lot of time. The key is consistency. After cooking, a quick wipe-down is usually all that's needed. This prevents food particles and liquids from setting in, which can be a real pain to remove later. For everyday spills, a soft cloth or sponge is your best friend. Remember, the goal is to maintain that fresh, just-installed look without a lot of fuss.
Recommended pH-neutral cleaners for longevity
When it comes to cleaning natural stone, the wrong product can do more harm than good. Harsh chemicals or acidic cleaners can etch the surface of marble and travertine, dulling their natural shine. That's why we always recommend using a pH-neutral cleaner. These cleaners are specifically formulated to be gentle on stone, effectively removing grime without stripping away its protective qualities or damaging its finish. Using the right cleaner means your backsplash stays vibrant and protected.
Quick response to accidental spills
Accidents happen, especially in the kitchen! Whether it's a splash of wine, a drop of oil, or a bit of tomato sauce, the best approach is to act fast. Blot the spill immediately with a clean, dry cloth. For tougher messes, use your pH-neutral cleaner and a soft sponge. The quicker you address a spill, the less likely it is to penetrate the stone and cause a lasting stain. This simple habit is one of the most effective ways to protect your investment.
Periodic professional deep cleaning tips
While daily care keeps your backsplash looking good, a periodic deep clean can really make it shine. Think of this as a spa treatment for your stone. A professional can use specialized tools and techniques to remove any stubborn grime or build-up that might have accumulated over time. This is also a great opportunity to have them inspect the grout and sealer, ensuring everything is in top condition. For those looking to buy marble tiles online in the USA, remember that even the most beautiful tiles benefit from professional care.
Signs that your backsplash needs resealing
Sealing is vital for protecting your marble and travertine from stains and moisture. But sealers don't last forever. How do you know when it's time to reseal? A simple water test can tell you. Sprinkle a little water on the surface. If it beads up and sits on top, your sealer is still doing its job. If the water is absorbed into the stone, darkening it, it's time to reseal. This is a critical step to maintain the stone's integrity and beauty. Don't wait until you see stains to reseal!
Products and tools to avoid on natural stone
To keep your backsplash looking its best, it's important to know what not to use. Avoid abrasive cleaners, scouring pads, steel wool, and harsh chemicals like bleach or ammonia. These can scratch, etch, or discolor your stone. Also, be mindful of cutting boards; always use one when chopping ingredients to prevent direct contact with the stone surface. Sticking to soft cloths, sponges, and pH-neutral cleaners will help preserve the natural beauty of your marble or travertine.
Developing a cleaning schedule for busy kitchens
Life gets busy, and sometimes cleaning schedules fall by the wayside. But with a natural stone backsplash, a little planning makes a big difference. Consider a simple routine: a quick wipe-down after each meal preparation, a more thorough clean with a pH-neutral cleaner once a week, and a water test for sealing every six months. For those who frequently buy marble tiles online USA, maintaining them properly is key to enjoying their beauty for years. A structured approach ensures your backsplash remains a stunning focal point in your kitchen.
Case Study: The Miller Residence
The Millers, a busy family in Austin, Texas, installed a stunning Calacatta Gold marble backsplash in their kitchen. Initially, they were worried about the upkeep, especially with two young children. However, by following a simple routine – wiping down after cooking, using a recommended pH-neutral cleaner weekly, and resealing every 8-10 months – their backsplash has remained as beautiful as the day it was installed. They found that a quick response to spills, like a dropped glass of red wine, prevented any staining issues. Their experience shows that with the right habits, even delicate natural stone can thrive in a high-traffic family kitchen.
Case Study: The Chen Project
For a modern kitchen renovation in San Francisco, the Chens opted for a sleek honed travertine backsplash. They were advised by their designer to use a specific pH-neutral cleaner and to test the sealer's effectiveness every six months. After about a year, they noticed water was starting to soak in. They promptly resealed the area using a high-quality impregnating sealer, which restored its stain resistance. This proactive approach prevented potential damage and maintained the backsplash's sophisticated look, proving that consistent maintenance is key to long-term beauty. If you're considering buying travertine tiles, remember that proper sealing is non-negotiable for lasting results.
Using creative layouts and borders for custom backsplashes
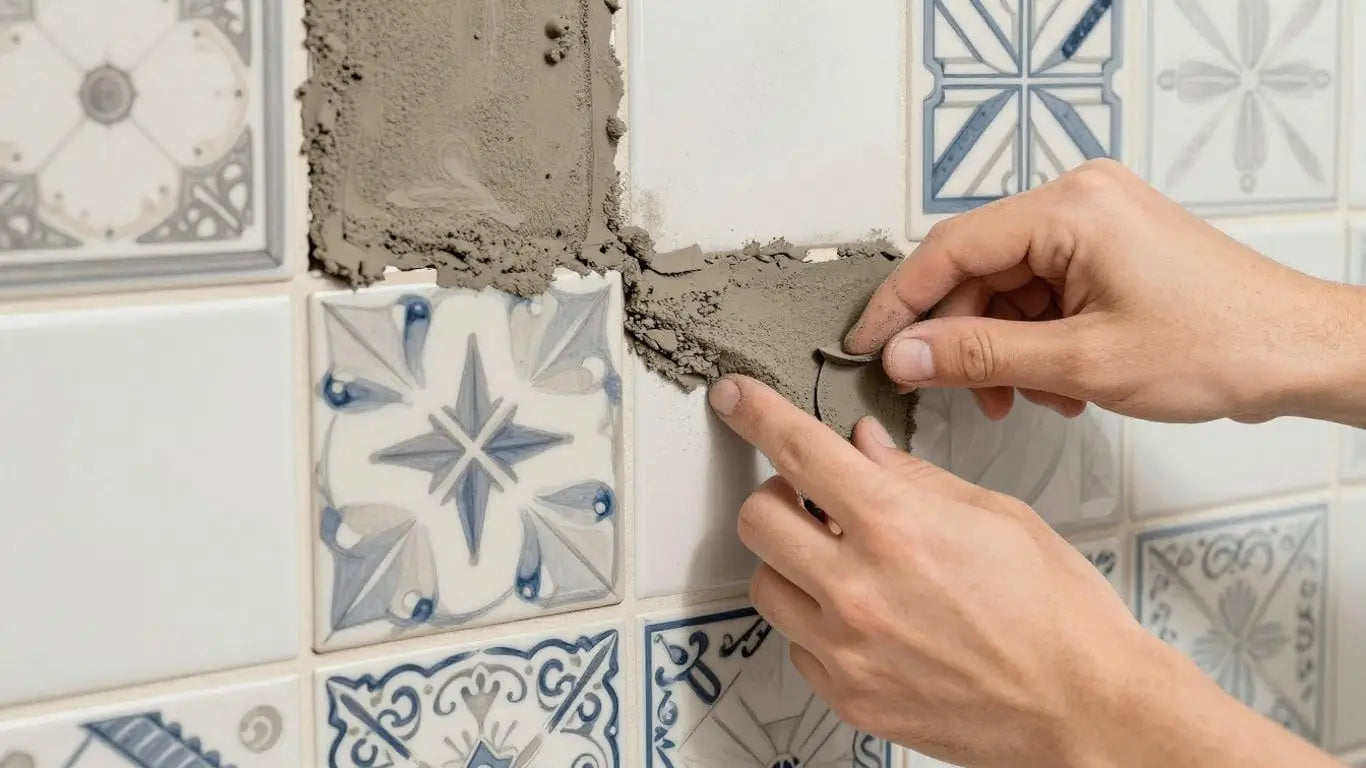
Looking to make your kitchen or bath stand out from the cookie-cutter crowd? Patterns like herringbone, basketweave, and the always classic checkerboard can completely transform a backsplash.
- Herringbone patterns give you a sense of movement and energy, ideal for modern spaces.
- Basketweave adds a touch of old-world charm – think of Parisian cafés or cozy bistros.
- Checkerboard brings a bold, eye-catching contrast that's timeless and works perfectly with both marble and travertine tiles.
Many homeowners who buy marble tiles online USA gravitate toward these styles for a reason. They balance sophistication and personality. If you want ideas beyond the basic subway arrangement, discover unique kitchen backsplash ideas that showcase innovative patterns and layouts.
Mosaics and decorative strips are more than just design extras. They let you add pops of color, texture, or even metallics, drawing the eye to a focal point without overpowering the space. You can run a row of mosaics through a backsplash field, or frame an area behind the stove with a custom accent. Mosaics made with marble or travertine introduce shimmer and complexity. Accent strips can tie in countertop colors or highlight unique cabinetry finishes.
Mosaics give you the chance to inject your unique style into your kitchen or bathroom without taking on a full renovation.
Borders are the secret to a professional, pulled-together backsplash. Use marble or travertine field tiles, then finish the perimeter with a contrasting border for instant style. Borders can be simple straight strips, intricate listellos, or even hand-cut stone pieces. Combine different widths, finishes, or colors for a bold look. This technique is perfect for tying together open-concept kitchens, helping define zones while staying understated.
Sample Layout Table
| Pattern | Visual Effect | Best Uses |
|---|---|---|
| Herringbone | Dynamic, modern | Full wall, stove splash |
| Basketweave | Classic, textured | Small spaces, decorative panels |
| Checkerboard | Bold, timeless | Large backsplashes, feature walls |
Listellos are slender, decorative strips – usually made from marble or travertine. They act as a finishing touch, outlining spaces or breaking up larger tiles. Installing a listello:
- Defines the upper edge of your backsplash neatly.
- Adds a visual "frame," making even simple field tiles look high-end.
- Lets you introduce subtle patterns or metallic accents.
Pros often recommend matching the listello color to a vein or tone in your main tiles for a cohesive design.
If your marble or travertine tiles have intricate veining, you can still use bold layouts—just keep the color palette tight. Pair a wild pattern with calm, monochrome stone, or go for high-contrast grout to highlight the design. Remember, with natural stone, sometimes less is more: overdoing borders with busy tiles can clutter the look.
No one wants rough tile ends! Use matching trim or bullnose pieces in marble or travertine to smooth out transitions. This is especially important in open-plan kitchens or where backsplashes meet windows or cabinets. Professional installers often mix trim from the same batch as the field tiles for a perfect match in tone and finish.
If you’re dreaming up a truly custom look, a designer can help you combine creative layouts and specialty borders with your lifestyle in mind. Experienced designers can source patterned tiles to anchor a space, or customize mosaic borders to fit a unique color scheme. For example, a recent client requested a herringbone marble mosaic with a gold-trimmed travertine border, now the showpiece of their home’s open kitchen.
Case Study 1: "Herringbone Hero"
A busy family in Dallas wanted their kitchen to feel lively but classic. By installing a marble herringbone backsplash with a simple travertine border, they achieved a look that felt both trendy and timeless.
Case Study 2: "Checkerboard Classic"
A New York homeowner went with a bold checkerboard wall using marble and travertine, framed by a narrow listello. The design gives their loft a focal point and pairs beautifully with exposed brick. Their work highlights how patterned tiles can command attention and add depth to any style.
Ready to buy marble tiles online USA for your custom backsplash? Take time to explore all the creative layouts and border options: a few extra steps now will pay off for years.
Working around outlets, switches, and tricky surfaces
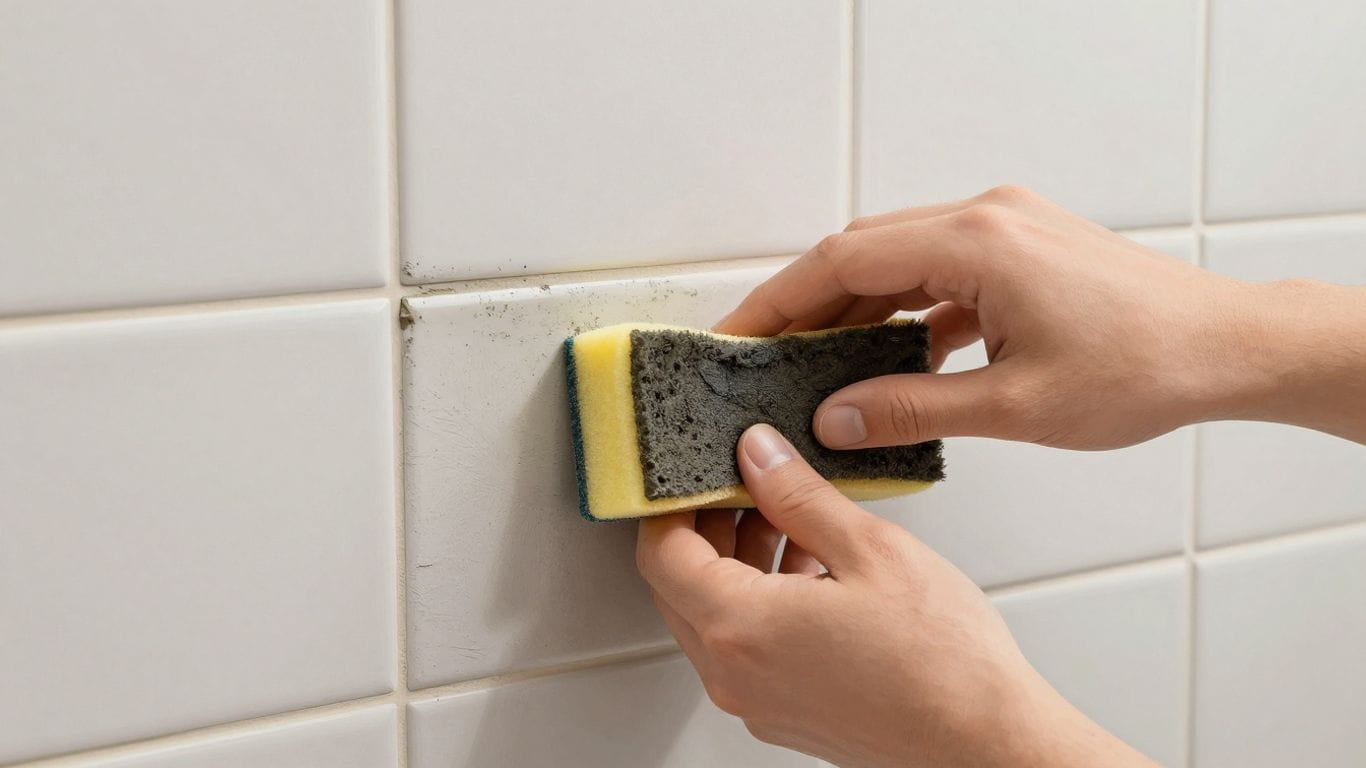
Measuring and marking precise cut lines
This is where precision really counts. You don't want to mess this up. Take your time measuring the space around outlets and switches. Use a reliable tape measure and a pencil to mark exactly where your cuts need to be. Accurate measurements prevent costly mistakes. Think of it like tailoring a suit – everything has to fit just right.
Cutting stone safely with a wet saw
Cutting natural stone like marble or travertine requires the right tools. A wet saw is your best friend here. It keeps the blade cool and reduces dust, making the job safer and cleaner. Always wear safety glasses and gloves. Remember, rushing the cut can lead to chips or breakage. Take it slow and steady for a clean edge. If you're looking to buy marble tiles online in the USA, make sure you have the right cutting equipment ready.
Smoothing and polishing cut edges
After cutting, those edges might be a bit rough. You'll want to smooth them down. A rubbing stone or a fine-grit sandpaper can work wonders. This step is important for a professional look and to avoid sharp edges. It makes the tile look like it belongs there, not like it was just hacked to fit.
Fitting tiles snugly around obstacles
This is the puzzle part. You need to fit your tiles perfectly around electrical boxes and other fixtures. Sometimes, you might need to make multiple cuts on a single tile to get it to fit just right. Don't be afraid to dry-fit pieces to see how they look before you commit to adhesive. A snug fit looks much better than a gappy one.
Protecting outlets from grout and sealer
Before you start grouting, cover those outlets and switch plates. Painter's tape works well for this. You don't want grout or sealer getting into the electrical components. It's a messy job, and protecting these areas will save you a lot of cleanup time later. It’s a small step that makes a big difference.
Blending grout lines for a seamless look
When you're working around obstacles, the grout lines can become a bit more noticeable. Try to keep your grout lines consistent, even in these tricky spots. If you're using a contrasting grout color, this is especially important. A uniform grout line makes the whole backsplash look more cohesive. You can find great tile layout ideas on Surfaces Galore's website to help visualize this.
Finishing details for a professional result
Take a step back and look at your work. Are there any small gaps? Any rough edges? Now's the time to fix them. Use a bit of caulk or grout where needed to fill tiny spaces. The goal is a smooth, clean finish that looks like it was done by a pro. It’s these little details that really make a backsplash shine. For inspiration on unique designs, check out the customer installations showcase at Surfaces Galore.
Managing grout color variation and blending lines
Grout lines play a huge part in how your marble or travertine backsplash looks and feels. Messy color variation or blotchy lines can distract from the natural beauty of stone. Whether you want crisp contrast or a near-invisible blend, here’s how to control the final look—and why working with experts like Surfaces Galore pays off.
Reasons for Overt or Inconsistent Grout Lines
Grout doesn’t always dry the way you expect. Sunlight, humidity changes, or even opening a fresh bag before the last one is gone can cause color shifts. Here are the main culprits for variation:
- Inconsistent water-to-powder ratio when mixing batches
- Not blending dry grout powder from multiple bags
- Applying grout with wet sponges that dilute the surface too soon
- Using different brands or types in the same project
- Variations in stone porosity soaking up moisture unevenly
If you want seamless color, consistency at every single step is non-negotiable.
Techniques to Maintain Uniform Grout Color
Don’t settle for streaky results. Use these pro tips to get clean, even color across your backsplash:
- Blend bags: Mix all the dry grout powder needed for the job in a single large bucket before adding water.
- Use distilled water for mixing—minerals in tap can alter the shade.
- Carefully measure water for every batch; don’t eyeball it.
- Work in small sections to maintain the same drying environment.
- Scrub haze away gently, never flooding the stone with water.
Well-prepared batches reduce visual breaks and keep your stone looking sharp.
Combining Marble and Travertine in One Backsplash
Want the drama of veining and stone in one focal wall? You can do it—but you’ve got to get blending right. Use a grout color that picks up the tones in both stones for harmony. For example, a light gray grout can draw together white marble and tawny travertine.
CASE STUDY: A Chicago kitchen in a luxury townhouse used Spanish Mix Marble Mosaic from Surfaces Galore. The installer chose a neutral almond grout to bridge creamy and brown elements—resulting in a refined, unified backsplash that thrilled the homeowners.
Minimizing Grout Haze on Polished Stone
Haze is the film left behind after grouting. With polished marble or tumbled travertine, it’s especially obvious. Here’s what works:
- Use only non-scratch sponges
- Lightly dampen, don’t soak, your sponge
- Wipe in small circular motions
- Polish gently with a dry microfiber towel after final clean
Renovating Old Grout for a Refreshed Appearance
Sometimes, all you need for a big impact is fresh grout. Remove old, stained, or cracked grout with a specialized removal tool. Then—using the steps above—re-grout for spotless lines.
TIP: For clients looking to buy marble tiles online in the USA, Surfaces Galore recommends matching new grout to the existing shade for seamless repairs.
Handling High-Traffic or Splash-Prone Areas
Grout in backsplashes behind stoves or sinks must resist moisture and stains. We recommend:
- Sealing grout promptly after curing
- Choosing stain-resistant formulas
- Cleaning daily with pH-neutral products
Choosing Contrasting vs. Matching Grout for Style
Do you want grout lines to pop or blend? Here’s a quick comparison:
| Look | Grout Color Choice | Effect |
|---|---|---|
| High-contrast | Charcoal on white marble | Modern, bold focus on pattern |
| Subtle, seamless | Light beige on travertine | Classic, soft, lets stone’s movement stand out |
| Neutral balance | Soft gray | Safe, timeless, complements most combos |
No matter what vision you have for your kitchen or bath, controlling grout color and line blending is one of the smartest ways to boost the wow factor of your installation.
For stone that deserves a flawless frame, trust Surfaces Galore—your nationwide source for quality materials, matching grout, and expert advice every step of the way.
Avoiding the most common mistakes when grouting marble and travertine
Risks of Excess Moisture During Grouting
Water is your friend during grouting, but too much can be a real problem. When you mix your grout, follow the manufacturer's instructions precisely. Adding too much water makes the grout weak. It won't hold up well over time, and you might see cracks or crumbling later on. Think of it like trying to build a sandcastle with really wet sand – it just doesn't stick together properly. For a strong, lasting grout line, get the consistency just right. If you're unsure, start with less water and add a tiny bit more if needed. It’s easier to add water than to fix weak grout.
What Happens If Grout is Applied Too Thickly
Applying grout too thickly can lead to a few issues. First, it's wasteful. You'll use more grout than you need, which costs more money. Second, thick grout can be harder to clean off the tile faces. This means more scrubbing for you later. And if the grout lines are uneven in thickness, it just doesn't look professional. Consistency is key for both strength and appearance. When you're spreading the grout with your float, aim for an even layer that fills the joints completely but doesn't pile up excessively on the tile surface. You can always go back and add a little more to low spots, but it's tough to remove excess without smudging the tiles.
Potential for Scratching Delicate Stones
Marble and travertine are beautiful, but they can be softer than other tile materials. This means they're more prone to scratching, especially if you're not careful during the grouting process. Always use a grout float with a soft, flexible edge and hold it at a consistent angle. Avoid dragging it too hard across the tile surface. When cleaning up excess grout with a sponge, make sure the sponge is clean and well-rinsed. A gritty sponge can act like sandpaper on your stone. If you've bought some beautiful marble tiles online USA, you'll want to protect that investment. Remember, gentle but firm pressure is the goal.
Effects of Mismatched Grout Color on Aesthetics
Choosing the right grout color is a big deal. It frames your tiles and can either complement or clash with your stone. A grout that's too dark can make your tiles look muddy, while one that's too light might highlight every tiny imperfection. It's always a good idea to test a small, inconspicuous area first or get a grout sample. Consider how the grout color will look next to the veining and color variations in your specific marble or travertine. For instance, a stark white grout might not be the best choice for a deeply veined marble. Sometimes, a slightly off-white or a light gray can blend more naturally. If you're looking for inspiration, check out some of the stunning kitchen backsplashes featured by Surfaces Galore clients; you'll see how grout color plays a huge role.
Dangers of Using Harsh Cleaning Agents
After grouting, you'll need to clean up. This is where many people make a mistake. Never use acidic or abrasive cleaners on marble or travertine. These can etch the stone, dulling its natural shine and potentially causing permanent damage. Stick to pH-neutral cleaners specifically designed for natural stone. Even after the grout has cured, harsh cleaners can break down the sealer and stain the grout itself. Always read the labels and when in doubt, test a cleaner in a hidden spot first. Protecting your beautiful stone surfaces means using the right products for cleaning and maintenance.
Importance of Proper Expansion Joints
This might seem like a small detail, but expansion joints are really important, especially in larger areas or where there's a change in material. They are small gaps left in the grout line that allow the tiles to expand and contract with temperature and moisture changes. Without them, the stress can build up, leading to cracked tiles or grout. For a backsplash, this is less of a concern than for a large floor, but it's still good practice to be aware of it. If you're tiling a large wall area or a floor, consult installation guidelines for proper expansion joint placement. It's a key step for long-term durability.
Recovering from Grout-Related Staining
Sometimes, despite your best efforts, grout can get stained. This can happen from spills, improper cleaning, or even the grout itself reacting with something. If you notice staining, act fast. For fresh spills, blot them up immediately. For more set-in stains, you might need a specialized stone poultice. These are designed to draw stains out of porous stone. If the grout itself is discolored, you might need to remove and reapply the affected sections. It’s a bit of a process, but it’s often fixable. Don't despair if you encounter a little staining; there are ways to address it. For example, a client recently shared how a red wine spill on their new travertine backsplash was successfully removed using a poultice, saving the day and their beautiful tile work. This highlights the importance of quick action and using the right products for stain removal.
Troubleshooting and repairing grout in natural stone backsplashes
If your elegant marble or travertine backsplash isn’t looking so fresh anymore, you’re not alone. Even high-end materials need a little TLC now and then. Here’s a straight-shooting guide to fixing loose grout, stains, cracks, or even missing sections—without making things worse or risking damage to your cherished natural stone. Whether you’re a homeowner or looking to buy marble tiles online USA, this will set you up for lasting results.
Diagnosing loose or crumbling grout
Don’t ignore those wobbly tiles or flaky grout lines. They’re often the first warning sign of bigger issues. Look for:
- Gaps along grout lines.
- Tiles that shift when pressed.
- Powdery residue or pieces falling out.
Addressing loose grout promptly helps maintain the structural integrity and appearance of your backsplash.
If you notice tiles moving, address loose tiles promptly, since this could mean trouble with the underlying adhesive or even moisture issues behind the wall.
Removing and reapplying discolored sections
Marble and travertine are gorgeous but porous—sometimes dark spills or even improper cleaners can leave a stain. If you spot a section that’s discolored:
- Use a grout saw or oscillating tool to carefully remove the affected grout.
- Avoid scratching the soft stone by going slow and using the right blade.
- Vacuum the space to remove debris.
- Mix a fresh batch of grout that matches your original color.
- Fill in the section, smoothing it flush with surrounding lines.
When matching grout shade, mix small test batches first. Marble and travertine often highlight even small color variations, so patience pays off here.
How to handle cracked or missing grout lines
Cracks can let water seep behind your beautiful tile, which is a recipe for bigger headaches. Here’s how to patch it up:
- Use painter’s tape to protect tile edges.
- Dig out the damaged grout gently (don’t chip the stone!).
- Dampen the joint, then fill with new grout using a precision tool.
- Smooth the joint so it blends seamlessly with the rest.
For missing grout, the process is similar. Be methodical—rushing could damage delicate patterns or veining.
Refinishing the area without damaging tiles
Stone is durable, but restoring the grout shouldn’t mean harming the tile. A few best practices:
- Always test your grout removal tool on a spare tile or out-of-sight spot.
- Wipe up dust immediately with a pH-neutral, non-scratch sponge. See recommended pH-neutral cleaners for longevity.
- Reseal any exposed stone before you call it done.
Tools for safe grout removal in tight spaces
The right tool makes all the difference—especially in corners or behind faucets. Top tools include:
- Slim-bladed manual grout saws
- Oscillating multi-tools with grout-removal blades
- Narrow vacuum attachments for fine debris
Preventing reoccurring grout issues
Some common causes of grout failure—and how to avoid a repeat:
- Excess water or moisture behind the wall
- Wrong grout type for natural stone (always use stone-safe, non-sanded grouts!)
- Skipping or delaying sealer application
- Using harsh cleaning agents
Matching new grout to existing installations
Getting the repair to blend perfectly can require some trial and error. Here’s what helps:
- Bring a small sample of the original grout to your supplier when buying new.
- Mix in small batches; grout can change color as it dries.
- Wipe finished lines gently for the best match.
Quick Case Study: Sarah’s Kitchen Save
Sarah bought travertine subway tile for her kitchen five years ago. Two winters ago, she noticed the grout by her sink turning gray and starting to flake. Instead of redoing the whole thing, she:
- Cut away just the bad sections,
- Matched the grout to her existing lines using samples,
- Opted for a high-quality, stone-specific sealer after repair.
The result? Her backsplash looks new again, and she’s still glad she chose to buy marble tiles online USA from a trusted supplier. No more gray, no more flakes—just classic beauty.
Don't wait until grout issues become an eyesore—fix them early with patience and the right technique. A sharp eye and a gentle touch can keep your marble or travertine backsplash looking flawless for years to come.
Expert tips for a flawless, professional finish
The value of patience and careful attention
Achieving a perfect marble or travertine backsplash isn’t about speed—it’s about detail. Slow down and inspect every grout joint as you go. Rushing leads to uneven joints, missed spots, and potential scratching. Use a clean sponge and change your water often. Take time to line up veins or patterns for each tile. The result? A beautiful, seamless backsplash that truly turns heads.
- Set aside extra time for each phase—good things come to those who don't rush!
- Double-check all grout lines and tile surfaces as you move from one section to the next.
- Maintain a tidy workspace—debris can cause scratches or haze that are hard to fix after the fact.
Why ‘less is more’ with grout application
Marble and travertine are porous. Overfilling joints or smearing grout across tile faces sets you up for stubborn haze and stains. Load your float lightly and always work at a proper angle. Focus on pressing grout deep into the joints—apply diagonally for best results.
- Use small batches so grout never dries out ahead of you.
- Clean as you go—never allow grout to set on marble or travertine for too long.
- Wipe diagonally as well, which keeps joints full but tile faces clean.
Insider tricks for smooth transitions and corners
Corners and edges can be tricky. Dry-fit all tiles first to spot problem cuts. Pre-finish exposed edges with sandpaper or a polishing stone for a soft, safe transition. For corners: alternate grout joints so they don’t stack up visually. If you need caulk, match the color to your grout. A continuous line makes even a tricky corner look sharp.
Table: Pro Tips for Common Problem Areas
| Area | Quick Tip |
|---|---|
| Corners | Alternate pattern, pre-polish |
| Outlets | Cut with wet saw, dry-fit first |
| Trim edges | Sand and bevel for comfort |
Double-checking all joints before sealing
Before you even think about sealer, check the whole backsplash for pinholes, cracks, or missed grout lines. Fix tiny flaws now—they grow fast in daily use. Give grout lines a final, light swipe with a damp sponge. Use a bright light at a low angle to detect haze or low spots.
"When you think it's good enough, check it again. Fresh eyes the next morning catch issues you missed last night."
Importance of working in ideal conditions
Temperature and humidity matter. Set your work zone to a steady temp and avoid drafts. If your kitchen is busy, tape off the backsplash and let it cure undisturbed. Don’t rush the process with fans or heaters—slow, even drying keeps grout from cracking.
- Target 60–75°F (15–24°C) and 30–50% relative humidity if possible.
- Avoid direct sunlight or cold air on the freshly grouted surface.
Using lighting to inspect your finished surface
Once the grout is dry and your first wipe is complete, grab a portable LED light. Shine it at different angles to spot haze or uneven grout lines. It’s easier to fix an issue now than after sealing. This makes your backsplash look professionally installed—even if it’s your first try.
Getting the most longevity from your investment
A professional-looking backsplash should stand the test of time. Seal your grout and stone as recommended. Use a pH-neutral cleaner for daily care. For particularly high-traffic areas (behind the stove or sink), plan to reseal every 6–12 months. If you ever need help, don’t hesitate to reach out to your supplier—especially if you buy marble tiles online USA from a trusted source.
Real-World Case Study: Modern Kitchen Transformation
Last winter, a homeowner in Texas ordered classic white marble mosaic tiles online for her kitchen remodel. She followed each of these expert tips: dry-fitted all tiles, applied grout diagonally, checked every joint with an LED torch, and waited the full 48 hours before sealing. The outcome? Visitors thought the backsplash was installed by a pro, not a first-timer! She shared, "The simple process took a few days, but the result is timeless. Would recommend Surfaces Galore for their guidance and selection."
Quick Recap
- Take your time—patience pays off.
- Use proper tools and minimal grout.
- Pay special attention to corners and details.
- Illuminate and inspect everything before sealing.
- Maintain your investment with the right products.
If you’re ready to create a custom masterpiece, check out Surfaces Galore’s expert resources or explore their full range of stone tile layout ideas and inspiration. Your space deserves nothing but the best.
Why Surfaces Galore is your trusted partner for natural stone backsplash projects
When it comes to natural stone backsplashes, choosing the right supplier makes all the difference. At Surfaces Galore, we're not just selling tiles; we're providing the foundation for your dream kitchen or bath. We understand that natural stone, especially marble and travertine, is an investment. That's why we've built our business around quality, selection, and support.
Access to Premium, Nationwide Stone Selections
We are one of the largest direct importers of natural stone in the U.S. This means we have an incredible range of marble and travertine, sourced from quarries around the globe. Whether you're looking for the classic elegance of Carrara marble or the warm, earthy tones of Scabos travertine, we have it. You can explore our extensive collection online or visit our showroom to see the beauty firsthand. We bring the world's finest stone directly to you.
Exclusive Benefits for Architects and Designers
We know that design professionals need reliable partners. Surfaces Galore works closely with architects and designers, offering trade accounts with special discounts. We provide detailed product information and can help you source unique materials for your clients' projects. Let us be your go-to for premium natural stone that will impress.
Bulk Discounts for Larger or Commercial Projects
Planning a big renovation or a commercial build? We've got you covered. Surfaces Galore offers competitive pricing on bulk orders. Whether you need enough tiles for multiple homes or a large hospitality project, we can accommodate your needs and budget. Get in touch to discuss your project requirements.
Exceptional Customer Service Every Step of the Way
From the moment you start browsing to the day your tiles arrive, our team is here to help. Have questions about grout colors, sealing, or installation? Need help selecting the perfect stone to match your existing décor? Our knowledgeable staff is ready to provide expert guidance. We want your project to be a success.
Reliable Cross-Country Shipping for Any Order Size
No matter where you are in the country, Surfaces Galore can deliver. We offer reliable shipping services to get your natural stone tiles to your doorstep safely and efficiently. We work with trusted carriers to handle your order with care, from our warehouse to your home. You can buy marble tiles online USA with confidence.
Expert Guidance on Matching Stone and Grout
Choosing the right grout color can transform your backsplash. Our experts can advise you on the best grout options to complement your chosen marble or travertine. We understand how grout lines affect the overall look, and we're here to help you achieve a cohesive and stunning design. We can help you match stone and grout for a perfect finish.
Inviting Readers to Request a Quote or Visit the Showroom
Ready to start your backsplash project? We invite you to request a personalized quote through our website or visit our showroom in Anaheim, California. See the quality of our natural stone up close and let our team help you find the perfect materials. Your dream backsplash is just a step away.
Case Study: The Miller Residence Kitchen Remodel
The Miller family wanted a kitchen that felt both timeless and modern. They chose a stunning Honey Onyx tile for their backsplash. Initially, they were unsure about how to seal and maintain the onyx. Our team provided detailed care instructions and recommended the perfect sealer. The result? A breathtaking backsplash that has become the heart of their home. They often mention how easy it was to buy marble tiles online USA from us and how helpful our staff was throughout the process.
Case Study: Designer Project - The Coastal Retreat
An interior designer approached us for a high-end bathroom project featuring Thassos marble. She needed a specific mosaic pattern and trim pieces to complete the look. We were able to source the exact Thassos marble mosaics and custom-cut the required marble trims, ensuring a perfect match and a luxurious finish. The designer praised our selection and our ability to fulfill custom requests, making her project a standout success.
Showcasing real-world backsplash projects for inspiration
Sometimes, seeing is believing. We've gathered some amazing examples of how real homeowners and designers have used marble and travertine to create stunning backsplashes. These aren't just pictures; they're proof of what's possible when you combine quality materials with creative vision. Get ready to be inspired and see how these natural stones can transform your kitchen or bath.
Exploring Creative Designs from Surfaces Galore Clients
Our clients consistently impress us with their design choices. From sleek, modern kitchens to cozy, rustic bathrooms, the versatility of natural stone shines through. You'll see how marble's classic elegance and travertine's earthy charm are used in unexpected and beautiful ways. These projects highlight the unique character that only natural stone can bring. Take a look at how others have successfully integrated these materials into their homes.
Modern and Classic Backsplash Layouts in Action
Whether you lean towards clean, contemporary lines or timeless, traditional patterns, our gallery has something for everyone. Discover how a polished marble backsplash can add a touch of glamour to a modern kitchen, or how a tumbled travertine mosaic can bring warmth to a classic bathroom. We showcase a variety of layouts, proving that natural stone fits any style. You can even find inspiration for unique backsplash ideas.
Combining Stone Mosaics with Decorative Borders
Want to add an extra layer of sophistication? See how our clients have masterfully combined intricate stone mosaics with elegant borders and listellos. These combinations create focal points and add depth to a backsplash design. It’s a fantastic way to personalize your space and add a custom feel. Explore how these decorative elements can truly make a backsplash pop.
Before-and-After Stories from Satisfied Homeowners
Witness the dramatic transformations! Our before-and-after features show just how impactful a well-chosen natural stone backsplash can be. See how drab, outdated spaces are revitalized with the timeless beauty of marble and travertine. These stories are a testament to the lasting value and aesthetic appeal these materials provide. It’s amazing what a difference the right tile can make.
How Designers Integrate Marble and Travertine in Kitchens
Get a professional's perspective on using natural stone. We feature insights from designers who share their favorite techniques for incorporating marble and travertine into kitchen backsplashes. Learn about color matching, pattern selection, and how to create a cohesive look that complements countertops and cabinetry. Their advice can help you avoid common pitfalls and achieve a designer-quality finish. You might even find some great kitchen backsplash trends for 2026.
Visual Impact of Checkerboard and Herringbone Patterns
Patterns can make or break a backsplash. Explore stunning examples of checkerboard and herringbone layouts using marble and travertine. These classic patterns add visual interest and a sense of movement to your space. See how different stone colors and finishes can alter the mood of the pattern, from bold and dramatic to subtle and sophisticated. A checkerboard layout can really make a statement.
Encouraging Readers to Submit Their Own Project Photos
We love seeing your creations! If you've used Surfaces Galore products in your backsplash project, we invite you to share your photos with us. Your project could be featured here, inspiring others and showcasing your unique style. It’s a great way to get recognition for your hard work and beautiful design choices. We’re always looking for new inspiration, and our customers are our best source. You can even buy marble tiles online USA from us to start your own project.
Seeing these real-world applications can help solidify your design choices. It’s one thing to look at samples, but quite another to see how a full backsplash comes to life. Don't hesitate to draw inspiration from these projects as you plan your own renovation.
Looking for ideas to make your kitchen or bathroom pop? We've gathered some amazing real-life examples of backsplashes that are sure to spark your creativity. See how others have transformed their spaces with stunning tile work. Ready to find the perfect backsplash for your home? Visit our website today to explore a wide selection of beautiful options!
Your Grout Job: Done and Dusted
So, you've made it through the grouting process. It might have seemed like a lot at first, but you tackled it step-by-step, and now your backsplash is looking pretty sharp. Remember, the right materials, like the premium marble and travertine tiles from Surfaces Galore, make a huge difference in the final look. Taking your time with the grout and sealing it properly means your beautiful new backsplash will last for years. Now, step back and admire your work – you've added a real touch of quality to your home.
Frequently Asked Questions
What makes marble and travertine good choices for backsplashes?
Marble and travertine are beautiful natural stones that add a touch of elegance to your kitchen or bathroom. They are also quite strong and can last a long time, making them a great choice for areas that get a lot of use. Plus, they can make your home more valuable.
How do I know if I'm picking the right kind of marble or travertine tile?
Think about where it will go. Kitchens might need a tougher finish, while bathrooms can be a bit more delicate. Look at the finish – polished is shiny, honed is smooth and matte. Also, check out the colors and patterns to make sure they match your style.
What tools do I really need to grout a backsplash?
You'll need a grout float to spread the grout, a good sponge for cleaning, and buckets for water. Don't forget safety gear like gloves and eye protection. Spacers help keep your grout lines even.
How do I get my workspace ready for installing stone tiles?
First, protect your counters and floors with drop cloths. Make sure the area is clean and dry. If you're working near electrical outlets, it's a good idea to turn off the power at the breaker box for safety.
Should I check my stone tiles before I start grouting?
Yes, definitely! Look closely at each tile for any chips or cracks. Sometimes, tiles can look a bit different in color or pattern. Laying them out dry first helps you see how they'll look together and catch any problems.
How do I mix the grout just right?
Follow the instructions on the grout package carefully. You want a smooth, paste-like texture, kind of like peanut butter. Too watery and it won't stick; too dry and it will be hard to work with.
What's the best way to put grout between the tiles?
Use a grout float to press the grout firmly into the gaps between the tiles. Work at an angle to make sure the joints are filled all the way. It's best to work in small sections so the grout doesn't dry out too fast.
How do I clean off the extra grout without messing up the stone?
After letting the grout set for a bit, use a damp (not soaking wet) sponge to gently wipe away the excess grout from the tile surfaces. Rinse your sponge often in clean water. Be careful not to dig grout out of the lines.
How long does grout need to dry before I can use my backsplash?
Grout needs time to harden, usually at least 24 to 72 hours, depending on the type. After that, it's a good idea to put on a sealer to protect the stone and grout from stains.
Why is sealing my marble or travertine backsplash so important?
Marble and travertine are natural stones, which means they can soak up liquids and get stained easily. Sealing creates a protective layer that helps prevent spills from sinking in, keeping your backsplash looking beautiful for longer.
What's the best way to clean my natural stone backsplash every day?
Use a soft cloth and a cleaner that's made for natural stone or is pH-neutral. Avoid harsh chemicals or abrasive scrubbers, as these can damage the stone or dull its shine. Wipe up spills right away.
What if I make a mistake, like scratching the stone or having uneven grout lines?
Don't worry, mistakes can often be fixed! Small scratches might be buffed out, and uneven grout lines can sometimes be carefully scraped out and redone. For bigger issues, it might be best to contact a professional for advice.


Leave a comment