
Mastering the Art: A Comprehensive Guide on How to Grout Travertine Tile

Travertine tile brings a natural, earthy beauty to any space. But to really make it shine and last, you've got to get the grouting right. It's not just about filling gaps; it's about protecting your investment and making sure your floor looks its best. This guide will walk you through how to grout travertine tile, step-by-step, so you can achieve that professional, finished look.
Key Takeaways
- Travertine is porous, so proper preparation and sealing are vital to protect it from stains and moisture.
- Choose a grout color that complements the natural tones of your travertine for the best aesthetic.
- Always use the right tools, like a grout float and damp sponges, for smooth application and cleaning.
- Work in small, manageable sections to ensure the grout is applied and cleaned effectively before it dries.
- Allow the grout to cure completely for the recommended time before walking on it or sealing.
- Sealing your travertine and grout is a critical step to protect against spills and wear.
- Regular cleaning with appropriate solutions will help maintain the beauty and longevity of your grouted travertine.
- If the project feels too complex or you're unsure about any step, don't hesitate to consult a professional installer.
Preparing for the Grouting Process
Before you even think about mixing grout, a little preparation goes a long way. Travertine is a beautiful natural stone, but it demands respect. Understanding its unique characteristics is the first step to a flawless finish. Get this right, and your grout lines will look professionally done, adding lasting value to your home. We want your project to shine, whether you're installing travertine tiles in your kitchen or creating a stunning patio. If you're looking for premium travertine tiles, consider exploring options like Latravonya Travertine for a touch of natural elegance.
Understanding travertine's porous nature
Travertine is a natural stone, and like many natural stones, it's porous. This means it can absorb liquids. Think of it like a sponge. This porosity is what gives travertine its unique character and texture, but it also means it needs careful handling during grouting. If grout or cleaning solutions get into these pores and aren't dealt with properly, they can stain or discolor the stone. It’s why we always recommend sealing your travertine after grouting. It’s a small step that makes a big difference in protecting your investment.
Gathering essential grouting tools and materials
Having the right gear makes the job smoother and the results better. You'll need a grout float for application, buckets for water and mixing, sponges for cleaning, and of course, the grout itself. Don't forget safety gear like gloves and eye protection. Having everything ready before you start means you won't be scrambling mid-job. It’s like having a well-organized toolbox – everything is where you need it, when you need it.
Ensuring your travertine is ready for grout
This is critical. Your travertine tiles need to be firmly set, and the thin-set mortar must be completely dry. We're talking at least 24 hours, sometimes more, depending on conditions. Check the manufacturer's instructions for your specific thin-set. You don't want any movement under the tiles when you're applying grout. Also, make sure the joints are clean and free of any excess mortar. A clean joint means good grout adhesion. For more on this, remember that allowing thin-set to cure is vital.
Choosing the right grout for your travertine
Not all grouts are created equal. For travertine, you'll typically want a sanded grout for wider joints, as it provides more strength. Unsanded grout is usually for very narrow joints. Consider the color too – it can dramatically affect the final look. A color that complements the natural tones of your travertine will create a cohesive feel. If you're unsure, testing a small, inconspicuous area first is a smart move. We have a whole section on choosing the right grout color to help you nail this.
Preparing the grout mixture correctly
Follow the grout manufacturer's instructions precisely. Too much water weakens the grout, while too little makes it hard to work with. Mix it to a consistency like peanut butter – thick enough to hold its shape but spreadable. Let it slake (rest) for a few minutes if the instructions say so; this allows the chemicals to fully activate. A well-mixed grout is a strong grout.
Protecting surrounding areas from grout splatter
Travertine is beautiful, but grout can be a pain to clean off if it dries on the surface. Use painter's tape to protect adjacent walls, countertops, or fixtures. Lay down drop cloths to catch any stray drips. A little effort here saves a lot of scrubbing later. It’s about being tidy and professional.
Acclimating grout to the installation environment
Just like your tiles, the grout needs time to adjust to the room's temperature and humidity. If you bring a cold bag of grout into a warm room, it can affect how it mixes and cures. Let the grout bags sit in the installation area for at least 24 hours before you plan to mix them. This helps ensure a consistent and predictable outcome for your project.
Mastering the Art of Grout Application
Now that your travertine is prepped and ready, it's time for the main event: applying the grout. This is where your careful preparation truly pays off, transforming a tiled surface into a finished masterpiece. Don't underestimate the impact of well-applied grout; it's the glue that holds your design together and adds that professional polish. Let's get this done right.
Applying grout with a float for optimal coverage
This is your primary tool for getting the grout where it needs to be. Hold the grout float at a 45-degree angle to the tile surface. Work the grout into the joints by moving the float diagonally across the tiles. This motion helps push the grout deep into the gaps, ensuring full coverage without pulling it back out. Think of it as spreading butter on toast – you want an even layer everywhere. If you're looking for beautiful tiles to apply this to, consider exploring options like Malibu Travertine tiles.
Working grout into the travertine joints effectively
Don't just skim the surface. You need to really pack that grout into every nook and cranny. Apply firm pressure with your float, making sure there are no air pockets or voids left behind. Travertine's natural texture can sometimes make this a bit trickier, but persistence is key. A well-filled joint prevents future issues like cracking or water infiltration.
Maintaining consistent grout lines during application
Consistency is king here. Aim for grout lines that are the same depth and width across the entire installation. This uniformity creates a clean, professional look. Use your float to scrape off excess grout as you go, keeping the tile surface relatively clean. If you're aiming for very narrow joints, remember that unsanded grout is typically recommended for polished or honed travertine to avoid scratches.
Techniques for filling larger grout gaps
Sometimes, especially with certain travertine styles or if you've intentionally created wider joints, you might need a bit more grout. Don't be afraid to go over an area a second time with your float to ensure those larger gaps are completely filled. You can also use a smaller trowel or even a putty knife for precision in very wide or irregular gaps, but always follow up with the float to smooth and compact the grout.
Ensuring grout adheres properly to travertine edges
Pay special attention to the edges of your tiles. The grout needs to bond securely to both the sides of the tiles and the substrate. When you're working the grout with your float, make sure you're pressing it right up against the tile edges. This creates a strong seal and prevents the grout from easily chipping away later.
Avoiding overfilling grout lines
While you want full joints, you don't want mounds of grout sitting on top of the tiles. Use the edge of your float to scrape off excess grout as you work. The goal is to have the grout level with the tile surface, or slightly below, depending on the desired finish. Overfilling makes the cleaning process much harder and can lead to a messy appearance.
The importance of working in manageable sections
Don't try to grout your entire floor at once. Work in sections that you can comfortably complete within about 15-20 minutes, depending on the grout's working time. This allows you to apply, work it in, and begin the initial cleanup before the grout starts to set too firmly. This approach prevents the grout from drying out unevenly and makes the entire process much more manageable. It's better to do a great job on a small section than a mediocre job on a large one.
Case Study: The Kitchen Backsplash Transformation
Sarah was redoing her kitchen backsplash using beautiful ivory travertine tiles. She was nervous about grouting, having heard horror stories. She decided to work in small, 3x3 foot sections. She meticulously applied the grout with her float, ensuring each joint was packed full. After letting it set for about 10 minutes, she began the initial cleanup. By breaking the project down, she felt in control and was able to achieve a remarkably clean and professional finish, far exceeding her expectations. She later mentioned how much she loved the natural beauty of travertine and how the grout application really made it pop.
Remember, patience and attention to detail are your best allies during grout application. Take your time, work methodically, and the results will speak for themselves. This is the stage where your beautiful tile choice truly comes to life.
Cleaning Excess Grout from Travertine Surfaces
So, you've just finished applying grout, and now it's time for the cleanup. This is where the magic happens, turning a messy job into a polished finish. Don't worry, it's not as daunting as it might seem. With the right approach, you'll have your beautiful travertine looking its best.
Initial Grout Removal with a Float
First things first, grab that grout float. You want to work at a roughly 45-degree angle to the tile. This helps you skim off the bulk of the excess grout without digging into the fresh lines. Think of it as a gentle scraping motion. It’s important to get this initial layer off while the grout is still workable but not too wet. This step is key to making the rest of the cleaning process much easier. If you're looking for premium travertine tiles, check out options at Surfaces Galore.
Using a Damp Sponge for Surface Cleaning
Now, it's time for the sponge. Use a grout sponge – they're denser and hold up better than regular kitchen sponges. Dip it in clean water, then wring it out really well. You want it damp, not soaking wet. Gently wipe the surface of the tiles in a diagonal motion, just like you did with the float. This lifts the grout residue left behind. The goal here is to clean the tile face without disturbing the grout in the joints.
Rinsing the Sponge Frequently for Best Results
This is a big one: rinse your sponge. A lot. Seriously, get a second bucket of clean water just for rinsing. As soon as you see a bit of grout film on the sponge, dunk it in the rinse bucket and give it a good squeeze. Then, dip it into your clean water bucket, wring it out, and get back to wiping. A dirty sponge just smears grout around, making more work for you later. This constant rinsing is what prevents that dreaded grout haze.
Avoiding the Removal of Grout from Joints
When you're wiping with that damp sponge, be mindful of the grout lines. You're cleaning the tile surface, not re-sculpting the joints. Use light pressure and keep your strokes consistent. If you press too hard or scrub back and forth aggressively over a joint, you risk pulling out the grout you just carefully applied. It’s a delicate balance, but you’ll get the feel for it.
Timing the First Grout Cleanup
Timing is everything with grout cleanup. You don't want to wait too long, or the grout will harden and become a real pain to remove. But you also don't want to clean too soon, or you'll pull it out of the joints. Generally, you'll have about 15-30 minutes after applying the grout, depending on the temperature and humidity. The grout should be firm to the touch but not rock hard. It’s a bit of an art, but you’ll learn to read it.
Dealing with Stubborn Grout Haze
Sometimes, despite your best efforts, a light haze can still appear as the grout dries. Don't panic! This is often a sign that you used a bit too much water or didn't rinse your sponge enough. For minor haze, a dry microfiber cloth buffed over the surface can work wonders. For tougher haze, you might need a specialized grout haze remover. Always test it in an inconspicuous spot first. If you're having trouble, remember that cleaning and maintaining travertine tile and grout is key.
The Role of Clean Water in Grout Removal
I can't stress this enough: clean water is your best friend during this stage. Using dirty water is like trying to wash your car with mud – it just doesn't work. Keep those buckets clean, change the water frequently, and you'll find the entire cleaning process goes much smoother. It makes a world of difference in the final look of your travertine installation.
Case Study: The Kitchen Countertop Transformation
Sarah, a homeowner in Austin, Texas, was installing beautiful Ivory Travertine tiles for her kitchen backsplash. She was meticulous during the grout application but started to worry when she saw a cloudy film forming. By diligently rinsing her sponge every few wipes and using a clean microfiber cloth for a final buff, she managed to remove the haze completely, leaving a stunning, professional finish. She later mentioned how she wished she'd known about baking soda and hydrogen peroxide grout paste for future projects, but her current method worked perfectly.
Remember, patience is key during the cleanup phase. Rushing this step can undo all your hard work. Take your time, work methodically, and your travertine will thank you for it.
Allowing the Grout to Cure Properly
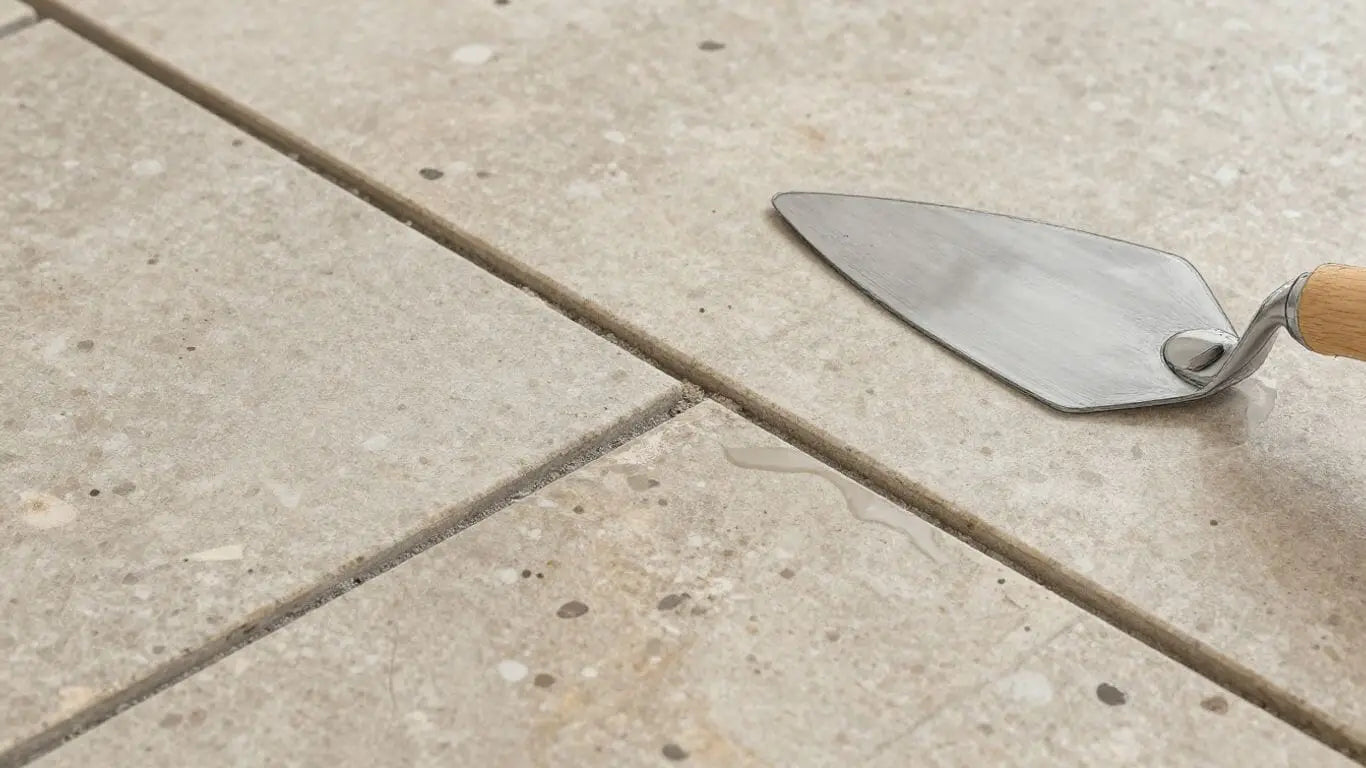
You've applied the grout, you've cleaned up the excess, and now comes a stage that many people rush through – the curing process. But hold on! This is where the real magic happens, where your grout hardens and becomes a strong, durable part of your beautiful travertine installation. Skipping this step is like building a house and not letting the foundation set. It's a recipe for future problems.
Understanding Recommended Grout Curing Times
Every grout product is a little different, and the manufacturer knows best. Always check the packaging for their specific recommendations. Generally, you're looking at a period of 48 to 72 hours before you can really put your new grout to the test. This isn't just a suggestion; it's a critical window for the grout to reach its full potential strength. Think of it as giving your new travertine floor the time it needs to settle in and become truly robust.
Factors Influencing Grout Curing Speed
Several things can speed up or slow down how quickly your grout cures. Temperature and humidity play a big role. Warmer, drier conditions usually mean faster curing, while cooler, more humid environments can extend the time. It's a bit like baking – the conditions matter! If you're installing travertine tiles in a bathroom, for instance, the moisture might affect how quickly the grout sets up.
The Importance of Undisturbed Curing
This is a big one. During the curing phase, your grout is still a bit like a teenager – it needs space and time to develop. Avoid walking on the newly grouted area as much as possible. Even light foot traffic can cause micro-fractures that might not be visible now but can lead to bigger issues down the line, like cracking or crumbling. If you're doing a whole floor, try to work in sections so you can at least use parts of the room while others cure. For a stunning kitchen backsplash, this is less of an issue, but still, try not to bump into it.
Recognizing Signs of Proper Grout Curing
How do you know it's ready? The grout will feel hard to the touch. It won't be soft, crumbly, or easily indented. You might notice a slight color change as it fully cures, often becoming a bit lighter and more uniform. If you tap it gently, it should sound solid. If it still feels soft or chalky, it needs more time. This is especially true if you're considering buying marble tiles online USA for another project and want to compare installation timelines.
Avoiding Premature Traffic on the Grouted Area
We can't stress this enough: patience is key. Resist the urge to move furniture back, let the dog run across it, or start cleaning vigorously. Premature traffic is the enemy of freshly cured grout. It can dislodge the grout from the joints or cause it to crack. Imagine the stress on those delicate grout lines if they aren't fully hardened yet. It's worth waiting those extra couple of days for a job that will last for years.
The Impact of Humidity and Temperature on Curing
As mentioned, environmental conditions are significant. High humidity can slow down the curing process because the grout needs to release moisture to harden. Conversely, very low humidity or high temperatures can cause the grout to dry out too quickly on the surface, potentially leading to cracking or a weaker bond. Aim for a stable, moderate environment if possible. This is why proper acclimation of your travertine tiles before installation is also so important.
When to Proceed to the Next Steps
Once the grout has reached its recommended curing time and shows all the signs of being properly set – hard, solid, and uniform – you're ready to move on. This usually means it's time for the next critical step: sealing your beautiful travertine and grout. Don't rush this transition; the grout needs to be fully cured before sealing to allow it to breathe and bond correctly with the sealer.
Case Study: The Kitchen Countertop Transformation
A homeowner in Austin, Texas, was installing a stunning travertine backsplash. They followed all the steps meticulously, but on day two, they decided to place their coffee maker back on the counter, right over the freshly grouted area. Within a week, they noticed fine cracks appearing in the grout lines around that spot. This is a classic example of premature stress on uncured grout. Had they waited the full 72 hours, the grout would have been strong enough to handle the weight, and the backsplash would have remained flawless.
Proper curing isn't just a waiting game; it's an investment in the longevity and appearance of your travertine installation. Rushing this phase can undo all the hard work you've put in.
Sealing Your Travertine and Grout
Alright, so you've put in the work, the grout is looking good, and you're almost done. But wait, there's one more super important step: sealing. Think of it like putting a protective coat on your beautiful travertine. It's not just about making it look shiny; it's about keeping it that way for years to come.
Why Sealing Travertine is Crucial
Travertine is a natural stone, and like most natural things, it's porous. That means it can soak up spills, stains, and moisture. Without a good seal, that red wine spill or greasy kitchen splash can become a permanent mark. Sealing creates a barrier, making it much easier to clean up messes before they set in. It also helps prevent discoloration and general wear and tear. Basically, sealing is your travertine's best defense against everyday life.
Selecting the Appropriate Stone Sealer
Not all sealers are created equal. You need one specifically designed for natural stone, and ideally, for travertine. There are penetrating sealers that soak into the stone and grout, and topical sealers that form a protective layer on the surface. For most travertine applications, a good quality penetrating sealer is the way to go. It protects without changing the natural look and feel of the stone too much. Some sealers can even add a bit of a sheen if that's what you're after. Always check the product label to make sure it's suitable for your specific type of travertine and for interior or exterior use, depending on your project. If you're looking for high-quality options, you might want to check out what's available for buy marble tiles online USA, as many of those products will have compatible sealers.
Applying Sealer to the Travertine Tiles
This is where you get to see your hard work pay off. Make sure your tiles and grout are completely clean and dry. Seriously, completely dry. Any moisture trapped underneath can cause problems later. You can apply the sealer with a brush, a roller, a sprayer, or even a clean cloth. Work in small sections so the sealer doesn't dry before you can spread it evenly. You want to get good coverage on both the tiles and, importantly, the grout lines. Don't let it pool up; wipe away any excess. It's a bit like painting, but with a much more important outcome.
Ensuring Grout Lines are Adequately Sealed
Don't forget those grout lines! They're often the most porous part of the whole installation. When you're applying the sealer, pay extra attention to filling those joints. A good penetrating sealer will soak into the grout and protect it from absorbing stains. If you skip the grout, you're leaving a weak spot wide open for trouble. Think of it as sealing the entire package, not just the wrapping paper.
Following Manufacturer Instructions for Application
Every sealer product is a little different. Some might need a second coat, some might have specific drying times, and some might require you to wipe off excess within a certain window. Always, always read and follow the manufacturer's instructions. They know their product best. This is your roadmap to a successful seal. Skipping this step is like trying to assemble furniture without the manual – you might get lucky, but you'll probably end up with something wobbly.
Understanding Sealer Curing Times
After you've applied the sealer, it needs time to do its thing. This is called curing. It might feel dry to the touch pretty quickly, but it can take anywhere from 24 hours to several days for the sealer to fully cure and reach its maximum protective potential. During this time, try to keep foot traffic off the area and avoid exposing it to moisture or spills. Patience here is key to a long-lasting seal.
The Benefits of a Well-Sealed Travertine Surface
So, what's the payoff for all this sealing effort? A well-sealed travertine surface is easier to clean, more resistant to stains and moisture, and generally looks better for longer. It protects your investment and keeps your beautiful stone looking its best. It's the final step that truly locks in the beauty and durability you've worked so hard to achieve. Think of it as the cherry on top of a perfectly executed project.
Case Study: The Kitchen Countertop Transformation
Sarah, a homeowner in Austin, Texas, had just installed a stunning honed travertine backsplash in her kitchen. She loved the natural look but was worried about cooking splatters. After grouting, she opted for a high-quality penetrating sealer. She meticulously applied it, ensuring every inch of the travertine and grout was covered. Six months later, a pot of tomato sauce boiled over, splattering the backsplash. Sarah was able to wipe it clean with a damp cloth with no staining whatsoever. She credits the sealer for saving her backsplash from a permanent mess.
Case Study: The Bathroom Floor Resilience
Mark, a contractor in Miami, Florida, was working on a bathroom renovation. He chose tumbled travertine for the floor, appreciating its rustic charm. Knowing bathrooms are prone to moisture, he insisted on a thorough sealing process after grouting. He used a penetrating sealer designed for wet areas, applying two coats to the tiles and grout. Even with daily showers and occasional water spills, the travertine floor has remained beautiful and stain-free, with no signs of water damage or discoloration. The homeowner frequently comments on how easy it is to keep clean.
Case Study: The Outdoor Patio Durability
When a client in Phoenix, Arizona, wanted to install travertine pavers on their patio, they were concerned about the harsh desert sun and potential for spills from outdoor entertaining. After the pavers were laid and grouted, a robust exterior-grade sealer was applied. This sealer not only protected against stains from food and drinks but also offered UV protection against fading. Even after a year of intense sun and occasional rain, the patio looks as good as new, with the grout lines remaining intact and the stone's color vibrant. The client was thrilled with the longevity and ease of maintenance.
Final Touches and Inspection
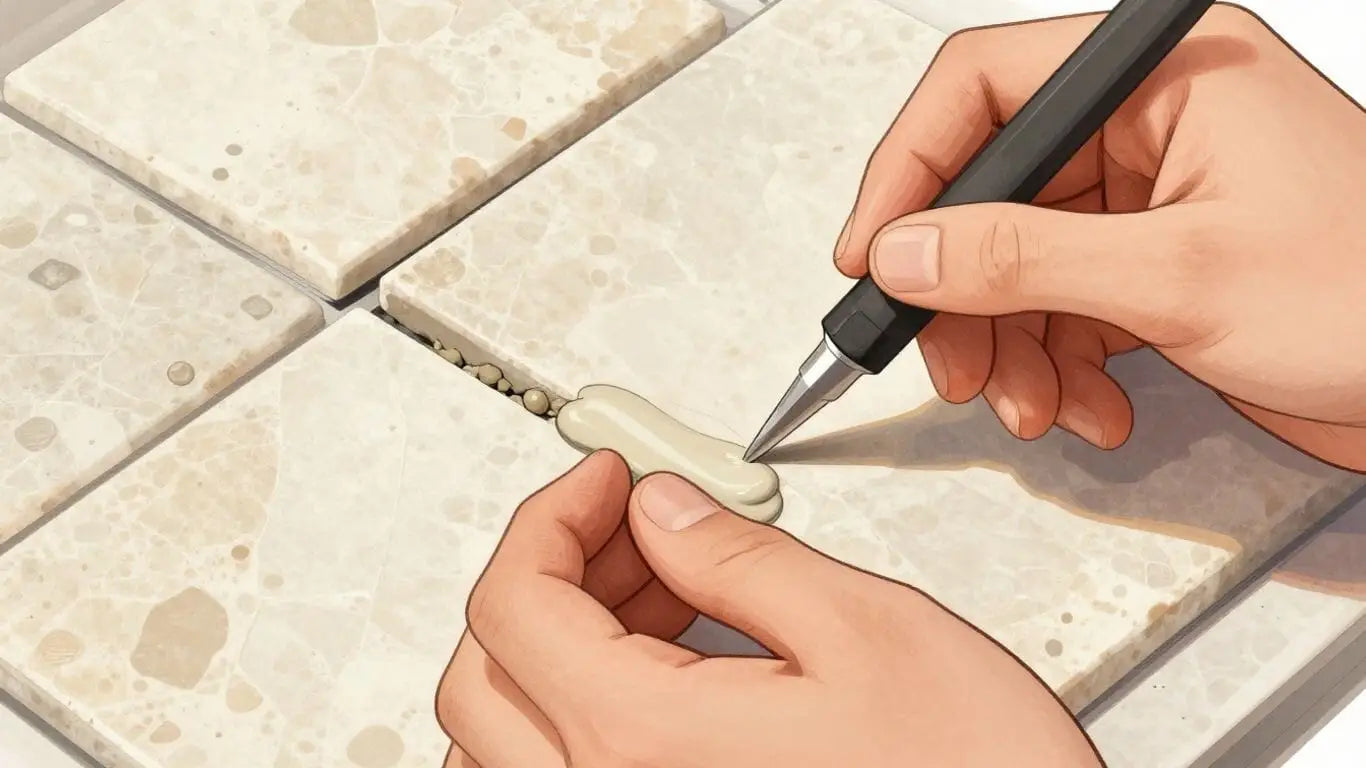
You've worked hard to get your travertine tiles looking their best. Now, it's time for the grand finale: a thorough inspection and a final clean-up. This stage is where your meticulous work truly shines, transforming a project into a masterpiece. Think of it as the final polish on a beautiful piece of art.
Performing a Final Cleaning of the Entire Area
Before you can truly appreciate your handiwork, a final sweep is in order. This isn't just about tidying up; it's about revealing the full glory of your newly grouted travertine. We're talking about removing any lingering dust, stray grout particles, or smudges that might have escaped earlier cleaning efforts. A clean surface makes all the difference, allowing the natural beauty of the travertine to take center stage. For a deep clean that preserves the stone's natural beauty, consider using warm water and a pH-neutral stone cleaner with a soft-bristle brush. This method helps maintain a lasting shine.
Inspecting Grout Lines for Uniformity
Take a step back and really look at those grout lines. Are they consistent? Do they flow smoothly from one tile to the next? Uniformity is key to a professional look. You're checking for any dips, bumps, or unevenness that might have occurred during the application. This is your chance to spot any areas that might need a little extra attention before they become permanent features.
Checking for Any Imperfections in the Tile Work
Beyond the grout, give the tiles themselves a once-over. Look for chips, cracks, or any other blemishes that might have occurred during the installation process. While travertine is durable, sometimes small issues can arise. Identifying them now means you can address them before they become bigger problems. If you find any loose or crumbling grout, now is the time to repair it.
Addressing Any Missed Spots or Unevenness
Did you miss a small section during the initial grout cleanup? Is there a spot where the grout didn't quite fill the joint perfectly? This is the time to find those little imperfections. It's the attention to these small details that separates a good job from a truly great one. Don't be afraid to get up close and personal with your new tile work.
Making Necessary Repairs to the Grout
If you've found any issues – uneven lines, missed spots, or minor chips – now is the time for targeted repairs. This might involve a small touch-up of grout or a careful scraping and reapplication in a specific area. The goal is to make these repairs as invisible as possible, blending them seamlessly with the surrounding grout.
Ensuring a Smooth and Polished Finish
Once all repairs are made, give the entire area a final, gentle wipe-down. This is about achieving that polished, finished look. It’s the final step that makes your travertine installation look like it was done by a seasoned professional. You want the tiles to gleam and the grout lines to look clean and sharp.
The Satisfaction of a Completed Project
Stand back and admire your work. You've taken on a challenging project, mastered the art of grouting, and now you're seeing the beautiful results. There's a unique sense of accomplishment that comes with completing a project like this. You've not only enhanced your home but also gained valuable skills. It’s a testament to your dedication and effort, a beautiful, durable surface that you can be proud of for years to come. Many homeowners choose travertine for its natural beauty and durability, and a well-executed grout job ensures that beauty lasts. For instance, a client in Scottsdale, Arizona, recently completed a kitchen backsplash using our Ivory Travertine tiles. After carefully following the grouting and sealing steps, they reported that the final inspection revealed a flawless finish, with the grout lines perfectly complementing the stone's natural variations. They mentioned how the final cleaning made the entire area 'pop,' and they were thrilled with the professional look they achieved themselves.
Another case involved a bathroom renovation in Austin, Texas, where the homeowner opted for Scabos Travertine tiles. They were initially concerned about achieving a uniform grout line, but after meticulous application and a thorough final inspection, they were delighted. They noted that the final cleaning step was particularly satisfying, removing the last traces of grout haze and revealing the rich, earthy tones of the Scabos travertine in their shower surround. The project was a resounding success, proving that with careful attention to detail, a DIYer can achieve stunning results.
Essential Tools for Travertine Grouting
Alright, let's talk tools. You've picked out some gorgeous travertine, maybe from our Travertine Tiles Collection, and you're ready to grout. But hold on a second – you can't just wing it. Having the right gear makes all the difference between a pro job and a 'well, that's… interesting' outcome. Think of these as your trusty sidekicks in the battle against uneven grout lines and messy surfaces.
Grout float for application and removal
This is your workhorse. A good grout float, usually made of rubber or dense foam, is designed to push grout deep into those travertine joints. You'll also use it to scrape off the bulk of the excess grout afterward. Get one with a sturdy handle; you'll be using it a lot.
Sponges for cleaning and wiping
Not just any sponge will do. You need dense, grout-specific sponges. These are designed to hold up to the abrasive nature of grout and are perfect for that initial wipe-down to remove excess. You'll need a couple – one for the main cleaning and another for a final rinse. Remember to rinse them out constantly.
Buckets for water and grout mixing
Two buckets are better than one. One for mixing your grout to the perfect consistency (more on that later) and another for clean rinse water. You'll be surprised how quickly that rinse water turns into a muddy mess. Having a dedicated clean water bucket is key to avoiding streaks.
Grout saw for joint cleaning
Before you even think about applying new grout, you need to make sure those joints are clean. A grout saw is a lifesaver here. It's a small, sharp tool that lets you carefully scrape out old grout, dust, or any debris that might be lurking in the gaps. This step is super important for a good bond with your new grout.
Trowels for grout mixing
While a float is for application, a trowel or margin trowel is handy for mixing your grout. It gives you good control when adding water to the powder and helps ensure you get a lump-free, creamy mixture. Some people just use a mixing stick, but a trowel feels more substantial.
Protective gear for safety
Don't skip this! Grout can be harsh on your skin and eyes. You'll want sturdy gloves (not thin latex ones), safety glasses to protect from splashes, and maybe even knee pads if you're working on the floor for extended periods. Safety first, always.
Measuring tools for accuracy
This might seem obvious, but having a reliable tape measure and possibly a level is important. You'll use these for planning your grout lines, checking spacing, and making sure everything is looking straight and even. Precision matters, even in the details.
Case Study: The DIY Disaster Averted
Sarah decided to grout her kitchen backsplash herself. She had beautiful Scabos Travertine Mosaics and was excited to finish the project. She grabbed a kitchen sponge and a bucket of water. The result? Streaks everywhere, grout missing in some spots, and way too much on the tiles. After a frustrating afternoon, she realized she was missing key tools. A quick trip to the hardware store for a proper grout float and dense sponges, plus a bit more research, turned her project around. The right tools really do make a world of difference.
Remember, investing in quality tools isn't just about making the job easier; it's about achieving a professional, long-lasting finish that you'll be proud of. Don't let subpar equipment sabotage your beautiful travertine installation.
Choosing the Right Grout Color
The grout color you select for your travertine tile installation is more than just a filler; it's a design element that can dramatically alter the final look of your space. Think of it as the frame for your artwork – it can either blend in or make a bold statement. Getting this choice right means your beautiful travertine will truly shine.
Considering the Natural Tones of Travertine
Travertine itself comes in a range of beautiful, earthy hues, from creamy ivories and warm beiges to richer browns and even subtle grays. Your grout color should ideally complement these natural variations. For a cohesive, high-end feel, opt for a grout color that closely matches the dominant tone of your travertine. This creates a seamless look, making the tiles appear larger and the overall surface more unified. For example, a light beige grout with ivory travertine tiles offers a soft, natural aesthetic that feels both luxurious and understated. You can find beautiful options for your travertine tiles at Surfaces Galore.
Matching Grout to Existing Decor
Beyond the tile itself, consider the room's overall color scheme and style. Is your decor modern and minimalist, or more rustic and traditional? A neutral grout color, like a soft gray or a warm greige, can bridge the gap between different elements in the room, providing a sophisticated backdrop. If you're aiming for a cohesive look, try to pick a grout that echoes an accent color already present in your furniture, cabinetry, or decor. This ties the entire design together.
The Impact of Grout Color on Perceived Tile Size
This is a big one! Grout color has a significant effect on how we perceive the size of the tiles and the overall space. Darker grout against lighter tiles creates a strong contrast, which can make the individual tiles stand out more. This can make a large area feel more dynamic but might make smaller tiles seem even smaller. Conversely, using a grout color that's very close to the tile color minimizes the visual separation between tiles. This technique is fantastic for making a room feel more expansive and can be particularly effective in smaller spaces or when using smaller format tiles. It’s a trick that designers often use to create a sense of openness.
Using Contrasting Grout for a Bold Look
Want your travertine to pop? A contrasting grout color is the way to go. Imagine dark charcoal grout against light silver travertine, or a deep espresso grout with creamy ivory tiles. This approach creates a striking visual effect, highlighting the pattern and texture of the travertine. It's a bold choice that can add a lot of personality to a space, turning a simple tile installation into a design feature. This is especially effective in areas where you want to make a statement, like a kitchen backsplash or a feature wall.
Opting for Complementary Grout for a Subtle Effect
If a bold statement isn't your style, a complementary grout color offers a more understated elegance. This is where you choose a grout that harmonizes with the travertine's tones without creating a stark contrast. Think of a soft sand grout with a noce travertine, or a light taupe with a gold travertine. This approach emphasizes the natural beauty of the stone itself, creating a serene and sophisticated atmosphere. It’s a classic choice that rarely goes out of style.
Testing Grout Colors Before Full Application
Before you commit to a large batch of grout, always test your chosen color. Grout colors can look different in the packaging than they do when mixed and applied. It's a good idea to mix a small sample and apply it to a scrap piece of travertine or an inconspicuous area of your installation. Let it dry completely, as grout color often lightens as it cures. This step can save you from a costly mistake and ensure you're happy with the final result. You can often get small sample packets from tile suppliers.
Understanding Grout Color Variations
It's important to remember that natural stone like travertine has inherent variations. This means that even with the same grout color, the final appearance can differ slightly from one installation to another. Factors like the specific batch of travertine, the lighting in the room, and even the way the grout is mixed and applied can influence the final hue. Embrace these subtle differences; they are part of what makes natural stone so unique and beautiful. For instance, a project using Scabos Travertine might have a slightly different grout appearance than one using Ivory Travertine, even with the same grout color.
Case Study: The Modern Farmhouse Kitchen
A client wanted a modern farmhouse kitchen with a timeless feel. They chose a tumbled ivory travertine for the backsplash. Initially, they considered a dark grout for contrast, but after testing, they found it made the small tiles look too busy. Instead, they opted for a light, warm beige grout that closely matched the travertine. The result was a soft, inviting backsplash that made the kitchen feel larger and more cohesive, perfectly complementing the white cabinetry and wooden accents. It was a subtle choice that made a huge difference.
Case Study: The Luxury Bathroom Retreat
For a high-end bathroom renovation, the homeowner selected a honed silver travertine for the floor and shower walls. They wanted a sophisticated, spa-like atmosphere. A dark, almost black grout was chosen to create a dramatic contrast, highlighting the unique veining of the silver travertine. This bold choice gave the bathroom a luxurious, contemporary edge, making the stone the undeniable focal point. It proved that the right grout color can truly transform a space.
Troubleshooting Common Grouting Issues
Even with the best preparation, sometimes things don't go exactly as planned when grouting travertine. Don't worry, most common issues have straightforward solutions. Let's tackle them head-on so you can achieve that flawless finish you're after.
Addressing Grout Shrinkage or Cracking
This is a common headache, often caused by mixing the grout too wet or applying it too thickly. If you notice small cracks or shrinkage, it means the grout didn't set properly. For minor issues, you might be able to carefully fill the cracks with a bit more grout mixture. If it's widespread, you may need to remove the affected grout and reapply it, paying close attention to the mixing ratios. Always follow the manufacturer's instructions for mixing grout precisely.
Fixing Uneven Grout Lines
Uneven grout lines can really detract from the beauty of your travertine. This usually happens if spacers weren't used consistently or if the grout wasn't applied evenly. If the grout is still wet, you might be able to carefully scrape away the excess with a grout saw or a putty knife. For cured grout, you'll likely need to remove the uneven sections using a grout saw and then reapply grout to those specific areas. Consistency is key here, so take your time. If you're looking for new tiles to start with, consider exploring options like buy marble tiles online USA for a high-quality foundation.
Removing Grout Stains from Travertine
Travertine's porous nature means it can pick up stains easily, especially from colored grout. If you catch a stain while the grout is still fresh, a damp sponge should do the trick. For set-in stains, you might need a specialized stone cleaner. Always test any cleaner in an inconspicuous spot first. Some stains might be permanent, which is why proper sealing after grouting is so important.
Dealing with Grout Haze That Won't Disappear
That cloudy film left behind after cleaning? That's grout haze. It usually means you didn't rinse thoroughly enough or you waited too long to do the initial cleanup. A clean, damp sponge or microfiber cloth is your best friend here. For stubborn haze, a commercial grout haze remover can be very effective. Just be sure to follow the product's instructions carefully and rinse well afterward.
Repairing Chipped or Damaged Grout
Accidents happen! If you chip or damage a section of grout, don't panic. You can often repair it by carefully removing the damaged material with a grout saw or utility knife, cleaning the area, and then applying a small amount of new grout mixture. Let it cure fully before cleaning the surrounding tile. This is a great way to address surface etching from acidic cleaners or other minor damage.
Revisiting the Sealing Process for Protection
If you're experiencing persistent staining or haze issues, it might be time to re-evaluate your sealing. A good quality stone and grout sealer is your first line of defense against many common problems. If your current sealer isn't performing well, consider applying a new, high-quality product. Proper sealing can prevent many future headaches.
When to Seek Professional Assistance
While many grouting issues are DIY-friendly, sometimes it's best to call in the pros. If you're dealing with widespread cracking, significant staining that won't budge, or if you're simply not comfortable tackling the repairs yourself, a professional tile installer can save you time, frustration, and potentially costly mistakes. They have the tools and experience to get it right the first time.
Maintaining Your Newly Grouted Travertine
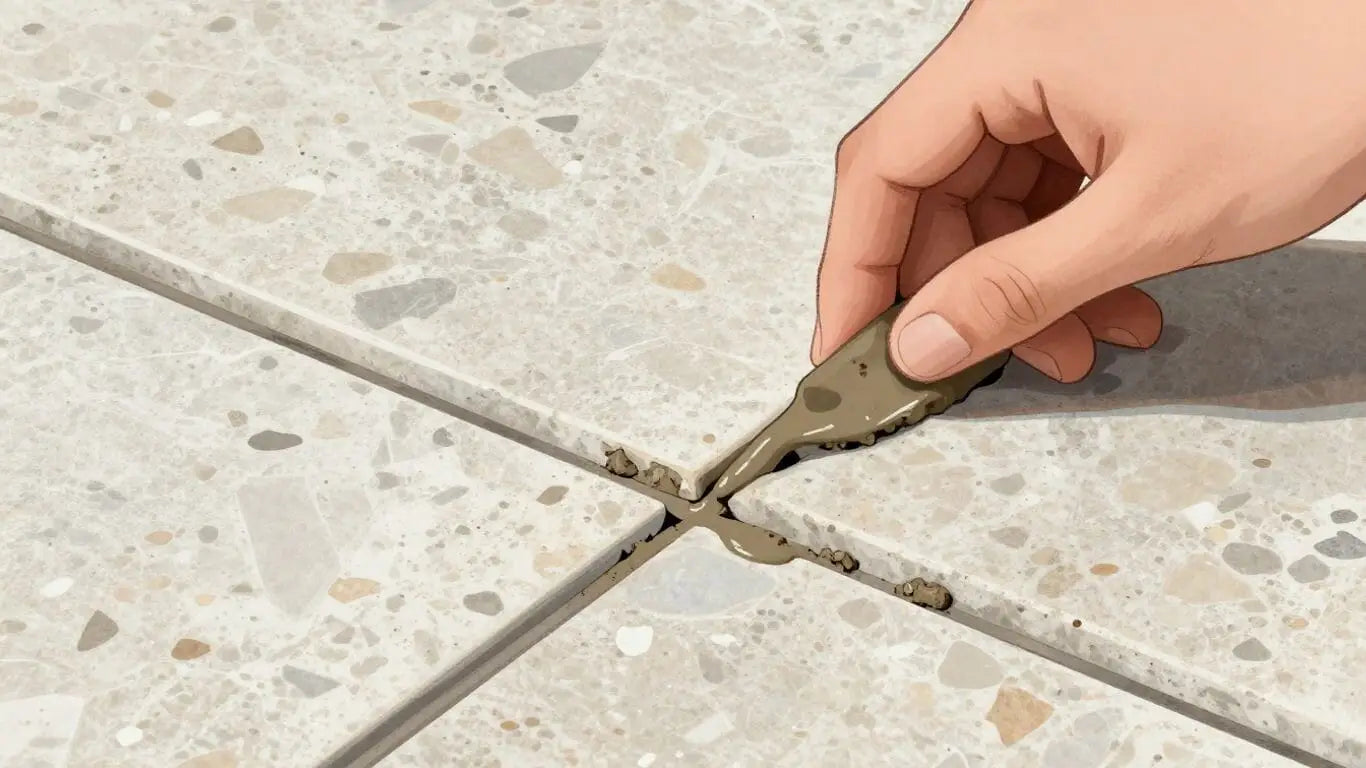
So, you've finished grouting your beautiful travertine. Awesome job! But wait, the work isn't quite done yet. Keeping that grout looking sharp and your travertine protected is key to making sure your hard work pays off for years to come. Think of it like this: you wouldn't buy a fancy car and then never change the oil, right? Same idea here. Proper upkeep is what separates a good job from a truly stunning one.
Regular Cleaning Routines for Travertine
Daily sweeping or vacuuming is your first line of defense. Little bits of grit and dirt can act like sandpaper on your travertine over time. So, get into the habit of giving your floors a quick sweep every day. It takes maybe two minutes, but it makes a huge difference. For a deeper clean, a light mopping a few times a week is usually plenty. The goal is to keep it clean without overdoing it.
Using Appropriate Cleaning Solutions
This is super important. Travertine is natural stone, and it's porous. That means it can soak up liquids and react to harsh chemicals. Forget the bleach, ammonia, or vinegar. Those can actually etch the stone and damage the grout. You want a pH-neutral cleaner specifically made for natural stone. It's gentle but effective. You can find great options online or at your local tile store. If you're looking for quality stone cleaners, check out what's available at Surfaces Galore.
The Importance of Prompt Spill Cleanup
Accidents happen, especially in kitchens and bathrooms. If you spill something, especially something colored like wine, coffee, or oil, clean it up immediately. Don't let it sit there and soak in. Grab a clean cloth and blot it up. For tougher spills, use your pH-neutral stone cleaner. Acting fast is way easier than trying to fix a stain later.
Reapplying Sealer as Needed
Remember all that sealing you did? Great! But sealers don't last forever. Depending on how much foot traffic you have and what kind of cleaners you use, you'll need to reapply it periodically. A good rule of thumb is to re-seal about once a year. You can test if it's time by dripping a little water on the surface. If it beads up, you're good. If it soaks in and darkens the stone, it's time to reseal. This step is vital for preventing stains and moisture damage.
Protecting Travertine from Harsh Chemicals
We touched on this with cleaning solutions, but it's worth repeating. Be mindful of everything that comes into contact with your travertine. Even things like certain bathroom cleaners or kitchen degreasers can be too harsh. Always read the labels and, when in doubt, stick to products designed for natural stone. Your travertine will thank you for it.
Avoiding Abrasive Cleaning Tools
Scrub brushes with stiff bristles? Steel wool? Nope. Those can scratch the surface of your travertine and even damage the grout. Stick to soft cloths, microfiber mops, and soft-bristled brushes. Gentle cleaning is the name of the game here. You want to maintain that beautiful finish, not wear it down.
Ensuring the Longevity of Your Grout Installation
Taking these simple maintenance steps seriously will make a world of difference. It's not about spending hours cleaning; it's about using the right methods and products consistently. Proper care means your grout lines stay strong and your travertine tiles keep looking their absolute best for years to come. It's an investment in the beauty and value of your home.
Case Study: The Miller Residence
The Millers installed beautiful Noce Travertine tiles in their kitchen and dining area. Initially, they were diligent with cleaning, using a standard floor cleaner. Within a year, they noticed the grout lines were starting to look dingy and some minor staining appeared on the tiles. After consulting with a stone care specialist, they switched to a pH-neutral cleaner and started sealing the travertine annually. They also made sure to wipe up spills immediately. Six months later, the difference was remarkable. The grout looked brighter, and the tiles had a renewed luster. They realized that the right maintenance routine was just as important as the initial installation.
Case Study: The Chen Family Patio
The Chens opted for tumbled travertine pavers for their outdoor patio. They assumed outdoor meant 'care-free.' After a couple of harsh winters, they noticed some grout erosion and discoloration. They learned that outdoor travertine still needs attention. They now sweep regularly, use a specialized outdoor stone cleaner, and ensure proper drainage is maintained. They also reseal the pavers every 18 months. The patio is now back to its beautiful, original state, ready for summer gatherings.
Understanding Grout Types for Travertine
Choosing the right grout is a big deal for your travertine project. It's not just about filling gaps; it's about making sure your beautiful stone lasts and looks its best. Let's break down the options so you can pick the perfect match.
Exploring Sanded vs. Unsanded Grout Options
This is a fundamental choice. Sanded grout has fine sand mixed in, which gives it more strength and makes it less likely to shrink. It's generally the go-to for wider grout joints, typically 1/8 inch or larger. Why? The sand helps fill those wider spaces without cracking. It's a robust option for floors and areas that see a lot of foot traffic.
Unsanded grout, on the other hand, is smoother. It doesn't have the sand aggregate. This makes it ideal for very narrow grout lines, usually less than 1/8 inch. Think of delicate mosaic tiles or polished travertine where you want to avoid any scratching. Using unsanded grout in wider joints can lead to shrinkage and cracking, so it's important to match it to your joint width. For polished or honed travertine, unsanded grout is often recommended to prevent any surface scratching. Learn more about tile preparation.
The Benefits of Epoxy Grout for Travertine
Epoxy grout is a bit of a different beast. It's made from epoxy resins and a filler powder. This makes it incredibly durable, non-porous, and resistant to stains and chemicals. If you're grouting a high-moisture area like a shower or a busy kitchen backsplash, epoxy is a fantastic choice. It's practically maintenance-free and won't discolor over time. The downside? It's a bit trickier to work with and usually more expensive than cementitious grouts. It also cures much faster, so you need to be prepared to work quickly.
Choosing Cementitious Grout Formulations
This is your standard, go-to grout. Cementitious grout is a mix of cement, fillers, and pigments. It's widely available, comes in many colors, and is generally the most budget-friendly option. It's suitable for most interior applications. You'll find it in both sanded and unsanded varieties, so you can pick based on your joint size. It's a reliable choice for many travertine projects, offering a good balance of performance and cost.
Considering Pre-Mixed Grout Advantages
Pre-mixed grout is exactly what it sounds like: grout that comes ready to use right out of the tub. This is a huge time-saver and simplifies the process, especially for DIYers. You don't have to worry about mixing ratios or consistency. It's often a good choice for smaller projects or when you want to avoid the mess of mixing. However, pre-mixed grouts can sometimes be more expensive and may have a shorter shelf life than powdered versions. They are typically available in a range of colors suitable for travertine.
Grout Additives for Enhanced Performance
Want to give your grout a little boost? Additives can really make a difference. Latex or polymer additives can increase grout strength, flexibility, and water resistance. This is especially helpful for areas that might experience some movement or moisture. They can also improve adhesion and reduce shrinkage. Always follow the manufacturer's recommendations for the correct ratio of additive to grout.
Matching Grout Type to Joint Width
This is critical for a successful grout job. As we've touched on, sanded grout is for wider joints (1/8"+) and unsanded is for narrower ones (<1/8"). Epoxy grout is versatile and can handle a range of joint sizes. Using the wrong type can lead to cracking, shrinking, or even damage to your travertine tiles. Always measure your grout lines before you buy your grout.
Consulting Product Specifications for Travertine Compatibility
Before you buy, always check the grout manufacturer's specifications. They'll tell you exactly what type of tile the grout is suitable for and what joint widths it's designed for. Some grouts might have specific recommendations for natural stones like travertine. This step helps prevent costly mistakes and ensures your grout performs as it should. For example, some lighter-colored travertine might benefit from a white thin-set mortar to avoid discoloration, and the right grout choice complements this. Explore travertine tile options.
Case Study: The Shower Upgrade
Sarah wanted to update her master bathroom shower. She chose beautiful travertine tiles for the walls and floor. The grout lines were relatively narrow, around 1/16th of an inch. After researching, she decided on an unsanded, high-performance cementitious grout in a soft beige color that complemented the travertine's natural tones. She also opted for a grout additive to boost its water resistance, knowing it was a high-moisture area. The result? A stunning, durable shower that looked professionally done, with grout lines that were perfectly filled and resistant to water damage. She mentioned how the additive made the grout easier to clean too.
Case Study: The Patio Project
Mark was redoing his outdoor patio with travertine pavers. The joints between the pavers were wider, about 1/4 inch. He needed a grout that could withstand the elements and foot traffic. He chose a sanded, exterior-grade grout specifically designed for pavers. He also made sure to use a flexible grout additive to accommodate any slight movement from temperature changes or ground settling. This choice prevented cracking and ensured the grout held up beautifully through different seasons. He was happy he didn't have to worry about constant repairs.
Preparing the Travertine Surface Before Grouting
Before you even think about mixing grout, let's get that travertine surface prepped. This step is super important, like making sure your foundation is solid before building a house. Get this wrong, and you'll be dealing with problems down the line. We want your travertine to look amazing, right? So, let's do this properly.
Ensuring Thin-Set Mortar Has Fully Cured
This is non-negotiable. Your thin-set mortar needs time to do its job. It's what holds your beautiful travertine tiles in place. If you rush this, you risk tiles shifting or even cracking later. We recommend waiting at least 24 to 48 hours after laying your tiles. Some manufacturers might say longer, so always check their instructions. Patience here pays off big time. Think of it as letting your new floor settle in properly. You can find great travertine tiles at Surfaces Galore to start your project right. buy marble tiles USA
Removing Excess Thin-Set from Tile Edges
After the mortar cures, you might see little bits of it sticking out from under the tile edges. These need to go. If you grout over them, you'll end up with uneven grout lines and a less-than-perfect finish. Use a putty knife or a grout saw to carefully scrape away any hardened thin-set. Be gentle; you don't want to chip the travertine edges. This makes sure your grout lines will be clean and consistent.
Cleaning Debris from Grout Joints
Your grout lines need to be clean and clear for the grout to adhere properly. Sweep or vacuum out any dust, small stones, or bits of thin-set that might have fallen into the joints during installation. A clean joint means a strong bond for your grout. It’s a small step, but it makes a big difference in the final look and durability.
Checking for Loose Tiles or Grout Lines
Give each tile a gentle tap. Do any sound hollow? Do any wiggle? If you find loose tiles, you'll need to address that before grouting. Re-adhere them with more thin-set and let it cure again. Also, check existing grout lines (if any) for cracks or crumbling. These areas need to be cleaned out and refilled with grout. A solid base is key.
Wiping Down the Travertine Surface
Once the joints are clear and any loose tiles are fixed, give the entire travertine surface a good wipe-down. Use a slightly damp cloth or sponge. This removes any fine dust or residue left from the previous steps. You want a clean canvas for your grout. Make sure the surface is dry before you start grouting, though.
Protecting Adjacent Surfaces from Grout
Don't forget to protect anything next to your tiled area. Use painter's tape or plastic sheeting to cover baseboards, countertops, or cabinets. Grout can be tough to remove once it dries, and you don't want to damage surrounding finishes. This simple step saves a lot of cleanup hassle later.
The Importance of a Clean Working Area
Finally, make sure your whole workspace is clean. Remove any tools or materials not needed for grouting. A tidy area makes the process smoother and safer. It also helps prevent accidental spills or contamination of your grout mixture. A clean space leads to a clean job.
Case Study: The Kitchen Countertop Project
Sarah was renovating her kitchen and chose beautiful Ivory Travertine tiles for her backsplash. She was eager to grout, but her contractor advised her to wait a full 48 hours after the thin-set was applied. During that time, he meticulously scraped away any excess thin-set from the edges and vacuumed the joints. He also taped off the surrounding cabinets. The result? Perfectly clean grout lines and a backsplash that looked professionally installed, avoiding any damage to the adjacent cabinetry. This attention to detail made all the difference.
Achieving a Professional Finish with Grout
You've put in the work, and now it's time to make that travertine tile installation truly shine. Getting that grout just right is where the magic happens, transforming a good job into a masterpiece. It’s all about the details, the smooth lines, and that final, polished look that says 'professional.'
The Art of Smoothing Grout Lines
This is where patience pays off. You want those grout lines to be perfectly smooth and even. Think of it like frosting a cake – you want a consistent layer, no lumps or gaps. A well-smoothed grout line not only looks better but also helps protect the grout itself from wear and tear. It’s a small step that makes a huge difference in the overall appearance and longevity of your tile work. For a truly polished look, consider the finish of your travertine tiles. Whether you've chosen a tumbled, honed, or polished finish, the grout should complement it, not compete with it. For instance, with polished travertine, you'll want a grout finish that matches its sleekness.
Creating Crisp Edges Around the Installation
Sharp edges make a project look clean and intentional. This means carefully cleaning up any excess grout that gets onto the tile edges or adjacent surfaces. Use a damp sponge, working gently, to define the borders of your tiled area. This attention to detail prevents a messy, DIY look and gives your installation that high-end, finished feel. It’s the difference between a tiled area and a beautifully integrated design element.
Ensuring Consistent Grout Depth
Uneven grout depth can make even the most beautiful tiles look a bit off. The goal is to fill the joint completely, from the bottom to the tile surface, without overfilling. This consistency ensures that the grout lines are visually balanced and that the tiles sit evenly. When you're applying the grout with your float, a consistent angle and pressure will help achieve this uniformity. It’s a technique that comes with practice, but the results are worth it.
The Role of Patience in Achieving Perfection
Let's be honest, rushing through the final stages is tempting. But when it comes to grout, patience is your best friend. Take your time with the application, the cleaning, and the final touches. Rushing can lead to mistakes like removing too much grout from the joints or leaving behind stubborn haze. Slowing down allows you to be more precise and catch any imperfections before they become permanent. Remember, this is the final step before sealing, so you want it to be right.
Detailing Edges and Corners Meticulously
Corners and edges are often the most visible parts of a tiled area. Pay extra attention here. Use a smaller tool, like a grout saw or even a gloved finger, to carefully shape and smooth the grout in these tight spots. This meticulous detailing ensures that the grout lines flow smoothly around the entire installation, creating a cohesive and professional look. It’s these small, detailed areas that often distinguish a professional job from a DIY one.
Final Buffing for a Polished Look
Once the grout has had a chance to set up a bit, and you've done your initial cleaning, a final buffing can really make the tiles and grout pop. Use a clean, dry microfiber cloth to gently buff the tile surfaces. This removes any lingering haze and brings out the natural sheen of the travertine. It’s a satisfying step that reveals the true beauty of your work. For those looking to buy marble tiles online in the USA, remember that the finish of the grout plays a huge role in how the entire floor looks.
Case Study: The Kitchen Backsplash Transformation
Sarah, a homeowner in Austin, Texas, was redoing her kitchen backsplash. She chose a beautiful tumbled travertine tile. Initially, she was worried about the grout, fearing it would look messy. She followed the steps for achieving a professional finish, taking her time with smoothing the grout lines and carefully cleaning the edges. The result? A stunning backsplash that looked like it was professionally installed. "I couldn't believe the difference taking those extra few minutes made," she said. "The grout lines are so clean, and it really makes the travertine pop."
Case Study: The Bathroom Floor Upgrade
Mark, a contractor in Florida, was working on a bathroom floor using honed travertine. He knew that for a bathroom, a perfect grout finish was key to both aesthetics and preventing water issues. He focused on ensuring consistent grout depth and meticulously detailed the edges around the tub and vanity. The client was thrilled with the flawless finish, noting how the clean grout lines made the bathroom feel more luxurious and spacious. This attention to detail is what sets apart quality installations, whether you're using travertine or looking to buy marble tiles online in the USA.
Advanced Grouting Techniques for Travertine
Using Grout Bags for Precise Application
Want to get grout exactly where you want it? Grout bags are your best friend. Think of them like piping bags for cakes, but for your tile. You fill the bag with your mixed grout, snip the tip, and then squeeze it right into the joints. This method is fantastic for keeping things neat, especially on intricate patterns or when you want a really clean line. It helps avoid getting excess grout all over your beautiful travertine tiles. It’s a game-changer for a professional look.
Creating Decorative Grout Lines
Who says grout has to be boring? You can actually make your grout lines a design feature. This involves using specialized tools or techniques to shape the grout as you apply it. For instance, you can create a slightly concave or convex finish to the grout line. This adds a subtle dimension that really makes the tile work pop. It’s a detail that shows you’ve paid attention to the finer points.
Working with Colored Grouts for Artistic Effects
Color is powerful, and grout is no exception. Moving beyond standard beige or gray, colored grouts can dramatically change the look of your travertine. Want a bold contrast? Try a dark grout on light travertine, or vice versa. For a more subtle, blended look, choose a color that closely matches your tile. Experimenting with color can totally transform the feel of your space. You can find a wide range of options if you're looking to buy marble tiles online USA and want to match them perfectly.
Applying Grout to Intricate Patterns
Mosaic tiles, herringbone patterns, or custom designs? These can be tricky. The key is patience and precision. Using a grout bag is highly recommended here. Work in small sections, and use a damp sponge to carefully clean up any excess without disturbing the grout in the joints. It takes time, but the result is worth it.
Techniques for Large Format Travertine Tiles
Large format tiles mean fewer grout lines, but those lines are more prominent. For these, you want to ensure your grout application is perfectly even. A good grout float is vital for spreading the grout evenly across the larger surface and into the wider joints. Pay extra attention to maintaining consistent joint width, as any variation will be more noticeable.
Ensuring Seamless Transitions Between Areas
When grouting areas that meet other surfaces or different tile types, the transition needs to be clean. This might involve using a grout color that bridges the two materials or using a flexible sealant in the transition joint instead of grout. Careful application and a steady hand are needed to make these transitions look intentional and polished.
Advanced Cleaning Methods for Difficult Spots
Sometimes, despite your best efforts, grout can be stubborn. For dried-on grout haze that won't budge with a sponge, you might need a specialized grout haze remover. Always test these in an inconspicuous area first. For very tough spots, a grout saw can help carefully remove hardened grout without damaging the tile. Remember, repairing travertine tile might be necessary if grout removal goes too far.
Case Study: The Artisan Kitchen Backsplash
A client wanted a unique backsplash using small, intricate travertine mosaics. Standard application methods were too messy. We opted for grout bags to precisely fill each tiny joint. Then, using a very fine-tipped tool, we carefully shaped each grout line before it set. The result was a stunning, clean mosaic that looked professionally done, highlighting the natural beauty of the travertine without any grout smudges.
Case Study: The Modern Living Room Floor
For a large-format travertine tile floor in a modern living room, the homeowner desired a minimalist look. We chose a grout color that was a near-perfect match to the travertine tiles. This created a very subtle, almost seamless appearance. The advanced technique here was the meticulous cleaning process, using a high-quality grout cleaner and microfiber cloths to ensure absolutely no haze was left behind, making the floor look like one continuous stone surface.
Safety Precautions During Grouting
Working with grout can be a rewarding DIY project, but safety should always come first. Travertine, while beautiful, requires careful handling, and so does the grout that binds it. Let's make sure you're protected while you create that stunning finish. Think of it as prepping for success, just like picking out the perfect buy marble tiles online USA for your space.
Wearing Protective Gloves and Eyewear
Grout can irritate your skin and eyes. It's not just about comfort; it's about preventing potential harm. Always wear sturdy, waterproof gloves to keep your hands clean and safe from chemicals. Safety glasses are non-negotiable. Grout can splash unexpectedly, and protecting your eyes is paramount. A simple pair of safety glasses can save you a lot of trouble.
Ensuring Adequate Ventilation
Many grout products release fumes. You want to breathe easy while you work. Open windows and doors to create a cross-breeze. If you're working in a confined space, consider using a fan to keep the air circulating. Good ventilation helps dissipate any airborne particles and fumes, making the environment safer and more pleasant.
Handling Grout Materials Safely
Read the labels. Seriously. Every grout product has specific handling instructions. Understand what you're working with before you start mixing. Some materials might require special care. Keep all materials out of reach of children and pets. Proper storage is part of safe handling.
Avoiding Skin Contact with Uncured Grout
We mentioned gloves, but it bears repeating. Uncured grout can cause skin irritation or even burns. If you do get grout on your skin, wash it off immediately with plenty of soap and water. Don't let it sit there. This is especially important if you have sensitive skin. Remember, the goal is a beautiful finish, not a rash.
Proper Disposal of Grout Waste
Don't just wash all that excess grout down the drain. It can harden and clog your pipes. Let excess grout dry in a bucket, then dispose of the solid waste in your trash. Check local regulations for specific disposal guidelines. Responsible disposal protects your plumbing and the environment.
Ergonomic Considerations for Repetitive Tasks
Grouting involves a lot of repetitive motion. Your back, knees, and wrists will thank you for taking breaks. Use knee pads if you're working on the floor. Pace yourself. Don't try to grout an entire room in one go if it means straining yourself. Listen to your body. A little planning goes a long way in preventing aches and pains.
Awareness of Potential Slip Hazards
Water and grout are slippery. Keep your work area as clean and dry as possible between mixing and application steps. Clean up any spills immediately. Be mindful of where you step, especially if you're working on a floor that's already partially grouted. A simple mistake can lead to a fall. Always be aware of your surroundings.
Case Study: The Kitchen Backsplash Project
Sarah decided to add a beautiful travertine backsplash to her kitchen. She gathered her materials, including a new grout mix. Excited, she skipped the gloves for the first few minutes, thinking it would be faster. Within ten minutes, her hands felt itchy and red. She quickly washed them and put on gloves. Later, while cleaning up, she noticed a small amount of grout had splashed near her eye. Thankfully, she was wearing safety glasses and experienced no irritation. This experience taught her the importance of following all safety steps, no matter how small the task seems. She also made sure to let the excess grout dry in a bucket before disposing of it, avoiding a plumbing headache.
Case Study: The Bathroom Floor Challenge
Mark was retiling his bathroom floor with travertine. He was working alone and focused on getting the tiles laid perfectly. He spent hours on his knees, and by the end of the day, his back was aching. He realized he hadn't taken any breaks and hadn't used knee pads. The next day, he felt stiff and sore. For the grouting phase, he made a conscious effort to take short breaks every 30 minutes, used knee pads, and ensured the area was well-ventilated. He also made sure to clean up any water spills promptly to prevent slips. While the grout work was still tiring, he felt much better prepared and safer thanks to these adjustments.
Remember, taking a few extra minutes to prepare and follow safety guidelines can prevent injuries and ensure your beautiful travertine project is a success from start to finish. Don't cut corners when it comes to your well-being.
The Lifespan of Travertine Grout
Your beautiful travertine installation is a long-term investment, and the grout is a key part of its enduring appeal. Understanding how long your grout should last and what affects its lifespan is important for maintaining that pristine look. With the right care, your grout can look great for years, complementing your natural stone beautifully.
Factors Affecting Grout Durability
Several things play a role in how well your grout holds up over time. It's not just about the grout itself, but also how it's installed and what it's exposed to. Think of it like this: a well-built house lasts longer, right? The same applies to your grout.
- Initial Installation Quality: Was the grout mixed correctly? Was it fully worked into the joints? A good start makes a big difference.
- Type of Grout Used: Different grout types have different strengths. Epoxy grout, for example, is known for its toughness and resistance to stains and moisture.
- Environmental Exposure: Is the area high-traffic? Is it exposed to moisture, chemicals, or extreme temperature changes? Bathrooms and kitchens see more action than a guest bedroom.
- Maintenance Routine: Regular cleaning and timely sealing are like giving your grout a good skincare routine – it keeps it looking fresh and prevents damage.
Understanding Wear and Tear Over Time
Over the years, even the best-installed grout will show some signs of use. This is normal! You might notice slight discoloration, especially in areas with heavy foot traffic or spills. Sometimes, the grout can become a bit softer or more prone to collecting dirt. This gradual wear is a natural process, but it doesn't mean your travertine is failing.
Signs That Grout Needs Attention
Keep an eye out for these indicators. They're your grout's way of telling you it might need a little TLC:
- Visible Cracks or Crumbling: Small cracks can appear over time, especially if the grout was not mixed with the right water ratio or if the substrate shifted slightly. Crumbling grout is a clear sign it's degrading.
- Discoloration and Stains: If your grout looks significantly darker or has persistent stains that cleaning won't remove, it might be absorbing too much and needs a refresh.
- Grout Pulling Away from Tile Edges: This is a more serious sign that the bond is weakening. It can lead to loose tiles and water infiltration.
- Excessive Haze or Grime Buildup: If cleaning becomes a constant battle and the grout always looks dirty, its protective qualities might be diminished.
The Role of Regular Maintenance
Consistent care is your best friend when it comes to grout longevity. Think of it as preventative medicine for your floors. A simple routine can save you a lot of trouble down the line. For instance, promptly cleaning up spills, especially acidic ones like wine or lemon juice, prevents them from setting into the porous grout. Regular sweeping or vacuuming also removes abrasive grit that can wear down the grout over time.
Preventing Premature Grout Failure
Want to avoid having to regrout sooner than expected? Focus on these key areas:
- Proper Sealing: Always seal your grout after installation and reapply sealer periodically. This is your first line of defense against stains and moisture. For areas like bathrooms and showers, this step is non-negotiable.
- Use Appropriate Cleaners: Stick to pH-neutral cleaners designed for natural stone. Harsh chemicals can break down the grout's structure.
- Address Moisture Issues: In wet areas, ensure proper ventilation and drainage. Standing water can degrade grout over time.
When Grout Replacement Becomes Necessary
Sometimes, despite your best efforts, grout reaches the end of its useful life. If you notice widespread cracking, crumbling, or significant discoloration that can't be cleaned, it might be time for a replacement. This is often a good opportunity to reassess your grout choice and consider a more durable option, like epoxy grout, especially for high-moisture areas. Replacing grout isn't a small task, but it can restore the integrity and beauty of your entire travertine installation. If you're looking to buy new tiles, perhaps some mixed travertine tiles to complement your refreshed grout, Surfaces Galore has a fantastic selection.
Extending the Life of Your Grout Installation
By understanding the factors that influence grout lifespan and implementing a consistent maintenance plan, you can significantly extend the life of your grout. This means enjoying the stunning look of your travertine for longer, with fewer worries about repairs. Remember, a little attention goes a long way in preserving the beauty and functionality of your natural stone surfaces. Investing in quality materials and proper care from the start, like choosing durable travertine tiles, sets the stage for a long-lasting, beautiful floor.
Grouting Travertine in Wet Areas
When you're working with travertine in places like bathrooms, showers, or even around a pool, you need to be extra careful with the grout. Water is the enemy of grout if it's not protected. We're talking about making sure your grout job can stand up to moisture without falling apart or getting gross.
Selecting Waterproof Grout for Bathrooms and Showers
This is your first line of defense. You can't just use any old grout here. You need something specifically designed to resist water. Look for epoxy grouts or high-performance cementitious grouts with added polymers. These are built to handle constant dampness and prevent water from seeping through to the substrate. Think of it as giving your travertine a waterproof suit. It’s a small detail that makes a huge difference in the long run. If you're looking for durable tiles for these areas, check out our Malibu Travertine tiles.
Ensuring Proper Substrate Preparation for Wet Areas
Before you even think about grout, the surface underneath needs to be perfect. This means a properly installed waterproofing membrane. No exceptions. This membrane acts as a barrier, stopping water from getting behind your tiles. If your substrate isn't prepped right, even the best grout will eventually fail. It’s like building a house on a shaky foundation – it’s just a matter of time before things go wrong. A solid, waterproofed base is non-negotiable for any wet area installation.
Techniques for Achieving Watertight Grout Lines
Application is key here. You want to pack the grout into the joints completely, leaving no air pockets. Use a grout float at a consistent angle to push the grout deep into the gaps. Work methodically, ensuring every joint is filled. After the initial cleanup, you might consider a secondary grout application in any areas that look a bit low. The goal is a smooth, continuous surface that water can't penetrate. This is where patience really pays off. For a project that demands this level of detail, consider our premium travertine tiles.
The Importance of Adequate Sealing in Damp Environments
Even with waterproof grout, sealing is your second layer of protection. Once the grout has fully cured (and this is important – don't rush it!), apply a high-quality penetrating sealer specifically designed for natural stone and grout. This sealer soaks into the pores of both the travertine and the grout, creating a barrier against moisture and stains. For bathrooms and showers, you might need to reapply sealer more often than in drier areas. Think of it as giving your travertine a regular spa treatment to keep it looking its best.
Preventing Mold and Mildew Growth
Travertine and grout can be a breeding ground for mold and mildew if moisture gets trapped. Proper ventilation is your best friend here. Ensure your bathroom has a good exhaust fan that's used during and after showers. For tiled areas like shower floors, make sure there's adequate slope for water to drain away quickly. Choosing the right grout color can also help mask minor discoloration that might occur over time, though prevention is always better than cure. Regular cleaning with a mild, stone-safe cleaner will also go a long way.
Choosing Grout Colors That Hide Moisture Issues
While not a substitute for proper installation and sealing, grout color can play a role in how well your wet area installation holds up visually. Darker grout colors, like charcoal, deep brown, or even some grays, tend to hide water spots and minor discoloration better than lighter shades. This can make maintenance seem easier and keep your space looking cleaner for longer between deep cleans. Consider colors that complement your travertine, like a rich noce or a deep gold, for a sophisticated look that’s also practical.
Specific Challenges of Grouting Shower Floors
Shower floors are arguably the most challenging area. They deal with constant water exposure, foot traffic, and often have smaller tiles or mosaics, meaning more grout lines. The slope for drainage is critical. You need to ensure the grout is packed tightly and sealed thoroughly. Mosaics, especially, can be tricky because of the sheer number of joints. Take your time, work in small sections, and don't be afraid to go back over areas that don't look perfectly filled. A well-grouted shower floor is a testament to careful work and attention to detail.
Grouting Travertine for Outdoor Applications
When you're looking to bring the natural beauty of travertine outside, whether it's for a patio, walkway, or pool deck, the grouting process needs a bit of extra thought. Outdoor travertine isn't just about looks; it's about standing up to the elements. That means choosing the right materials and techniques is key to a long-lasting, beautiful finish.
Using Exterior-Grade Grout for Patios and Walkways
For any outdoor travertine project, you absolutely need grout that's built for the outdoors. Standard indoor grout just won't cut it. Exterior-grade grouts are formulated to handle temperature swings, moisture, and UV exposure without breaking down. Think of it as giving your travertine the best possible defense against the weather. When you're shopping, look for products specifically labeled for exterior use. This is a small step that makes a huge difference in the longevity of your project.
Considering Freeze-Thaw Cycles
If you live in a climate that experiences freezing temperatures, you know how brutal they can be. Freeze-thaw cycles are a major enemy of outdoor installations. Water seeps into tiny cracks, freezes, expands, and can push your tiles and grout apart. Choosing a flexible grout is a smart move here. It can expand and contract slightly with temperature changes, reducing the risk of cracking. Some exterior grouts are naturally more flexible, but additives can also boost this quality. It’s about building resilience right into the joints.
Ensuring Proper Drainage to Protect Grout
Water is a beautiful thing, but too much of it sitting around your travertine can cause problems. Proper drainage is non-negotiable for outdoor installations. This means ensuring your base is sloped correctly so water runs away from the tiles and grout lines, not pools on them. If water sits, it can freeze and expand, or it can lead to mold and mildew issues. Good drainage is like giving your grout a long, dry life.
Selecting Durable and Weather-Resistant Grout Colors
Outdoor grout colors need to be tough, not just in composition but in appearance too. UV rays can fade some colors over time, making your beautiful patio look tired. Opt for grout colors that are known for their fade resistance. Earthy tones often work well with travertine and tend to hide dirt and discoloration better than very light or very dark colors. Consider how the color will look after a few seasons, not just when it's freshly laid.
Techniques for Wider Grout Joints in Outdoor Settings
Outdoor travertine, especially pavers, often have slightly wider grout joints than indoor tiles. This is partly for aesthetics and partly for flexibility. When grouting wider joints, you need to make sure you're filling them completely. A grout float is your best friend here, used at an angle to really push the grout deep into the gaps. Don't be shy with the grout; you want those joints packed solid for stability. It’s about creating a strong bond that can withstand outdoor pressures.
The Role of Flexible Grout in Outdoor Installations
Flexibility is a superpower for outdoor grout. As mentioned, temperature fluctuations and ground movement can put stress on grout lines. Flexible grout, often achieved through specific formulations or additives, acts like a shock absorber. It can bend and move slightly without cracking, which is vital for patios, walkways, and pool decks that experience a lot of environmental change. It’s a proactive measure against future damage.
Maintaining Outdoor Travertine Grout
Just like indoor grout, outdoor grout needs care. Regular cleaning is important to prevent dirt and grime buildup. Promptly address any spills, especially from things like barbecue sauces or pool chemicals. Re-sealing your travertine and grout periodically is also a good idea. This helps maintain its protective barrier against stains and moisture. Think of it as ongoing maintenance to keep your outdoor oasis looking its best for years to come.
Case Study: A Patio Transformation
Sarah and Tom wanted to upgrade their backyard patio. They chose beautiful travertine pavers for their natural look and durability. Initially, they considered using a standard grout, but after consulting with a local landscaping supplier, they opted for a high-quality, flexible exterior-grade grout in a complementary sandy beige color. They made sure the base was properly prepared with excellent drainage before applying the grout. Two years later, their patio still looks fantastic, with no signs of cracking or discoloration, even after harsh winters. They attribute its success to using the right grout and paying attention to drainage.
Choosing the right grout for outdoor travertine isn't just about filling gaps; it's about creating a durable, weather-resistant surface that enhances your home's exterior appeal for years to come. Don't cut corners on materials or preparation.
Ready to create your own stunning outdoor space? Explore our collection of premium travertine tiles perfect for any patio or walkway. We have options that will make your outdoor living area truly shine.
The Aesthetic Impact of Grout Lines
Think of grout lines as the punctuation marks of your tile design. They define the shapes, guide the eye, and can dramatically alter the overall feel of your space. Getting them right is key to a professional, polished look. It's not just about filling gaps; it's about artful design.
How Grout Lines Define the Tile Pattern
Grout lines are the silent artists that bring your tile layout to life. Whether you've chosen a classic subway pattern, a complex mosaic, or a simple grid, the grout is what makes those shapes pop. It separates each tile, creating a visual rhythm that can be subtle or bold, depending on your choices.
Creating a Sense of Flow with Grout Color
The color of your grout plays a huge role in how your tiles are perceived. A grout that closely matches your tile can make the entire surface look like one continuous piece, creating a sense of expansive flow. This is perfect for smaller spaces where you want to avoid visual clutter. Imagine the smooth, uninterrupted look of Ivory Travertine Tiles laid with a matching grout – it just expands the room.
The Visual Effect of Thick vs. Thin Grout Lines
| Grout Line Thickness | Visual Effect |
|---|---|
| Thin (1/16" - 1/8") | Creates a modern, minimalist look; emphasizes the tile. |
| Medium (1/8" - 1/4") | Offers a balanced look; good for most tile types. |
| Thick (1/4" +) | Provides a rustic or traditional feel; highlights grout. |
Thin grout lines offer a sleek, contemporary feel, making the tiles themselves the star. They create a more unified surface. On the other hand, thicker grout lines can add a rustic charm, reminiscent of older homes or more traditional designs. They draw attention to the pattern and texture of the grout itself.
Using Grout to Highlight Travertine's Natural Beauty
Travertine is known for its unique, earthy tones and natural variations. The right grout color can really make these features stand out. A slightly contrasting grout can emphasize the natural pits and textures of travertine, giving it a more dimensional and authentic look. It’s like adding a frame to a beautiful painting.
Achieving a Seamless Look with Matching Grout
For a truly cohesive and expansive feel, matching your grout color to your travertine is a fantastic strategy. This technique visually merges the tiles, making the floor or wall appear larger and more unified. It’s a popular choice for creating a serene, spa-like atmosphere in bathrooms or a sophisticated, open feel in living areas. This approach is often used when installing travertine tiles for flooring.
Making a Statement with Contrasting Grout
Don't shy away from contrast! Using a grout color that stands out against your travertine can create a bold, graphic statement. Think dark grout with light travertine, or vice versa. This technique highlights the individual tiles and the pattern of your installation. It's a great way to add personality and visual interest to a space. For example, a dark charcoal grout against a light silver travertine can create a striking modern look.
The Overall Contribution of Grout to the Design
Ultimately, grout is not an afterthought; it's an integral part of the design. It ties everything together, influences the perceived size of the room, and contributes significantly to the overall style and mood. Choosing your grout color and line width carefully is just as important as selecting the tiles themselves. It’s the detail that can truly make or break your tile project. For inspiration on how to integrate these elements, explore tile layout ideas.
When to Call a Professional for Grouting
So, you've tackled the travertine installation, and now it's time for the grout. It might seem like a straightforward step, but sometimes, calling in the pros is the smartest move. When does a DIY project cross the line into needing expert help? Let's break it down.
Assessing the Complexity of Your Project
Is your space a simple, square room, or are you dealing with intricate layouts, multiple angles, or a large area? Complex designs often require a level of precision that can be tough to achieve on your own. Think about custom patterns or areas with lots of cuts – these are prime candidates for professional attention. If you're looking at a large-scale installation, like a whole house or a commercial space, the sheer volume of work can be overwhelming. Professionals have the manpower and efficiency to handle these big jobs without sacrificing quality. For those seeking to buy marble tiles online in the USA, ensuring a professional installation is key to maintaining their value.
Recognizing When DIY Efforts Fall Short
Have you hit a snag? Maybe the grout isn't mixing right, or you're struggling to get those lines perfectly even. If you're spending more time troubleshooting than tiling, it might be time to step back. Uneven grout lines, inconsistent color, or grout that's drying too fast are all signs that the process might be beyond your current skill set. Don't let a few mistakes turn into a costly repair job. Sometimes, the cost of professional help upfront saves you money and headaches down the line.
The Benefits of Professional Expertise
Professionals bring more than just tools; they bring experience. They know the nuances of different grout types, how to work with travertine's unique properties, and how to avoid common pitfalls. They can ensure a flawless finish that stands the test of time. Improper installation can lead to issues like cracking or water damage, compromising the look and function of your tiled areas. Professionals have the know-how to guarantee a high-quality result.
Dealing with Large-Scale Installations
If your project involves a significant square footage, like a large kitchen floor, an expansive patio, or a commercial lobby, the time and effort required for proper grouting can be immense. Professionals are equipped to handle these large jobs efficiently, ensuring consistency across the entire area. They have the right tools and enough hands to get the job done right, without the fatigue that can lead to errors.
Handling Challenging Travertine Finishes
Some travertine finishes, like highly polished or uniquely textured surfaces, can be more sensitive during the grouting process. Professionals understand how to protect these delicate finishes and apply grout without causing damage or discoloration. They know which products are compatible and how to achieve the best aesthetic outcome for specific stone types.
When Time is a Critical Factor
Deadlines matter. If you have a tight schedule for completing your project, hiring professionals can be a lifesaver. They can often complete the grouting process much faster than a DIYer, allowing you to move on to the next stages of your renovation or construction without delay. This is especially true if you're looking to buy marble tiles online USA and need them installed promptly.
Ensuring a Flawless, Long-Lasting Result
Ultimately, the goal is a beautiful, durable tiled surface. Professionals have the skills and experience to deliver that. They understand the importance of proper grout curing and sealing, which are vital for the longevity of your travertine installation. Hiring professional tile installers is crucial for ensuring the longevity and quality of your tile work. They can provide peace of mind, knowing the job is done right the first time.
If your grout is looking old, cracked, or stained, it might be time to call in the pros. Don't let worn-out grout ruin the look of your tiles. For expert help and to see our beautiful tile options, visit our website today!
Your Travertine Project, Perfected
So, you've made it through the steps of grouting your travertine tile. It might have seemed like a lot at first, but by taking it one step at a time, you've managed to give your space a real upgrade. Remember, travertine is a beautiful natural stone that adds lasting value. For the best selection of premium travertine tiles and expert advice, think of Surfaces Galore. We're here to help you find exactly what you need for your next project, whether it's a simple update or a complete transformation. Don't hesitate to reach out to us for quotes or to explore our current stock – we ship nationwide and are ready to assist you.
Frequently Asked Questions
Why is it important to choose the right grout for travertine?
Travertine is a natural stone that can be a bit soft. Picking the correct grout helps protect it and makes sure your floor or wall looks great for a long time. Using the wrong kind could damage the stone or not look good.
What's the difference between sanded and unsanded grout?
Sanded grout has fine sand mixed in, which makes it stronger and better for wider gaps, usually 1/8 inch or more. Unsanded grout is smoother and best for very thin gaps, less than 1/8 inch, because the sand could scratch the stone.
Can I use any color grout with travertine?
You can use almost any color! Lighter grout can make the travertine look bigger and brighter, while darker grout makes the stone stand out more. It's a good idea to test a small spot first to see how you like the color.
How do I prepare the grout mixture?
You'll usually mix grout powder with water. It's important to follow the instructions on the grout package exactly. You want a smooth, peanut-butter-like consistency that's easy to spread but not too watery.
How much grout do I need for my project?
It depends on how big your area is and how wide your grout lines are. It's always better to buy a little extra just in case. You can figure this out by looking at the grout bag's coverage information or asking someone at the store.
What's the best way to apply grout to travertine?
Use a grout float, which is like a rubber squeegee. Hold it at an angle and spread the grout across the tiles, pushing it firmly into the gaps. Work in small sections so the grout doesn't dry out too fast.
How do I clean the excess grout off the tiles?
After applying, use a damp (not soaking wet) sponge to gently wipe the extra grout off the tile surfaces. Rinse your sponge often in clean water. Be careful not to pull grout out of the lines.
How long does grout need to dry before I can walk on it?
You usually need to wait at least 24 to 72 hours for the grout to harden properly. It's best to check the grout manufacturer's instructions for the exact drying time. Avoid heavy traffic until it's fully cured.
Why is sealing travertine and grout so important?
Travertine is porous, meaning it can soak up liquids easily. Sealing creates a protective layer that helps prevent stains from spills and stops moisture from getting into the stone and grout, which can cause damage over time.
How often should I reseal my travertine and grout?
Generally, you should reseal about once a year. However, this can change based on how much the area is used and what kind of sealer you used. If water stops beading up on the surface, it's probably time to reseal.
What if I get grout haze on my travertine tiles?
Grout haze is a chalky film left after cleaning. It usually happens if you clean too soon or use too much water. You can often remove it with a special grout haze remover or a clean, dry cloth after the grout is fully dry.
Can I grout travertine in my bathroom or shower?
Yes, but you need to use the right type of grout, often one that's made for wet areas and is mold-resistant. Making sure the grout lines are completely filled and sealed properly is very important to prevent water damage.


Leave a comment