
What Is Grout Haze? Causes, Removal, and Prevention

TL;DR:
- Grout haze is a thin film of residue left on tile surfaces after installation, causing a dull appearance. It is an installation issue that can be removed if cleaned within the proper time frame and with the correct cleaner. Proper timing, matching cleaner to grout and tile type, and preventive techniques help avoid permanent damage and make cleanup more manageable.
Grout haze is defined as a thin film of grout residue left on tile surfaces after installation, causing a white, cloudy, or dull appearance that dulls the tile’s natural finish. It is not a tile defect. Grout haze is an installation residue issue, and nearly 25% of homeowners experience it after a tiling project. The good news: grout haze can be removed, but only if you act within the right time window and use the correct cleaner for your grout and tile type. This guide covers what causes grout haze, how to identify it, and the safest, most effective removal methods for kitchens and bathrooms.
What causes grout haze during tile installation?
Grout haze forms when grout residue is not fully cleaned from the tile face during or immediately after installation. The residue dries into a thin, hard film that bonds to the tile surface. 30% of grout haze issues originate from improper grout mixing. That single error sets off a chain reaction: poorly mixed grout is harder to spread evenly, leaves more residue on the tile face, and dries faster than expected.
The chemistry of the grout itself also matters. Cement-based grout is the most common type used in residential kitchens and bathrooms. It leaves an alkaline, calcium-rich film that bonds to tile surfaces as it cures. Epoxy and urethane grouts are less porous and more durable, but their residue is chemically different and far harder to remove once dry.
Timing is the most critical factor in grout haze formation. Grout haze bonds chemically to tile within 24 to 72 hours after installation. After that window closes, water-based cleaning becomes ineffective. That three-day deadline is the single most important fact any homeowner or DIYer needs to know about grout haze.
Common installer mistakes that cause grout haze include:
- Cleaning too late, after the grout has already begun to cure on the tile face
- Using dirty wash water that redeposits grout film with every wipe
- Applying too much grout and leaving excess on the tile surface
- Mixing grout too thin, which causes it to spread beyond the joints
- Skipping the initial dry wipe that removes bulk residue before wet cleaning
The tile type also affects how visible and stubborn the haze becomes. Smooth, glazed porcelain shows haze clearly but is easier to clean. Natural stone tiles like marble, travertine, and limestone are more porous, which means grout residue can penetrate the surface and become harder to lift without risking damage.
Pro Tip: Always read the grout manufacturer’s instructions for the specific working time before you start spreading. Working time varies by brand, temperature, and humidity. In warm rooms or during summer months, grout can begin to set faster than expected.
How do you identify grout haze on tile surfaces?
Grout haze appears as a white, gray, or cloudy film spread across the tile face, not just along the grout lines. It often looks like the tile has been wiped with a dirty cloth and never fully rinsed. The film is usually uniform across the tile surface, which is one of the clearest signs that it is haze rather than a localized stain.
The fastest identification method is the finger test. Run your finger across the tile surface: if a white or gray residue transfers to your finger, grout haze is present. This test also tells you whether the grout is ready for cleanup. Residue transfer during the early cure stage means the grout is still too wet to clean without spreading it further.
Grout haze is frequently confused with three other surface problems:
- Hard water stains: These appear as white mineral deposits, usually near water sources. They feel rough and crusty, not filmy.
- Soap scum: This builds up gradually over weeks or months of use. It is sticky and often has a yellowish tint.
- Sealing problems: A sealer applied over uncleaned haze traps the residue underneath, making the tile look permanently dull. Sealing over haze makes removal significantly harder.
Epoxy grout residue looks different from cement haze. It appears as a yellowish or amber-tinted film, often with a slightly waxy texture. It does not respond to the same cleaners as cement haze. Identifying the grout type before choosing a cleaner is not optional. It is the step that determines whether your cleaning effort succeeds or damages the tile.
Pro Tip: Take a photo of the tile surface in natural light before you start cleaning. The angle of light reveals haze that is invisible under artificial lighting. This also gives you a before-and-after reference to confirm the haze is fully removed.
How to remove grout haze based on tile and grout type
Grout haze removal requires matching the cleaner to both the grout chemistry and the tile material. Using the wrong cleaner is the most common reason DIY removal fails or causes new damage. Cement-based grout haze responds to mild acidic cleaners, while epoxy and urethane residue requires specialized solvents because they are acid-resistant.
Cleaner compatibility by grout and tile type
| Grout type | Haze characteristics | Safe tile types | Cleaner to use |
|---|---|---|---|
| Cement-based | White, chalky film | Porcelain, ceramic | Mild acidic cleaner or inhibited acid |
| Cement-based | White, chalky film | Marble, travertine, limestone | pH-neutral cleaner only |
| Epoxy | Yellowish, waxy film | Porcelain, ceramic | Epoxy-specific solvent |
| Urethane | Cloudy, slightly sticky | Porcelain, ceramic | Urethane-specific remover |
Natural stone tiles require special attention. Marble, travertine, and limestone are acid-sensitive. Applying an acidic cleaner to these surfaces causes etching, which is permanent surface damage that looks like dull, rough patches. For cleaning grout on marble and other natural stone, always use a pH-neutral cleaner and test it on a hidden area first.
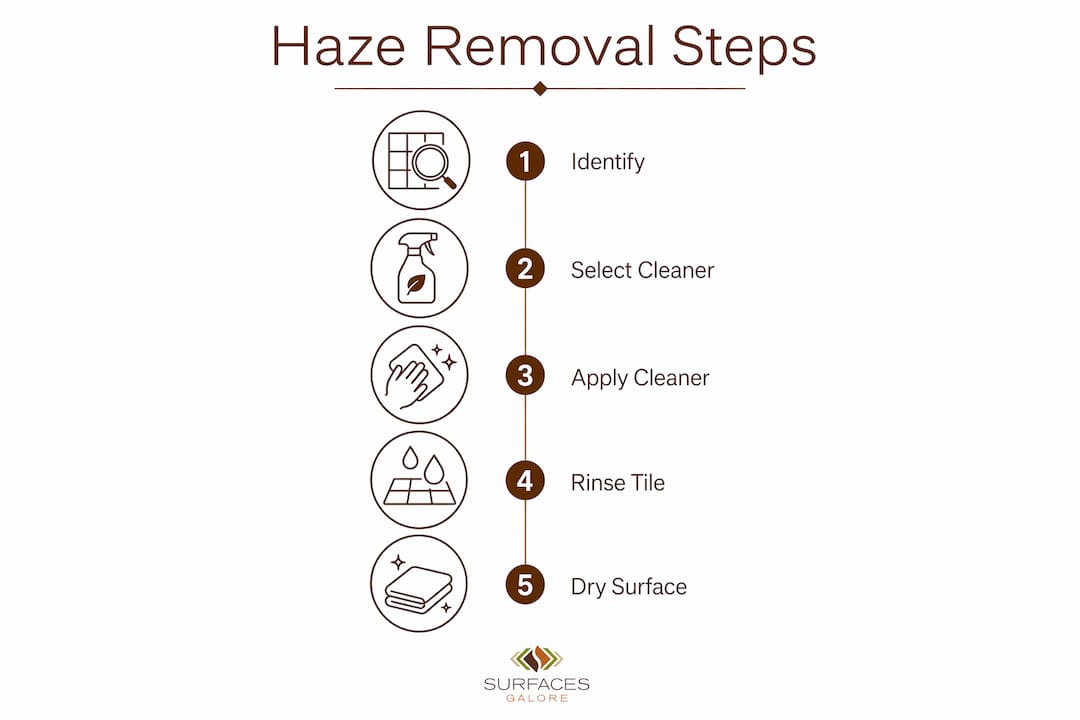
Step-by-step removal process
- Wait for the right moment. Use the finger test to confirm the grout has set enough that it does not smear, but has not yet fully bonded to the tile. This is typically 2–4 hours after grouting, depending on temperature and humidity.
- Remove bulk residue dry. Use a clean, dry microfiber cloth or cheesecloth to wipe away loose grout from the tile face before introducing any water.
- Set up a two-bucket wash system. Fill one bucket with your cleaning solution and a second with clean rinse water. The two-bucket system prevents redepositing grout film back onto the tile with every wipe.
- Apply the cleaner. Use a sponge for smooth tiles and a stiff bristle brush for textured or natural stone surfaces. Work in small sections, no more than 4–6 square feet at a time.
- Rinse thoroughly. Change your rinse water frequently. Dirty rinse water is the number one reason haze spreads instead of disappearing.
- Inspect under natural light. Check each section before moving to the next. Haze that looks clean under artificial light often reappears in daylight.
- Repeat if needed. For stubborn cement haze, a second application of cleaner after a 5-minute dwell time is more effective than scrubbing harder.
For hardened cement haze that has been left beyond 10 days, delayed cleaning locks haze into tile pores and may require professional-grade chemical treatments. At that stage, DIY methods are often insufficient.
Contractors prefer inhibited acid cleaners over muriatic acid for cement haze removal. Inhibited acids dissolve calcium-based residue effectively while protecting metal fixtures and reducing toxic fume exposure. Muriatic acid is aggressive, difficult to control, and dangerous in enclosed spaces like bathrooms.
Common mistakes to avoid during removal:
- Using white vinegar on marble, travertine, or limestone. Vinegar is acidic and will etch the stone permanently.
- Waiting more than 72 hours before starting cleanup on cement-based grout.
- Using a Magic Eraser as a primary removal tool. Magic Erasers are generally ineffective on cement or epoxy haze and can dull the tile glaze.
- Scrubbing dry haze without a cleaner, which scratches the tile surface.
Pro Tip: Always wear chemical-resistant gloves and work in a ventilated space when using any acidic or solvent-based cleaner. Open windows and run the bathroom exhaust fan. Spot test every cleaner on a hidden tile before applying it to the full surface.
How to prevent grout haze in future tile projects
Prevention is faster and cheaper than removal. The most effective prevention strategy is proper timing during the grouting process itself. Mix grout to the correct consistency, spread it in small sections, and begin cleanup before the working time expires. For grouting natural stone tiles like marble and travertine, working in smaller sections is especially important because these surfaces are more porous and absorb residue faster.
Key prevention practices for homeowners and DIYers:
- Mix grout correctly. Follow the manufacturer’s water-to-powder ratio exactly. Too much water weakens the grout and increases residue spread.
- Work in small sections. Grout no more than 10–15 square feet at a time before cleaning. This keeps you ahead of the cure window.
- Use the two-bucket system from the start. Clean rinse water at every wipe prevents residue from being reapplied.
- Pre-seal porous tiles before grouting. For marble, travertine, and limestone, applying a penetrating sealer before grouting reduces how much residue the stone absorbs. Learn more about sealing grout lines before your next project.
- Do not seal over uncleaned tile. Sealing before the tile is fully clean traps haze permanently under the sealer layer.
Routine maintenance after installation also reduces the chance of residue buildup returning. Wipe tile surfaces weekly with a pH-neutral cleaner. Avoid abrasive scrubbers on polished stone. For bathroom tiles, a squeegee after each shower removes water and soap before mineral deposits can form.
Improper cleaning during installation leads to biofilm formation linked to grout haze residue. That means unremoved haze does not just look bad. It creates a surface that attracts bacteria and mold over time. Thorough cleanup is a hygiene issue as much as an aesthetic one.
Pro Tip: For natural stone tile projects, consult the Surfacesgalore guide on preventing stains before you start grouting. Stone-specific advice on sealing and cleaning products will save you from costly mistakes.
Key takeaways
Grout haze is always an installation residue issue, and removing it safely requires matching the cleaner to the grout type and tile material before touching the surface.
| Point | Details |
|---|---|
| Act within 24–72 hours | Cement-based grout haze bonds chemically to tile after three days, making removal far harder. |
| Match cleaner to grout type | Cement haze needs mild acid; epoxy needs a solvent; natural stone needs pH-neutral cleaners only. |
| Use the two-bucket system | Separate wash and rinse buckets prevent spreading grout film back onto clean tile. |
| Never seal over haze | Sealing before the tile is fully clean traps residue permanently under the sealer layer. |
| Prevention beats removal | Proper mixing, small grouting sections, and timely cleanup eliminate most haze before it forms. |
What I’ve learned from watching homeowners fight grout haze
The biggest mistake I see homeowners make is not waiting too long to clean. It is reaching for the wrong product immediately. Someone finishes grouting their bathroom floor, sees the haze the next morning, and grabs whatever cleaner is under the sink. On a marble floor, that often means white vinegar or an all-purpose bathroom spray. Both are acidic. Both etch the stone. Now they have haze plus permanent surface damage, and the repair cost is far higher than a proper grout haze remover would have been.
The second pattern I see constantly is the assumption that haze means the tile is defective. Homeowners call the supplier, demand replacements, and feel frustrated when the new tiles develop the same film. Grout haze is not a tile problem. It is always a process problem. The tile is fine. The cleanup window was missed, or the wrong water ratio was used during mixing.
What actually works is understanding that grout haze has chemistry. Cement haze is alkaline and calcium-based. Mild acid dissolves it. Epoxy haze is a polymer film. Acid does nothing to it. You need a solvent designed for that specific chemistry. Once you know what you are dealing with, the solution is straightforward.
The tile types I see cause the most confusion are polished marble and filled travertine. Both are beautiful, both are porous, and both are acid-sensitive. If you are installing either of these in a kitchen or bathroom, pre-sealing before grouting is not optional. It is the single step that makes cleanup manageable instead of stressful. The travertine tiling guide at Surfacesgalore covers this in detail, and I recommend reading it before you mix a single bag of grout.
My honest advice: if the haze has been sitting for more than two weeks and you are working with natural stone, call a professional tile cleaner. The cost of a professional visit is a fraction of the cost of re-tiling a floor you accidentally etched.
— cihan
Natural stone tiles and expert guidance at Surfacesgalore
Surfacesgalore specializes in premium natural stone tiles, including marble, limestone, and travertine, shipped nationwide from Anaheim, California. Whether you are tiling a kitchen backsplash or a full bathroom floor, choosing the right stone and understanding how to care for it makes the difference between a surface that lasts decades and one that requires constant repair.

Surfacesgalore carries an extensive selection of marble and natural stone tiles suited for both DIY projects and professional installations. The Surfacesgalore blog also offers detailed guides on grouting, sealing, and maintenance for every stone type. Browse the full collection and find the right tile for your next project at Surfacesgalore.
FAQ
What is grout haze exactly?
Grout haze is a thin film of grout residue left on tile surfaces after installation. It causes a white, cloudy, or dull appearance and is an installation issue, not a tile defect.
Can grout haze be removed after it dries?
Yes, cement-based grout haze can be removed after drying with the correct cleaner. However, waiting beyond 10 days locks haze into tile pores and may require professional-grade chemicals.
How do I remove grout haze from natural stone?
Use only a pH-neutral cleaner on marble, travertine, and limestone. Acidic cleaners etch natural stone permanently. For detailed stone-specific steps, the marble grout cleaning guide at Surfacesgalore covers safe methods.
How long do I have to clean grout haze before it becomes permanent?
The critical window is 24 to 72 hours after installation for cement-based grout. After that, water-based cleaning becomes ineffective and stronger chemical treatments are needed.
Does vinegar remove grout haze?
Vinegar removes light cement haze from acid-resistant tiles like porcelain or ceramic. Never use vinegar on natural stone tiles. It causes etching, which is permanent surface damage that no cleaner can reverse.
Leave a comment