
Mosaic grout options explained for high-end projects

Selecting the right grout for mosaic tile installations in luxury interiors is more complex than many professionals realize. A single misstep in grout type, joint width, or application technique can compromise years of aesthetic appeal and structural integrity in high-end residential and commercial spaces. With tesserae as small as half an inch and materials ranging from delicate glass to robust natural stone, the grout you specify must balance visual refinement with long-term performance. This comprehensive guide clarifies grout types and their appropriate uses, joint width standards, and maintenance protocols to empower informed decisions that protect your design vision and your client’s investment.
Table of Contents
- Understanding Grout Joint Sizes For Mosaic Tiles
- Comparing Grout Types: Unsanded, Sanded, Cement, And Epoxy
- Advanced Considerations: Epoxy Grout Advantages And Project Standards
- Practical Tips For Selecting And Maintaining Mosaic Grout
- Explore Premium Mosaic Tile And Grout Solutions
Key takeaways
| Point | Details |
|---|---|
| Joint width precision | Mosaic tiles require 1/16 to 1/8 inch joints to prevent cracking and maintain visual balance |
| Grout type matters | Unsanded for narrow joints protects delicate surfaces; epoxy excels in wet, high-traffic areas |
| Maintenance commitment | Cement grout needs annual sealing while epoxy offers near-zero maintenance in demanding environments |
| Standards compliance | ANSI A118.3/6 guidelines ensure commercial-grade performance in upscale U.S. projects |
| Lifecycle economics | Epoxy’s higher upfront cost is offset by decades of stain resistance and durability |
Understanding grout joint sizes for mosaic tiles
The term tesserae refers to the individual pieces that compose a mosaic, and their diminutive scale dictates every aspect of grout selection. Mosaic tiles typically require narrow grout joints of 1/16 to 1/8 inch to maintain proportional aesthetics and structural stability. When joints exceed 1/8 inch in mosaic work, the grout lines visually overpower the tile pattern, destroying the seamless effect clients expect in luxury installations. Conversely, joints narrower than 1/16 inch create weak points where grout may crack under normal expansion and contraction cycles.
Improper joint width generates cascading problems that surface months after installation. Overly wide joints collect debris and require excessive maintenance, while insufficient spacing prevents proper grout adhesion and leads to premature failure. You must also account for tile thickness variations, a common challenge with handmade or natural stone mosaics that demand slight joint width adjustments to accommodate surface irregularities. The goal is visual consistency paired with structural resilience.
Different mosaic materials and formats require specific joint width approaches:
- Glass sheet mosaics mounted on mesh: 1/16 inch joints preserve translucency and prevent grout show-through
- Natural stone tesserae with irregular edges: 1/8 inch joints accommodate variation while maintaining pattern integrity
- Porcelain micro mosaics in geometric patterns: 3/32 inch joints balance precision with installation practicality
- Mixed-material artistic installations: Variable widths from 1/16 to 1/8 inch create depth without compromising cohesion
Pro Tip: Always verify final joint width with a physical mockup under project lighting before committing to full installation, as grout color and width interact to dramatically alter perceived tile color and pattern density.
For comprehensive guidance on selecting mosaic formats that align with your design intent, explore our mosaic tile guide for designers covering material properties and application contexts.
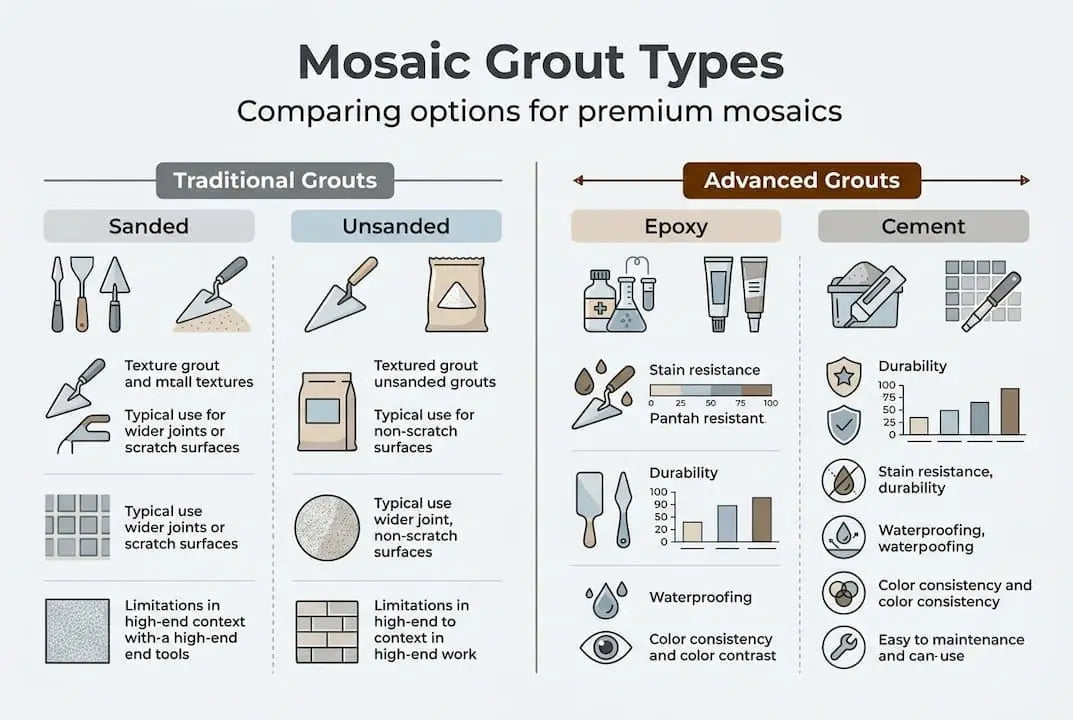
Comparing grout types: unsanded, sanded, cement, and epoxy
Grout formulation determines performance across every metric that matters in upscale projects: durability, stain resistance, color stability, and maintenance burden. The fundamental distinction between sanded and unsanded varieties centers on aggregate particle size and resulting joint width compatibility. Unsanded grout is recommended for mosaic tiles with joints under 1/8 inch because it lacks the coarse silica particles that can scratch delicate glass, polished marble, or metallic tile surfaces during installation and cleanup. This smooth formulation flows easily into narrow spaces and cures to a dense, uniform finish.
Sanded grout contains fine sand particles that provide structural reinforcement in wider joints. Sanded grout is used for joints 1/8 inch and wider, delivering superior shrinkage resistance and durability in high-traffic floor installations. However, its abrasive texture makes it unsuitable for most mosaic work where joint widths fall below this threshold and tile surfaces demand gentle handling. Specifying sanded grout for narrow mosaic joints risks visible scratching on premium materials and incomplete joint filling that compromises water resistance.
Cement-based grout, whether sanded or unsanded, dominates residential installations due to its affordability and familiar application process. Cement grout is more affordable but requires sealing to prevent staining from oils, acids, and organic matter. Its porous structure absorbs liquids and harbors bacteria unless properly maintained, making it a liability in wet areas like steam showers, spa surrounds, and commercial kitchens where hygiene standards are non-negotiable. Color stability also suffers as cement grout fades and discolors over time, particularly in installations exposed to UV light or harsh cleaning chemicals.
Epoxy grout represents the performance ceiling for demanding applications. Its two-part resin formulation cures to a waterproof, non-porous surface that resists stains, chemicals, and biological growth without any sealing requirement. Epoxy’s flexural and compressive strength exceed cement alternatives by significant margins, making it ideal for floors subject to rolling loads, thermal cycling, or structural movement. The material’s higher viscosity requires skilled application technique, and its extended working time demands careful planning, but these challenges pale against decades of maintenance-free performance in luxury settings.
| Grout Type | Joint Width | Durability | Maintenance | Cost |
|---|---|---|---|---|
| Unsanded cement | Under 1/8 inch | Moderate, prone to cracking | Annual sealing required | Low |
| Sanded cement | 1/8 inch and wider | Good for floors | Annual sealing required | Low |
| Epoxy unsanded | Under 1/8 inch | Excellent, stain-proof | Minimal, no sealing | High |
| Epoxy sanded | 1/8 inch and wider | Superior, chemical resistant | Minimal, no sealing | High |
Pro Tip: Never use sanded grout on honed marble, glass, or metal mosaics regardless of joint width, as even careful installation can leave microscopic scratches that accumulate grime and dull the surface over time.
Understanding how different marble mosaic types interact with grout formulations helps you specify materials that enhance rather than compromise natural stone’s inherent beauty. Similarly, reviewing stone mosaic installation workflow clarifies how grout selection integrates with broader project sequencing and quality control.
Advanced considerations: epoxy grout advantages and project standards
Epoxy grout offers superior stain resistance, waterproofing, and durability that justifies its premium positioning in high-end mosaic installations. Laboratory testing reveals epoxy’s abrasion resistance exceeds cement grout by 300%, while its flexural strength withstands structural movement that would crack traditional formulations. These properties translate directly to reduced callbacks, extended warranty periods, and enhanced client satisfaction in projects where long-term performance outweighs initial material costs.
Lifecycle cost analysis consistently favors epoxy in wet areas and high-traffic zones. While cement grout may cost $2 per pound compared to epoxy’s $8 per pound, the latter eliminates annual sealing expenses, reduces cleaning time by 60%, and extends replacement intervals from 7 years to 25+ years in typical commercial applications. Factor in the soft costs of occupant disruption during maintenance and the calculation becomes even more compelling for hotels, restaurants, healthcare facilities, and luxury residences where downtime carries significant financial impact.
| Property | Cement Grout | Epoxy Grout | Performance Gain |
|---|---|---|---|
| Compressive strength | 3,500 psi | 8,000 psi | 129% increase |
| Water absorption | 8-12% | Under 0.5% | 95% reduction |
| Chemical resistance | Poor to fair | Excellent | Withstands pH 2-12 |
| Service life (wet areas) | 5-10 years | 25+ years | 150% extension |
| Annual maintenance cost | $200-400/100 sq ft | $50-80/100 sq ft | 75% savings |
Pro Tip: Test epoxy grout color samples in your project’s actual lighting conditions, as the resin formulation can shift hue under different color temperatures compared to cement grout’s more predictable appearance.
“For U.S. high-end projects, follow ANSI A118.3/6 standards; specify epoxy for commercial kitchens and pool surrounds, and ensure cement grout receives annual sealing to maintain warranty coverage and hygiene compliance.”
ANSI standards provide the technical framework that separates professional-grade installations from amateur work. ANSI A118.3 governs chemical-resistant epoxy grout performance, mandating specific thresholds for water absorption, bond strength, and thermal expansion compatibility. ANSI A118.6 addresses cement grout specifications, establishing minimum compressive strength and shrinkage limits. Specifying products that meet or exceed these standards protects you legally and ensures material performance aligns with manufacturer warranties.
In practice, epoxy grout belongs in steam showers, pool waterlines, commercial kitchen backsplashes, and any mosaic installation where moisture exposure, chemical contact, or hygiene requirements demand zero-compromise performance. Cement grout remains viable for dry residential walls and low-traffic decorative installations where budget constraints outweigh performance concerns. The decision hinges on honest assessment of environmental conditions and client expectations for maintenance involvement.
When working with premium materials, understanding how to choose marble colors for designs ensures your grout selection complements rather than conflicts with the stone’s natural veining and undertones.
Practical tips for selecting and maintaining mosaic grout
Successful grout specification begins with systematic evaluation of three primary factors: tile material hardness and porosity, joint width dimensions, and installation location’s exposure profile. Glass and polished stone demand unsanded formulations to prevent surface damage, while textured natural stone can tolerate sanded options if joint width permits. Wet areas automatically elevate epoxy to preferred status regardless of other variables, as the long-term costs of cement grout’s maintenance requirements and mold susceptibility far exceed upfront material savings.
Color testing under actual project lighting cannot be overstated. Grout that appears neutral gray in the showroom may read warm beige under incandescent lighting or cool blue under daylight-balanced LEDs. Order samples in your shortlisted colors, apply them to spare tiles, and evaluate them in the installation location at different times of day. This simple step prevents costly color mismatches that haunt projects for decades. Remember that grout typically dries one to two shades lighter than its wet appearance, another variable that demands physical verification.
Maintenance protocols diverge sharply between grout types:
- Cement grout installations require initial sealing 72 hours after grouting, once full cure is achieved
- Reapply penetrating sealer annually in wet areas, every two years in dry locations
- Clean cement grout monthly with pH-neutral cleaners; avoid acidic or alkaline products that degrade sealer
- Inspect grout lines quarterly for cracks or discoloration indicating seal failure
- Epoxy grout needs only routine cleaning with standard tile cleaners; no sealing ever required
- Address epoxy grout haze immediately during installation, as delayed removal becomes exponentially difficult
Common installation pitfalls that compromise even well-specified grout include:
- Inadequate tile surface cleaning before grouting, leaving residue that prevents proper adhesion
- Excessive water added to cement grout mix, weakening final strength and increasing porosity
- Insufficient grout joint packing, creating voids that trap water and promote failure
- Premature sealer application before cement grout fully cures, trapping moisture and causing efflorescence
- Using incorrect trowel angle during epoxy application, leaving surface scratches on delicate tiles
Pro Tip: When working with antique mirror, glass mosaic, or other ultra-delicate materials, test your chosen epoxy unsanded grout on scrap pieces first to verify the specific product’s particle size won’t cause micro-abrasions during application.
For projects involving intricate patterns or custom designs, our custom tile mosaic workflow guide addresses grout selection within the broader context of design development and fabrication sequencing. Kitchen and bath professionals will find additional installation insights in our backsplash mosaic installation workflow covering substrate preparation through final sealing.
Explore premium mosaic tile and grout solutions
Now that you understand the technical distinctions between grout types and their appropriate applications, you can specify materials with confidence that your high-end projects will deliver lasting beauty and performance. Surfaces Galore provides design and remodeling professionals with curated access to premium natural stone mosaics in marble, travertine, and complementary materials, all backed by expert support to ensure your vision translates flawlessly from concept to completion. Our direct import model delivers authentic, durable materials at prices that respect project budgets without compromising quality standards.

Whether you’re designing a spa-inspired master bath, a statement kitchen backsplash, or a commercial lobby feature wall, the right combination of mosaic tile and grout creates installations that withstand decades of use while maintaining their original aesthetic impact. Visit our premium mosaic tiles and grout solutions collection to explore materials specifically selected for professional applications, and connect with our team to discuss your project’s unique requirements.
FAQ
What grout joint size is ideal for glass mosaic tiles?
Glass mosaics perform best with grout joints between 1/16 and 1/8 inch to preserve their translucent properties and prevent grout show-through that dulls visual impact. Narrower joints risk inadequate grout coverage and weak bonding, while wider joints create disproportionate grout lines that visually fragment the mosaic pattern. Always use unsanded grout formulations to prevent scratching the glass surface during installation and cleanup.
Why is epoxy grout preferred for upscale wet areas?
Epoxy grout’s waterproofing and stain resistance ensure decades of hygienic, low-maintenance performance in steam showers, pool surrounds, and commercial kitchens where moisture exposure is constant. Its chemical resistance withstands harsh cleaning agents and acidic substances without degrading, while its non-porous surface prevents mold and bacterial growth that compromise both aesthetics and health standards. The material’s superior bond strength also accommodates structural movement without cracking.
How often should cement grout be sealed in mosaic installations?
Cement grout requires annual sealing in wet areas and every two years in dry locations to maintain stain resistance and prevent mold colonization in its porous structure. Skipping this maintenance allows oils, pigments, and organic matter to penetrate deeply, creating permanent discoloration that cannot be removed through cleaning alone. High-traffic areas may need more frequent sealing depending on wear patterns and cleaning chemical exposure.
Can sanded grout be used on marble mosaics?
Sanded grout should never be used on polished or honed marble mosaics regardless of joint width, as the silica particles create microscopic scratches that accumulate dirt and dull the stone’s finish over time. These abrasions become visible as traffic patterns develop, particularly in floor installations where foot traffic grinds particles across the surface. Specify unsanded cement or epoxy grout for all marble mosaic work to preserve the material’s natural luster and protect your client’s investment in premium stone.
Leave a comment