
)
Common Mistakes When Buying Marble Tile (And How to Avoid Them!)

Buying marble tile can feel a bit overwhelming, right? It's beautiful, no doubt, but there are definitely some pitfalls to watch out for. This article, 'Common Mistakes When Buying Marble Tile (And How to Avoid Them!)', is here to help you steer clear of those common slip-ups. We'll cover everything from understanding the stone itself to making sure your installation goes off without a hitch. Let's get you set up for a successful marble project.
Key Takeaways
- Always check your marble tiles for any flaws before you start laying them. What you see before installation is usually what you get, so catch issues early.
- Do a dry run of your tiles on the floor first. This helps you see how the colors and patterns look together and plan where to make cuts.
- Use the right tools and materials, like white thin-set mortar for light marble, and make sure your subfloor is perfectly flat and stable.
- When cutting marble, use a sharp diamond blade and go slow to avoid chips. Plan your cuts so any rough edges are hidden.
- Give your mortar plenty of time to set before grouting, and seal your tiles afterward to protect them from stains and moisture.
Understanding Marble's Natural Variations

Marble is a natural wonder, and that's its charm! When you buy marble tiles, you're getting a piece of art from the earth. Each slab is unique, with its own story told through color and veining. This isn't a flaw; it's what makes your space truly one-of-a-kind. We'll help you embrace these natural differences.
Recognizing Inherent Color and Pattern Differences
Think of marble like a fingerprint. No two tiles are exactly alike. You might see subtle shifts in color, from creamy whites to soft grays, and the veins can range from delicate wisps to bold, dramatic strokes. This variation is a hallmark of genuine marble. When you buy marble tiles online in the USA, always remember that the samples or photos are a guide, not an exact replica. This is why we always recommend ordering a few extra tiles – it ensures you have plenty of beautiful, consistent material for your project.
Case Study: The "Carrara Confusion"
A homeowner in Florida was renovating their bathroom and ordered "Carrara White" marble tiles online. They expected a uniform look, but received tiles with varying degrees of gray veining. Initially disappointed, they contacted us. After explaining that this is typical for Carrara, they decided to embrace the variation. By dry-laying the tiles first (more on that next!), they arranged them to create a stunning, dynamic floor that looked far more luxurious than a uniform tile ever could. They later told us, "The variation is what makes it feel so high-end and natural!"
The Importance of Dry-Laying Tiles Before Installation
This is a game-changer for achieving a cohesive look. Before any adhesive touches your tiles, lay them out on the floor or wall where they'll be installed. This allows you to:
- Visualize the Flow: See how the colors and patterns play together.
- Mix and Match: Move tiles around to achieve the most pleasing distribution of veining and color. You can place tiles with similar tones next to each other or create a more dynamic contrast.
- Plan for Cuts: Identify any areas where awkward cuts might occur and adjust the layout to minimize them.
This simple step prevents surprises and ensures you're happy with the final aesthetic before the permanent installation begins. It’s a small effort that yields big results, especially when you buy marble tiles for a significant area.
Consulting Suppliers About Significant Imperfections
While natural variation is expected and desired, sometimes a tile might have a significant flaw – a large chip, a crack, or an unusual discoloration that goes beyond normal veining. Don't install it!
- Inspect Each Tile: Before you even think about laying them, give each tile a once-over.
- Set Aside Problem Pieces: If you find a tile that seems genuinely defective, put it in a separate pile.
- Contact Your Supplier: Reach out to us immediately with photos of the imperfection. We're here to help. We can often replace significantly flawed tiles, especially if you've purchased extra material to account for natural variations. This is part of our commitment to helping you buy marble tiles with confidence.
Remember, marble is a natural material. Its beauty lies in its uniqueness. By understanding and working with its natural variations, you ensure a stunning, authentic result that mass-produced materials simply can't match. Embrace the character!
Ensuring a Flawless Installation Foundation
Think of your beautiful marble tiles as the crown jewels of your home. They deserve a base that's just as magnificent, right? A solid, level foundation isn't just a suggestion; it's the bedrock of a stunning and long-lasting marble installation. Skipping this step is like building a mansion on sand – it's a recipe for disaster.
Verifying Substrate Stability and Levelness
Before a single tile is laid, we need to talk about what's underneath. Your subfloor or wall needs to be rock solid. We're talking about a surface that's clean, sound, and completely flat. Any dips or bumps can lead to cracked tiles down the line, and nobody wants that. For wood subfloors, make sure you've got the right underlayment, like cement backer board or an uncoupling membrane. It adds that extra layer of protection. If you're working with concrete, a crack-isolation membrane is your best friend. It stops those tiny substrate cracks from showing up in your gorgeous marble.
Preparing Surfaces by Removing Contaminants
This is where we get our hands a little dirty, but it's totally worth it. Dust, grease, old adhesive – anything that could get between your tile and the mortar needs to go. A clean surface means a strong bond. Imagine trying to glue two things together when they're covered in gunk; it just won't stick. The same principle applies here. A thorough cleaning ensures your marble tiles will stay put for years to come.
Implementing Crack Isolation for Concrete Slabs
Concrete slabs can develop hairline cracks over time, and these tiny fractures can travel right up through your tile installation, causing visible damage. That's where a crack-isolation membrane comes in. It acts like a flexible buffer, absorbing the movement of the slab and preventing those cracks from telegraphing through to your beautiful marble. It’s a small step that makes a huge difference in the longevity and appearance of your floor. If you're looking to buy marble tiles online in the USA, remember that proper prep is key to enjoying them for decades.
Case Study: The Foundation Fiasco
We had a client, Sarah, who was so excited to install Calacatta Gold marble in her entryway. She bought stunning tiles online and was eager to get them down. Unfortunately, she skimped on the substrate prep, thinking a quick sweep would be enough. Within six months, she started noticing lippage (uneven tile edges) and even a few cracked tiles. Turns out, the old vinyl flooring adhesive underneath was causing adhesion issues and the slight unevenness of the subfloor was stressing the marble. A proper foundation would have saved her a lot of headaches and money in the long run. Don't let this be you!
Selecting Appropriate Setting Materials
Choosing Thin-Set Mortars Formulated for Natural Stone
When you're ready to buy marble tiles online in the USA, don't forget the glue that holds it all together! Using the wrong mortar is a fast track to a cracked or stained floor. You need a thin-set mortar specifically made for natural stone. These aren't your average tile adhesives; they're designed to handle the unique properties of marble, like its porosity and natural variations. Think of it as giving your beautiful marble tiles the best possible foundation. We recommend high-quality thin-set mortars that are rated for natural stone. This is key to a lasting, beautiful installation.
Using White Thin-Set for Light-Colored Marble
This is a big one, especially if you're working with those stunning white or light-colored marble tiles, like Carrara or Thassos. Using a standard gray thin-set mortar can actually show through the stone, giving it a dull, discolored look. It's like wearing a dark undershirt with a light blouse – you can see it! Always opt for a white thin-set mortar when installing light marble. This keeps the true color of your marble shining through, maintaining that bright, elegant aesthetic you fell in love with. It’s a small detail that makes a huge visual difference.
Confirming Compatibility with Adjacent Finishes
Your marble tiles won't be alone, right? They'll meet other materials – maybe metal trim, glass accents, or even different types of flooring. It's super important that your setting materials play nice with everything else. Check that the thin-set mortar and grout you choose are compatible with these adjacent finishes. You don't want any weird reactions or adhesion problems down the line. A quick check with the manufacturer or your supplier can save you a lot of headaches. It’s all about creating a cohesive, well-built project from start to finish.
Case Study: The Discolored Shower Floor
Sarah wanted a luxurious marble shower. She bought beautiful white marble tiles online and hired a contractor. Unfortunately, the contractor used a standard gray thin-set mortar. A few months later, Sarah noticed the marble on the shower floor looked dingy and gray, especially when wet. The gray mortar was bleeding through the porous marble. If she had used a white thin-set, her shower would still look as bright and clean as the day it was installed. This is a common, and avoidable, mistake that impacts the entire look of the space.
Mastering the Art of Tile Layout
Getting your marble tile layout right is more than just aesthetics; it's about creating a foundation for a flawless installation. A well-planned layout minimizes waste, highlights the natural beauty of the stone, and prevents common installation headaches. Think of it as sketching your masterpiece before you pick up the brush. When you buy marble tiles online in the USA, you're investing in natural beauty, and the layout is how you showcase it.
Planning Layouts to Minimize Awkward Cuts
Nobody wants to see tiny, chipped slivers of marble along a prominent wall or doorway. That's where smart layout planning comes in. Before you even think about mixing mortar, do a dry lay. This means placing your tiles on the floor or wall without any adhesive. It’s your chance to see how the pattern flows and, more importantly, where those tricky cuts might fall. Aim to have cuts happen in less visible areas, like behind doors or under cabinets. This not only looks better but also saves you a lot of frustration during installation. A little time spent planning here can save you hours of rework later.
Achieving Pleasing Color and Veining Distribution
Marble is celebrated for its unique veining and color variations. Each tile is a piece of art. To truly appreciate this, you need to distribute these variations evenly across your installation. Don't put all the dark tiles or all the heavily veined tiles in one spot. Mix tiles from different boxes during your dry lay. This helps blend the natural differences, creating a cohesive and visually appealing surface. It’s like curating an art exhibition – you want each piece to shine, but also to complement its neighbors. This is especially important when you buy marble tiles online, as you might not see the exact slab your tiles came from.
Determining Optimal Grout Joint Spacing
Grout lines are the silent partners in your tile design. For marble, especially, you often want the stone to be the star. This usually means opting for narrow grout joints, often around 1/16 to 1/8 inch. This creates a more seamless look, allowing the marble's natural patterns to dominate the visual field. However, always check the tile manufacturer's recommendations. Some tiles might require slightly wider joints for proper support. Using tile spacers during installation is key to maintaining consistent lines, no matter how narrow you go. A consistent grout line makes the entire installation look more professional and intentional. For a truly elegant look, consider the classic grid pattern for your marble tiles, which works beautifully with tight grout lines. Explore timeless installation layout ideas for marble and travertine.
Case Study: The Grand Foyer Transformation
A homeowner was installing Calacatta Gold marble in their grand foyer. They initially planned to start from the center and work outwards, but during the dry lay, they noticed a concentration of very bold veining in one corner and almost solid white tiles in another. By rearranging the tiles and planning cuts to occur near the less visible side walls, they achieved a stunning, balanced distribution of the marble's natural beauty. The narrow grout joints (1/16 inch) made the floor look like a single, continuous slab of art. This careful layout planning transformed a potentially uneven look into a breathtaking entrance.
Planning your marble tile layout is not just about aesthetics; it's a practical step that significantly impacts the final look and longevity of your installation. Taking the time to dry lay and distribute veining ensures you're showcasing the natural stone's unique beauty to its fullest potential.
Employing Correct Installation Techniques
Getting your beautiful marble tiles installed correctly is just as important as picking the right ones. It’s the difference between a floor that wows for decades and one that causes headaches down the line. We’re talking about making sure every single tile is set perfectly, creating a surface that’s not just stunning but also built to last. When you buy marble tiles online in the USA, you're investing in quality, and the installation needs to match that. Let's get into the nitty-gritty of how to make sure your installation is top-notch.
Using the Right Notched Trowel for Mortar Application
Think of your trowel as your paintbrush for the adhesive. Using the wrong one is like trying to paint a masterpiece with a broom – messy and ineffective. For marble, especially larger formats, you need a trowel with notches that create the right amount of ridges in your thin-set mortar. These ridges are key; they allow air to escape when you press the tile down, giving you full coverage. Too few ridges, and you’ll have air pockets. Too many, and you’ll squeeze out too much adhesive. We recommend checking the tile manufacturer’s guidelines, but generally, a 1/2-inch by 1/2-inch square notch or a 3/4-inch by 1/2-inch U-notch trowel works well for most marble tiles. Getting this right means a stronger bond, which is exactly what you want for a durable, beautiful floor.
Ensuring Full Mortar Coverage on Tile Backs
This is where the magic happens – the bond between your tile and the floor. You absolutely need full mortar coverage on the back of every single marble tile. Why? Because marble is porous and can be prone to cracking if not fully supported. Gaps under the tile can lead to uneven pressure, chips, or even breakage over time. It’s not just about slapping mortar on the floor; it’s about pressing each tile firmly into the adhesive with a slight twist. This action helps to collapse those ridges you made with the trowel, ensuring the entire back of the tile is coated. Periodically lift a recently set tile to check – you should see mortar covering at least 95% of the back. This step is non-negotiable for a professional, long-lasting installation.
Utilizing Leveling Clips for Large Format Tiles
Large format marble tiles (think 12x24 inches or bigger) are gorgeous, but they can be tricky. Without the right technique, you can end up with uneven edges, also known as lippage. This isn't just an aesthetic issue; it creates trip hazards and makes cleaning a nightmare. That’s where leveling clips come in. These clever little devices help you set each tile perfectly flush with its neighbors. You place the clips under the edges of adjacent tiles and then tighten them with a special tool. They pull the tiles together, ensuring a flat, even surface across the entire installation. It’s a small step that makes a huge difference, especially when you’re aiming for that sleek, modern look that large format marble tiles provide. It’s the professional’s secret weapon for a flawless finish.
Case Study: The Grand Foyer Transformation
A client in Scottsdale, Arizona, wanted a show-stopping foyer using large format 24x24 Calacatta Gold marble tiles. They had purchased beautiful tiles online but were concerned about achieving a perfectly level surface. We advised them to use a high-quality thin-set mortar and a 3/4-inch square notch trowel for optimal coverage. Crucially, we recommended a robust tile leveling system. During installation, the crew meticulously used the leveling clips, ensuring each tile sat perfectly flush with its neighbors. The result? A breathtakingly smooth, seamless expanse of marble that looked like it was carved from a single block. The client was thrilled, noting how the leveling clips eliminated any worry about lippage and gave their luxury tiles the professional finish they deserved.
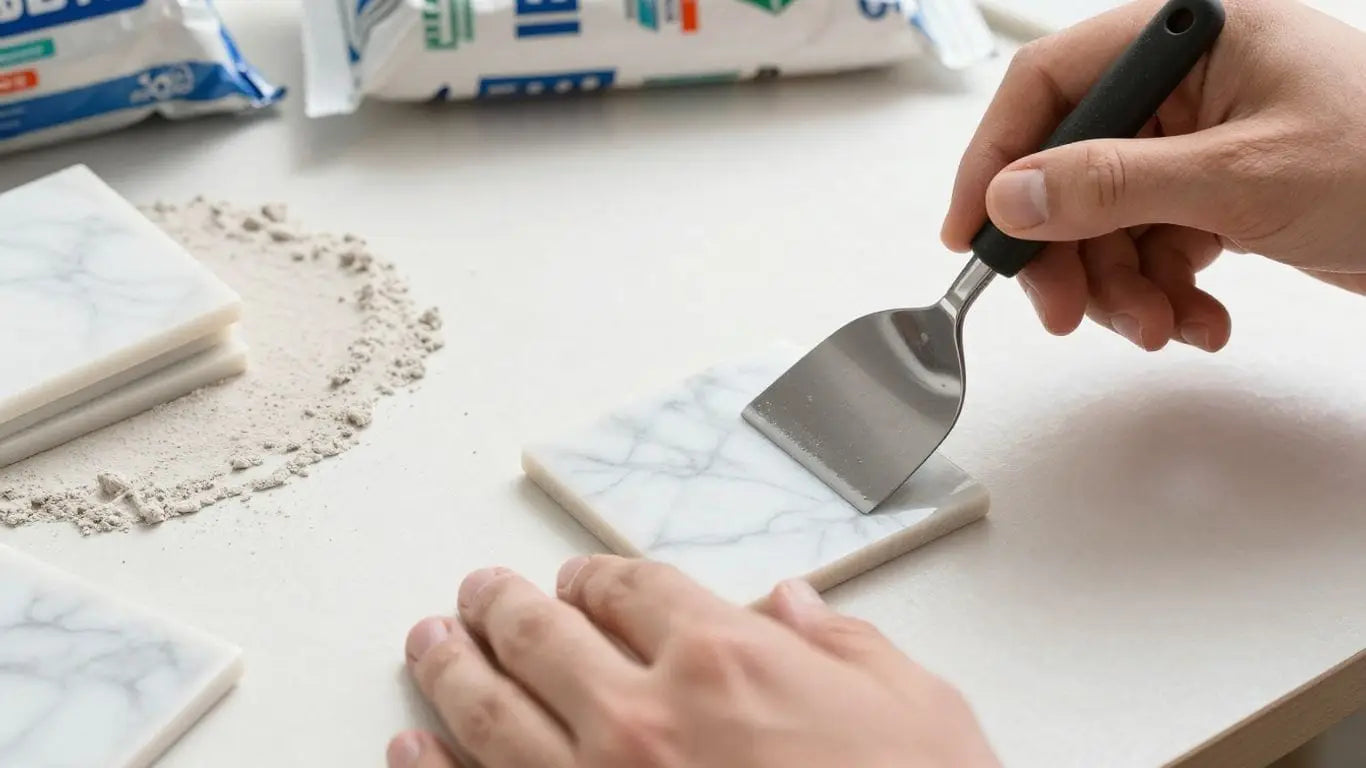
Executing Precise Stone Cutting
Cutting marble tile might seem straightforward, but it's where many DIY projects hit a snag. Get this wrong, and you're left with chipped edges, cracked tiles, and a look that's anything but professional. We're here to make sure your cuts are clean, precise, and practically invisible.
Using the Right Diamond Blade
Don't skimp on your cutting tools. A dull or incorrect blade is a recipe for disaster. You need a sharp diamond blade specifically designed for cutting natural stone. This isn't the time for a general-purpose blade; it'll just make a mess and potentially damage your beautiful marble tiles. Think of it as using the right knife for a delicate cut of fish – precision matters.
Slow and Steady Wins the Race
Marble is beautiful, but it can be brittle. Rushing the cut is the most common mistake that leads to chipping or outright breakage. Take your time. Let the saw do the work. A slow, steady pace with a wet saw (which keeps the blade cool and reduces dust) will give you the cleanest edges. It might feel like it's taking longer, but the result is worth it. You can buy marble tiles online in the USA from reputable suppliers like us, and we always recommend taking care during installation.
Planning for the Perfect Finish
Where will your cuts end up? If a cut edge will be against a wall or tucked into a corner, you have a bit more leeway. But if it's going to be exposed, you'll want it to look as good as the factory edge. Plan your cuts so that any visible edges are either concealed or can be easily smoothed with a bit of sanding or polishing after cutting. This attention to detail makes all the difference in the final appearance of your project.
Case Study: The Kitchen Backsplash Blunder
Sarah wanted a stunning marble backsplash for her kitchen. She bought beautiful Carrara marble tiles online, eager to get started. Unfortunately, she used a standard tile saw with a worn-out blade. The result? Many tiles had noticeable chips along the edges, especially around the outlets. She ended up having to buy extra tiles and carefully cut them again, this time with a proper diamond blade and a much slower pace. The extra time and cost were a lesson learned: the right tools and technique for cutting marble are non-negotiable.
Quick Cutting Tips:
- Always wear safety glasses and gloves.
- Ensure your wet saw's water supply is functioning to keep the blade cool.
- Practice on a few scrap tiles if you're new to cutting stone.
- Consider custom cutting services if you have complex shapes or many intricate cuts needed. We offer custom fabrication for unique designs at Surfaces Galore!
The Critical Role of Grouting and Sealing
Allowing Mortar to Cure Fully Before Grouting
Don't rush this step. Your marble tiles need time to settle in. The thin-set mortar needs to cure completely, usually 24 to 48 hours, sometimes longer depending on humidity and temperature. If you grout too soon, you risk shifting the tiles or creating weak spots. Think of it like letting concrete set before you drive on it. Patience here means a stronger, more stable floor later. It’s a small wait for a big payoff in durability.
Applying Grout Diagonally to Fill Joints
This is where the magic happens, filling those gaps between your beautiful tiles. Grab a grout float and work the grout into the joints at a 45-degree angle. This technique pushes the grout deep into the spaces, making sure there are no air pockets. You want a solid, continuous line of grout. Work in small sections, and then use the float to sweep away the excess. It’s a bit of elbow grease, but it’s key to a professional finish. You can find great grout options when you buy marble tiles online USA.
Sealing Tiles to Protect Against Stains and Moisture
Marble is a natural stone, and like most natural stones, it's porous. This means it can absorb liquids, leading to stains. Sealing is your marble's best defense. A good quality impregnating sealer creates a barrier, preventing spills from soaking in. This is especially important for areas like kitchens and bathrooms. Sealing your marble tiles is non-negotiable for long-term beauty and protection. Reapplying sealer annually, or as needed based on wear, keeps your investment looking its best. For example, a client in San Diego installed a stunning Carrara marble backsplash in their kitchen. They followed our advice and sealed it immediately. A year later, after a cooking mishap involving red wine, they were amazed to find the spill wiped away with no stain. That’s the power of proper sealing!
Case Study: The Kitchen Countertop Transformation
A homeowner in Austin, Texas, was worried about staining their new marble kitchen countertops. They had heard horror stories about wine and oil spills ruining the stone. After installation, they meticulously followed the grout curing times and then applied a high-quality penetrating sealer. Six months later, they hosted a dinner party where a bottle of olive oil was accidentally knocked over. Thanks to the sealer, the oil beaded up on the surface and was easily wiped away, leaving no mark. This saved them from a potentially costly and stressful cleanup.
Proper grouting and sealing aren't just finishing touches; they are integral parts of the installation process that safeguard your marble's beauty and longevity. Skipping these steps is like building a beautiful house and forgetting to put a roof on it – you're leaving your investment vulnerable.
Considering Marble Finishes and Edges

Choosing the right marble finish and edge profile is more than just an aesthetic choice; it's about balancing beauty with practicality for your specific space. Get this right, and you're setting your project up for long-term success and satisfaction. Let's look at how different finishes and edges impact your marble tiles.
Understanding the Aesthetic and Maintenance of Polished Finishes
A polished marble finish is all about that high-gloss, mirror-like shine. It really makes the stone's colors pop and its veining stand out, giving a luxurious, sophisticated feel. Think of it as the red carpet of tile finishes. It's fantastic for areas where you want a bit of glamour, like a grand entryway or a statement bathroom wall. However, this shine comes with a bit of a trade-off. Polished marble is more susceptible to scratches and etching from acidic substances (like lemon juice or vinegar). It also tends to be more slippery when wet, so it might not be the best choice for high-traffic, wet areas like shower floors unless you're prepared for diligent care. Regular sealing and prompt cleanup of spills are key to keeping that polished look pristine. If you're buying marble tiles online in the USA and want that dazzling effect, polished is the way to go, but be ready for the upkeep.
Appreciating the Durability of Honed or Tumbled Finishes
If you prefer a softer, more understated look, or if durability is a top priority, honed or tumbled finishes are excellent options. A honed finish offers a smooth, matte surface – think satin, not shine. It's less reflective than polished, which means it hides minor scratches and water spots better. This makes it a more forgiving choice for busy kitchens or family bathrooms. Tumbled finishes take it a step further, giving the marble a worn, aged appearance, almost like it's been tumbled in the sea. This rustic look is fantastic for creating a cozy, traditional, or farmhouse vibe. Both honed and tumbled marbles are generally less slippery than their polished counterparts, adding a safety benefit, especially in areas prone to moisture. They still require sealing, but the maintenance is often less demanding than with polished marble.
Choosing Edge Profiles for Installation and Appearance
The edge of your tile matters more than you might think. It affects both the look and the installation process. The most common edge profiles include:
- Straight Edge (or Squared Edge): This is a clean, sharp edge that creates a modern, minimalist look. It's ideal for installations where you want tight grout lines or a very contemporary feel. It's also often used for creating seamless transitions.
- Beveled Edge (or Chamfered Edge): A beveled edge has a slight angle cut into it. This is a practical choice because it makes installation easier and helps to mask minor lippage (unevenness between tiles). It also provides a softer visual line where tiles meet.
- Chiseled Edge: This profile is designed to look rough and uneven, mimicking the look of stone that has been freshly quarried. It's perfect for achieving a rustic, antique, or old-world aesthetic. It adds a lot of character but requires wider grout joints to accommodate the unevenness.
Case Study: The Polished vs. Honed Dilemma
Sarah and Tom were renovating their master bathroom. They fell in love with a stunning white Carrara marble tile with dramatic veining. They envisioned a spa-like retreat. Initially, they were drawn to the polished finish because it looked so luxurious in the showroom. However, their installer gently advised them that for a bathroom floor, especially with kids occasionally using it, a honed finish would be much more practical. It would still offer the elegance of marble but with better slip resistance and less worry about water spots or minor scratches. They decided to go with the honed finish and were thrilled with the result – a beautiful, serene bathroom that was also easy to live with.
When you're ready to buy marble tiles online in the USA, consider these finishes and edges carefully. They play a huge role in the final look and how easy your beautiful new marble is to maintain. Don't hesitate to ask your supplier about samples to see and feel the difference yourself!
Calculating Material Quantities Accurately
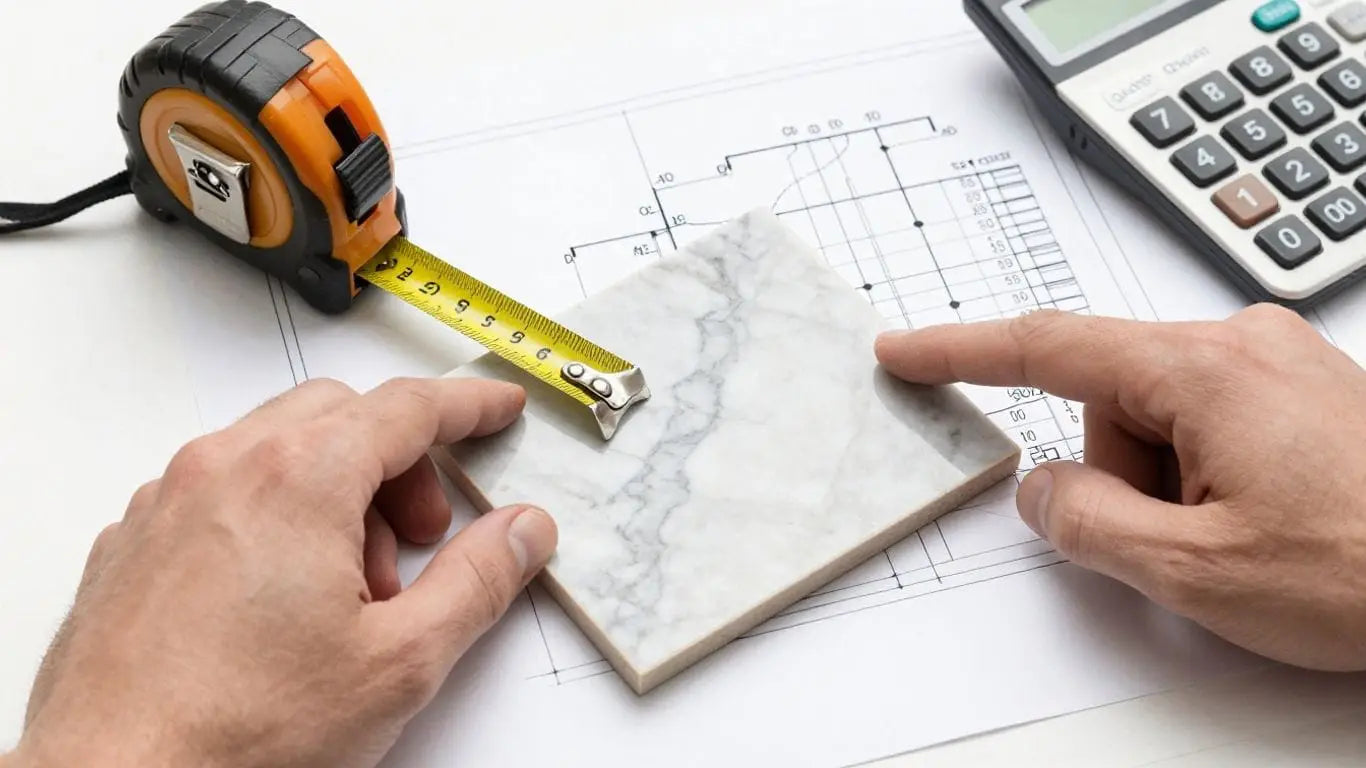
Measuring Square Footage of the Installation Area
Before you even think about buying marble tiles, you need to know exactly how much space you're working with. It sounds simple, but getting this right is the first step to avoiding costly mistakes. Grab a tape measure and get those numbers. Measure the length and width of your room or area. Multiply those two numbers together to get your square footage. For any irregular shapes, break them down into smaller rectangles or squares, measure each, and then add them all up. This is your base number. If you're looking to buy marble tiles online in the USA, having this precise measurement ready will make your shopping experience so much smoother. Remember, accurate measurements prevent overspending and under-ordering. For a project area of 1,000 square feet, you'll need to calculate your needs based on that figure. Measure the square footage of your space and add 10-15% extra for cuts and waste.
Adding Extra Percentage for Cuts and Waste
This is where many DIYers stumble. You can't just buy enough tile to cover the exact square footage. Why? Because you'll be cutting tiles to fit edges, corners, and around obstacles. Plus, accidents happen – a tile might chip during cutting, or you might find a slight imperfection in a piece. It's standard practice to add a percentage for this 'waste factor'. For most projects, 10-15% is a good starting point. If you have a lot of intricate cuts or are using very large format tiles, you might want to bump that up to 20%. Think of it as insurance for your project. You'd rather have a few extra tiles left over than run out mid-installation and have to track down a matching batch, which can be tricky with natural stone due to its inherent variations.
Case Study: The Kitchen Countertop Calamity
Sarah wanted a stunning marble backsplash for her kitchen. She measured her backsplash area, which was 30 square feet. She ordered exactly 30 square feet of beautiful Calacatta Gold marble tiles. During installation, she needed to cut around her electrical outlets and the corner of the cabinets. Two tiles chipped during cutting, and one had a noticeable crack. Suddenly, she was short 5 square feet. Finding the exact same batch of marble proved difficult, and the slight color difference in the new tiles was obvious. Her beautiful backsplash ended up with a visible patch, a constant reminder of not ordering extra.
Accounting for Natural Stone Variations in Calculations
Marble is a natural product, and that's its beauty! But it also means no two pieces are exactly alike. Veining patterns and color tones can vary from one batch to another. This is why ordering a bit extra is even more important with marble than with manufactured tiles. You need enough material to select the best pieces and to blend the variations for a cohesive look. When you buy marble tiles online, always check if the supplier provides information on expected variations. If you're ordering a significant amount, consider ordering a sample first to see the typical range of color and veining you can expect. This helps manage expectations and ensures you have enough material to achieve the look you desire without awkward color shifts. Remember, a little extra planning goes a long way in achieving a flawless marble installation.
Evaluating Marble Samples Before Purchase
Requesting Samples to Assess Color and Texture
Buying marble tiles online USA can feel like a gamble. You see a picture, you like it, you click 'buy'. But marble is a natural stone, and what you see online might not be exactly what you get. That's why getting samples is a really smart move. It's like test-driving a car before you buy it. You get to hold the marble in your hands, see its true colors, and feel its texture. This is super important because marble has natural variations in veining and color. A sample lets you see these unique characteristics up close. It helps you make sure the marble you choose actually fits your style and your home's vibe. Don't skip this step – it's your first line of defense against a tile choice you might regret.
Understanding Online Representation vs. Physical Appearance
Let's be real, screens can be tricky. The lighting in a photo, the calibration of your monitor – it all plays a part. What looks like a deep, rich black online might be a softer charcoal gray in person. A creamy white could have subtle pink undertones you didn't notice. This is where samples shine. They give you the unvarnished truth. You can see how the marble looks under your home's actual lighting, next to your cabinets or paint colors. It’s the best way to bridge the gap between digital images and the real deal. Remember, marble is a unique material, and its beauty is in its natural variations. Seeing a sample helps you appreciate that uniqueness before you commit to a large purchase. If you're looking to buy marble tiles online, always request samples first. It's a small step that makes a huge difference in the final outcome.
Confirming Sample Suitability for the Intended Space
So you've got your marble samples. Now what? It's time to put them to the test in the actual space where they'll be installed. Take them into the bathroom, the kitchen, or wherever your project is. See how the light hits them at different times of the day. Does that polished finish look too slippery for your shower floor? Maybe a honed finish would be a better fit for your bathroom. Consider the overall look and feel. Does the veining complement your existing decor? If you're working with a contractor, show them the samples too. This ensures everyone is on the same page. It's about making sure the marble you choose isn't just beautiful, but also practical and perfectly suited for its new home. This careful evaluation prevents costly mistakes and ensures you'll love your marble for years to come.
Case Study: The Kitchen Countertop Dilemma
Sarah was renovating her kitchen and fell in love with a marble slab she saw online. It was a stunning white marble with dramatic gray veining. She ordered a sample, but when it arrived, the veining was much more subtle than she expected, and the white had a slightly yellow tint that clashed with her white cabinets. She was so glad she ordered the sample! If she had ordered the full slab based on the online photo, she would have been very disappointed. Instead, she used the sample to work with her supplier and found a different slab with the exact look she wanted, avoiding a costly mistake.
Case Study: The Bathroom Floor Surprise
Mark was planning a bathroom remodel and wanted a luxurious marble floor. He ordered samples of a few different options. One sample, a polished Carrara marble, looked amazing online. However, when the sample arrived, he realized how slippery the polished surface was. He also noticed that the subtle veining he liked online was barely visible in person. He ended up choosing a honed Calacatta marble sample instead, which offered a better grip and more visible veining, making it a much safer and more aesthetically pleasing choice for his bathroom floor.
Before you buy marble, it's smart to check out a few things. Make sure the color and pattern look just right for your space. Feel the surface to see if it's smooth or has a bit of texture. Also, think about how you'll use the marble – some types are tougher than others. Want to see our amazing marble options? Visit our website today to explore the perfect stone for your project!
Wrapping Up Your Marble Tile Project
So, buying marble tile might seem a little tricky at first, but with a bit of know-how, you can totally nail it. We've gone over a bunch of common slip-ups, from picking the wrong type of stone to not prepping your space right. Remember, taking your time, doing your homework, and maybe even getting a sample before you commit can save you a lot of headaches down the road. If you're looking for top-notch marble and need some guidance, check out Surfaces Galore. They've got a huge selection and can help you find just what you need to make your project shine. Happy tiling!
Frequently Asked Questions
Why does my marble look different from the picture online?
Marble is a natural stone, and just like fingerprints, no two pieces are exactly alike! The colors and patterns can vary a lot from one tile to another, and even from what you see in a photo. That's why it's super important to get a sample of the marble you like. This way, you can see the real color and texture up close before you buy the whole batch.
How much extra marble tile should I buy?
It's smart to buy a little extra tile, usually about 10% more than you think you'll need. This extra bit is for any tiles that might get cut into weird shapes, break during installation, or if you need to replace one down the road. Always measure your space carefully and add that extra percentage to avoid running short.
Can I install marble tiles myself?
You can! But it takes patience and the right tools. You'll need to make sure your floor or wall is super flat and clean, use special glue made for stone, and cut the tiles carefully. If you're not sure, it's always a good idea to get help from a pro to make sure it looks amazing and lasts a long time.
What's the difference between polished and honed marble?
Polished marble is super shiny and smooth, giving a fancy, bright look. Honed marble has a more matte, soft finish that's less slippery. Polished marble shows scratches and water spots more easily, while honed marble is a bit tougher for everyday use. Both look beautiful, but they have different vibes and care needs.
Do I need to seal my marble tiles?
Yes, absolutely! Marble is like a sponge; it can soak up liquids and get stained easily. Sealing creates a protective barrier that helps keep spills from sinking in. You'll need to seal it when it's first installed and then again every year or so to keep it looking its best.
What kind of glue should I use for marble tiles?
You can't just use any old glue! You need a special type called 'thin-set mortar' that's made just for natural stone like marble. If your marble is light-colored, it's best to use white thin-set mortar. This stops any gray color from showing through the stone and making it look dingy.
What if some of my marble tiles have chips or cracks?
Before you start sticking any tiles down, check each one really carefully. If you find one that's chipped, cracked, or looks weird, don't use it! Set it aside. It's best to talk to the place you bought it from before you install it, because once it's glued down, it's usually considered accepted.
Is travertine a good alternative to marble?
Travertine is a great choice and often costs less than marble, making it a more budget-friendly option. It's also a natural stone with its own unique beauty. While marble is known for its luxurious veining, travertine has a distinct, earthy look with natural holes that can be filled or left open. Both are beautiful, but travertine can be a bit easier on your wallet.
Leave a comment