
Custom Mosaic Design Guide for Stunning Stone Projects

Did you know that mosaic art dates back over 4,000 years but continues to captivate homeowners today? A well crafted stone mosaic can transform any space, offering both style and durability. Whether you dream of a dramatic entryway or a serene outdoor retreat, planning each detail helps you create a mosaic that feels tailored and timeless. Careful design choices and material selection lay the foundation for artwork that brings personality and lasting beauty to your home.
Table of Contents
- Step 1: Define Your Mosaic Vision And Space
- Step 2: Select Stone Materials And Color Palette
- Step 3: Lay Out And Design Mosaic Patterns
- Step 4: Prepare Substrates And Gather Tools
- Step 5: Install Mosaic Pieces Precisely
- Step 6: Seal, Clean, And Inspect Final Mosaic
Quick Summary
| Key Point | Explanation |
|---|---|
| 1. Define your mosaic vision first | Understand the personality of your space before creating a mosaic to ensure it complements and enhances your environment. |
| 2. Choose the right materials and colors | Selecting appropriate stone types and colors is crucial for durability and aesthetic appeal, creating harmony with the surroundings. |
| 3. Use precise layout techniques | Create detailed sketches and utilize tools to ensure each stone piece fits perfectly for a cohesive and visually appealing design. |
| 4. Prepare your workspace and tools | A clean, organized area with the correct tools enhances installation efficiency and ensures safety during the mosaic creation process. |
| 5. Seal and inspect your mosaic meticulously | Proper sealing protects against damage and ensures longevity, while an inspection checks for consistency and visual integrity in the final piece. |
Step 1: Define Your Mosaic Vision and Space
Defining your mosaic design begins with understanding the unique personality of your space and how a custom stone mosaic can transform it. According to research from art education resources, creating mosaics involves strategically using small shapes to form compelling patterns that integrate seamlessly with their environment.
Start by walking through the area where you plan to install your mosaic. Take careful measurements and observe the existing color palette, architectural lines, and natural lighting. Your mosaic should complement these elements while adding visual interest. Marble Mosaic Designs to Elevate Your Space can provide additional inspiration for your project.
Consider the functional and aesthetic goals of your mosaic. Will it serve as a dramatic focal point in your entryway? A serene backdrop in your garden? Or an intricate accent wall in your living space? Each purpose requires a different approach to design and material selection.
Visualize potential designs by creating rough sketches or using digital design tools. Play with different geometric patterns geometric configurations that match the character of your space. Natural stone mosaics offer incredible versatility whether you prefer classic symmetrical arrangements or more organic flowing designs.
Pro Tip: Always purchase slightly more material than your initial measurements suggest. This provides flexibility for complex cuts and potential replacements during installation.
By thoughtfully defining your mosaic vision upfront, you set the stage for a stunning stone project that will enhance your environment with timeless elegance.
Step 2: Select Stone Materials and Color Palette
Selecting the right stone materials and color palette is critical to creating a stunning mosaic that transforms your space. Research shows that material choices dramatically affect a mosaic’s durability and visual appeal, with each stone offering unique characteristics and aesthetic potential.
Natural stone provides exceptional versatility for mosaic design. What Is Natural Stone? Complete Guide for Designers can help you understand the nuanced qualities of different stone types. Consider marble for elegant veining, travertine for warm earthy tones, or onyx for dramatic translucent effects.
When choosing your color palette, think beyond individual stone colors and focus on creating visual harmony. According to gardening design research, successful mosaics require colors that complement each other and integrate seamlessly with the surrounding environment. Walk through your space and observe existing color tones in walls, furniture, and natural lighting.
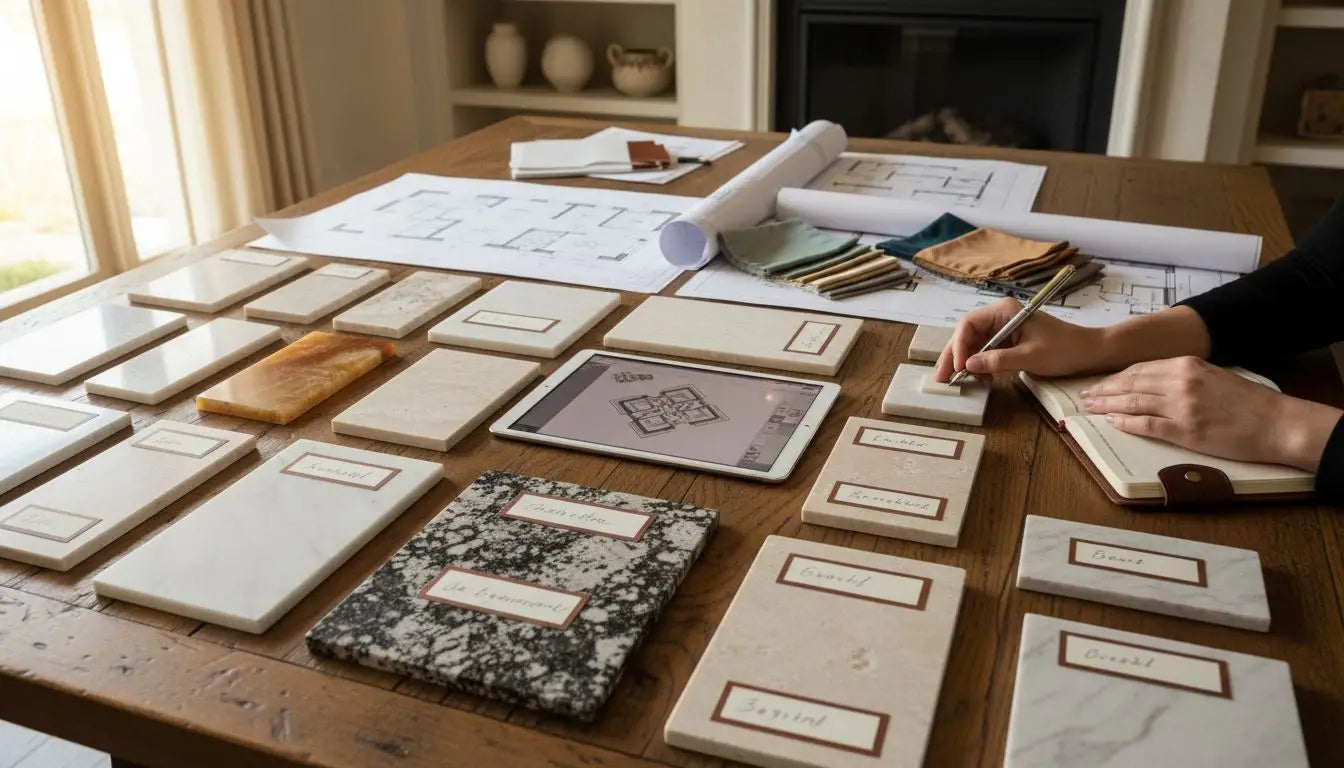
Experiment with stone samples in your intended space. Some stones look dramatically different under various lighting conditions. Hold stones against your background and observe how light and shadows interact with their natural textures and colors.
Pro Tip: Always purchase stone samples before committing to a full mosaic installation. Natural stone variations mean no two pieces are exactly alike.
Your material and color selections will set the foundation for a mosaic that tells a unique visual story in your home.
Here’s a quick comparison of common natural stones for mosaics:
| Stone Type | Appearance | Durability | Ideal Spaces |
|---|---|---|---|
| Marble | Elegant veining Wide color range |
High | Bathrooms Entryways Living areas |
| Travertine | Warm earthy tones Soft texture |
Moderate | Kitchens Patios Accent walls |
| Onyx | Dramatic translucence Unique patterns |
Moderate-Low | Feature walls Backsplashes |
| Granite | Consistent texture Speckled look |
Very High | Floors Outdoor areas |
Step 3: Lay Out and Design Mosaic Patterns
Laying out mosaic patterns is where your artistic vision transforms into a tangible design. According to design research, this process involves strategically arranging small shapes to create a cohesive and visually compelling larger image that reflects your unique artistic intent.
Start by creating a detailed sketch or template of your proposed design. Elevate Your Space with Hexagon Marble Mosaic Designs can inspire different geometric approaches. Consider classic patterns like herringbone or basketweave, or explore more organic and free flowing configurations.
Use graph paper or digital design tools to map out precise tile placements. This helps you understand how individual stone pieces will interact and create visual rhythm. Pay attention to the natural variations in stone color and texture, allowing these subtle differences to add depth and character to your mosaic.
Consider creating a paper or digital mock up before cutting any actual stone. This allows you to experiment with pattern variations and color interactions without committing to permanent materials. Test different arrangements by moving pieces around to find the most visually harmonious composition.
Pro Tip: Leave small consistent gaps between mosaic pieces for grout. These spaces are crucial for structural integrity and can become design elements themselves.
Your mosaic pattern will serve as the visual heartbeat of your stone installation, telling a unique story through carefully arranged pieces.
Step 4: Prepare Substrates and Gather Tools
Preparing the right substrate and collecting essential tools are critical foundations for a successful mosaic project. According to gardening design research, choosing an appropriate base material and assembling the right tools can make or break your stone mosaic installation.
Select a substrate that matches your project location and intended durability. Plywood works well for indoor projects, while cement board provides superior moisture resistance for exterior or wet environments. Research from construction design indicates that the substrate must be clean, smooth, and structurally sound before beginning your mosaic work.
Gather your toolkit with precision. Essential items include tile nippers for cutting stone pieces, a notched trowel for spreading adhesive, rubber grout float, spacers, and safety equipment like protective gloves and goggles. The Luxurious World of Natural Stone Tiles offers additional insights into working with different stone materials.
Prepare your workspace by creating a clean, well ventilated area with ample lighting. Lay out all materials and tools within easy reach. Measure and mark your substrate carefully, ensuring you have a precise guide for tile placement.
Pro Tip: Always wear safety glasses when cutting stone tiles. Small fragments can easily fly during the cutting process.
With your substrate prepared and tools assembled, you are now ready to transform your mosaic design from concept to reality.
Step 5: Install Mosaic Pieces Precisely
Installing mosaic pieces is an art of precision where each stone finds its perfect place in your design. According to gardening design research, successful mosaic installation requires careful adhesive application and meticulous piece placement to bring your artistic vision to life.
Start by applying a thin layer of high quality adhesive using a notched trowel. Work in small sections to prevent the adhesive from drying before you can place your stone pieces. Mosaic Tile Designs for Marble can provide additional guidance on working with different marble varieties.
Begin placing your mosaic pieces from the center of your design outward. This approach helps maintain symmetry and allows you to make minor adjustments as you progress. Use tile spacers to ensure consistent gaps between pieces these will create uniform grout lines and contribute to the overall precision of your installation.
Apply gentle pressure to each stone piece to ensure secure adhesion. Check your design template frequently to confirm you are maintaining the intended pattern. Take your time and work methodically stone by stone.
Pro Tip: Clean excess adhesive immediately with a damp cloth to prevent it from hardening on your stone surfaces.
With patience and attention to detail, you will transform your carefully planned design into a stunning stone mosaic masterpiece.
Step 6: Seal, Clean, and Inspect Final Mosaic
Sealing and caring for your mosaic is the final crucial step in transforming your stone artwork into a lasting masterpiece. According to research, proper sealing protects your mosaic from moisture damage and environmental wear while preserving its stunning visual appeal.
Begin the sealing process by thoroughly cleaning the mosaic surface. Remove any excess grout or adhesive residue using a specialized stone cleaner and soft cloth. How to Properly Seal Your Kitchen Backsplash offers additional insights into effective sealing techniques.
Apply a high quality stone sealer using a clean foam brush or soft cloth. Work in thin even layers, allowing each coat to dry completely before applying the next. Pay special attention to grout lines and areas with more intricate stone patterns to ensure comprehensive protection.
Conduct a meticulous final inspection of your mosaic. Check each stone piece for secure placement, examine grout lines for consistency, and verify that the overall design matches your original vision.
Look for any small imperfections that might need touch up or additional attention.
Pro Tip: Test your sealer on a small inconspicuous area first to ensure it does not alter the natural stone color or finish.
Your carefully sealed and inspected mosaic is now ready to become a stunning focal point in your space.
Bring Your Custom Mosaic Vision to Life with Premium Natural Stone
Crafting a stunning stone mosaic requires more than just creativity it demands the right materials and expert support to realize your vision. If you have struggled with selecting durable stones that complement your space or figuring out how to lay patterns with precision your project can benefit greatly from premium marble and travertine options designed for mosaics. Surfaces Galore specializes in authentic natural stone that delivers elegance and longevity, helping you avoid common installation headaches such as uneven texture or color mismatch.

Explore our exquisite collection today and discover how easy it is to elevate your home or commercial project with carefully sourced stone mosaics. Whether you seek advice on tile layouts or require specific stone samples to refine your design choose Surfaces Galore for quality, affordability, and nationwide delivery. Start your mosaic journey now at Surfaces Galore and turn your unique design ideas into breathtaking stone masterpieces.
Frequently Asked Questions
How do I define my mosaic vision for a custom stone project?
Start by evaluating the unique personality of your space, taking note of the color palette, architectural lines, and natural lighting. Create sketches or use digital design tools to visualize your intended design, ensuring it complements your environment.
What materials should I consider for my custom mosaic design?
Choose from various natural stones such as marble, travertine, or onyx based on aesthetics and durability. Experiment with stone samples in your intended space to see how they interact with light and existing colors before making your selection.
How can I lay out and design mosaic patterns effectively?
Begin by sketching your proposed design and mapping it out using graph paper or digital tools for precise placements. Explore different patterns such as herringbone or basketweave, and consider creating a mockup for adjustments before cutting the stones.
What tools are essential for installing a stone mosaic?
Gather essential tools such as tile nippers, a notched trowel, rubber grout float, and spacers before starting your project. Ensure you also have safety equipment like gloves and goggles to protect yourself while working with stone materials.
How do I properly seal and clean my completed mosaic?
Clean the mosaic surface to remove any adhesive residue, then apply a high-quality stone sealer in thin, even layers. Allow each coat to dry completely and check for secure placements and consistent grout lines before considering the project complete.
Leave a comment