
How Much Extra Tile Should You Order? Understanding and Calculating Waste

So, you're planning a tiling project, huh? Whether it's a fancy new bathroom floor or just a backsplash, figuring out how much tile to buy can be a bit of a headache. You don't want to end up with a bunch of leftover tiles, but you *really* don't want to run out halfway through. This whole 'how much extra tile should you order?' thing is pretty important. We'll break down why you need a little extra and how to figure out the right amount, so you don't have to stress about it.
Key Takeaways
- Always buy more tile than you think you need. A common rule is to add 10-30% to your total square footage to account for cuts, mistakes, and breakage.
- Measure your project area carefully. Get the square footage right first, then add your waste percentage.
- Complex layouts, lots of cuts, and natural stone variations mean you'll likely need a higher waste percentage.
- Ordering a bit extra is also smart for future repairs. Natural stone especially can vary between batches, so having matching tiles later is a lifesaver.
- Plan your tile layout before you start cutting. Sometimes, you can use offcuts in less visible spots to reduce waste.
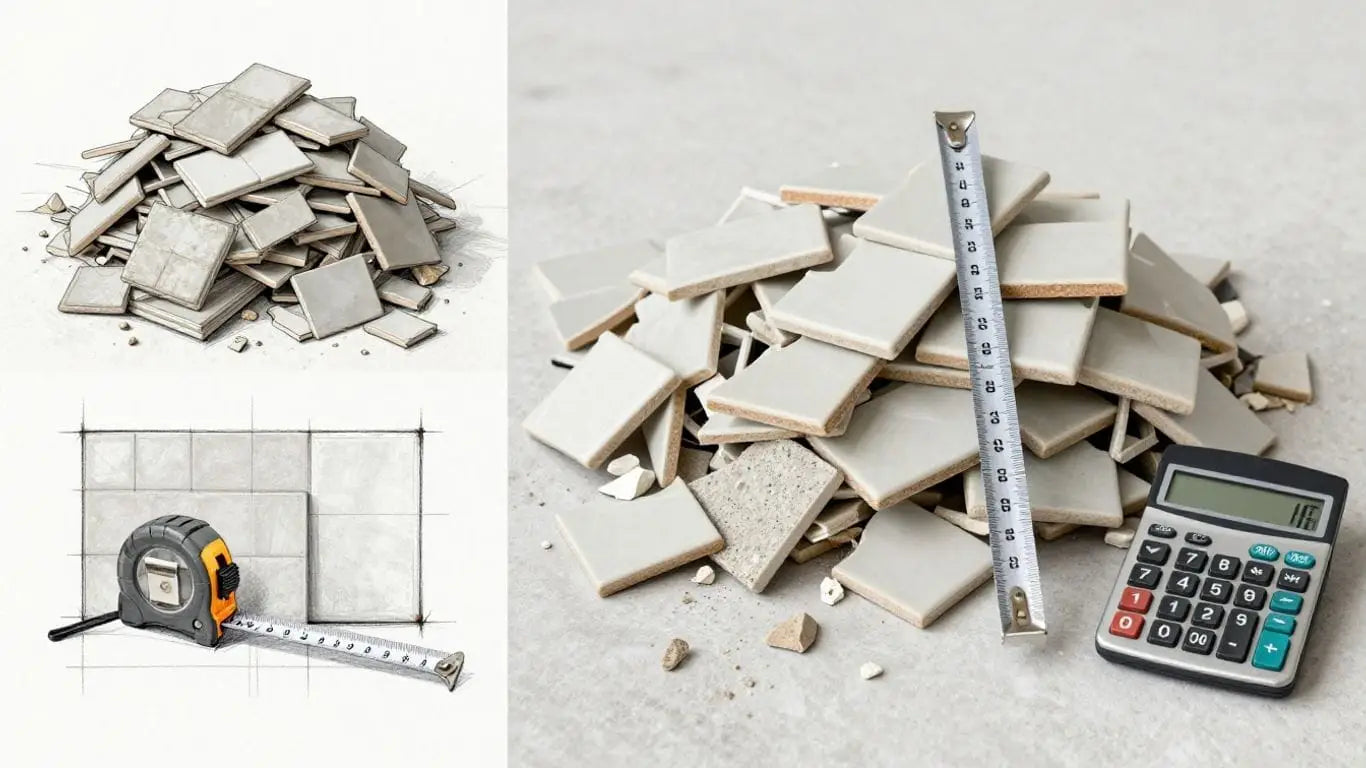
Understanding Tile Waste Factors
When you're planning a tiling project, thinking about waste might seem like a downer. But honestly, it's super important. It's not just about how many tiles you'll see on the floor or wall; it's about the ones you'll cut, trim, or maybe even break along the way. Getting this right means you won't run out of tiles mid-job, and you won't have a bunch of mismatched pieces later on.
Defining The Waste Factor In Tiling
The "waste factor" is basically the extra percentage of tile you need to buy to cover all the cuts, mistakes, and unexpected issues that pop up during installation. Think of it as your insurance policy against running short. For most projects, especially with natural stone like marble or travertine, we recommend adding 10-15% extra. For more complex jobs, you might need even more. It’s better to have a little left over than to be short a few tiles and have to hunt for a matching batch later.
Why Waste Occurs During Installation
Waste happens for a bunch of reasons. You've got cuts needed for edges, corners, and around pipes or fixtures. Then there's the chance of a tile chipping or cracking during cutting or handling – it happens to the best of us! Sometimes, you might even make a mistake and have to cut a new tile. Planning your cuts carefully can help, but some waste is just part of the process. For example, if you're installing beautiful marble tiles, you'll want to make sure every cut is precise to maintain that luxurious look.
The Impact Of Joint Tightness On Waste
How close you set your tiles together, or the "joint tightness," really affects waste. If you're aiming for super tight, almost invisible grout lines (like 1/16th of an inch), you'll need to be incredibly precise with your cuts. This often means more trimming and, you guessed it, more waste. On the flip side, wider grout lines can sometimes be a bit more forgiving. It’s a trade-off between the look you want and the material you’ll use. For a project using something like buy marble tiles online USA, precision is key, and that often means a slightly higher waste factor.
Case Study: The Kitchen Backsplash Mishap
Sarah was redoing her kitchen backsplash with stunning subway tiles. She measured carefully and ordered exactly the square footage needed, plus a tiny bit extra. But when she started cutting around the electrical outlets and the window frame, she realized how many cuts were needed. A couple of tiles chipped during cutting, and one even cracked when she dropped it. By the time she finished, she was just one tile short. She had to order a single tile, paying for shipping and waiting an extra week, which delayed her project. If she had added an extra 10-15% from the start, she would have saved herself the headache and the extra cost.
Case Study: The Bathroom Floor Challenge
Mark was installing large format travertine tiles in his bathroom. He wanted a very modern look with minimal grout lines. This meant precise cuts were needed for every single tile. He calculated his square footage and added 15% for waste. During installation, he found that a few tiles had slight warps, making it hard to achieve perfectly flush edges without extra trimming. He also had to make several complex cuts around the curved vanity base. In the end, his 15% overage was just enough, but it was a close call. He learned that for intricate layouts or large format tiles, it's wise to use a material calculator that accounts for these complexities.
Calculating Your Tile Material Needs
Getting the tile quantity right is key. Too little, and you're stuck with an unfinished project. Too much, and you've wasted money. Let's break down how to figure out exactly what you need.
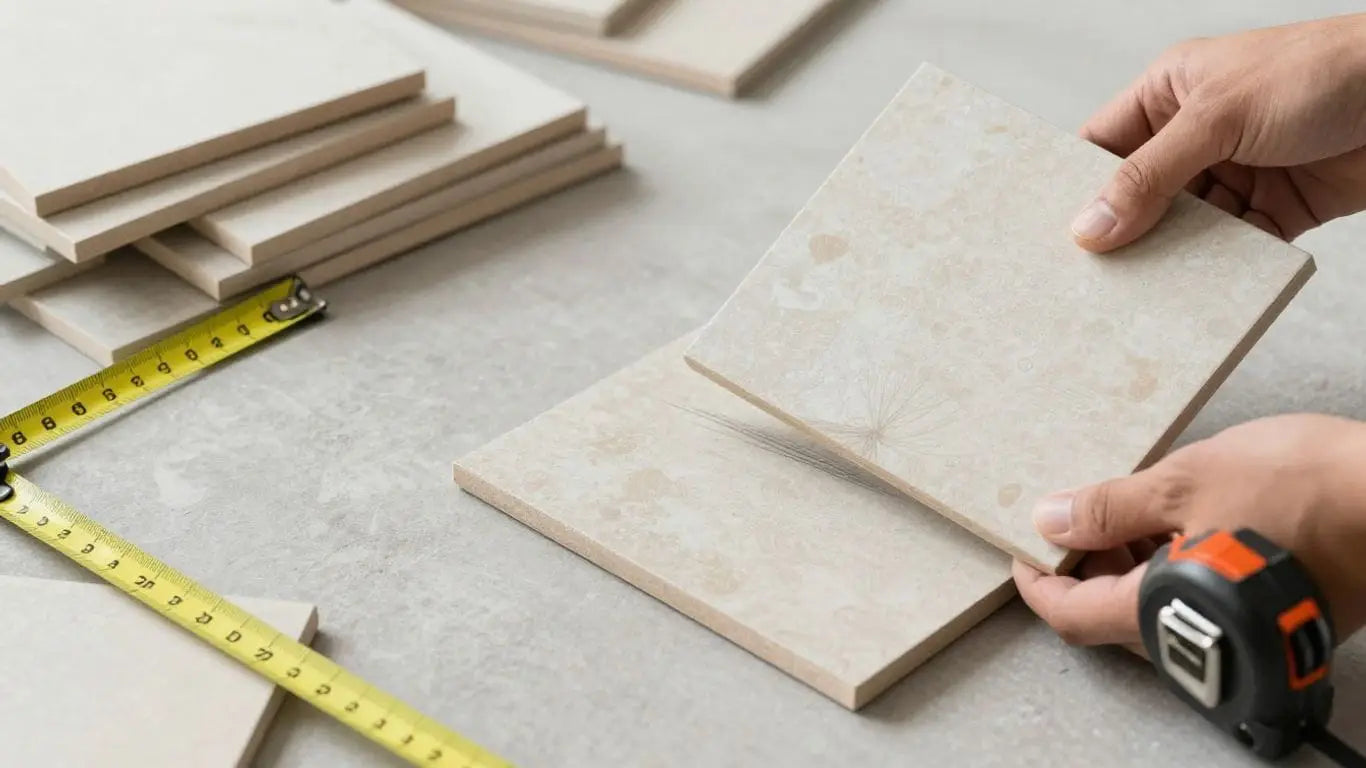
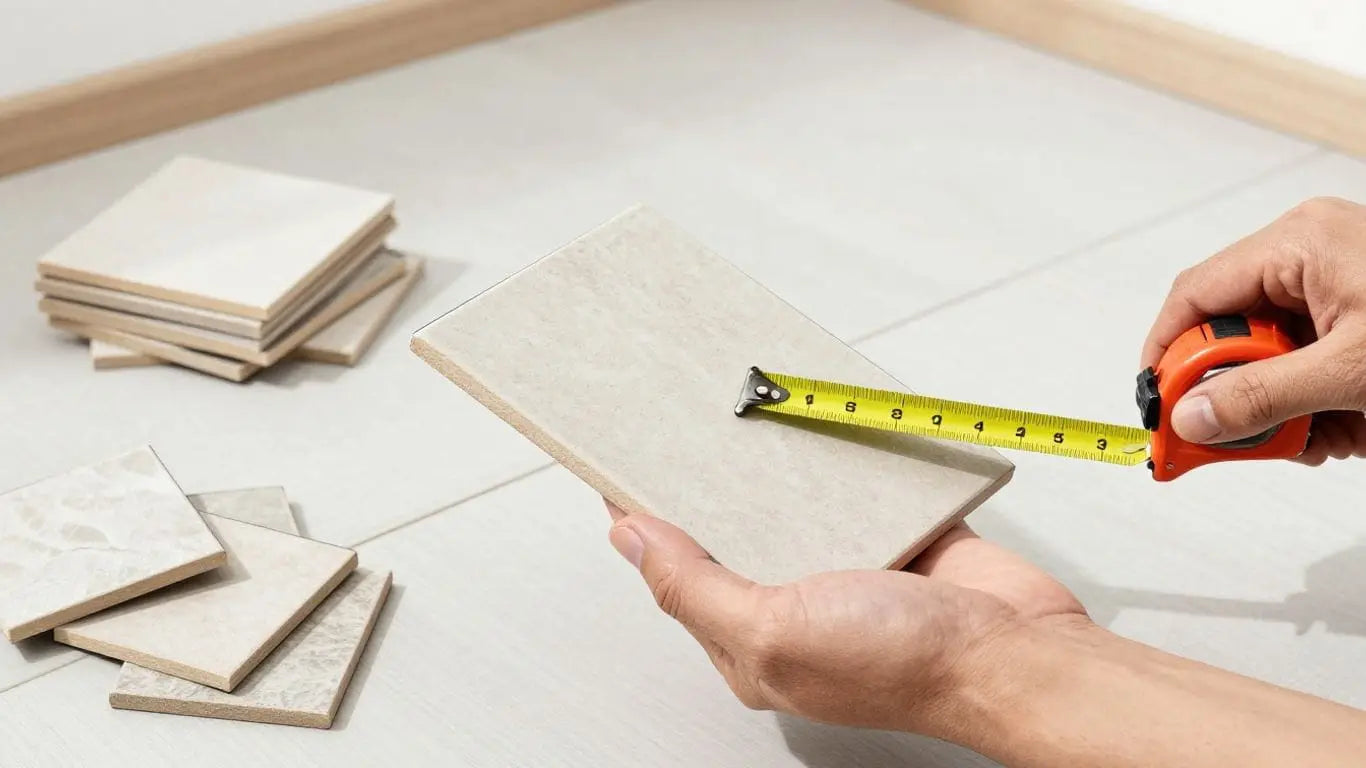
Measuring Your Project Area Accurately
First things first: measure your space. You need the square footage of the area you're tiling. For walls, measure the height and width of each section and add them together. For floors, it's a simple length times width calculation. Be precise here; accuracy now saves headaches later. You can use a tape measure for this. For example, a room that's 10 feet by 12 feet is 120 square feet. If you're tiling a wall that's 8 feet high and 20 feet long, that's 160 square feet. Always double-check your measurements before you buy.
Applying The Waste Percentage To Your Square Footage
Now, let's talk about waste. It's not about being wasteful; it's about being prepared. Cuts, breaks, and fitting around obstacles all add up. A good rule of thumb is to add 10-15% extra tile to your total square footage. This accounts for the inevitable cuts and potential breakage. So, if your project area is 120 square feet, you'd add 10% (12 sq ft) or 15% (18 sq ft), meaning you'd need between 132 and 138 square feet of tile. This is a standard practice when you buy marble tiles online in the USA or anywhere else.
Don't skip this step – it's your insurance policy against running short.
Considering Project Size For Waste Estimation
Larger projects might sometimes get away with a slightly lower waste percentage, maybe closer to 10%. This is because you can often use offcuts more efficiently. Smaller, more intricate projects, however, might need that 15% or even a bit more. Think about complex patterns or lots of cuts around doorways and windows. For instance, a small bathroom with many angles might require a higher overage than a large, open living room floor. It’s about looking at the job realistically. If you're planning a checkerboard layout with marble or travertine, you'll want to be extra sure about your measurements and waste factor.
Case Study: The Kitchen Backsplash
Sarah wanted a stunning marble backsplash for her kitchen. The area measured 30 square feet. She decided to add 15% for waste, bringing her total to 34.5 square feet. She ordered 35 square feet of tile. During installation, she had a few tricky cuts around outlets and a couple of tiles that chipped slightly. Having that extra bit meant she finished the job without needing to make a rush trip to the store, saving her time and stress.
Case Study: The Large Living Room Floor
Mark was tiling a 500-square-foot living room with travertine. He calculated 10% for waste, needing 550 square feet. He found that with careful planning and using offcuts for the edges, he only used about 530 square feet. The extra 20 square feet he ordered came in handy later when a heavy piece of furniture scratched a few tiles, allowing for a perfect repair without any color match issues.
Always measure twice and order once, but when it comes to tile, order a little extra. It's far better to have a few spare tiles than to be short on your project.
Factors Influencing Tile Waste
When you're planning your tile project, it's not just about the square footage you need to cover. Several hidden factors can significantly impact how much extra tile you should order. Ignoring these can lead to frustrating shortages mid-project or, worse, an inconsistent look if you have to source replacements later.
Natural Stone Variations and Their Effect
Natural stone, like marble or travertine, is beautiful precisely because it's unique. Each slab or tile has its own character – veining, color depth, and subtle texture differences. This natural variation is a huge selling point, but it also means you can't just cut and paste. When you're laying out your tiles, especially if you're working with different batches or even different parts of the same quarry, you'll need extra pieces to find the best matches and ensure a cohesive look. Trying to force a perfect match with limited stock can lead to awkward cuts or visible seams. Always account for the natural beauty of stone by ordering more than you think you'll need.
Case Study: Sarah was renovating her kitchen and fell in love with a particular marble backsplash. She ordered just enough for the area, plus a small 10% overage. When she started installing, she found that some tiles had very strong veining, while others were almost solid white. To achieve the balanced, flowing pattern she envisioned, she had to use more tiles than initially calculated, leaving her short for a small section above the stove. She ended up having to buy a few more tiles, but they were from a slightly different batch, and the color variation was noticeable.
The Role Of Complex Cuts And Patterns
Simple rectangular rooms are one thing, but what about those tricky corners, curved walls, or intricate patterns? Projects involving a lot of cuts – around doorways, windows, or for decorative patterns like a checkerboard layout – naturally generate more waste. The more cuts you make, the higher the chance of error or breakage. Complex patterns, like mosaics or herringbone, require precise cuts and often result in smaller offcuts that might not be usable elsewhere. If you're planning a detailed design, like a custom mosaic, you'll need to factor in a higher waste percentage. For intricate designs, consider increasing your overage to 15-20% or even more.
Material Breakage During Handling And Installation
Let's be honest, tiles can be fragile. From the moment they arrive at your door to the final placement on the wall or floor, there are multiple opportunities for breakage. Shipping can sometimes cause minor chips, and handling them around the job site – moving boxes, carrying them to the installation area – increases the risk. During installation, mistakes happen. A tile might slip, a cut might be slightly off, or a piece might crack under pressure. It's wise to order at least 10-15% extra tile to cover these inevitable mishaps. This buffer is especially important when you're buying marble tiles online in the USA, where you want to minimize the need for reordering due to shipping delays or damage.
Case Study: John was installing large format travertine tiles on his patio. He was careful, but one of the heavy 24x24 tiles slipped as he was positioning it, and a corner chipped off. He had ordered a 10% overage, which covered this one incident. However, a few days later, while cutting a tile to fit around a drainpipe, his wet saw blade snagged, causing a clean break across the tile. Thankfully, his initial overage was enough to cover both breakages, allowing him to complete the project without delay.
Best Practices For Ordering Extra Tile
Recommended Overages for Common Projects
When you're planning your tile project, it's easy to just measure the space and order that exact amount. But that's a recipe for a headache later on. You absolutely need to factor in extra tile. For most standard projects, like a simple bathroom floor or a rectangular kitchen backsplash, aim for about 10-15% extra. This covers those inevitable cuts, mistakes, and maybe a tile that chips when you're setting it. If you're working with a more complex layout, like a diagonal pattern or a lot of small cuts around fixtures, bump that up to 15-20%. It might seem like a lot, but trust me, it's better to have a few extra tiles than to run short.
The Importance of Ordering for Future Repairs
Think about it: life happens. A dropped pot, a leaky pipe, or even just wear and tear over the years can damage a tile. If you didn't order extra, finding a perfect match later can be a real challenge. Natural stone, especially, has variations in color and veining from batch to batch. Ordering enough extra tile upfront means you'll have a perfect match for any future repairs, keeping your floor or wall looking consistent and beautiful for years to come. It’s like having a little insurance policy for your beautiful new tile installation. For instance, if you're looking to buy marble tiles online in the USA, make sure to ask about batch consistency and order a bit more than you think you'll need.
Batch Consistency and Future Availability
This is a big one, especially with natural materials like marble and travertine. Every batch of stone can have slight differences in color, tone, and veining. If you order 100 square feet today and then need another 10 square feet in six months for a repair, that new batch might look noticeably different. This is why ordering a bit more than your immediate needs is so smart. It guarantees that any tiles you use for repairs will blend in seamlessly with the original installation. It’s a small step that makes a huge difference in the long-term appearance of your project. We've seen customers who didn't account for this, and the patch job really stood out, ruining the overall look they worked so hard to achieve.
Case Study: The Kitchen Backsplash Mishap
Sarah was renovating her kitchen and fell in love with a beautiful tumbled travertine backsplash. She measured her backsplash area precisely and ordered exactly that amount, plus a tiny bit extra for cuts. During installation, she accidentally broke three tiles while cutting them to fit around her outlets. She called the tile supplier, only to find out that specific batch was sold out, and the new stock had a slightly darker, more reddish hue. The few tiles she had left didn't quite match the new ones, and the backsplash ended up with a visible, mismatched patch. If she had ordered an extra 15%, she would have had plenty to cover the breakage without any issue.
Case Study: The Bathroom Floor Save
Mark was installing a classic checkerboard pattern with black and white marble tiles in his bathroom. He calculated his square footage and added a generous 20% overage, knowing marble could be tricky. A few months after the installation, his dog had an accident that stained one of the white marble tiles beyond repair. Luckily, Mark had a few pristine white tiles left from his original order. He was able to replace the damaged tile, and you couldn't even tell where the repair was made. That extra 20% saved his entire floor from looking mismatched and ruined.
Always remember that ordering extra tile isn't just about covering mistakes; it's about future-proofing your beautiful design and ensuring a perfect finish for years to come. It’s a small investment that pays off big time.
Minimizing Waste During Installation
Even with careful planning, some tile will inevitably be cut or trimmed. But smart installation practices can significantly reduce that waste. It’s about working with your materials, not against them. Think of it as a puzzle where every piece counts. By being strategic, you can save money and ensure you have enough tile for the long haul. This is where the real magic happens, turning a good plan into a great installation.
Strategic Planning of Tile Layouts
Before you even open a box of tile, take time to plan your layout. This step is non-negotiable for minimizing waste. A well-thought-out plan means fewer awkward cuts and better use of each tile. It’s about visualizing the finished space and working backward.
- Dry Lay Everything: Lay out your tiles without adhesive first. This lets you see how the pattern flows and where cuts will be needed. You can rearrange tiles to use pieces with natural breaks or unique features in less visible spots.
- Center Your Design: Starting from the center of the room and working outwards often leads to more balanced cuts on the edges, rather than one very small, difficult cut on one side and a large piece on the other.
- Consider Tile Orientation: For natural stones like marble, pay attention to the veining. Planning your layout can help create a cohesive flow, using offcuts strategically where the pattern might be less critical.
A Case Study in Smart Layouts: Sarah wanted a classic marble floor in her entryway. She initially planned to start tiling from the door. However, during her dry lay, she noticed this would result in a very thin, chipped-looking cut piece right in the center of the main walkway. By shifting her starting point slightly and centering the layout, she ended up with two balanced cuts on opposite sides, using a larger offcut from one side to complete the other. This saved her from having to make a difficult cut and ensured a more visually appealing finish.
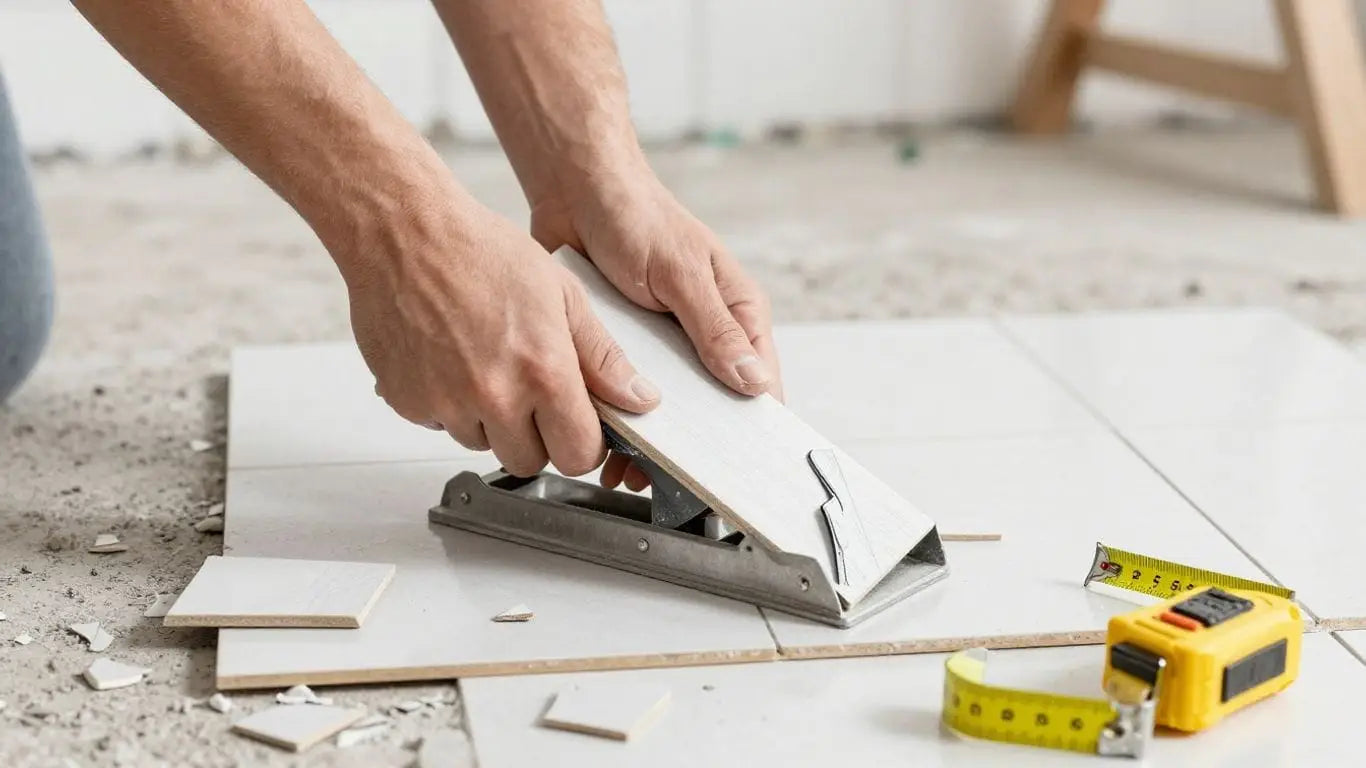
Efficient Cutting Techniques for Stone
Cutting natural stone requires precision. Rushing the process is a fast track to breakage and wasted material. Using the right tools and techniques makes all the difference.
- Use a Wet Saw: For most natural stones, a wet saw with a diamond blade is your best friend. It provides clean, precise cuts and keeps dust down. Make sure the blade is sharp and the water reservoir is full.
- Measure Twice, Cut Once: This old adage is especially true with tile. Double-check your measurements before making any cut. A small mistake here can turn a full tile into scrap.
- Plan for Intricate Cuts: For complex shapes like around doorways or fixtures, consider using a jigsaw with a tile blade or a rotary tool. Practice on scrap pieces first if you're unsure.
When cutting natural stone, always prioritize safety. Wear safety glasses and gloves. Work slowly and let the tool do the work. Forcing a cut is the quickest way to chip or break the stone, turning a usable piece into waste.
Utilizing Offcuts in Less Visible Areas
Don't toss those smaller pieces! Offcuts can be incredibly useful, especially in areas that aren't the main focal point. This is where you can really maximize your material.
- Under Cabinets and Appliances: These areas are perfect for using smaller cut pieces. Once installed, they'll never be seen.
- Behind Doors: Similar to under cabinets, the area just inside a doorway can often accommodate smaller, less perfect cuts.
- Small Nooks and Crannies: Tight corners or small alcoves can often be filled with carefully pieced-together offcuts.
Example: A homeowner installing travertine in their kitchen found they had several good-sized offcuts from around the perimeter. Instead of discarding them, they used these pieces to fill in the area under the dishwasher and the small space behind the refrigerator. This meant they didn't have to use new, full tiles for these hidden spots, effectively reducing their overall waste and ensuring they had more full tiles left over for the main visible areas. If you're looking to buy marble tiles online in the USA, remember that smart use of offcuts can make your budget go further.
Preparing For Your Tile Installation
Essential Tools For Cutting And Fitting
Getting your tiles ready for installation is half the battle. You wouldn't build a house without a hammer, right? Same goes for tiling. Having the right gear makes all the difference between a smooth job and a frustrating mess. Think of it as setting yourself up for success before you even lay the first tile.
- Wet Saw: For clean, precise cuts on natural stone like marble or travertine. A good diamond blade is key here. You can buy marble tiles online USA and have them delivered, but you still need to cut them.
- Tile Cutter: A manual snap cutter can work for simpler cuts, especially on less dense materials.
- Measuring Tape & Pencil: Obvious, but vital for marking your cuts accurately.
- Safety Gear: Always wear safety glasses and gloves. Cutting stone can create dust and sharp edges.
Case Study: Sarah wanted a stunning marble backsplash. She bought beautiful Calacatta Gold tiles online but underestimated the cuts needed around her outlets. She ended up having to make a second trip to the tile store for more material because her initial cuts were a bit rough with a basic cutter, leading to more waste than planned.
Subfloor Preparation For Optimal Results
Don't skip this step! A bad subfloor means a bad tile job, no matter how fancy your tiles are. We're talking about making sure your base is solid, level, and clean. It’s the foundation for your beautiful new floor or wall.
- Cleanliness is Key: Sweep and vacuum thoroughly. Any dirt or debris can mess with the adhesive bond.
- Leveling Up: Use a level to check for high or low spots. A self-leveling compound can fix unevenness.
- Moisture Check: Ensure the area is dry. Moisture can cause adhesive and grout issues down the line.
A solid, well-prepared subfloor is the unsung hero of a long-lasting tile installation. It prevents cracking, shifting, and other headaches later on.
Acclimating Your Natural Stone Tiles
This is a pro tip that many DIYers miss. Natural stone, like marble or travertine, needs to get used to its new environment before you stick it down. Think of it like letting a new plant adjust to its pot.
- Bring Them In: Place your tiles in the room where they'll be installed for at least 48 hours before starting.
- Temperature & Humidity: This allows the stone to adjust to the room's temperature and humidity levels.
- Why It Matters: This prevents issues like expansion or contraction after installation, which can lead to cracks or unevenness. It’s a small step that makes a big difference for the longevity of your beautiful stone, whether you buy marble tiles online USA or locally.
Advanced Waste Calculation Strategies
Creating Mock-Ups for Waste Estimation
Think of a mock-up as a mini-trial run for your tile project. Before you commit to buying all your materials, set up a small section of your space with the actual tiles you plan to use. This lets you see exactly how the tiles fit, how many cuts you'll realistically need, and where those cuts will fall. It’s a smart way to get a much more accurate idea of your waste percentage than just guessing. You might find that a certain pattern or layout creates more waste than you initially thought. This hands-on approach helps you avoid surprises later on.
Adjusting Percentages For Intricate Designs
Standard waste percentages, often around 10-15%, are usually fine for simple, rectangular rooms. But what about those complex patterns, like checkerboards or intricate mosaics? These designs demand more cuts and often more precise ones, which naturally leads to more waste. For these situations, you need to bump up that percentage. A complex pattern might require 20% or even 30% extra material. It’s better to have a little extra than to run short halfway through your project, especially when you buy marble tiles online in the USA and need them to match perfectly.
Consulting With Your Tile Supplier
Don't go it alone! Your tile supplier is a goldmine of information. They know their products inside and out and have seen countless projects. Talk to them about your specific design, the type of stone you're using (like marble or travertine), and the layout you have in mind. They can offer tailored advice on waste percentages and might even suggest more efficient ways to lay out your tiles. Some suppliers even offer tile layout planning tools to help you visualize and optimize your project. They can also help you understand batch consistency and future availability, which is key if you ever need to do repairs.
Case Study: The Intricate Mosaic Bathroom
A homeowner wanted a stunning mosaic tile design for their bathroom floor. They calculated a standard 10% waste factor for their 50 sq ft bathroom. However, after creating a mock-up, they realized the complex curves and small tile pieces in the mosaic pattern generated significantly more waste. They adjusted their order to include 25% extra tile, which proved to be just enough to complete the project without running short. This proactive approach saved them from a potential delay and the headache of trying to find matching tiles later.
Case Study: Large Format Tile Project
For a large living room (500 sq ft) using large format marble tiles, the installer initially planned for 15% waste. During the dry-lay phase, they noticed that due to the size of the tiles and the room's dimensions, many cuts were needed along the perimeter. They consulted with their supplier, who recommended a slightly higher waste factor of 18% to account for potential breakage and ensure enough material for any unforeseen issues. This adjustment meant they had a few extra tiles, which were later used to replace a damaged tile a year after installation, maintaining the room's consistent look.
The Benefits Of Ordering Sufficient Extra Tile
Ensuring A Consistent Aesthetic
When you're working with natural stone, like the beautiful marble tiles you can buy online from Surfaces Galore, you're dealing with nature's own artistry. No two pieces are exactly alike. That's part of their charm, right? But it also means that if you run short, finding a perfect match later can be a real headache. Ordering a bit extra upfront means you can pick the best-looking pieces for prominent areas and ensure the color and veining flow just right across your entire project. It’s about making sure your finished floor or wall looks like one cohesive, stunning piece of art, not a patchwork job.
Avoiding Future Material Shortages
Think about it: you finish your project, and you're just a few tiles shy. You go back to order more, only to find that the specific batch you used is gone. Natural stone availability can change, and future orders might have noticeable color or pattern differences. This is especially true if you're buying marble tiles online USA and need a specific look. Having extra on hand means you won't face that disappointment or have to settle for a less-than-perfect match down the line. It’s a small investment now to avoid a big problem later.
Facilitating Seamless Repairs And Additions
Life happens. A dropped heavy object, a plumbing leak, or even just wear and tear over many years might require a tile replacement. If you have extra tiles from the original installation, making those repairs is straightforward. You'll have a perfect match ready to go, keeping your space looking as good as new. Without them, you might be left with a visible patch that detracts from the overall beauty of your stone. It’s like having a spare part for your home’s most beautiful features.
Case Study: The Kitchen Countertop Calamity
Sarah was renovating her kitchen and fell in love with a particular travertine tile for her backsplash. She meticulously measured, calculated, and ordered just enough, plus a tiny bit extra. Midway through installation, her contractor accidentally broke three tiles while cutting them for the corner. Panic set in. When she tried to reorder, the exact batch was no longer available. The new tiles had a slightly different tone, making the backsplash look uneven. If Sarah had ordered just 10% more, she would have had those replacements readily available, saving her stress and ensuring a flawless finish. This is why we always recommend adding that buffer – it’s peace of mind for your project.
Common Tile Installation Challenges
Even with the best planning, tiling projects can hit a few snags. Understanding these common hurdles can help you prepare and avoid costly mistakes. Don't let unexpected issues derail your dream space! We're here to guide you through them, ensuring a smoother installation and a stunning finish.
Dealing With Irregularly Shaped Spaces
Rooms aren't always perfect squares or rectangles. Awkward nooks, curved walls, or odd angles can make laying tiles tricky. This is where precise measurement and careful cutting become super important. You'll need to plan your layout meticulously to minimize waste and ensure a clean look, especially around doorways or built-in features. Think about how you'll handle those tricky corners – sometimes a custom cut is the only way to get that professional finish. For these situations, having a good wet saw is a lifesaver. It allows for those precise cuts needed to make irregular shapes fit perfectly.
Managing Lipped Edges and Uneven Surfaces
Ever laid tiles only to find some stick up higher than others? That's called lippage, and it's a common headache. It happens when tiles aren't perfectly flat or the subfloor isn't level. The key to avoiding lippage is a level subfloor and consistent tile setting. Using a good quality thin-set mortar and a notched trowel of the right size helps create an even bed for your tiles. For larger format tiles, consider using a tile leveling system. These clips and wedges help ensure all your tiles sit flush with each other, creating a smooth, even surface. It’s worth the extra effort for a floor that looks and feels professional.
Preventing Breakage During Tile Setting
Natural stone, like the beautiful marble tiles you can buy online from USA suppliers, can be brittle. Dropping a tile, hitting it too hard with a mallet, or even cutting it incorrectly can lead to chips and cracks. Always handle your tiles with care, especially during transport and before they're set. When cutting, use a sharp diamond blade on your wet saw and cut slowly. For setting, a gentle tap with a rubber mallet is usually enough to set the tile into the mortar. Remember, a little patience goes a long way in preventing costly breakage. It’s always wise to order that extra 10-15% of material to account for these little mishaps. You don't want to be left with a shortage of that perfect shade of marble halfway through your project!
Case Study: The Awkward Alcove
Sarah was tiling her bathroom and ran into trouble with a small, awkwardly shaped alcove for the vanity. Standard cuts just weren't working. She ended up having to make several complex angled cuts. By dry-laying the tiles first and marking each cut precisely, she managed to get a perfect fit. She also used some of the offcuts from larger tiles to fill in smaller gaps, saving material and looking great. This highlights how planning and careful cutting can solve even the trickiest spatial problems.
Case Study: The Uneven Floor
Mark was installing large format travertine tiles in his entryway. The old concrete subfloor had settled unevenly over the years. He initially tried to just spread more mortar, but he ended up with significant lippage. After realizing his mistake, he went back, ground down the high spots, and used a self-leveling compound to create a perfectly flat surface. The result? A smooth, even floor that looks fantastic and is safe to walk on. This shows the importance of proper subfloor preparation before you even think about laying the first tile.
Understanding Natural Stone Characteristics
Color and Vein Variations in Marble
Marble is a natural wonder, and that's part of its charm. When you buy marble tiles online in the USA, you're getting a piece of art sculpted by nature over millennia. This means each tile is unique. You'll see subtle shifts in color and distinct veining patterns that tell a story. It’s not like a manufactured tile where every piece is identical. This variation is what gives marble its luxurious, one-of-a-kind look. Think of it as a fingerprint for your floor or walls.
Embrace the natural beauty; it's what makes your space truly special.
- Veining: The lines and swirls in marble are caused by mineral impurities and pressure during its formation. These can range from delicate, hair-like lines to bold, dramatic streaks.
- Color: Marble comes in a spectrum of colors, from classic whites and creams to deep blacks, greens, and even reds. The base color is influenced by the original limestone and the types of minerals present.
- Consistency: While variations are normal, it's important to order enough material at once. This helps ensure that the tiles you receive are from the same quarry run and have a similar overall appearance. Trying to match a few tiles later can be a challenge due to these natural differences.
Ordering extra marble is always a smart move. It accounts for cuts, potential breakage, and those unique variations that make your project stand out. Plus, it guarantees a consistent look if you ever need repairs.
Porosity and Texture Differences in Travertine
Travertine is another stunning natural stone, known for its earthy tones and distinctive texture. Unlike marble, travertine often has small pits and pores on its surface. These aren't flaws; they're part of its natural character. These characteristics mean travertine can absorb liquids if not properly sealed.
When you're looking at travertine tiles, you'll notice different finishes. Some are tumbled, giving them a soft, worn look, while others might be honed for a smoother, matte finish. The texture can really change the feel of a room.
- Porosity: Travertine is more porous than granite, for example. This means it needs to be sealed to protect against stains, especially in areas like kitchens or bathrooms. Regular sealing, usually once a year, is key.
- Texture: The natural pits can be filled or left unfilled. Filled travertine has a smoother surface, while unfilled has a more rustic, textured feel. Choose based on your aesthetic and how easy you want cleaning to be.
- Durability: Travertine is quite durable, making it a great choice for floors and walls, both indoors and out. It offers a warm, inviting look that's hard to replicate.
Case Study: A homeowner in Arizona wanted a rustic patio. They chose unfilled travertine tiles for their natural texture and earthy color. After proper sealing, the patio held up beautifully against the desert sun and occasional rain, providing a durable and attractive outdoor space.
The Unique Properties of Different Stone Types
Every natural stone has its own personality and set of characteristics. Understanding these differences is key to selecting the right material for your project. It's not just about looks; it's about performance too.
For instance, granite is incredibly hard and resistant to heat and scratches, making it a top choice for busy kitchen countertops. You can buy granite tiles online and trust in their resilience. Marble, while beautiful, is softer and more prone to etching and staining, so it's often better suited for areas with less wear, like bathrooms or decorative accents.
- Granite: Super tough, great for high-traffic areas. Low maintenance.
- Marble: Elegant and luxurious, but needs more care. Best for low-traffic zones.
- Slate: Offers a unique texture and is naturally slip-resistant, ideal for entryways or bathrooms.
- Limestone: Softer, with a natural, matte appearance. Requires sealing and is best for areas with less foot traffic.
Choosing the right stone means matching its properties to your lifestyle and the demands of the space. Don't hesitate to ask for samples to see and feel the stone before you commit. It’s a big decision, and we want you to be thrilled with the result!
Natural stones are unique, each with its own special look and feel. Think of them like fingerprints – no two are exactly alike! This means the stone you pick might have slight color differences or patterns, which is part of its charm. It's what makes your space truly one-of-a-kind. Want to see these beautiful natural characteristics up close? Visit our website to explore our stunning collection!
Wrapping Up Your Tile Order
So, when it comes to ordering tile, it's not just about measuring your space. You really need to think about all the little things that can eat up your materials, like cuts, mistakes, or even just a few broken pieces. Adding that extra 10-30% isn't just a suggestion; it's pretty much a necessity to avoid running short mid-project. It saves you the headache of trying to match dye lots later on, which, trust me, can be a real pain. By taking a little time to figure out your waste factor and ordering a bit more upfront, you'll make the whole installation process go a lot smoother and end up with a finished look you'll be happy with for years to come. And hey, if you're looking for beautiful marble or travertine to start with, Surfaces Galore has a huge selection and can help you figure out just what you need.
Frequently Asked Questions
Why do I need to buy extra tiles?
It's smart to get a little more tile than you think you'll need. This extra amount, often called 'waste' or 'overage,' helps cover mistakes, pieces that break during cutting, or tiles that might have small flaws. It's also super important for future fixes if a tile gets damaged later on.
How much extra tile should I order?
A good rule of thumb is to add about 10% to 20% extra tile. For trickier projects with lots of cuts or if you're using natural stone like marble or travertine, you might want to go a bit higher, maybe 20% or even 30%.
What is a 'waste factor' in tiling?
The 'waste factor' is just a fancy term for the amount of tile you expect to lose or not use because of cuts, breakage, or mistakes during installation. It's usually shown as a percentage of your total tile needed.
Does the size of my project affect how much extra tile I need?
Yes, it can! For very large areas, you might be able to use a slightly smaller percentage for waste because you can often use smaller cut pieces more efficiently. But for smaller, more detailed jobs, you might need a higher waste percentage.
Why is natural stone like marble different when it comes to ordering extra?
Natural stones, like marble and travertine, have unique patterns and colors that vary from piece to piece. Ordering extra helps ensure you have enough matching material if you need to replace a tile later, as it's hard to find an exact match from a different batch.
What if I have a really complicated tile pattern or design?
If your design involves a lot of intricate cuts, curves, or a complex pattern, you'll definitely need to increase your waste percentage. These kinds of designs require more cutting and often result in more unusable pieces.
Can I use the cut-off pieces of tile?
Absolutely! Smart installers often save the larger cut-off pieces, called 'offcuts.' These can be used in less noticeable areas, like under appliances or in corners, to help reduce the amount of waste and save on your overall material cost.
What's the best way to figure out exactly how much tile to buy?
First, measure your room's square footage accurately. Then, decide on your waste percentage (10-20% is common, more for complex jobs). Multiply your room's square footage by your chosen waste percentage (e.g., 1.10 for 10% waste) to get your total order amount.
Leave a comment