
How to Layout Tile Before Installation: DIY Guide

TL;DR:
- Properly planning your tile layout before setting ensures professional results and prevents costly mistakes. Using precise measurements, dry lay techniques, and the 3-4-5 method helps achieve perfect alignment and centered patterns. The patience invested during this phase enhances the overall appearance and durability of natural stone tile installations.
Getting your tile layout right before a single tile is set permanently makes the difference between a professional result and a frustrating redo. Whether you’re working with marble, limestone, or travertine, knowing how to layout tile before installation saves you time, money, and materials. Skip this step and you’ll face crooked grout lines, awkward cuts at walls, and patterns that look off-center. This guide walks you through every stage of the process, from tools to final verification, so you can install with confidence.
Table of Contents
- Key takeaways
- How to layout tile before installation: tools you need
- Measuring and preparing your space
- Marking layout lines and planning your tile pattern
- Executing the tile layout with natural stone
- Verifying and adjusting your layout
- My take on what actually matters in tile layout
- Discover premium natural stone for your next project
- FAQ
Key takeaways
| Point | Details |
|---|---|
| Measure before you mark | Accurately measuring your room and checking for level floors prevents costly layout errors down the line. |
| Start from center | Beginning your layout from the room’s center produces balanced edge cuts and a more professional finished look. |
| Dry lay every time | Placing tiles with spacers before using any adhesive lets you catch pattern problems and cut locations in advance. |
| Use the 3-4-5 method | This technique squares your reference lines so grout joints stay straight across the entire installation. |
| Verify before committing | Rechecking your layout for small edge cuts and misalignment before permanent installation prevents expensive rework. |
How to layout tile before installation: tools you need
Before you mark a single line, you need the right equipment on hand. Working without the proper tools leads to guesswork, and guesswork leads to waste. Here’s what to gather before you start preparing tile installation:
Measuring and marking tools:
- Tape measure (at least 25 feet)
- Chalk line or laser level for snapping straight reference lines
- Carpenter’s square for checking corners
- Pencil or tile marker for noting cut lines
Layout and spacing tools:
- Tile spacers in the correct joint width (typically 1/8 inch to 3/8 inch for natural stone)
- Long straightedge or level for checking alignment across multiple tiles
- Notched trowel (for later installation, but size must match your tile dimensions)
Cutting tools:
- Wet saw with a diamond blade for clean cuts on marble, travertine, and limestone
- Scoring cutter for straight cuts on thinner tiles
Safety and support items:
- Knee pads for working on the floor
- Protective eyewear for cutting
- Drop cloth to protect cut stone from debris
Natural stone tiles require extra care during layout. Wet saw and scoring cutters are recommended for these materials, and you should always dry lay them first to check how cuts will look. Marble and travertine are more fragile at edges than ceramic tile, so rough handling during the layout phase can chip corners before the installation even begins.
| Tool | Purpose |
|---|---|
| Chalk line or laser level | Snaps straight reference lines across the floor |
| Tile spacers | Simulates grout joint width during dry layout |
| Wet saw with diamond blade | Makes clean, chip-free cuts in natural stone |
| Carpenter’s square | Checks corners for 90-degree angles |
| Long straightedge | Verifies tile alignment across a row |
Pro Tip: Buy 10 to 15 percent more tile than your square footage requires. Natural stone has natural variation, and having spares means a broken tile during layout or cutting doesn’t stall your project.
Measuring and preparing your space
Accurate measurement is the foundation of any good tile layout. A room that looks square often isn’t, and that gap between reality and assumption is where layouts go wrong.
Follow these steps to measure and prepare your space properly:
- Measure the length and width of the room in at least three places: both ends and the middle. Rooms with walls that bow or diverge will give you different readings across those points. Use the smallest measurement as your working dimension.
- Check the floor for level and flatness. Use a long straightedge laid across the floor in multiple directions. Uneven surfaces cause tile lippage and grout cracking over time, especially with larger format natural stone. If you find dips greater than 1/8 inch across 10 feet, plan to use a self-leveling compound or cement backer board before laying any tile.
- Identify your focal points. Where will someone’s eye land first when they enter the room? The wall facing the doorway, the shower wall, the kitchen island? That focal point should receive your best cuts and a centered tile pattern.
- Locate obstructions. Mark the positions of drains, vents, cabinets, and any fixed fixtures on your layout sketch. These will influence where cuts happen and how you adjust your grid.
- Square your corners with the 3-4-5 method. Measure 3 units on one line, 4 units on the perpendicular line, and adjust until the diagonal measures exactly 5 units. This works in any unit of measurement. For a bathroom or kitchen floor, using 3 feet, 4 feet, and 5 feet gives you a reliable right angle for your reference lines.
- Adapt to imperfect walls. Most walls are not perfectly straight. Rather than following the wall, follow your chalk lines. Let the grout line at the wall edge vary slightly rather than force the entire layout to follow a bowed surface.
For help measuring irregular rooms or spaces with alcoves, the DIY measuring guide at Surfacesgalore walks through practical techniques for tricky layouts.
Pro Tip: Sketch your room on paper first, even roughly. Writing down measurements and marking obstacles before touching the floor gives you a planning tool you can reference and adjust without being on your knees.
Marking layout lines and planning your tile pattern
Once your measurements are solid, the next phase of how to plan tile layout is establishing your reference lines. These lines are the skeleton of your entire installation. Get them right and every tile you set will fall into place cleanly.
Choosing your starting point
Starting tile layout in the center of the room generally yields more balanced cuts and a more professional appearance, unless your walls are extremely straight and parallel. For most residential spaces, the center-start method is the standard best practice.
To find the center, measure both the length and width of the room and mark the midpoints on opposing walls. Snap chalk lines between those midpoints. Where the two lines cross is your starting point.
If your room is long and narrow, or if one wall is a major visual feature, you may want to start from the longest straight wall instead. The key question to answer: where will an off-center layout look worst? Start your planning from there.
Snapping chalk lines accurately
Pull your chalk line tight before snapping it to avoid a curved line. For laser levels, set the device at the center of the room and confirm the beams align with your reference marks at both walls before using the projected line as a guide.

Accurate layout lines with chalk or laser levels ensure straight grout joints and professional results. Snap your first line, then snap a perpendicular line through the same center point. Use the 3-4-5 method to verify these lines are truly at 90 degrees to each other.
Dry laying tiles to visualize the pattern
This is one of the most important tile layout techniques you will use. Starting from your center point, place tiles along both reference lines without adhesive, using spacers to simulate grout joints. Spacers ensure your dry layout grout-joint width matches installation joints, which prevents layout errors after setting.
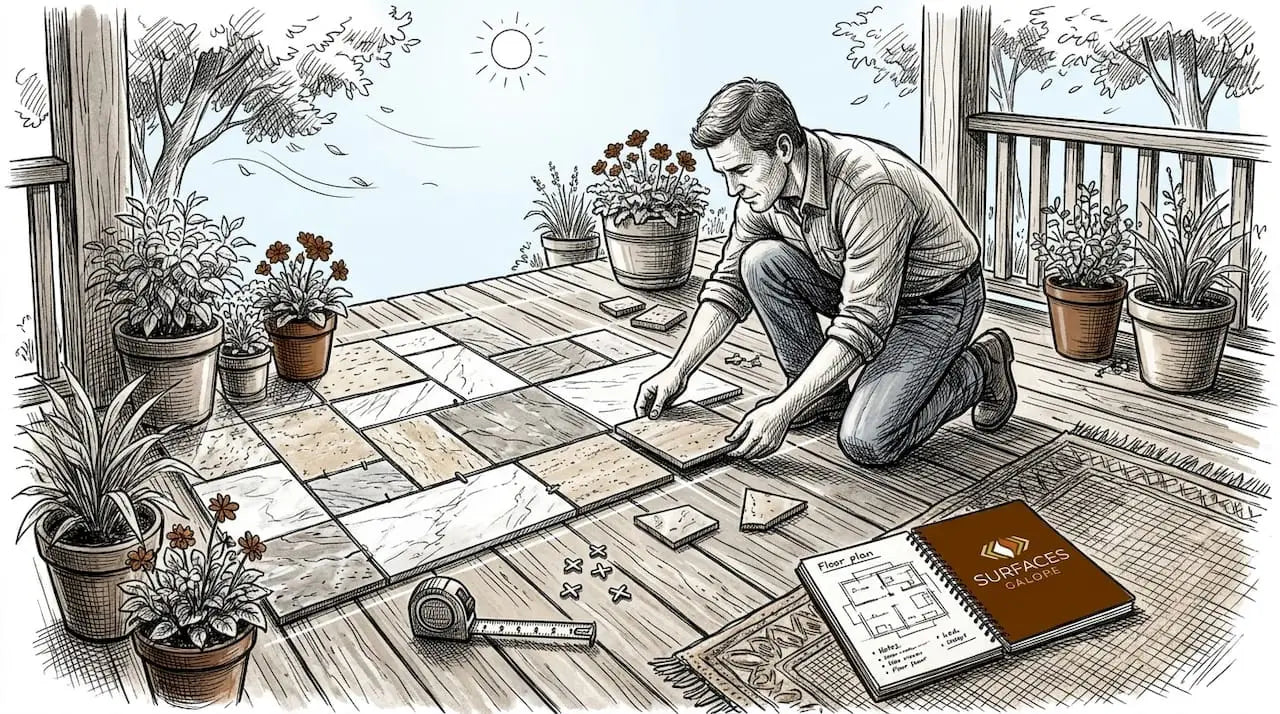
Extend the dry lay out to the walls so you can see exactly what size cut tiles will appear at the edges. For natural stone specifically, this step is non-negotiable. Marble and limestone veining means cuts that look fine on paper can expose awkward or ugly sections of the stone when you see them in place.
Choosing the right pattern
Your pattern selection affects both the look and the complexity of the layout. Here are the most common options:
- Straight grid: Tiles set square to the walls. This is the most forgiving layout for beginners and looks clean with any size tile.
- Diagonal (45-degree): Tiles set at a 45-degree angle to the walls. This creates a sense of width in smaller rooms but produces more cuts. When using the diagonal pattern, the 3-4-5 rule must be oriented along the diagonal lines to maintain uniform edge tiles.
- Offset (brick or running bond): Each row is offset by half a tile from the row before. Popular for rectangular tiles and travertine plank formats. Requires careful attention to seam alignment.
- Herringbone: A more advanced pattern that requires precise cutting and consistent tile sizing.
For a deeper look at how different patterns affect the visual result and planning requirements, the stone tile layout patterns guide at Surfacesgalore covers each format in detail.
Pro Tip: Before committing to a diagonal or herringbone layout, dry lay at least a 4x4-foot section in the actual room to see how the pattern looks with your specific tile. Photos and samples can be misleading under different lighting conditions.
Executing the tile layout with natural stone
With your lines snapped and your pattern chosen, you move into the most hands-on phase of how to plan tile layout. This is where you transfer everything from concept to the actual floor.
Follow this sequence for a controlled, accurate layout:
- Place spacers at every joint. Even during the dry layout phase, spacers are non-negotiable. Dry layout spacers simulate grout joint width to prevent post-installation misalignment. For marble and limestone, use the spacer size recommended by your installer or the tile manufacturer, typically between 1/16 inch and 3/16 inch.
- Work outward from center. Always start at your center reference point and work toward the walls. Setting tiles from a wall inward is one of the most common DIY errors because it forces every subsequent adjustment to compound in the direction of the focal point.
- Mark cut lines on the floor. As you reach the edges, note where cuts are needed. Use a marker on the substrate, not on the tile itself, to record the cut position. This way your dry lay can be lifted and repositioned without losing your reference.
- Plan cuts around fixtures. For floor drains, toilet flanges, or heating vents, measure twice and cut once. Template the cut shape in cardboard before transferring it to the tile.
- Label each cut tile. Write the location and cut direction on the back of tiles that need trimming. When you have a dozen cut tiles waiting to be processed, clear labeling prevents costly mistakes at the saw.
- Check alignment frequently. Lay a long straightedge across multiple tiles at different angles to catch any creeping misalignment early. Even minor misalignments in the first row become increasingly noticeable as the installation progresses.
Handling large-format natural stone tiles
Marble, travertine, and limestone tiles in 12x24 or 18x18 inch sizes are heavier and more demanding during layout than standard ceramic. Here’s what to keep in mind:
- Never drag these tiles across the substrate during layout. Lift and place each one.
- Check the underside of large natural stone tiles for cracks before placing them. Stone can arrive from the factory with hairline fractures that only show up under pressure.
- Use a balanced tile design workflow approach when working in bathrooms: confirm the wet area boundaries before laying out the dry field, so waterproofing layers don’t interfere with your reference lines.
- For floors, verify that uniform thin-set application with the right notched trowel size is planned for your tile dimensions. A 3/8-inch notch trowel works for most standard tiles, but large-format marble may need a 1/2-inch notch for full coverage.
The waterproofing under tiles must cure fully before you begin marking layout lines on the substrate in wet areas. Marking over uncured membrane can cause adhesion failures later.
Verifying and adjusting your layout
You’ve dry laid your tiles and marked your cuts. Before anything gets set permanently, run through this verification checklist:
- Check every grout line with a straightedge. Run a 4-foot level along rows in both directions. Any tile that is more than 1/16 inch out of line with its neighbor is a problem waiting to become visible.
- Count edge tile widths. Modify layout lines slightly if needed to prevent very small edge tiles, which look unprofessional. A good rule: no edge tile should be less than one-third the width of a full tile. If your current layout produces a 2-inch edge tile on a 12-inch floor tile, shift the grid by 5 inches in that direction to split the difference.
- Re-square your reference lines. Measure the diagonals of your laid-out tile field. If both diagonals are equal, your layout is square. If they differ, your reference lines need adjustment before you set a single tile permanently.
- Photograph the dry layout. Take photos from multiple angles, including from the main entry point. This gives you a visual record to reference during installation and catches aesthetic issues you might not notice from floor level.
- Mark layout lines for permanent reference. Once verified, re-snap your chalk lines or score lightly into the substrate. Chalk can brush away during installation, so having a backup mark protects the accuracy you’ve worked to establish.
Pro Tip: Walk away from the layout for 15 minutes, then look at it again with fresh eyes before making your final decision. Patterns and alignments that looked fine during close inspection often reveal problems when you see the whole floor from a standing position.
For more on planning your overall project timeline and setting up your workflow before installation day, the tile project planning guide at Surfacesgalore is worth reading before you commit any adhesive.
My take on what actually matters in tile layout
I’ve watched a lot of homeowners skip the dry layout phase because they were eager to get the tile set and the project finished. Almost every time, they regret it. Not necessarily because the finished floor looks terrible, but because they spend the back half of the project compensating for a mistake that a 30-minute dry lay would have caught.
What I’ve learned from watching hundreds of natural stone installations is that the layout phase is where your design decisions actually get made. You can look at a mood board and a sample for weeks, but the moment you lay marble tiles on your actual floor under your actual light, you realize things you couldn’t see on paper. Veining directions, pattern balance, the way a grout joint size changes the overall scale of the room. These only become visible once the tile is physically in place.
My honest advice is this: treat the dry layout as the real installation and treat the permanent setting as the confirmation. If something looks off during the dry lay, it will look worse once it’s grouted and sealed. Natural stone does not forgive. It doesn’t have the visual noise of a busy ceramic pattern to hide a crooked line. Every joint, every cut, every edge tile is on full display.
I also think homeowners underestimate how much the starting point choice matters. In my experience, starting from the center is right for most rooms, but there are spaces where the focal wall is so dominant that starting there and working backward produces a clearly better result. The best practices for tile layout are guidelines, not laws. Learn the rules, then look at your specific space and decide.
The patience you invest in layout is returned tenfold in the quality of the finished installation. Take the extra hour. Re-check the diagonals. Shift the grid 3 inches to get better edge cuts. It’s always worth it.
— cihan
Discover premium natural stone for your next project
When you’ve put this much thought into how to layout tile before installation, the tile itself deserves to match that level of care. Surfacesgalore is a direct importer of marble, limestone, and travertine tiles, mosaics, and decorative stone pieces, shipped nationwide from Anaheim, California. Whether you’re planning a kitchen floor in classic travertine, a bathroom wall in polished marble, or a custom mosaic accent, Surfacesgalore carries the material quality that makes a careful layout worth every minute.
Beyond standard tile sizes, Surfacesgalore offers custom cuts and expert guidance to help you match your layout plan to the right product dimensions. Shop natural stone tiles online and explore the full range of marble, limestone, and travertine collections available for direct shipping to your door. When you’re ready to move from planning to purchasing, Surfacesgalore makes it easy to find exactly what your project needs.
FAQ
Where should you start when laying out tile?
Starting from the center of the room produces the most balanced edge cuts and the most professional appearance. Snap perpendicular chalk lines through the room’s center and dry lay tiles outward from that point to verify the layout before setting anything permanently.
What is the 3-4-5 method in tile layout?
The 3-4-5 method squares your reference lines by measuring 3 units on one line, 4 units on the perpendicular, and confirming the diagonal equals 5 units. When the diagonal measures exactly 5 units, the two lines are at a true 90-degree angle.
Why is dry laying tiles before installation so important?
Dry laying tiles with spacers lets you see exactly where cuts will fall, how the pattern looks in your actual space, and whether the grout joint width looks right before any adhesive is applied. For natural stone, it also lets you check veining direction and match patterns across tiles.
How do you avoid small, awkward cuts at the wall?
Check your edge tile width during the dry layout phase. If any edge tile would be less than one-third the width of a full tile, shift your entire grid slightly toward that wall to redistribute the cut evenly on both sides. A small adjustment to the center reference line prevents cuts that look unprofessional.
Do you need special tools for natural stone tile layout?
Yes. A wet saw with a diamond blade is required for cutting marble, travertine, and limestone without chipping the edges. A standard scoring cutter can crack or chip natural stone. During layout, handle these tiles by lifting rather than sliding to avoid damaging the edges on the substrate surface.
Leave a comment