
Avoid These Costly Marble Tile Installation Mistakes That Can Cost Homeowners Thousands

Thinking about putting in marble tile? It looks amazing, right? But hold on a sec. If you don't get the installation just right, you could be looking at some serious headaches and a hefty bill down the road. We're talking about Marble Tile Installation Mistakes That Cost Homeowners Thousands. Let's break down what can go wrong and how to avoid it, so your beautiful new floor or backsplash stays beautiful.
Key Takeaways
- Always start with a solid, level subfloor. Any bumps or wobbles underneath can lead to cracked tiles or loose grout later on.
- Use the right materials. Make sure your thin-set mortar and grout are made for natural stone, and use white thin-set for lighter marble to avoid color issues.
- Plan your tile layout before you start sticking anything down. Dry-lay your tiles to check for awkward cuts and to blend the natural color variations for a better look.
- Get full coverage when you set the tiles. Use the right trowel and press firmly to avoid hollow spots, which can cause tiles to break.
- Don't skip the finishing steps. Proper grouting, allowing adequate curing time, and sealing your marble are vital for its longevity and protection.
Critical Substrate Preparation for Marble Tile Installation
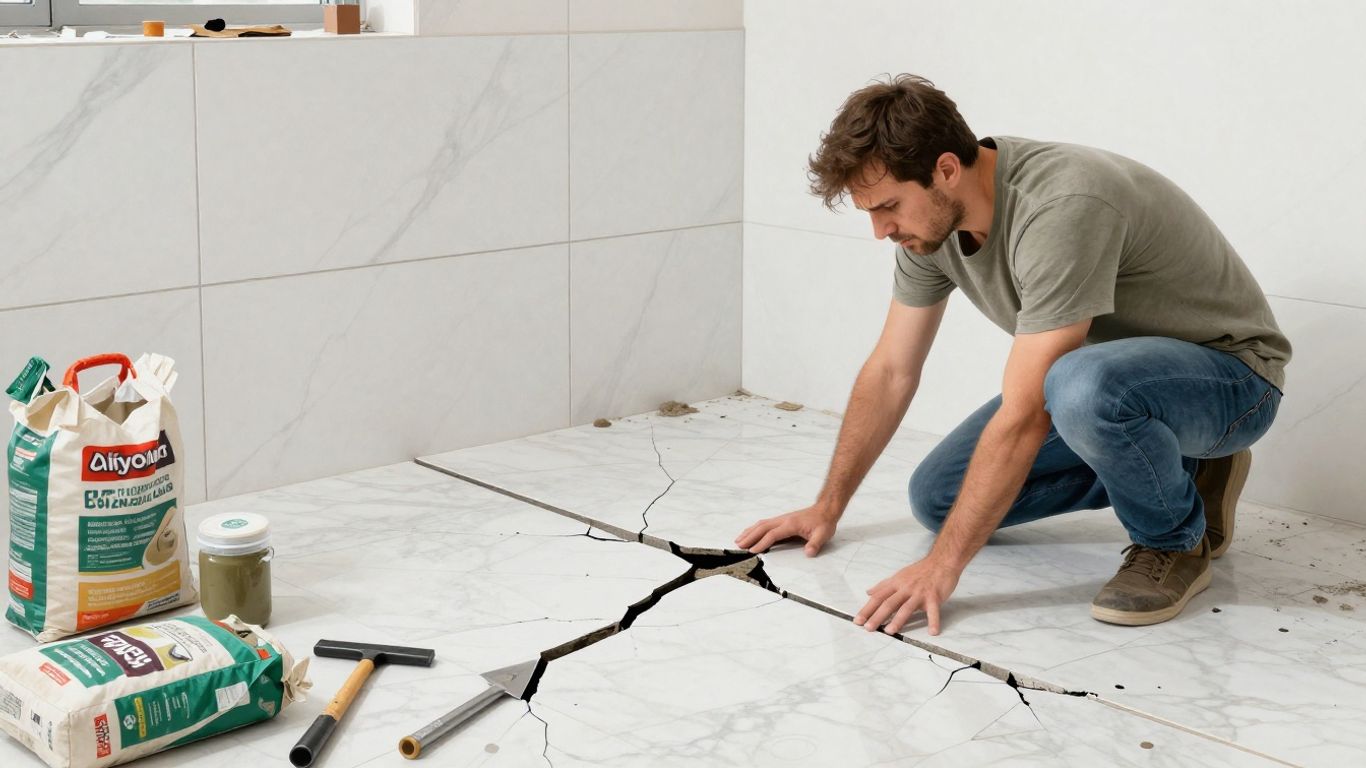
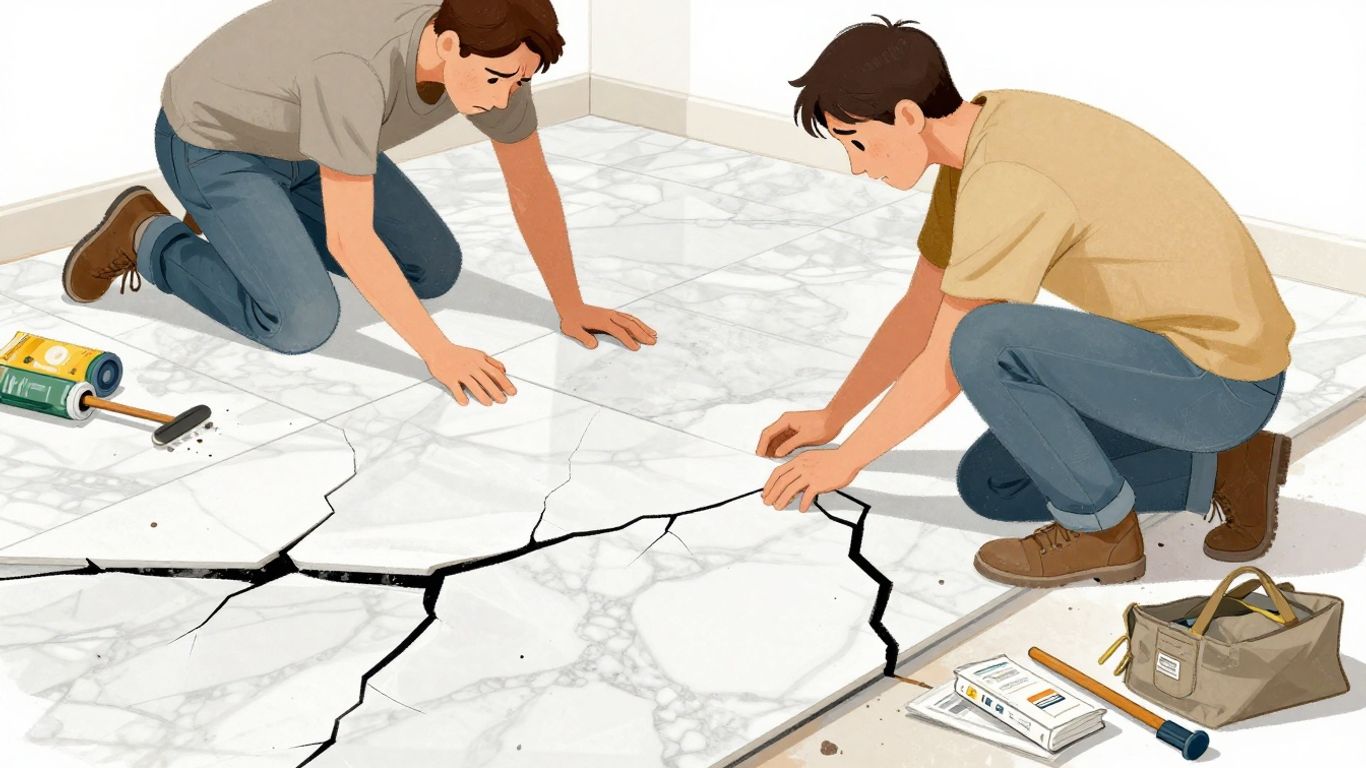
Think of your marble tile installation like building a house. You wouldn't start building the walls without a solid foundation, right? The same goes for your beautiful marble. A weak or uneven base is a recipe for disaster, leading to cracked tiles, loose grout, and a hefty repair bill down the line. Getting this step right is non-negotiable if you want your marble to look stunning for years to come.
Ensuring a Solid and Level Foundation
Before a single tile is laid, the surface it's going on needs to be perfect. We're talking clean, dry, and absolutely level. Any dirt, old adhesive, or grease can mess with the bond, making your tiles prone to popping off. Low spots or high spots? They're a big no-no. You might need to use a patch or a self-leveling underlayment to get it just right. This careful prep work is what sets the stage for a flawless finish and prevents issues like tiles cracking under pressure. It’s the bedrock of a successful project, whether you're installing marble floor tiles or intricate mosaics.
The Importance of a Stiff Subfloor
Marble is beautiful, but it's also heavy. Unlike ceramic tile, marble often needs a stiffer subfloor to support its weight and prevent flexing. A subfloor that bends or moves too much is a ticking time bomb for your tile installation. If you're working with a wood subfloor, make sure you've got the right underlayment, like cement backer board or an uncoupling membrane, installed correctly. For concrete slabs, a crack-isolation membrane is a smart move to stop any substrate cracks from showing up in your gorgeous marble. A stiff, stable base is key to avoiding costly repairs later.
Addressing Uneven Surfaces and Flex
Let's get real: most surfaces aren't perfectly flat right out of the box. That's where preparation comes in. You need to actively address any unevenness. Using a quality self-leveling compound can work wonders on floors, creating that smooth, consistent surface marble needs. For walls, a leveling compound or a properly installed backer board will do the trick. The goal is to eliminate any flex or give in the substrate. If the surface moves, your tiles will eventually crack or loosen. Investing a little extra time and effort here saves you from major headaches and expenses, like having to buy marble tiles online USA only to have them fail.
Case Study: The Shifting Foundation
Sarah and Tom were thrilled with the stunning white marble tiles they picked out for their kitchen. They hired a contractor who seemed experienced, but skipped the crucial step of properly leveling their slightly uneven subfloor, thinking it wouldn't make a difference. Within six months, they started noticing grout lines cracking and a few tiles felt loose. By the end of the year, several tiles had actually cracked, and they had to pay for a complete tear-out and re-installation, costing them an extra $3,000. The original contractor's oversight on substrate preparation led to a costly lesson in the importance of a solid foundation.
Selecting Appropriate Setting Materials for Marble
Compatibility of Mortars and Adhesives
Choosing the right mortar is super important when you're working with marble. It's not like regular tile, you know? Marble is a natural stone, and it needs special care. Using the wrong stuff can lead to big problems down the road, like discoloration or tiles coming loose. You really want to make sure whatever adhesive you pick is made for natural stone. A lot of people think any old tile adhesive will do, but that's a mistake that can cost you.
Always check the product packaging to confirm it's suitable for marble or natural stone. Don't guess!
Choosing White Thin-Set for Light Marble
This is a big one, especially if you're using lighter colored marble, like Carrara or Thassos. Gray thin-set mortar can actually show through the stone, making it look dingy or discolored. It's a real bummer when you've spent a lot on beautiful, light marble tiles, only to have them look off because of the adhesive. That's why a white thin-set mortar is your best friend here. It's specifically designed to prevent that kind of color bleed-through. It keeps your marble looking bright and true to its natural color. If you're looking to buy marble tiles online in the USA, make sure you also plan for the right setting materials.
Adhering to Manufacturer Recommendations
Look, the companies that make these setting materials, they know their stuff. They put a lot of research into what works best with different types of tiles. So, when it says on the bag, "Use with natural stone" or "White thin-set recommended for light-colored stone," you should probably listen. It’s not just a suggestion; it’s a guide to help you get a professional, long-lasting result. Ignoring these instructions is like trying to build a house without a blueprint – you're just asking for trouble. It’s always a good idea to check out their websites or even give them a call if you're unsure. They often have detailed guides on their product pages for specific applications.
Case Study: The Discolored Shower
A homeowner in Arizona decided to save a few bucks by using a standard gray thin-set mortar for their new white marble shower. They figured, "It's all going to be covered up anyway." Big mistake. After installation and grouting, they noticed a distinct gray haze showing through the beautiful white marble tiles. It made the whole shower look dull and dirty, completely ruining the luxurious feel they were going for. They ended up having to pay to have the tiles removed and reinstalled with white thin-set, costing them an extra $1,500 in labor and materials. A simple check of the mortar bag would have saved them a headache and a lot of money.
Here’s a quick rundown of what to look for:
- Mortar Type: Always opt for a high-quality thin-set mortar specifically formulated for natural stone. Avoid premixed mastic adhesives, as they often aren't suitable for marble.
- Color: For light-colored or translucent marble, use white thin-set mortar to prevent discoloration.
- Additives: If the manufacturer recommends specific additives for enhanced performance or flexibility, consider using them, but always follow their guidelines.
- Manufacturer Instructions: Read and follow all instructions on the packaging for mixing, application, and curing times.
Mastering Marble Tile Layout and Dry Laying
Before you even think about mixing thin-set, you need to plan. This is where you avoid those costly mistakes that make a beautiful marble floor look amateurish. We're talking about the dry lay – essentially a practice run for your tiles.
Verifying Layout and Avoiding Awkward Cuts
This is your chance to see how the tiles will actually fit. Lay them out on the floor, without any adhesive. Why? Because you need to check the edges. If you have a narrow sliver of tile on one side and a full tile on the other, it just looks wrong. A balanced layout is key to a professional finish. You want to avoid those awkward, super-thin cuts that are prone to chipping later. Sometimes, just shifting the whole pattern a tiny bit can make a huge difference. It’s all about making sure the cuts at the edges are at least a third of a tile wide. This planning step is so important, it's worth repeating. If you're looking to buy marble tiles online in the USA, make sure you factor in this planning time.
Blending Color and Veining Variations
Marble is a natural stone, and that means every tile is unique. You'll see variations in color and veining from one tile to the next, and even between different boxes. A dry lay lets you see how these variations play together. You can move tiles around, mix them up, and find the most pleasing arrangement. This step helps create a cohesive look, so your floor doesn't look like a random collection of stones. It’s about creating a beautiful, flowing pattern that highlights the natural beauty of the marble.
Determining Optimal Grout Joint Spacing
While you're dry laying, also think about your grout lines. For marble, you often want a tight grout joint, maybe 1/16 to 1/8 inch. This makes the tiles look more like a solid surface. However, always check the tile manufacturer's recommendations. Some tiles might need a slightly wider joint for expansion or to accommodate slight variations in size. Getting this right now prevents issues down the line and contributes to that polished, high-end look you're after.
Case Study: The Unbalanced Bathroom
Sarah wanted a luxurious marble bathroom. She skipped the dry lay, eager to get the tiles down. When she finished, she was horrified. The shower niche had a tiny, chipped sliver of marble on one side, and the opposite wall had a full tile with a huge gap next to it. The color variations also looked jarring, with a cluster of dark tiles in one corner. She ended up having to rip out a section and re-tile, costing her extra time and money. A simple dry lay would have saved her the headache.
Case Study: The Grout Line Nightmare
Mark was installing a beautiful white marble floor. He used standard spacers, assuming they'd be fine. But his marble tiles had slight variations, and the grout lines ended up being uneven – some wide, some narrow. It made the whole floor look uneven and detracted from the elegance of the stone. He later learned that for natural stone, especially marble, using a leveling system during installation and carefully planning grout lines during the dry lay is crucial for a perfectly flat and uniform finish.
Proper Tile Setting Techniques for a Lasting Bond
Using the Correct Notched Trowel Size
Getting the right amount of adhesive on the back of your marble tiles is super important. Too little, and you'll have weak spots. Too much, and it'll squeeze out everywhere. For marble, you generally want a trowel that creates consistent ridges. A common size is a 1/4-inch by 1/4-inch square-notched trowel, but check what the adhesive manufacturer recommends. They know their stuff.
Ensuring Full Mortar Coverage on Tile Backs
This is where a lot of DIYers mess up. You need to make sure that adhesive is all over the back of the tile. Don't just spread it on the floor; comb it onto the tile too. This is called "back-buttering." It's a bit more work, but it makes a huge difference. You want to see that adhesive when you lift a tile you just set. No hollow spots allowed!
Case Study: The Hollow Spot Horror
Sarah bought some beautiful Calacatta Gold marble tiles online from Surfaces Galore. She was so excited to get them installed. She spread the thin-set on the floor and set the tiles, wiggling them a bit. A few days later, she noticed some tiles sounded hollow when tapped. Turns out, she only had about 50% coverage because she didn't back-butter. A few months later, a heavy piece of furniture caused those tiles to crack. A simple fix like back-buttering could have saved her thousands in repairs and replacement tiles.
Minimizing Lippage with Levels and Clips
Lippage is when one tile edge is higher than the next. It looks bad and can be a tripping hazard. To avoid this, use a good level as you go. For larger tiles, especially, consider using a tile leveling system. These clips and wedges help pull the tiles together and keep them perfectly flush. It’s a small investment that makes a big difference in the final look. You can find great options if you buy marble tiles online USA.
Proper tile setting isn't just about making it look good right away; it's about building a foundation that lasts for decades. Skipping steps or using the wrong tools here is like building a house on sand. You're setting yourself up for problems down the road, and marble is too beautiful to risk that.
Here's a quick rundown of what to aim for:
- Full Coverage: Aim for at least 95% mortar coverage on the back of each tile.
- Consistent Depth: Use the correct trowel size to create uniform mortar ridges.
- Flat Surface: Regularly check with a level to prevent lippage.
- Secure Bond: Press tiles firmly into the mortar with a slight twist.
Remember, taking your time with these setting techniques is key to a professional, long-lasting marble installation. It's one of the most common mistakes to avoid when installing marble tiles, but getting it right makes all the difference.
Precise Cutting of Marble Tiles
Cutting marble tile isn't like cutting, say, wood. This stone is beautiful, yes, but it's also brittle. One wrong move, one slip of the hand, and you've got a chipped edge or a cracked tile. That's thousands of dollars down the drain if you're not careful. You need the right tools and a steady hand.
Utilizing a Wet Saw with a Diamond Blade
For clean, accurate cuts on marble, a wet saw is your best friend. Forget those cheap tile cutters; they just aren't up to the task. A wet saw with a quality diamond blade is what you need. The water keeps the blade cool, which is super important for preventing heat cracks in the marble, and it also cuts down on dust. This is the professional standard for a reason. If you're looking to buy marble tiles online in the USA, make sure you've got the right equipment lined up for when they arrive. A good wet saw will make all the difference in getting those perfect edges. Get the right saw.
Cutting Slowly to Prevent Chipping
This is where patience really pays off. You've got your marble tile, you've marked your cut line, and you're ready to go. Don't rush it. Seriously, take your time. Push the tile through the saw slowly and steadily. Let the blade do the work. If you try to force it, you'll likely end up with chips along the edge, or worse, the tile could shatter. It’s better to take an extra minute and get a clean cut than to ruin a tile and have to start over. Remember, practice makes perfect, but with marble, it's better to get it right the first time.
Managing Exposed Cut Edges
Sometimes, no matter how well you plan, you'll have cut edges showing. Maybe it's around a doorway or a feature wall. These exposed edges need a little attention to look finished. You can often smooth them out with a bit of sanding. If you're going for a really polished look, you might even consider having the edges professionally ground or polished. This step really takes your installation from 'DIY' to 'designer'. It’s these little details that make a huge difference in the final appearance of your marble floor or wall.
Case Study: The Kitchen Backsplash Blunder
Sarah bought some gorgeous Calacatta Gold marble tiles online for her kitchen backsplash. She was so excited to get them installed. She rented a tile saw, thinking it would be easy. She started cutting the tiles for the edges, but she was going way too fast. Chink! The first tile chipped badly. She tried again, even faster, and ended up with three chipped tiles and one that cracked right in half. Frustrated, she called a professional installer. He showed her how to use a wet saw properly and explained the importance of a slow, steady cut. Sarah ended up having to buy more tiles, costing her an extra $300 and delaying her project by a week. Lesson learned: don't skimp on the right tools or technique when cutting marble.
The Crucial Role of Grouting and Sealing
Applying Grout Diagonally for Full Coverage
So, you've laid your beautiful marble tiles. Now comes the grout. This isn't just about filling the gaps; it's about creating a strong, unified surface. When you apply grout, do it diagonally across the tiles. This technique helps push the grout deep into the joints, making sure there are no air pockets. Think of it like packing a suitcase – you want to fill every space. Using a grout float at a 45-degree angle is your best bet here. It’s a simple step, but it makes a huge difference in how your floor holds up over time. You can find great marble tiles online in the USA if you're looking to start a new project.
Allowing Adequate Grout Curing Time
This is where patience really pays off. After you've applied the grout, you absolutely must let it cure properly. We're talking at least 48 to 72 hours, sometimes longer depending on the product and conditions. Trying to rush this step is a recipe for disaster. If you walk on it too soon, or put furniture on it, you risk cracking the grout or even loosening the tiles. It’s like letting concrete set – it needs time to harden and gain strength. Don't skip this. It’s a small window of waiting for a lifetime of durability.
Protecting Marble with Proper Sealing
Marble is a natural stone, and like most natural things, it's porous. This means it can absorb liquids, leading to stains. That's where sealing comes in. Sealing creates a barrier that helps prevent spills from soaking into the stone. It’s like putting a raincoat on your tiles. You'll want to use a sealer specifically made for natural stone. Applying it correctly is key. Usually, you'll apply it, let it soak in, and then wipe off any excess. This step is non-negotiable if you want your marble to look good for years to come. A good sealer can be the difference between a stunning floor and one with permanent water spots. Learn how to seal marble tile like a professional with this step-by-step guide here.
Case Study: The Stained Kitchen Floor
Sarah and Tom were thrilled with their new marble kitchen floor. They bought beautiful tiles online and had them installed. However, they skipped the sealing step, thinking it wasn't that important. A few weeks later, a spilled glass of red wine left a permanent dark stain. A dropped olive oil bottle left a greasy mark that wouldn't come out. They ended up having to replace several tiles and then seal the entire floor, costing them extra time and money. If they had sealed it initially, these costly mistakes could have been avoided.
Common Marble Tile Installation Mistakes to Avoid
Ignoring Tile Inspection Before Installation
This is a big one. You've picked out your beautiful marble tiles, maybe you even bought them online from a place like Surfaces Galore. They look amazing in the pictures, and when they arrive, they're still gorgeous. But wait! Before you even think about mixing thin-set, grab each tile and give it a good look. Natural stone, especially marble, has variations. That's part of its charm, right? But sometimes, those variations include actual flaws. We're talking chips along the edges, cracks you might miss at first glance, or even a tile that's warped. If you install a flawed tile, it's there forever, or at least until you pay to rip it out. It's like trying to fix a bike chain and realizing one of the links is bent – you can't just ignore it. Set aside any questionable tiles. If you're unsure, call your supplier. It's way easier to deal with a bad tile before it's glued down.
Using Incompatible Adhesives or Grouts
This is where things can get really expensive, really fast. Marble is a natural stone, and it's not always best friends with every type of adhesive or grout out there. You can't just grab any old tub of mastic from the hardware store. Many of those premixed options can actually discolor your marble, especially if it's a lighter shade. You need to use a thin-set mortar specifically designed for natural stone. And here's a pro tip: if you're working with white or light-colored marble, always, always, always use a white thin-set mortar. Gray thin-set can actually bleed through the stone and make your beautiful white marble look dingy. It’s like trying to paint a light color over a dark wall without a primer – you’ll get a muddy mess. Always check the manufacturer's recommendations for both your tiles and your setting materials. Getting this wrong can lead to staining, discoloration, or even tiles popping loose down the line. For the best results, consider looking at high-quality thin-set mortars for natural stone.
Skipping the Dry-Lay Planning Stage
Okay, so you've inspected your tiles, you've got the right thin-set. Now you're ready to go, right? Not so fast. Before you spread any adhesive, you need to do a "dry lay." This means laying out your tiles on the floor (or wall) exactly how you want them to look, without any glue. Why? Because marble has natural variations in color and veining. You want to make sure those beautiful patterns blend well across the entire floor. You also want to avoid those super awkward, tiny cuts that look terrible at the edges of a room. By dry-laying, you can shuffle tiles around, mix up patterns from different boxes, and figure out where your cuts will fall. It’s your chance to create a cohesive, stunning look before committing. Think of it like a dress rehearsal for your floor. You wouldn't go on stage without practicing, would you? This planning stage is key to avoiding costly mistakes and achieving that professional finish. It’s a step that many DIYers skip, but it makes a world of difference. For example, planning your layout can help you avoid issues like those mentioned in avoiding common luxury tile installation mistakes.
Case Study: The Faded Floor Fiasco
Sarah and Tom were thrilled with their new marble tiles, a gorgeous creamy white with subtle gray veining. They bought them online, eager to get them installed. They skipped the dry-lay, figuring "how hard could it be?" They just started tiling from the center of the room. When they finished, they were horrified. One side of the room had tiles that were much darker and more heavily veined, while the other side looked washed out. They had accidentally created a stark visual divide. To make matters worse, they ended up with a tiny, awkward sliver of tile along one wall that looked like an afterthought. They ended up having to pay extra to have the tiles removed and reinstalled correctly, blending the variations and planning the cuts properly. It was a costly lesson in the importance of planning.
Case Study: The Grout Gloom
Mark was installing a beautiful, classic black and white marble checkerboard floor. He was so focused on getting the tiles perfectly placed that he didn't pay much attention to the grout. He used a standard gray grout, thinking it would be fine. Once the grout dried, however, it dulled the vibrant contrast between the black and white tiles. The grout lines looked muddy, and the whole floor seemed less impactful. He later learned that for high-contrast patterns like checkerboard, using a grout color that complements or matches one of the tile colors (or even a specialized grout for natural stone) would have made the pattern pop. He had to live with a less-than-perfect floor because he overlooked this detail during installation.
Ensuring Durability Through Correct Installation Practices
Don't let hollow sounds haunt your new marble floor. Hollow spots mean the mortar didn’t stick, causing loose tiles and cracks. Here’s how you keep your investment secure:
- Always use a high-quality thin-set made for natural stone.
- Trowel the mortar evenly—press the tile in with a slight wiggle.
- Check the first few tiles by lifting them to confirm full mortar coverage.
- Patch low spots in your subfloor before starting.
One real case: In Newport Beach, a family bought marble tiles online USA, aiming for a luxury bathroom. They skipped checking tile adhesion. Months later, three tiles let out a “pop.” Fixing it meant new tiles, labor, and dust everywhere. Had they lifted even one tile during setting, they would’ve saved $2,500.
Take the time for proper prep up front. Every hollow tile is a future repair bill waiting to happen.
Consistency isn’t just for show—it stops debris from creeping in and makes cleaning simple. If grout joints vary, you’ll notice gaps and uneven lines fast.
Here’s your checklist:
- Use plastic spacers between every tile.
- Check with a ruler or laser line as you go.
- Always follow the manufacturer’s recommended grout width.
Many pros recommend tight grout lines for marble—a common width is 1/16" to 1/8". Keeping those lines neat pays off in a smooth look and avoids weak joints.
Don’t rush into grouting or heavy traffic. Marble tile mortar needs time to set—usually 24–48 hours. Without that time, tiles shift and bonds break.
| Step | Cure Time | Notes |
|---|---|---|
| Thin-set laying | 24–48 hours | Keep the area completely clear |
| Grouting | After mortar cures | Prevents pulling tiles loose |
| Sealing | After grout cures | Stops stains and preserves finish |
A homeowner in Texas wanted their kitchen usable ASAP, so they started moving in after just 8 hours. Within days, multiple tiles shifted, needing a full reinstallation. Proper curing would have kept that kitchen perfect the first time.
Want more installation tips? Review some of the most common causes of marble flooring failure and learn why corners cut now cost big later in our section on common issues in marble flooring installation.
Get it right the first time and your marble floor will be the showpiece of your home for decades.
Protecting Your Investment with Proper Sealing
Marble is beautiful, no doubt about it. But it's also a natural stone, which means it's porous. Think of it like a sponge – it can soak up liquids. If you don't seal it properly, spills can lead to stains that are tough to get out. And nobody wants that.
Understanding Marble's Porosity
Marble's natural makeup means it has tiny little holes. These are what make it porous. Different types of marble have different levels of porosity. For example, some lighter marbles might soak up liquids faster than darker ones. It's why inspecting your tiles before you even start is a good idea. You want to know what you're working with. If you're looking to buy marble tiles online in the USA, always check the product details for information on porosity and recommended care.
Choosing the Right Stone Sealer
Not all sealers are created equal. You need one specifically made for natural stone, and ideally, one that's right for marble. Some sealers can change the color of your marble, giving it a darker, 'wet' look. Others are designed to keep the original color pretty much the same. If you're unsure, it's best to go with a sealer that doesn't have color enhancers. Always read the product label to see what it's best suited for. For instance, if you've got light-colored marble, you'll want a sealer that won't cause any discoloration. You can find a great selection of stone sealers designed for marble.
Adhering to Sealer Application Guidelines
This is where a lot of people mess up. You can't just slap it on and expect it to work. First, make sure your marble is completely clean and dry. Any dirt or moisture trapped underneath will be sealed in. Then, apply the sealer evenly. Usually, you'll use a cloth or a brush. Don't let it pool up. Wipe off any excess before it dries. You might need a couple of coats, depending on the sealer and the marble. And here's the kicker: you have to let it cure properly. This can take a day or two. Rushing this step means the sealer won't do its job effectively.
Proper sealing is your marble's best defense against stains and damage.
Case Study 1: The Kitchen Countertop Catastrophe
Sarah had just installed beautiful white marble countertops. She loved them! But a week later, her son spilled grape juice. She wiped it up quickly, or so she thought. By morning, there was a faint purple stain. She hadn't sealed the marble yet, and the juice had soaked right in. It took a professional poultice treatment to get it out, costing her several hundred dollars and a lot of stress. If she had sealed it first, that spill would have just beaded up on the surface.
Case Study 2: The Bathroom Floor Fiasco
Mark installed a stunning marble tile floor in his master bathroom. He thought sealing was optional. Then came the shampoo spills and leaky soap bottles. The marble started to look dull and blotchy in places where liquids had sat. He ended up having to reseal the entire floor and replace a few tiles that had started to etch. This was a much bigger job and expense than a simple initial sealing would have been.
Final Touches for a Professional Marble Finish
Thorough Cleaning After Sealer Drying
Alright, you've sealed your beautiful marble, and now it's time for the grand finale. Don't just walk away! A proper clean-up makes all the difference. After the sealer has had its full curing time – and yes, you need to let it cure completely, don't rush this part – give your new marble surface a good wipe-down. Use a soft, damp cloth or a pH-neutral cleaner specifically made for natural stone. This gets rid of any hazy residue left by the sealer and makes your marble truly shine. It’s like polishing a diamond; you want that sparkle to be perfect. This step really brings out the natural beauty of the stone, making it look like it was installed by a pro. If you're looking to buy marble tiles online in the USA, remember that even the best tiles need this final polish to look their absolute best.
Inspecting for Imperfections
Now, take a step back and really look at your work. Walk around the entire installation. Check for any stray grout haze, adhesive smudges, or minor scratches that might have happened during the process. Sometimes, a tiny bit of grout can get stuck in the texture of the marble, and you want to catch that now. Also, run your hand over the tiles. Do they feel smooth and even? Are the grout lines consistent? This is your last chance to spot anything that doesn't look quite right before calling the job done. Remember, attention to detail is what separates a good job from a great one. A quick inspection can save you headaches down the road.
Making Necessary Repairs
Found a little something that needs fixing? No worries. If you spot any minor chips on the edges of cut tiles, or if a grout line isn't quite perfect, now's the time to address it. For small chips, a bit of color-matched epoxy or even a specialized stone repair kit can work wonders. If a grout line is uneven, you might be able to carefully scrape out a bit and reapply grout, or touch it up. For any larger issues, it's always best to consult with a professional. But for those small, fixable imperfections, a little DIY touch-up can make your installation look flawless. It’s all about that perfect, finished look that makes your marble truly stand out. Case Study: The Miller family installed a stunning marble tile floor in their entryway. After sealing and cleaning, they noticed a small chip on the edge of a tile near the door. Using a marble repair kit, they carefully filled and smoothed the chip, making it virtually invisible. The final result? A perfect entryway that guests still compliment years later.
To give your marble surfaces that final, polished look, pay close attention to the details. A smooth, clean finish not only looks great but also protects your investment. For the best selection of premium marble and travertine, visit our website today!
Wrapping Up Your Marble Tile Project
So, we've gone over some of the common slip-ups people make when putting in marble tile. It's easy to see how these little mistakes can turn into big, expensive headaches down the road. Remember, taking your time, prepping right, and using the correct materials are super important. If you're feeling a bit overwhelmed or just want to make sure it's done perfectly, don't hesitate to reach out to the pros. Getting it right the first time saves you a lot of hassle and keeps your beautiful marble looking its best for years to come.
Frequently Asked Questions
Why is preparing the surface so important before laying marble tiles?
Getting the surface ready is super important because marble is heavy and can crack if the floor or wall underneath isn't strong and flat. Think of it like building a house – you need a super solid foundation. If the surface is bumpy or wobbly, the tiles might not stick well, leading to problems like tiles coming loose or breaking later on. Making sure it's clean, level, and sturdy helps the tiles last for ages.
What kind of glue should I use for marble tiles?
You can't just use any old glue! Marble needs special stuff called thin-set mortar. It's like a cement-based glue that sticks really well. If you're using light-colored marble, it's best to use white thin-set instead of gray. Gray can sometimes show through lighter stones and make them look a bit dingy. Always check the instructions on the product to make sure it's right for marble.
What's the point of laying out the tiles before sticking them down?
Laying out the tiles first, without any glue, is called a 'dry lay.' It's like a practice run! This lets you see how the pattern will look, make sure you don't have any weird, tiny cuts at the edges, and check that the colors and patterns of the marble look good together. Since marble is natural, each piece is a little different, so a dry lay helps you mix and match them for the best overall look.
How do I make sure the tiles are stuck on really well?
To get a strong bond, you need to use the right-sized notched trowel to spread the thin-set mortar. Then, press each tile into the mortar with a little twist. It's a good idea to peek under a tile now and then to make sure the whole back of it is covered in glue. This stops empty spaces, called 'hollow spots,' which can weaken the tile. Using levels and special clips helps keep the tiles flat and even with each other.
Why do I need to be careful when cutting marble tiles?
Marble can chip or break easily if you cut it too fast or with the wrong tool. It's best to use a wet saw with a diamond blade, which is made for cutting hard materials like stone. Cut slowly and steadily. If you have cut edges that will show, you might need to smooth them down a bit so they look nice and aren't sharp.
When should I put the grout between the tiles, and why is sealing important?
After the thin-set mortar has dried completely (usually a day or two), you can add the grout. Apply it carefully to fill all the gaps. Sealing the marble is super important because marble is like a sponge and can soak up spills, leading to stains. A good sealer acts like a protective coat, keeping your beautiful marble looking great for years. You need to let the grout dry first, then apply the sealer according to the product's instructions.
What are the biggest mistakes people make when installing marble?
Some common slip-ups include not checking the tiles for damage before starting, using the wrong kind of glue or grout that isn't meant for natural stone, and skipping the dry-lay step which leads to bad layouts or awkward cuts. Also, not prepping the floor properly or rushing the installation can cause big problems down the road.
How do I make sure my marble floor looks good for a long time?
To keep your marble looking its best, make sure it's installed correctly from the start – no hollow spots under the tiles and nice, even grout lines. After installation, sealing is key. Marble is naturally porous, meaning it can absorb liquids. Using the right sealer protects it from stains and damage. Regular cleaning with gentle, stone-safe cleaners will also help maintain its beauty.
Leave a comment