
Master Bathroom Wall Tile Workflow for Lasting Elegance

Every experienced designer knows that preparing premium natural stone wall tiles for a luxury bathroom in Southern California takes more than style and top-tier materials. Flawless results depend on meticulous wall assessment, precise waterproofing, and careful attention to each installation stage. This guide highlights workflow steps rooted in ANSI and TCNA guidelines, giving you practical strategies for consistent, high-quality tile installation on even the most demanding high-end residential projects.
Table of Contents
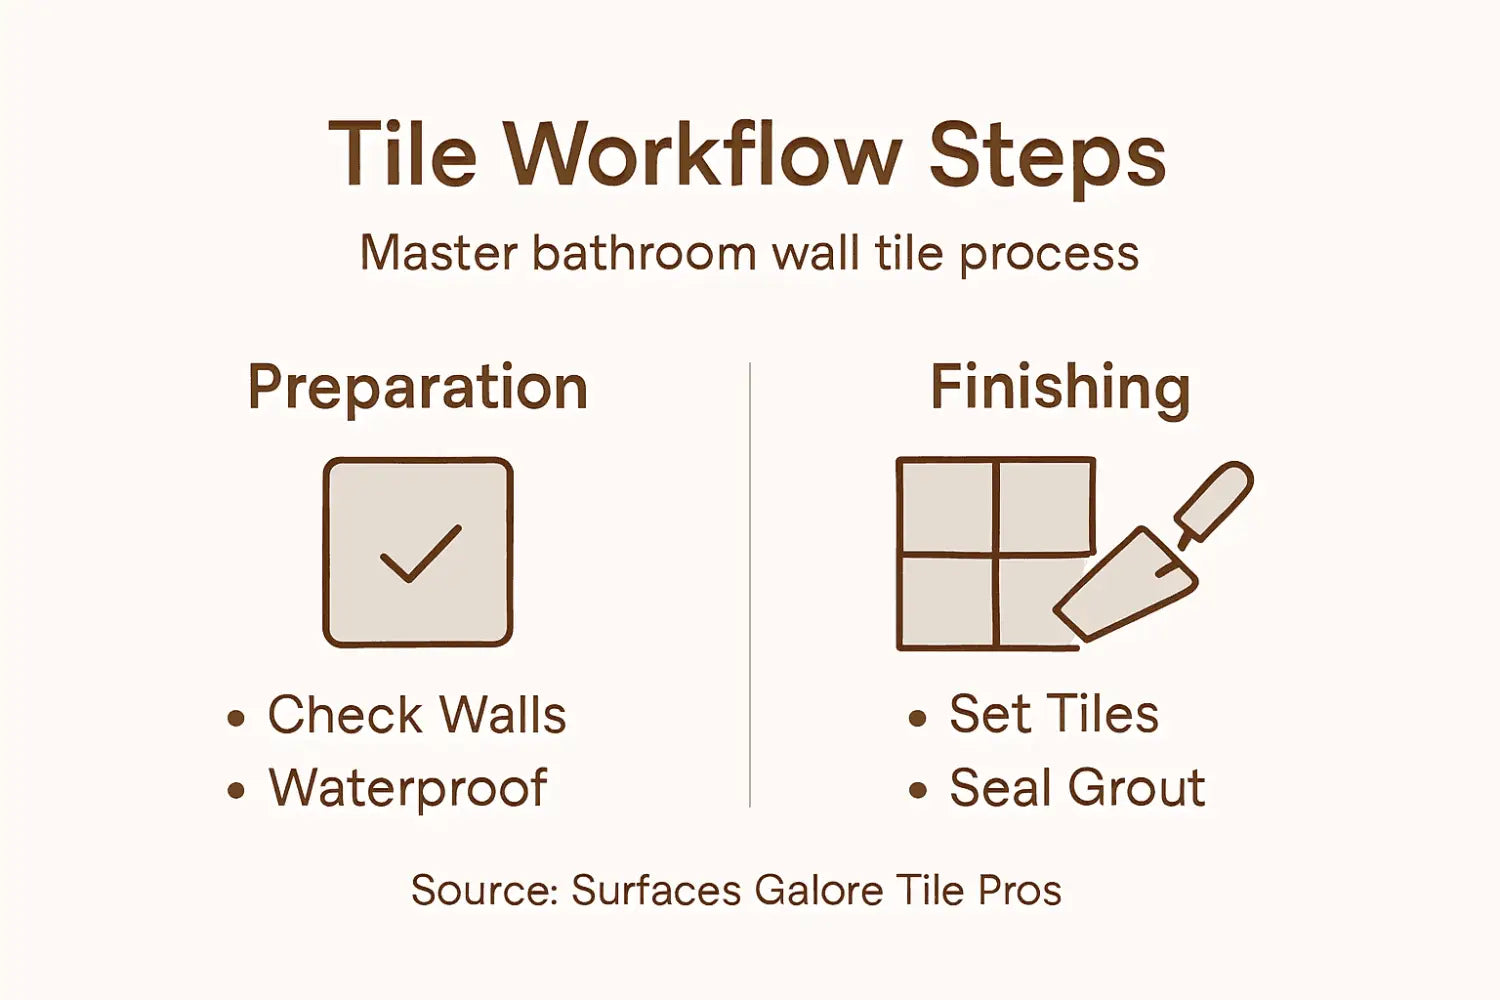
- Step 1: Assess and Prepare Wall Surfaces
- Step 2: Apply Waterproofing for Lasting Protection
- Step 3: Plan Tile Layout for Optimal Design
- Step 4: Set and Level Tiles with Precision
- Step 5: Grout, Seal, and Finish the Installation
- Step 6: Inspect and Verify Quality of Work
Quick Summary
| Essential Insight | Detailed Explanation |
|---|---|
| 1. Check Wall Stability Carefully | Ensure walls are structurally sound and free from moisture or previous adhesives for optimal tile adhesion. |
| 2. Apply High-Quality Waterproofing | Use a durable waterproofing membrane to protect the installation against moisture damage for long-lasting results. |
| 3. Plan the Tile Layout Thoroughly | Measure and create a detailed layout to ensure proper tile alignment and minimize awkward cuts. |
| 4. Use the Right Tools for Setting Tiles | Employ specialized tools to maintain precision when applying mortar and leveling tiles for a professional finish. |
| 5. Inspect Installation Thoroughly | Conduct a thorough final check for alignment, grout consistency, and waterproofing to ensure quality and durability. |
Step 1: Assess and Prepare Wall Surfaces
Assessing and preparing your bathroom wall surfaces is the critical foundation for a stunning tile installation that will stand the test of time. Every successful tile project begins with meticulous surface evaluation and preparation.
Start by thoroughly examining your existing wall surfaces for stability, smoothness, and structural integrity. Walls must be structurally sound, clean, and free from moisture, cracks, or previous adhesive residue. Proper substrate preparation is essential according to industry standards. This means checking for levelness using a long straightedge or laser level, ensuring walls are plumb, and addressing any uneven areas before tile installation begins.
Carefully inspect walls for potential issues like water damage, mold, or structural weaknesses that could compromise your tile installation. Remove any loose paint, old wallpaper, or damaged drywall sections. If you encounter significant wall damage, consider consulting a professional to repair the substrate. Clean surfaces thoroughly using a degreasing solution to remove dirt, oils, and contaminants that could prevent proper tile adhesion. Allow walls to dry completely before proceeding with the next preparation steps.
Here’s a comparison of common bathroom wall substrates and their suitability for tile installation:
| Wall Substrate Type | Tile Adhesion | Waterproofing Needed | Common Issues |
|---|---|---|---|
| Cement Backer Board | Excellent | Essential | Minimal, very stable |
| Moisture-Resistant Drywall | Good | Highly Recommended | Can absorb water, mold risk |
| Regular Drywall | Poor | Not Suitable | Not water-resistant |
| Plaster | Fair | Strongly Suggested | Cracking, uneven surfaces |
| Concrete Block | Good | Recommended | Requires patching, sealing |
Pro Tip: Invest in a high-quality moisture meter to precisely assess wall moisture levels before beginning your tile installation, preventing potential future adhesion and grout failure issues.
Step 2: Apply Waterproofing for Lasting Protection
Waterproofing is the critical barrier that protects your bathroom walls from moisture damage, ensuring your tile installation remains beautiful and structurally sound for years to come. This step transforms your bathroom walls from vulnerable surfaces to resilient, water-resistant foundations.
Begin by selecting a high-quality waterproofing membrane specifically designed for wet areas. Proper waterproofing membrane application is essential according to industry standards, as ceramic tile itself does not prevent water penetration. Apply the waterproofing membrane using a roller or specialized brush, ensuring complete and even coverage across all wall surfaces. Pay extra attention to corners, edges, and areas around fixtures like shower heads and faucets where water tends to accumulate. Allow the first coat to dry completely before applying a second layer for maximum protection.
Carefully inspect the membrane for any gaps, bubbles, or thin spots that could compromise its water resistance. Use waterproofing tape or liquid membrane to seal seams and joints, creating a continuous protective barrier. Some professionals recommend using a liquid waterproofing product that can be rolled or brushed on, while others prefer sheet membranes that provide a more rigid protection. Whichever method you choose, ensure thorough and precise application to prevent potential water intrusion.
Pro Tip: Allow waterproofing membranes to cure completely according to manufacturer specifications before proceeding with tile installation, typically 24 to 48 hours depending on product and environmental conditions.
Step 3: Plan Tile Layout for Optimal Design
Planning your bathroom tile layout is an art form that balances aesthetic appeal with precise technical execution. This critical step transforms your vision into a visually stunning and mathematically precise tile installation that will elevate your entire bathroom space.
Tile layout planning requires careful consideration of multiple design elements. Start by measuring your wall surfaces precisely and create a detailed scale drawing that accounts for every architectural feature. Consider the visual impact of tile size and orientation recommended by industry standards. Larger tiles can make a small bathroom feel more spacious, while smaller tiles offer more design flexibility around fixtures and corners. Aim to center your layout to create symmetry and balance minimizing awkward tile cuts and maintaining a professional appearance.
Pay close attention to grout line spacing and tile alignment, ensuring each tile is positioned to complement surrounding tiles and architectural elements. Use a laser level to establish perfectly straight reference lines and maintain consistent spacing throughout the installation. Mock up your design using tile layout software or physically arrange tiles on the floor to visualize the final result. Consider how different tile sizes and patterns will interact with your bathroom’s specific dimensions and design elements.
Below is a quick reference for tile layout patterns and their visual effects:
| Layout Pattern | Description | Visual Effect |
|---|---|---|
| Straight Stack | Tiles align in rows/columns | Clean, modern look |
| Brick Bond | Staggered, like brickwork | Classic, dynamic |
| Herringbone | Zigzag, V-shaped pattern | Luxurious, eye-catching |
| Diagonal | Set at a 45° angle | Enlarges appearance |
Pro Tip: Always purchase 10 to 15 percent more tiles than your calculated area requires to account for cuts, breakage, and future repairs.
Step 4: Set and Level Tiles with Precision
Setting and leveling tiles is the pivotal moment where your careful planning transforms into a stunning bathroom wall installation. This step requires a combination of technical skill, patience, and meticulous attention to detail.
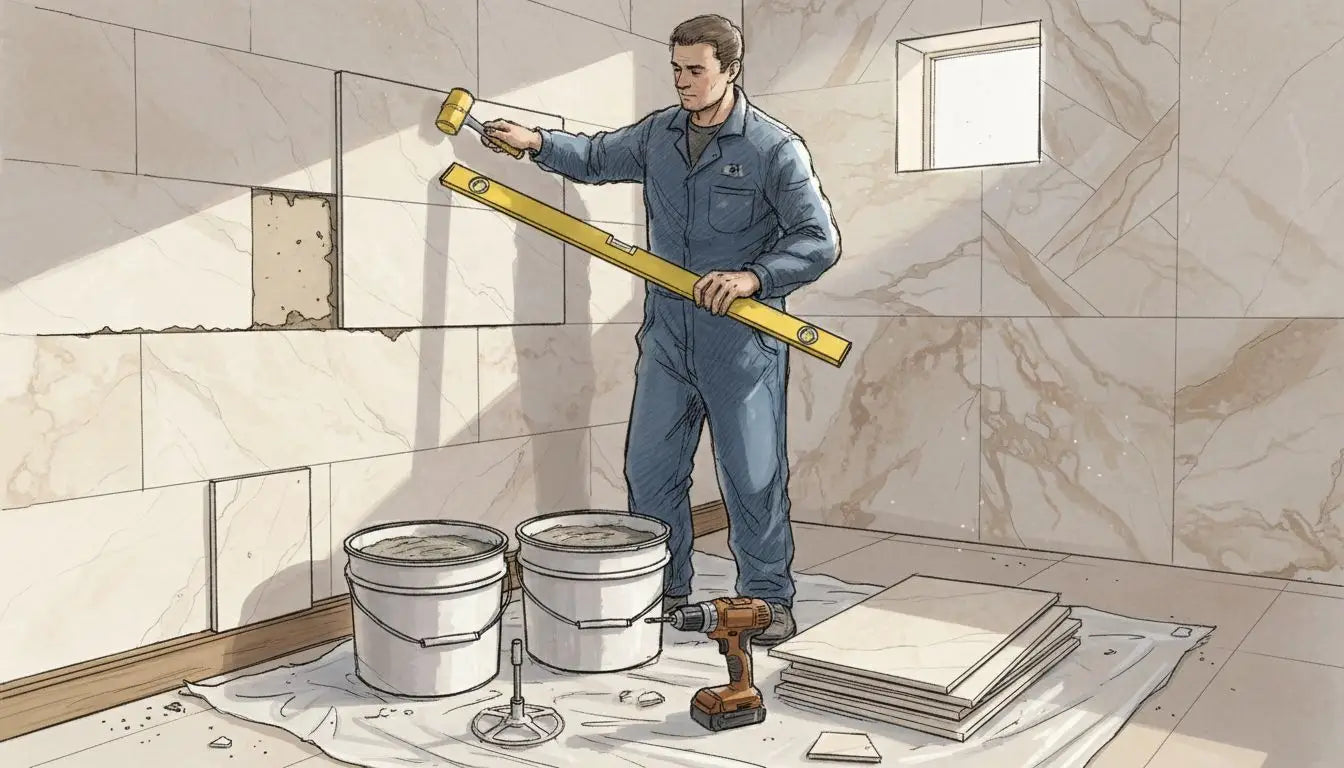
Professional tile installation standards demand precise technique and specialized tools. Begin by selecting the appropriate notched trowel for your specific tile size and mortar type. Apply the mortar using consistent angle and pressure to create uniform ridges that will provide complete coverage and strong adhesion. Press each tile firmly into the mortar with a slight twisting motion to ensure maximum contact and eliminate air pockets. Use spacers to maintain consistent grout line width and keep tiles perfectly aligned.
Employ a rubber mallet and long level to tap tiles into precise alignment and eliminate lippage between adjacent tiles. Check your work frequently using both a four foot level and a straight edge to confirm that the surface remains completely flat and even. Work in small sections and periodically step back to verify overall alignment and spacing. Remove and reset any tiles that are not perfectly positioned before the mortar begins to set. Take your time and maintain a methodical approach to achieve a professional result.
Pro Tip: Clean excess mortar from tile surfaces immediately using a damp sponge to prevent hardened residue that can compromise your final finish.
Step 5: Grout, Seal, and Finish the Installation
The final stage of your bathroom tile installation transforms individual tiles into a cohesive, professional surface that will look stunning for years to come. This critical finishing process requires precision and careful technique to achieve a flawless result.
Grout application techniques demand methodical attention to detail. Select a grout color that complements your tile and use a rubber float to press grout deeply into tile joints at a 45-degree angle. Work in small sections and remove excess grout with a damp sponge before it hardens. Clean the tile surface thoroughly, wiping diagonally across joints to prevent removing grout from between tiles. Allow the grout to cure completely according to manufacturer recommendations typically 24 to 48 hours before proceeding to sealing.
Once grout has fully cured, apply a high-quality penetrating sealer to protect against moisture and staining. Use a foam brush or roller to ensure even application, working in small sections and allowing the sealer to penetrate fully. Wipe away any excess sealer to prevent a hazy surface finish. For added protection, consider applying a second coat after the first has completely dried. Take time to inspect your work carefully, addressing any imperfections and ensuring a uniform, professional appearance across the entire installation.
Pro Tip: Keep leftover grout and sealer for future touch ups and repairs, storing them in a cool dry place with the lid tightly sealed to maintain their quality.
Step 6: Inspect and Verify Quality of Work
The final verification stage ensures your meticulous bathroom tile installation meets professional standards and will provide lasting beauty and functionality. This critical review transforms your project from a good installation to an exceptional one.
Quality verification measures involve systematic and thorough examination of every installation aspect. Begin by checking tile alignment using a long straight edge and laser level, verifying that no tile edges protrude more than 1/32 inch from adjacent tiles. Inspect grout lines for consistent width, color, and depth, ensuring they are clean and free from gaps or cracking. Look for any signs of lippage where tile edges are not perfectly aligned and address these immediately.
Carefully examine the entire surface under different lighting conditions to reveal subtle imperfections that might be missed during installation. Test the waterproofing by checking for any moisture penetration around fixtures and seams. Verify that sealant has been applied evenly and completely, paying special attention to corners and edges where water might accumulate. Document your inspection with photographs and notes, which can be valuable for future maintenance or if you need professional consultation.
Pro Tip: Create a small repair kit with matching grout, sealant, and a few spare tiles to address any future minor repairs quickly and seamlessly.
Elevate Your Bathroom Wall Tile Project with Premium Natural Stone
The journey to a flawless bathroom wall tile installation begins with solid preparation, precise waterproofing, and expert tile setting as detailed in our article. Now, imagine pairing these expert steps with authentic, durable natural stone that transforms your vision into lasting elegance. Whether you are tackling challenges like substrate preparation or aiming for perfect tile layout and sealing, the right materials make all the difference in preventing common issues like moisture damage or grout failure.
Discover how Surfaces Galore’s premium Marble and Travertine Tiles deliver not only exceptional beauty but also the reliable quality your project demands.

Ready to bring your bathroom walls to life with stunning natural stone that meets professional standards? Explore our extensive selection and get inspired by our authentic natural stone offerings at Surfaces Galore. Take the next step toward timeless elegance with stone that supports every phase of your tile workflow from preparation to finish.
Start your project today with the best materials and expert support from Surfaces Galore, where quality meets style for every bathroom transformation.
Frequently Asked Questions
How do I prepare my bathroom walls for tile installation?
To prepare your bathroom walls for tile installation, start by assessing the stability and smoothness of existing surfaces. Remove any loose materials, clean thoroughly, and ensure walls are dry and structurally sound before proceeding.
What type of waterproofing should I use before tiling my bathroom walls?
Use a high-quality waterproofing membrane specifically designed for wet areas. Apply it evenly to all wall surfaces, paying special attention to corners and seams to create a complete moisture barrier.
How can I effectively plan my tile layout for my master bathroom?
To plan your tile layout, measure your wall surfaces and create a detailed scale drawing. Center the design to avoid awkward cuts, and consider the visual impact of different tile sizes and patterns to enhance your bathroom’s aesthetics.
What tools are essential for leveling tiles during installation?
Essential tools for leveling tiles include a notched trowel, rubber mallet, long level, and tile spacers. Use these tools to ensure that each tile is properly aligned and that no tile edges are higher than 1/32 inch from others.
How long should I wait before sealing grout in my tile installation?
Wait 24 to 48 hours for the grout to cure completely before applying a penetrating sealer. Ensure even application and consider adding a second coat after the first has dried for optimal protection against stains and moisture.
What should I inspect after completing my tile installation?
After completing your tile installation, inspect tile alignment and grout lines for consistency in width and depth. Check for any signs of lippage or moisture penetration around seams, documenting your findings for any needed repairs.
Leave a comment