
How Much Marble Tile Do I Need? Your Easy Square Foot Calculator Guide

So, you're thinking about using marble tile for your next home project? That's awesome! Marble really makes a space feel fancy. But before you run out and buy a truckload, you probably have one big question: How Much Marble Tile Do I Need? Easy Square Foot Calculator Guide. It sounds simple, right? Just measure the room. But then you start thinking about all the cuts you'll have to make, especially around corners or fixtures. And what if you drop a tile? Or the color variation is a bit off? It’s a bit more involved than just a quick measurement, but don't worry, we'll break it down so you can figure out exactly how much you need without buying way too much or, worse, not enough.
Key Takeaways
- Measure your room's square footage accurately to get a baseline number for your tile needs.
- Always add extra material, typically 10-15%, to your total square footage to account for cuts, waste, and potential breakage during installation.
- Consider the complexity of your layout; intricate patterns or rooms with many angles and obstacles will likely require a higher waste percentage.
- When ordering, it's better to have a little extra left over for future repairs than to run short, as marble batches can vary in color and veining.
- Consulting with your supplier, like Surfaces Galore, can help you determine the right amount and even assist with custom cuts to minimize waste.
Calculating Your Marble Tile Requirements
Ready to bring the timeless beauty of marble into your home? Fantastic choice! But before you start dreaming about those elegant floors or stunning backsplashes, let's talk numbers. Getting the right amount of marble tile is key to a smooth project and a beautiful finish. We'll help you figure out exactly what you need, so you can buy marble tiles online USA with confidence.
Understanding Square Footage for Your Project
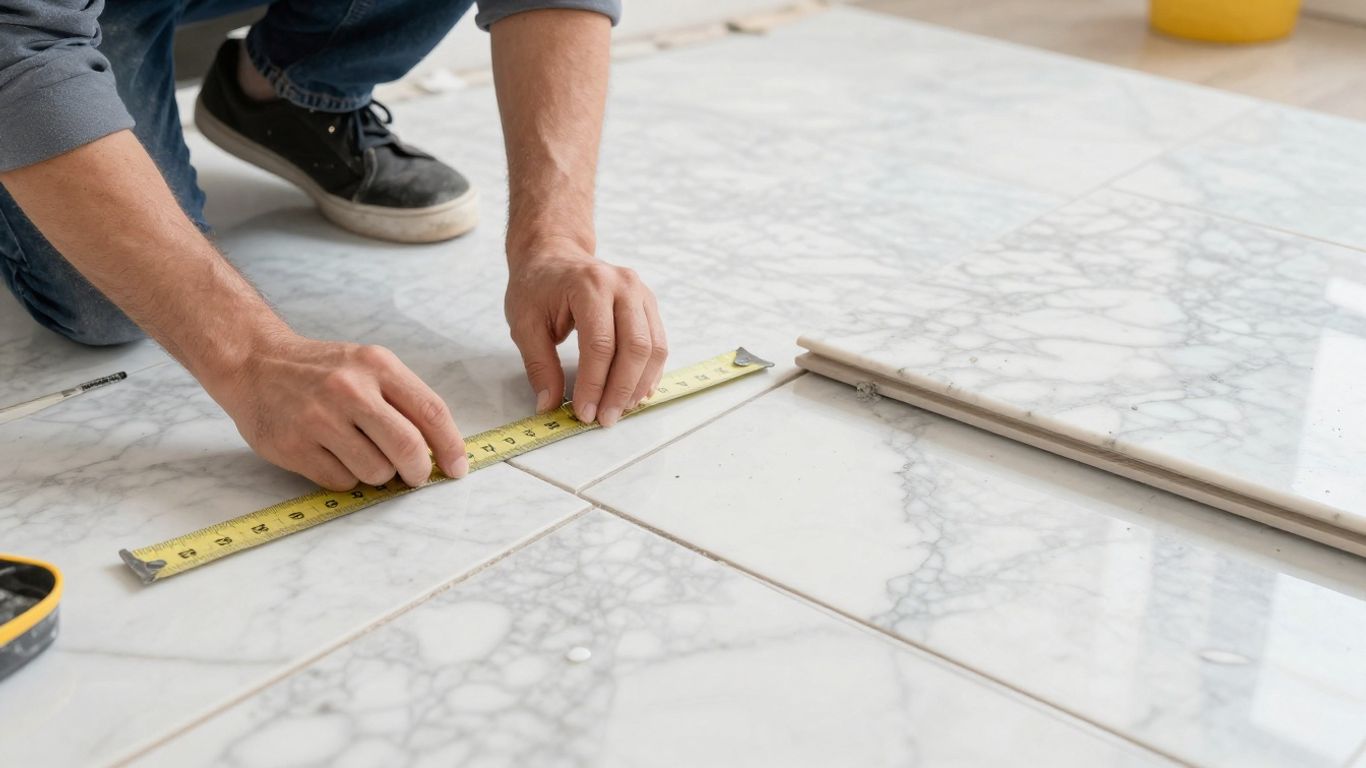
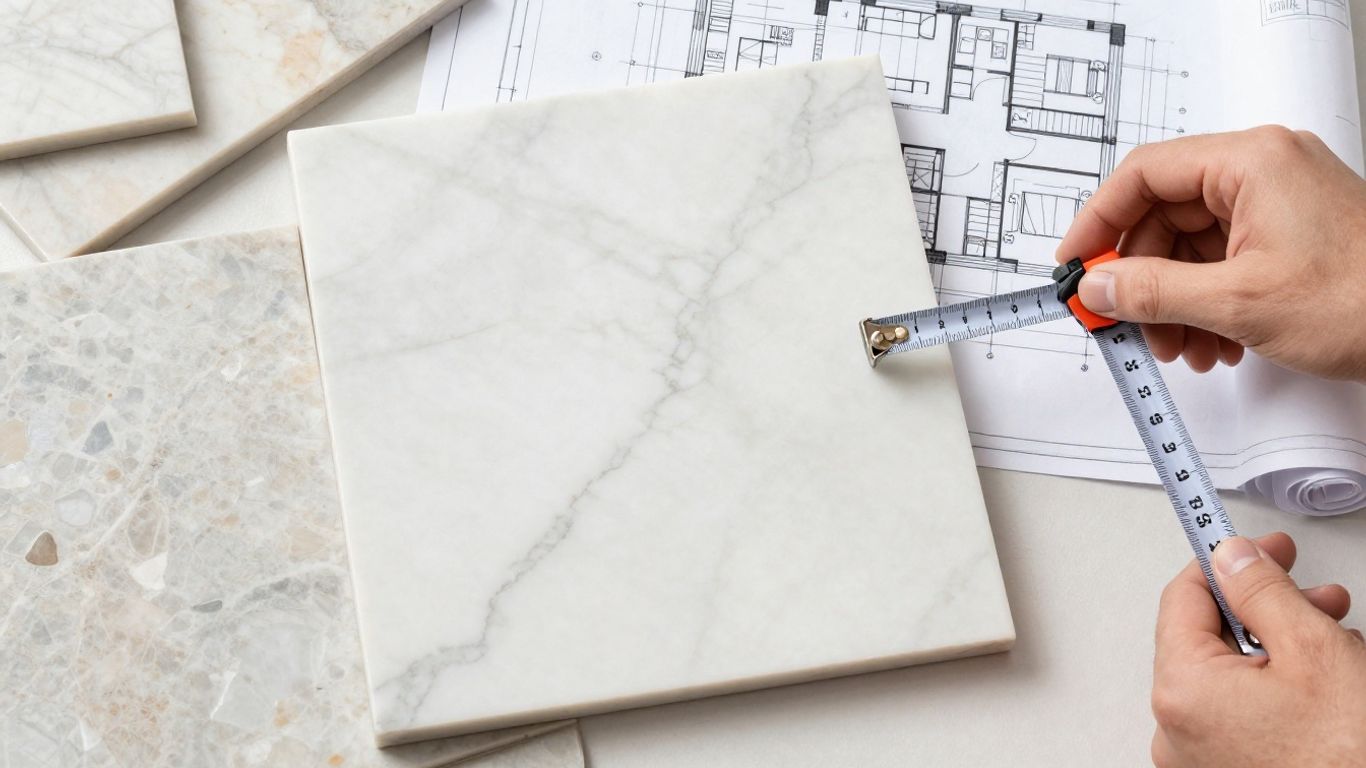
First things first: measure your space. It sounds simple, but accuracy here saves headaches later. For rectangular rooms, just multiply the length by the width. Easy, right? For trickier spaces, break them down into smaller, manageable sections. Measure each section and add them all up. This gives you the total square footage you need to cover.
Don't guess – measure!
- Rectangular Areas: Length (ft) x Width (ft) = Square Footage
- Irregular Areas: Break into shapes (squares, rectangles, triangles), calculate each, and sum them up.
- Complex Areas: Consider sloped ceilings or curved walls; measure these sections carefully.
For example, if you have a main rectangular room and an alcove, measure each separately and add the results. This method ensures you account for every inch of your project area. Measure your space accurately to get started.
Accounting for Cuts and Waste
Now, here's where we get real. You can't just buy the exact square footage of your room. Why? Because tiles need to be cut to fit edges, corners, and around obstacles like doorways or fixtures. These cuts, plus any tiles that might chip or break during handling or installation, add up. This is what we call the 'waste factor'.
It's standard practice to add extra material to your total square footage. For most projects, adding 10-15% is a good rule of thumb. If you're working with intricate patterns or have a lot of cuts, you might want to bump that up to 20%. It's always better to have a little extra than to run short mid-project, which can lead to delays and the headache of trying to match dye lots or veining from a different batch.
Always order more than you think you'll need. Running out of tile is a common project pitfall, and having extra ensures a perfect match if repairs are needed down the line.
Determining Additional Material Needs
Beyond the tiles themselves, think about the other bits and pieces you'll need. This includes:
- Adhesive (Thin-set Mortar): You'll need enough to cover your square footage, following the manufacturer's coverage rates. Factor in the size of your trowel's notches, as this affects how much mortar is spread.
- Grout: Calculate based on the total square footage and the width of your grout joints. Wider joints mean more grout.
- Sealer: Essential for protecting your beautiful marble from stains and moisture.
- Spacers: To keep those grout lines consistent.
Don't forget these items when planning your budget and your order. Running out of grout or adhesive can halt your progress just as easily as running out of tiles. When you're ready to buy marble tiles online USA, make sure to add these necessary supplies to your cart. For instance, if you're planning a stunning checkerboard floor, you'll need to ensure you have enough of both colors of marble tile, plus all the accompanying installation materials. Surfaces Galore has a wide selection of these items to complete your project.
Essential Tools for Marble Installation
Measuring and Layout Instruments
Getting your measurements right is the first step to a flawless marble installation. You don't want to end up with awkward gaps or too many cuts, right? A good tape measure is your best friend here. Seriously, grab a sturdy one. For layout, a chalk line is super handy for marking center lines and creating guides. This helps keep everything straight, especially in larger rooms. Think of it as drawing a blueprint on your floor before you even touch the tiles. A level is also a must-have. You want your beautiful marble tiles to sit perfectly flat, not like a bumpy road. Checking with a level as you go prevents "lippage," which is just a fancy word for uneven tile edges. Nobody wants that.
Adhesive and Grouting Supplies
Now for the sticky stuff! You'll need the right adhesive, usually a thin-set mortar specifically designed for natural stone. Mixing it correctly is key – follow the manufacturer's instructions to a T. A notched trowel is your tool for spreading this mortar evenly, creating those perfect ridges that help the tile bond. Spacers are small but mighty; they ensure your grout lines are consistent, giving your finished floor a professional, uniform look. And speaking of grout, you'll need that too, plus a grout float to spread it into those joints. Don't forget a bucket and sponge for cleanup – you'll be using them a lot!
Cutting and Finishing Equipment
Let's talk cuts. Marble is beautiful, but it's also hard. You'll likely need to cut tiles to fit edges, corners, or around obstacles. A wet saw with a diamond blade is the gold standard for cutting marble. It keeps the blade cool and reduces dust, giving you cleaner cuts. If you're doing a smaller job or just need to make a few simple cuts, a good quality tile cutter might work, but for marble, a wet saw is really the way to go. You can even buy marble tiles online USA and get the right tools to cut them. Remember to wear safety glasses and gloves – cutting stone can be dusty work. For any exposed cut edges, you might need sandpaper or a polishing tool to smooth them out for a finished look.
Preparing Your Installation Area
Before you even think about laying a single tile, getting your installation area ready is super important. It’s like building a house – you need a solid foundation. Skipping this step is a recipe for disaster, trust me. You want your beautiful marble tiles to look perfect and last for ages, right? That means we need to make sure the surface underneath is just right.
Ensuring a Level and Clean Subfloor
This is non-negotiable. Your subfloor needs to be as flat and clean as possible. Any bumps, dips, or debris can cause your tiles to crack later on, or worse, lead to an uneven finish. We're talking about a smooth, solid base that can handle the weight and wear. Think of it as giving your new marble floor the best possible start in life. A clean subfloor also means your adhesive will bond properly, which is key for a long-lasting installation. If you're unsure about your subfloor's condition, it's always best to get it checked out. A little prep work now saves a lot of headaches down the road.
Acclimating Your Marble Tiles
Marble is a natural stone, and like any natural material, it needs time to adjust to its new environment. Before you start, let your marble tiles sit in the room where they'll be installed for at least 48 hours. This allows them to get used to the temperature and humidity levels. Why is this so important? Because if you install them right away, they could expand or contract later, leading to cracks or unevenness. It’s a simple step, but it makes a big difference in the final outcome. It’s like letting a new plant settle into its pot before you water it.
Establishing Layout Guidelines
Okay, now for the fun part – planning where everything goes! Before you mix any mortar, do a dry layout. This means placing your tiles on the floor without any adhesive to see how they look. You can figure out the best pattern, where to start, and how to handle tricky edges. This is also your chance to mix tiles from different boxes to get a nice blend of color and veining. Remember, marble is natural, so no two pieces are exactly alike. A dry layout helps you visualize the final look and avoid awkward cuts. You can use chalk lines to mark the center of the room and create straight reference lines. This planning stage is where you really start to see your design come to life. It’s like sketching out your masterpiece before you start painting. If you're looking to buy marble tiles online in the USA, now's the time to visualize how they'll fit your space.
Proper surface preparation is absolutely critical for a successful marble tile installation. It's not just about aesthetics; it's about the longevity and integrity of your floor or wall. Taking the time to ensure a level, clean, and acclimated environment for your tiles will pay dividends in the years to come, preventing issues like cracking, lippage, and unevenness. Think of it as an investment in the beauty and durability of your natural stone.
Case Study: The "Uneven Entryway" Fiasco
Sarah was so excited to install her new marble tiles in her entryway. She skipped the subfloor prep, thinking it was an unnecessary step. Within a month, she noticed some tiles were higher than others, creating a tripping hazard. Worse, a few tiles near the door had cracked from the uneven pressure. If she had taken the time to level the subfloor and acclimate the tiles, she would have avoided this costly and frustrating problem. Her beautiful marble entryway ended up being a constant reminder of a skipped step.
The Tile Laying Process
Laying marble tile isn’t just a step-by-step process – it’s the moment your project vision starts to really take shape. Do it right, and you’ll enjoy a luxurious marble floor for years. Let’s walk through the pro’s approach with real-world tips and case studies from homeowners who ordered their marble tiles online right here in the USA.
Applying Thin-Set Mortar Correctly
The way you spread your mortar can make or break your installation. It’s easy to rush it, but careful, even coverage is key for top-notch results. Always use a notched trowel and work in sections so the mortar doesn’t dry out before you set your tile. Hold the trowel at about a 45-degree angle to get those all-important ridges. Press each marble tile down with a gentle twist – this ensures maximum adhesion and no hollow spots underfoot.
Here’s a quick reference table for trowel sizes by tile size:
| Tile Size | Recommended Notch (inches) |
|---|---|
| Up to 8" | 1/4 x 1/4 |
| 8" – 16" | 1/4 x 3/8 |
| Over 16" | 1/2 x 1/2 |
Many pro installers occasionally lift a tile they've just placed to check full mortar coverage. If you see gaps, add more mortar and reseat.
Setting Tiles with Precision
Precision is more than just lining up corners.
- Start your layout from the center and work out to the edges.
- Use tile spacers for even joints – most marble installations keep grout lines tight, around 1/16" to 1/8".
- Keep your level handy and check regularly to avoid lippage (uneven edges).
- Don’t walk on your new tile for at least 24 hours while everything sets up.
Case Study: Anna from Chicago ordered Carrara marble for her foyer. She said, “I used a chalk line for reference and small spacers for even joints – it made the final look so crisp.”
Maintaining Consistent Grout Joints
You want grout lines that are uniform, not crooked or too wide. Here’s how:
- Insert spacers as you lay each tile.
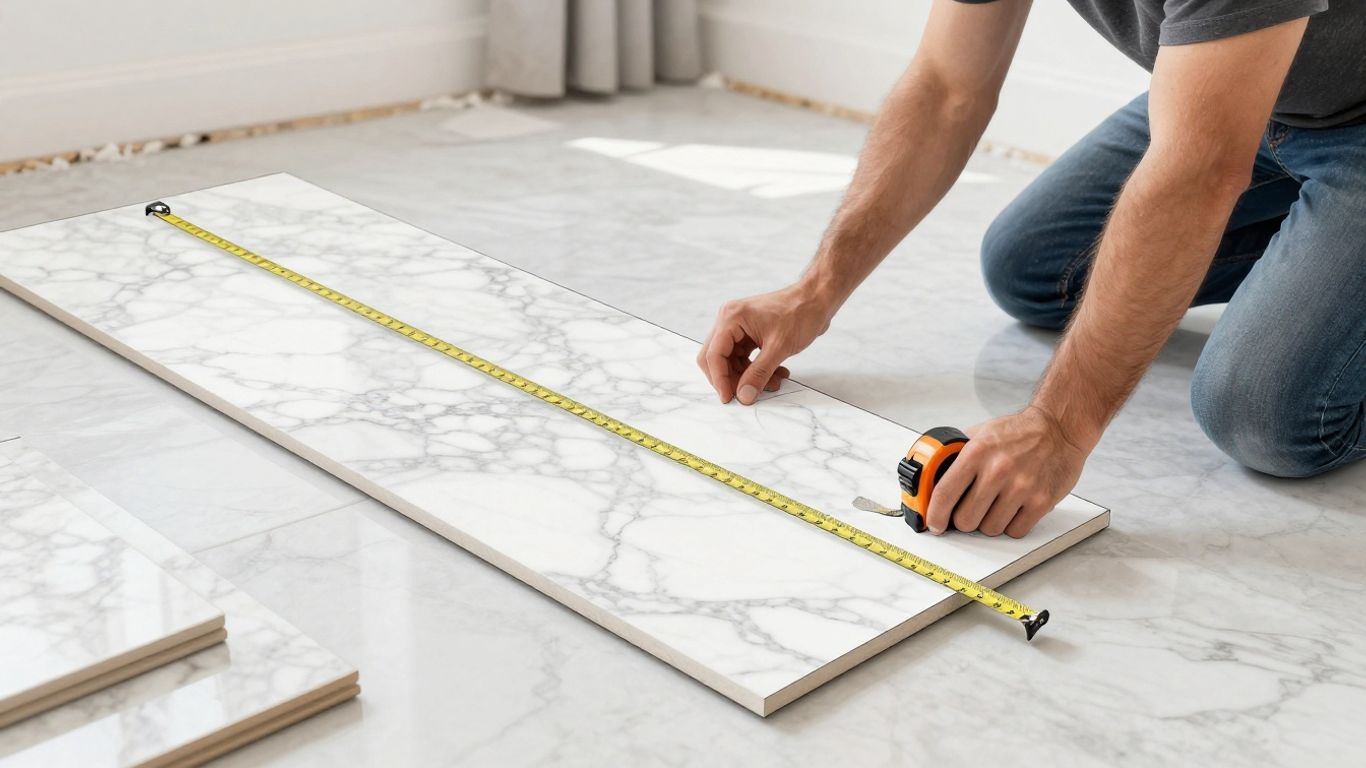
- Double-check with a tape measure every few rows.
- For large-format marble, occasionally step back and scan for shifting lines.
This attention to detail stops small errors from snowballing across the room. A flawless grout line ties the whole look together.
Case Study: Darren and Lisa, who recently updated their kitchen with honed marble, found that switching to larger spacers solved tiny inconsistencies left by hand placement alone. The finished grout lines looked professionally installed!
Need inspiration, technique tips, or want to avoid costly mistakes? Our expert tile layout tips cover more on marble and tile installations from start to finish.
Ready to get started? Buy marble tiles online USA today and turn your design dreams into a reality!
Cutting and Fitting Marble Tiles
Selecting the Right Cutting Tools
Getting those perfect cuts on your marble tiles is key to a professional finish. Don't wing it! For marble, a wet saw is your best friend. It uses water to keep the blade cool and dust down, which is a big deal for both safety and the quality of your cut. You'll want a diamond blade specifically designed for cutting stone. Trying to use the wrong tool is just asking for chipped edges and frustration. If you're doing a lot of intricate cuts or need specific shapes, consider looking into custom cutting services. It might save you time and headaches, especially if you're buying marble tiles online in the USA and want that perfect fit.
Techniques for Clean Cuts
Cutting marble isn't like cutting a piece of wood. You need a steady hand and patience. Always cut slowly and deliberately. Rushing the process is the quickest way to end up with a broken tile or a messy edge. Make sure your wet saw's water feed is working properly – this is crucial for a clean cut and to prolong the life of your diamond blade. Plan your cuts so that any edges that will be visible are along walls or in corners where they won't be as noticeable. For those cuts that will be exposed, you might need to do some extra work later.
Managing Cut Edges for a Finished Look
So, you've made your cuts. Now what? If a cut edge will be hidden against a wall or behind trim, you might be good to go. But if it's going to be out in the open, like on a countertop edge or a visible floor transition, you'll want to smooth it out. You can use a rubbing stone or a specialized polishing pad to carefully sand down the cut edge. This makes it look finished and also safer to the touch. It’s these little details that really make your marble installation shine. If you're unsure about custom cuts or finishing edges, remember that many suppliers offer custom cutting services, which can be a lifesaver for complex projects.
Case Study: The Bathroom Refresh
Sarah wanted to update her small guest bathroom. She decided on a beautiful Carrara marble tile for the floor and shower walls. She measured carefully, but realized she'd need several cuts for the shower niche and around the toilet base. Initially, she thought about renting a wet saw, but after watching a few tutorials, she felt a bit intimidated. She remembered seeing that Surfaces Galore offered custom cutting. She sent them her measurements for the niche and a few tricky corner pieces. When the tiles arrived, the custom cuts fit perfectly, saving her hours of work and the stress of potentially ruining expensive marble. The rest of the tiles she cut herself using a borrowed wet saw, taking her time and getting clean results for the main floor area. The finished bathroom looked like a high-end spa, and she was thrilled with how the cuts turned out.
Case Study: The Kitchen Backsplash Challenge
Mark was installing a stunning Calacatta Gold marble subway tile backsplash in his kitchen. He was confident about most of it, but the area around his range hood and electrical outlets required precise cuts. He decided to buy a few extra tiles just in case. He used a wet saw for the main cuts, but found that getting the small, precise cutouts for the outlets was tricky. He ended up using a Dremel with a diamond bit for those smaller details, working slowly and carefully. He also found that some of his cut edges were a bit rough, so he used a fine-grit sanding sponge to smooth them down before grouting. The result was a professional-looking backsplash that really made his kitchen pop.
Grouting and Sealing Your Marble
Applying Grout for Durability
Once your beautiful marble tiles are set and the adhesive has cured, it's time to fill those gaps. Grouting isn't just about filling space; it's about locking your tiles in place and protecting the edges. We recommend using a high-quality grout specifically designed for natural stone. For marble, a sanded grout is often best for floor applications, while unsanded grout might be preferred for wall tiles or very narrow joints. Always check the manufacturer's recommendations for your specific tile and grout.
When mixing, aim for a peanut butter consistency. Too wet, and it'll be runny; too dry, and it won't spread well. Use a grout float to apply the grout diagonally across the tiles, pressing it firmly into the joints. Work in manageable sections so the grout doesn't start to set before you can clean it up. This step is key to a long-lasting, professional finish. If you're looking to buy marble tiles online in the USA, make sure to also grab the right grout to complete your project.
Cleaning Excess Grout Effectively
This is where the magic happens – transforming a tiled area from 'almost done' to 'absolutely stunning.' After applying the grout and letting it set for about 15-30 minutes (check your grout's instructions – timing is important here!), it's time to clean. Use a damp, not soaking wet, sponge. Wipe diagonally across the tiles, rinsing your sponge frequently in a clean bucket of water. The goal is to remove the excess grout from the tile surface without pulling it out of the joints. You might need a couple of passes. For stubborn haze, a microfiber cloth can work wonders after the initial cleaning.
Don't let excess grout dry on your tiles! It's much harder to remove later. A clean grout line makes all the difference. Think of it as the frame around your artwork – it needs to be perfect.
Protecting Your Tiles with Sealer
Marble is a natural stone, and like all natural stones, it's porous. This means it can absorb liquids, leading to stains. Sealing your marble tiles is a non-negotiable step for protecting your investment. After the grout has fully cured (typically 48-72 hours after grouting), it's time to seal.
We suggest using a penetrating sealer specifically formulated for natural stone. These sealers soak into the stone and grout, creating a barrier against spills and moisture. Always test the sealer in an inconspicuous area first. Apply it evenly with a clean applicator pad or cloth, following the manufacturer's instructions. Allow it to penetrate for the recommended time, then wipe off any excess before it dries on the surface.
Sealing is your best defense against everyday spills and wear. It keeps your marble looking its best for years to come.
Case Study 1: The Kitchen Backsplash Transformation
Sarah wanted a dramatic kitchen update. She chose a stunning Carrara marble mosaic for her backsplash. After carefully laying the tiles and letting the thin-set cure, she mixed a high-quality white grout. She worked section by section, meticulously filling the small joints with her grout float. Once the grout had set slightly, she began the cleaning process with a damp sponge, rinsing frequently. The difference was immediate. After the recommended 72-hour grout cure time, she applied a penetrating stone sealer. The sealer brought out the subtle veining in the Carrara and gave it a soft sheen, protecting it from inevitable kitchen splatters. Her backsplash now looks like a work of art, and she feels confident it will stay that way.
Case Study 2: The Bathroom Floor Upgrade
Mark was renovating his master bathroom and opted for large-format Statuary White marble floor tiles. He knew the grout and sealing steps were critical for a bathroom environment. He meticulously grouted the wide joints, ensuring a smooth, even finish. After the grout cured, he applied a high-quality impregnating sealer. He noticed how the sealer darkened the marble slightly, making the veining pop. He followed up with a second coat for added protection, especially in the shower area. The result was a luxurious, spa-like bathroom floor that was not only beautiful but also protected against moisture and potential staining. He mentioned how the sealing step gave him peace of mind for a high-moisture area.
Understanding the Waste Factor
Why Extra Material is Necessary
So, you've measured your space, picked out the perfect marble tiles – maybe some classic Carrara or a dramatic Calacatta Gold – and you're ready to buy. Hold on a second! Before you hit that 'buy' button, let's talk about something super important: the waste factor. It sounds like a drag, but trust me, it's your best friend when it comes to a successful tile project. Trying to order just enough tile is like trying to bake a cake with exactly the right amount of flour; one little mistake and you're starting over. You absolutely need to order extra. It’s not just about being prepared; it’s about smart planning.
Factors Influencing Waste Percentage
Several things can bump up the amount of tile you'll need beyond the exact square footage of your room. Think about it: every cut you make, especially around corners, doorways, or irregular shapes, means a piece of tile that doesn't make it onto the floor or wall. Natural stone, like marble, has unique veining and patterns. Sometimes, to get that perfect flow and match the design, you'll need to cut away parts of a tile. This is especially true if you're going for a specific pattern, like a checkerboard with Empress Green Marble and white marble, or a complex mosaic. Even the way you plan your layout can affect waste. Tighter grout joints, while looking sleek, often require more precise cuts, leading to more material loss. Plus, let's be honest, accidents happen. A tile might chip during transport, or you might drop one during installation. Having a little extra on hand means you won't be left scrambling to find a matching batch later.
Here’s a quick look at what impacts your waste:
- Complex Layouts: Patterns like herringbone or intricate mosaics require more cuts.
- Room Shape: Rooms with lots of angles, curves, or obstructions will naturally generate more waste.
- Tile Size: Larger tiles might mean fewer cuts overall, but a single mistake can be more costly.
- Skill Level: While we all want to be DIY pros, less experienced installers might have a slightly higher waste percentage.
Strategic Ordering for Project Completion
So, how much extra should you actually buy? The general rule of thumb for most natural stone projects, including marble tiles, is to add 10-15% to your total square footage. For really complex jobs, or if you're working with very large format tiles or intricate patterns, you might even consider going up to 20%. It might seem like a lot, but it's a small price to pay for peace of mind. Imagine finishing your beautiful new floor, only to realize you're a few tiles short for the last row. Frustrating, right? Ordering that extra percentage ensures you have enough material for cuts, potential breakage, and even for future repairs down the line. You can buy marble tiles online USA with confidence, knowing you've planned for success. It's always better to have a few extra tiles left over than to run out mid-project. These leftovers can be stored for any unexpected issues that might pop up years from now.
Case Study: The Bathroom Bliss Project
Sarah was renovating her master bathroom and decided on stunning Statuario White Marble floor tiles. She calculated her square footage precisely and ordered exactly that amount, plus a tiny bit extra. Halfway through laying the tiles, she realized she'd underestimated the cuts needed around her custom vanity and shower niche. She ended up having to place a rush order for more tiles, which cost her extra in shipping and delayed her project by a week. If she had ordered the recommended 15% extra from the start, she would have had plenty of material and avoided the stress and extra cost.
Planning for waste isn't just about buying more tiles; it's about ensuring a smooth, stress-free installation and a flawless finished look that you'll love for years to come. Don't skip this crucial step!
Marble Tile Selection Guide
Exploring Different Marble Finishes
Marble isn't just one look. It comes in finishes that change its whole vibe. A polished finish gives you that high-gloss, mirror-like shine. It really makes colors pop and adds a touch of pure luxury. Think of it for a statement entryway or a fancy bathroom. On the other hand, a honed finish offers a softer, matte look. It's less reflective, giving a more understated elegance. This is great if you want a sophisticated feel without the glare, perfect for kitchens or areas with lots of natural light. Then there's tumbled marble. It looks aged, with softened edges and a worn-in feel. This finish is ideal for a more rustic or traditional design. Choosing the right finish is key to getting the exact look you want for your space.
Choosing Marble for Specific Applications
Where will your marble go? That matters. For kitchen countertops, you need something that can handle daily use. While marble is beautiful, it can scratch and stain. So, if you're a busy cook, consider a honed finish or be prepared for a bit more maintenance. For bathroom floors, especially in showers, a honed or tumbled finish can offer better grip than a slippery polished surface. Wall tiles, like backsplashes, are a bit more forgiving. Here, you can really play with polished finishes to make a space shine. Even fireplace surrounds benefit from marble's natural beauty. Always think about how the area will be used before you pick your marble.
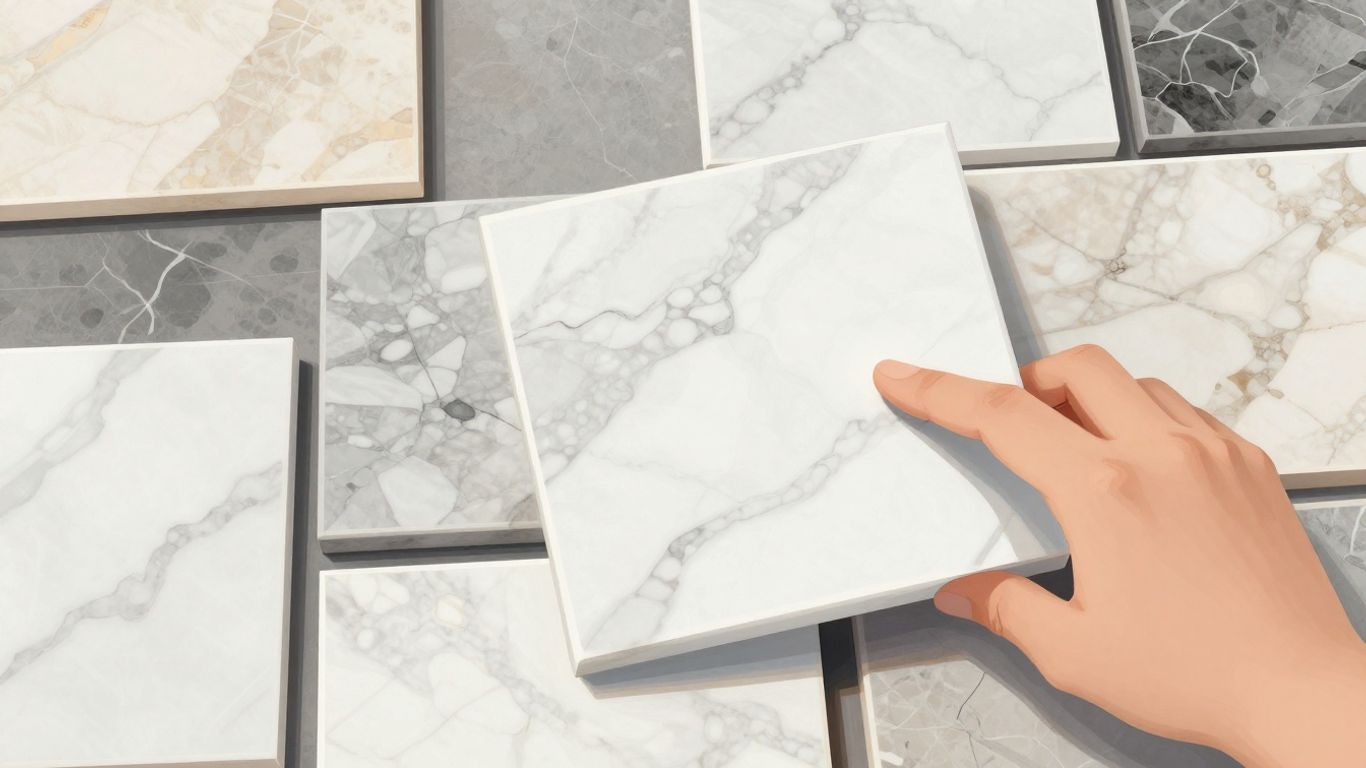
Understanding Natural Stone Variations
This is super important: marble is natural. That means no two tiles are exactly alike. You'll see variations in veining, color, and pattern. This is what makes marble so special and unique! When you buy marble tiles online USA, you might see a picture, but your actual tiles will have their own character. It's a good idea to order samples to see the range of what you can expect. Also, when you get your tiles, mix them up from different boxes before you lay them. This helps blend the natural variations for a more cohesive look. It's part of the charm of real stone.
Case Study: The Miller Residence Bathroom
The Millers wanted a spa-like master bathroom. They chose a honed Carrara marble for the floor and a polished marble mosaic for the shower walls. The honed finish on the floor provided a non-slip surface, while the polished mosaic added a touch of glamour. They ordered extra tiles to account for cuts and the natural variation in veining, ensuring a perfect match throughout the project. The result was a serene, luxurious space that exceeded their expectations.
Case Study: The Downtown Loft Kitchen
For a modern loft kitchen, the designer opted for a dramatic black marble backsplash with bold white veining. They used a polished finish to reflect light and make the space feel larger. Because the backsplash was a focal point, they carefully selected tiles with complementary veining patterns and ordered 15% extra to ensure a flawless installation, especially around the range hood. The finished kitchen has a sophisticated, high-end feel.
Design Possibilities with Marble
Marble isn't just a material; it's a statement. Its natural beauty and timeless appeal can transform any space into a work of art. Whether you're aiming for classic sophistication or modern flair, marble offers endless design avenues. Let's explore how you can use marble to create truly unforgettable interiors and exteriors.
Timeless Checkerboard Layouts
The checkerboard pattern is a classic for a reason. It's striking, elegant, and works beautifully with marble. Imagine a kitchen floor or a bathroom wall in a bold black and white marble checkerboard. It adds instant character and a touch of vintage charm. This pattern is also fantastic for high-traffic areas because the contrast can help hide minor imperfections. You can achieve this look with contrasting marble colors, like Nero Marquina and Bianco Carrara, for a dramatic effect. It’s a design that never goes out of style.
- Classic Aesthetic: Creates a striking and elegant visual effect.
- Durability: Marble is ideal for both residential and commercial applications.
- Versatility: Suitable for floors, walls, backsplashes, and even outdoor patios.
Case Study: A homeowner in Miami wanted to update their entryway. They chose a checkerboard pattern using Emperador Dark and Light marble tiles. The result was a dramatic, luxurious entrance that guests immediately commented on. It perfectly complemented their existing decor while adding a unique focal point.
Elegant Mosaic Patterns
Marble mosaics are where artistry meets practicality. These intricate designs can add texture, color, and a bespoke feel to your project. Think of a stunning marble mosaic backsplash in your kitchen, a detailed shower surround, or a decorative accent wall. From classic herringbone and basketweave to modern geometric and arabesque shapes, there's a mosaic to fit every style. These are perfect for adding a touch of luxury without overwhelming the space. You can even find custom-made mosaics to bring a truly unique vision to life. If you're looking to buy marble tiles online in the USA, exploring mosaic options is a must.
Marble mosaics allow for incredible personalization. They can turn a simple wall into a piece of art, adding depth and visual interest that solid tiles alone can't achieve. Consider the impact of a penny round mosaic in a shower or a delicate arabesque pattern behind your vanity.
Versatile Applications for Any Space
Marble's versatility is one of its greatest strengths. It's not just for floors and walls; it can be used in so many creative ways. Consider marble for:
- Kitchen Backsplashes: Adds a touch of luxury and is easy to clean.
- Bathroom Walls & Floors: Creates a spa-like, elegant retreat. White marble tiles are particularly popular for bathrooms.
- Shower Niches & Shelves: A practical and stylish addition.
- Fireplace Surrounds: Adds warmth and sophistication.
- Entryways & Hallways: Makes a grand first impression.
- Outdoor Patios: Certain marble types can withstand the elements beautifully.
Case Study: A boutique hotel wanted to create a high-end feel in its guest bathrooms. They opted for Calacatta Gold marble tiles on the shower walls and floors, complemented by a subtle marble mosaic accent. The result was a consistently luxurious and inviting atmosphere throughout the hotel, significantly elevating the guest experience.
Maximizing Your Marble Investment
The Value of Durable Natural Stone
Investing in marble tiles isn't just about looks; it's about smart, long-term value. Marble, a natural stone, brings a level of luxury and durability that synthetic materials just can't match. While the initial cost might seem higher, think of it as a purchase that pays off over time. These tiles are built to last, resisting wear and tear even in busy areas. This means fewer replacements and repairs down the line. Plus, the inherent beauty of marble never really goes out of style. It's a material that adds a permanent sense of quality to your home. When you buy marble tiles online USA, you're choosing a material that holds its appeal and value for years, making it a truly sound investment for your property. Marble tiles offer favorable long-term economics.
Enhancing Property Appeal with Marble
Let's be honest, marble makes a statement. It instantly upgrades the feel of any room, from a cozy bathroom to a grand entryway. This isn't just about personal enjoyment; it's about boosting your home's overall appeal and market value. Buyers recognize quality, and a home featuring marble often stands out. Think about the kitchens and bathrooms that catch your eye in magazines or online – marble is frequently the star. It signals luxury and good taste. Whether you're planning to sell soon or just want to enjoy a more beautiful home, marble is a smart choice. Consider the impact of a stunning marble floor or a sophisticated marble backsplash. It’s a design element that truly elevates your living space and can make a significant difference when it comes time to sell.
Long-Term Care for Lasting Beauty
Keeping your marble looking its best is simpler than you might think, and it's key to protecting your investment. Proper care ensures your marble tiles maintain their shine and integrity for decades. The first step is regular cleaning with pH-neutral cleaners – avoid anything harsh that could etch the stone. Spills should be wiped up immediately, as marble is porous and can stain if left untreated. Sealing your marble periodically is also a good idea. This creates a protective barrier against moisture and stains. Think of it like giving your marble a shield. With a little attention, your marble will continue to impress, looking as good as the day it was installed. It’s about preserving that initial beauty and ensuring your marble remains a source of pride and elegance in your home for years to come. For a project area of 1,000 square feet with an expected waste factor of 10% to 30%, you would need to purchase between 1,100 and 1,300 square feet of stone. This means ordering extra is not just recommended, it's practical.
Proper installation and consistent care are the cornerstones of preserving the inherent beauty and value of your marble investment. Small efforts in maintenance yield significant long-term rewards.
Case Study: The Miller Residence
The Miller family decided to renovate their kitchen and master bathroom. They opted for Carrara marble tiles for both areas, drawn to its classic veining and timeless appeal. Initially, they were concerned about the cost and maintenance. However, after installation, they were thrilled with the transformation. The kitchen felt brighter and more luxurious, while the bathroom exuded spa-like tranquility. They followed a simple cleaning routine and had the marble sealed annually. Five years later, the marble still looks stunning, with no signs of wear. They recently received a fantastic offer on their home, and the real estate agent specifically mentioned the marble as a major selling point, contributing significantly to the property's increased value. The Millers felt their investment in quality marble had truly paid off, both in daily enjoyment and financial return.
Thinking about buying marble? It's a great choice for adding beauty and value to your home. To make sure you get the most out of your purchase, explore our wide selection and expert tips. We're here to help you find the perfect stone for your project. Visit our website today to see our stunning marble and travertine options!
Wrapping Up Your Marble Tile Project
So, you've figured out how much marble tile you need. It might seem like a lot of math, but really, it's just about measuring your space and adding a little extra for those inevitable cuts and mistakes. Don't forget that extra bit – it's way better to have a few extra tiles than to run short halfway through your project. If you're still feeling unsure or just want to make sure you get the best quality, remember that Surfaces Galore is here to help. We've got a huge selection of beautiful marble and travertine tiles, and our team can help you find exactly what you need. Plus, we ship nationwide, so no matter where you are, you can get top-notch stone for your home. Happy tiling!
Frequently Asked Questions
How much extra marble tile should I buy?
It's a smart idea to get about 10% to 15% more tile than you think you'll need. This extra bit helps cover any tiles that might break during cutting or installation, and ensures you have enough for tricky spots.
What's the best way to figure out the square footage I need?
First, measure the length and width of the area you want to tile. Multiply those two numbers together to get the square footage. For example, a 10-foot by 12-foot room is 120 square feet.
Can I see marble samples before I buy?
Absolutely! Surfaces Galore offers samples so you can see the true color and feel the texture of the marble in your own home before making a big purchase. It's a great way to make sure it matches your style.
Why do marble tiles sometimes look different from the pictures online?
Marble is a natural stone, meaning each piece is unique! The colors and patterns, called veining, can vary from one tile to another, and even from one batch to the next. That's why seeing a sample is so helpful.
Is it okay to use marble tiles outside?
Yes, marble can be used outdoors for things like patios or pathways. However, it's important to choose a finish that's suitable for outdoor use and to make sure it's properly sealed to protect it from the weather.
What's the difference between polished and honed marble?
Polished marble has a shiny, smooth surface that reflects light, giving it a glamorous look. Honed marble has a more muted, matte finish that's less slippery and can give a softer, more natural feel to your space.
How do I keep my marble tiles looking good?
To keep your marble looking its best, clean spills right away, use gentle cleaners made for natural stone, and make sure to seal your tiles periodically. This helps prevent stains and keeps them protected.
Can I get custom-cut marble pieces?
Yes! Surfaces Galore can provide custom cuts for things like special shapes, shower shelves, or unique design elements. Just let them know what you need, and they can help make your vision a reality.
Leave a comment