
How to Match Tile Patterns for Flawless Design Results

Over 60 percent of american homeowners say choosing the right tile pattern feels more complicated than expected. With so many options for shape, color, and layout, it can feel tough to know where to start. Understanding tile characteristics and layout strategies is key to achieving a seamless, eye catching result. This guide will help you master the details behind matching tile patterns, from assessing materials to perfecting your final installation.
Table of Contents
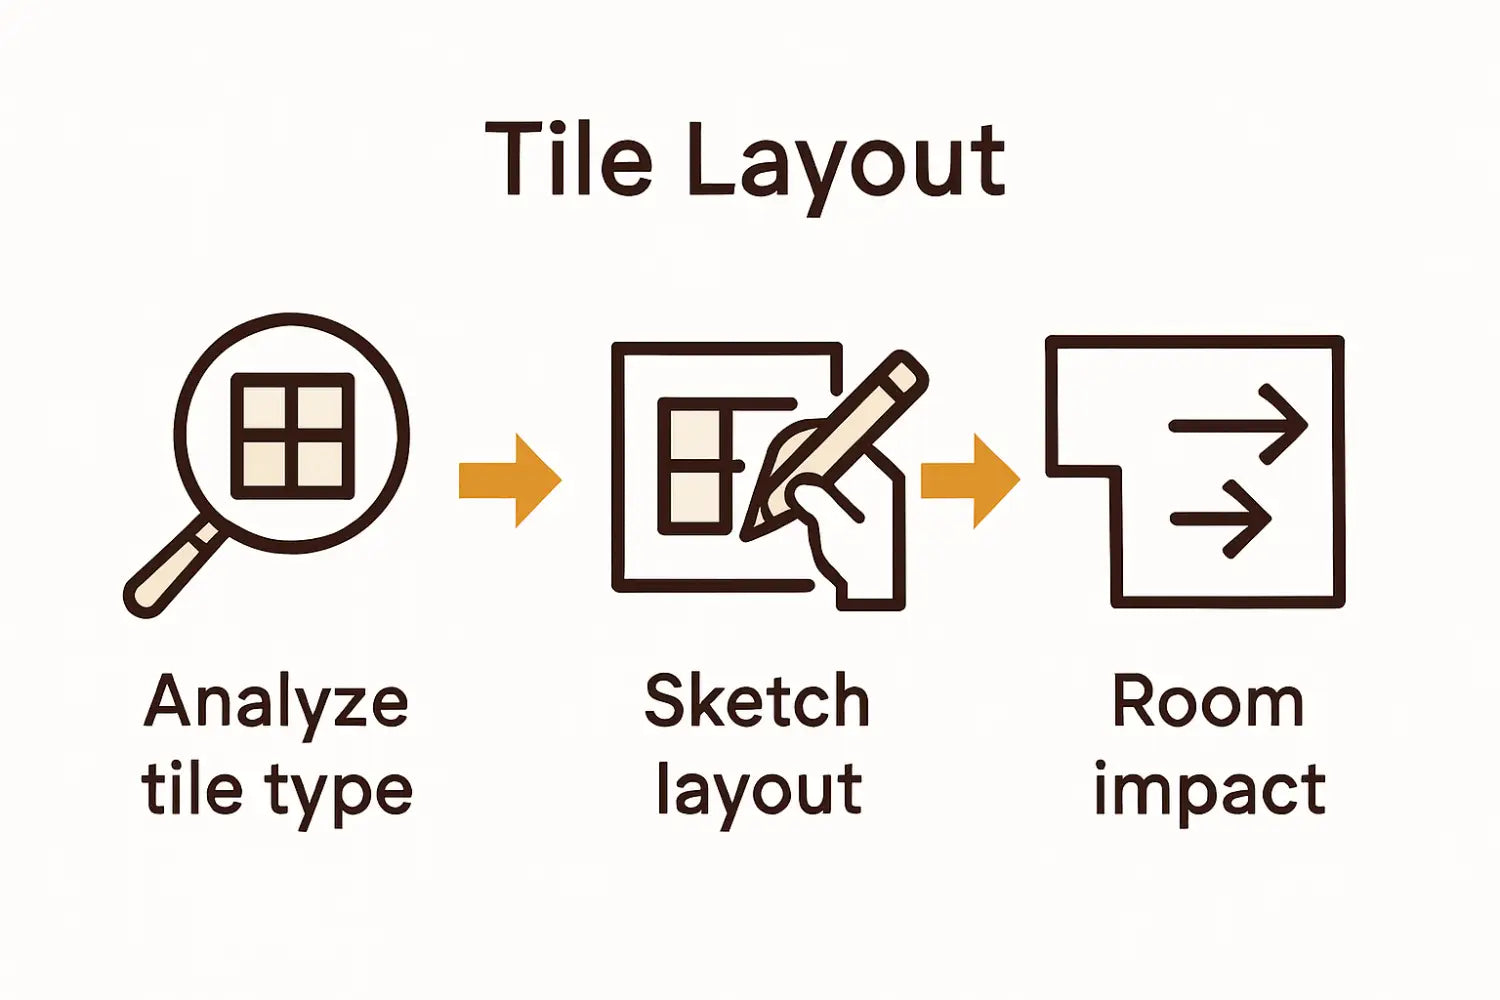
- Step 1: Assess Tile Characteristics And Variations
- Step 2: Plan Pattern Direction And Layout
- Step 3: Dry Lay Tiles To Preview And Adjust
- Step 4: Align And Install Tiles For Seamless Flow
- Step 5: Inspect And Fine-Tune Pattern Continuity
Quick Summary
| Important Insight | Detailed Explanation |
|---|---|
| 1. Assess Tile Characteristics First | Understand the shape, size, color, and texture of tiles to create visual harmony in your designs before installation. |
| 2. Plan Your Tile Layout Carefully | Determine how tile orientation can affect room perception, using horizontal, vertical, or diagonal arrangements for desired effects. |
| 3. Dry Lay Tiles to Test Arrangements | Arrange tiles on a flat surface to visualize patterns and adjustments, helping to identify potential issues prior to final installation. |
| 4. Focus on Proper Alignment | Ensure tiles are aligned accurately during installation to maintain a seamless look, using spacers and checking with a level regularly. |
| 5. Inspect for Consistency After Installation | Examine your tile layout for visual harmony and make necessary adjustments before finalizing the project for a professional finish. |
Step 1: Assess Tile Characteristics and Variations
Matching tile patterns successfully requires a keen understanding of tile characteristics and their potential variations. When designing a space, you need to examine key elements that influence how tiles will ultimately interact and create visual harmony. Tessellation principles provide an essential framework for understanding how geometric shapes can be arranged seamlessly without gaps or overlaps.
Start by analyzing the physical attributes of your tiles including shape, size, color, texture, and finish. Different tile types like ceramic, marble, or natural stone will behave differently when arranged. Pay close attention to tile patterns such as Truchet designs, which can create intricate visual effects through strategic rotation and placement. Consider how different tile orientations might impact the overall aesthetic transforming a basic surface into an artful composition.
A practical tip for designers is to create a small mockup or layout before final installation. Arrange sample tiles on a flat surface to preview how patterns and variations will interact. This allows you to experiment with different configurations and identify potential visual challenges before committing to a full installation. By carefully assessing tile characteristics upfront, you can achieve a polished and professional design result that looks intentional and sophisticated.
Step 2: Plan Pattern Direction and Layout
After assessing tile characteristics, the next critical step is planning your tile pattern direction and layout. Your tile orientation can dramatically transform a space visually. Research indicates that tile placement significantly impacts room perception, with different directional approaches creating unique spatial experiences.
Carefully consider how tile orientation will interact with your room dimensions. Horizontal tile layouts can visually expand smaller spaces, making rooms feel wider and more open. Vertical tile arrangements draw the eye upward, creating an illusion of increased height and architectural sophistication. Diagonal patterns introduce dynamic movement and energy, breaking traditional linear constraints and adding visual interest to otherwise static environments.
When selecting your pattern, measure your space precisely and create a preliminary layout sketch. Consider factors like room size, architectural features, natural light, and intended visual effect. A helpful strategy is to create a small mockup using sample tiles, allowing you to preview how different orientations will interact with your specific space. By thoughtfully planning your tile direction, you can transform a simple surface into a design statement that enhances the overall aesthetic and perceived dimensions of your room.
Step 3: Dry Lay Tiles to Preview and Adjust
Creating a comprehensive tile layout plan is a crucial step that allows you to visualize and refine your design before permanent installation. Dry laying tiles provides an opportunity to experiment with placement, identify potential challenges, and ensure a polished final result. This process helps you understand how different tiles will interact and create a cohesive visual experience.
To begin, clear a flat surface that approximates your actual installation area. Arrange your tiles carefully, paying close attention to tile placement strategies that ensure a balanced design. Start by finding the center point of your space and work outward, which helps create symmetry and minimize awkward tile cuts around edges. Use spacers to maintain consistent gaps and simulate real world installation conditions.
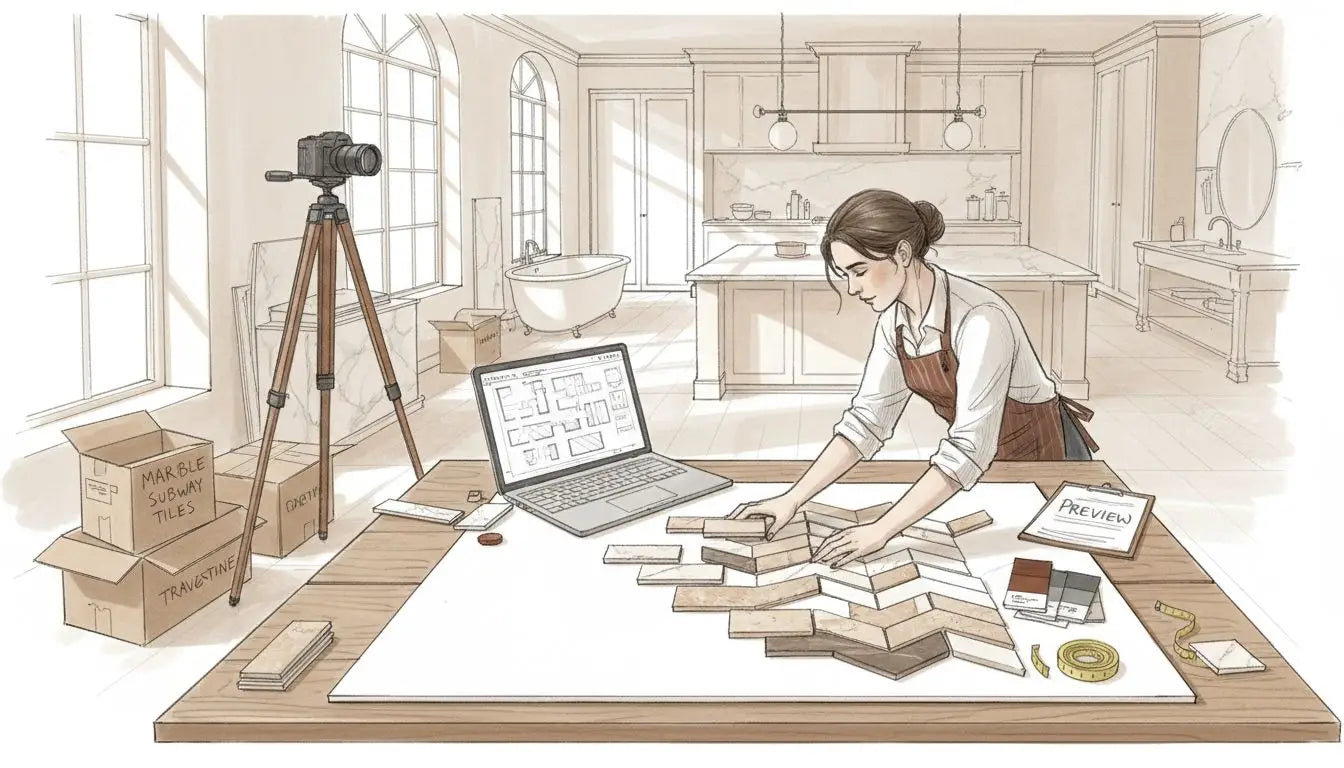
Pro tip for designers and DIY enthusiasts: take photographs of your dry layout from multiple angles. These images serve as valuable reference points, allowing you to compare different arrangements and make informed decisions. As you experiment, look for visual flow, pattern consistency, and how tiles interact with room features like windows, cabinets, or architectural elements. By thoroughly previewing your tile layout, you can catch potential design issues early and create a more professional finished result.
Step 4: Align and Install Tiles for Seamless Flow
Proper alignment during tile installation represents the critical final stage that transforms your carefully planned design into a professional result. Achieving a seamless tile installation requires precision, patience, and strategic approach. Your goal is to create a continuous visual surface that looks intentional and expertly crafted.
Begin by preparing your surface meticulously. Ensure the substrate is clean, level, and smooth with no irregularities that could disrupt tile placement. Use a quality thinset mortar applied with a notched trowel to create consistent ridges that will support your tiles. Advanced pattern editing tools can help you plan complex arrangements, but manual precision remains key. Work systematically from your predetermined center point outward, using tile spacers to maintain uniform gaps and checking alignment frequently with a level.
A professional tip for achieving flawless results is to periodically step back and view your installation from multiple angles. Small adjustments during the process can prevent significant visual discrepancies in the final design. Pay special attention to tile edges, corners, and transitions between different areas. By maintaining consistent pressure, using appropriate installation techniques, and checking your work methodically, you can create a tile installation that looks seamless, professional, and visually stunning.
Step 5: Inspect and Fine-Tune Pattern Continuity
Reviewing tile layout patterns meticulously represents the final critical stage of creating a professional tile installation. This process involves carefully examining every detail of your tile arrangement to ensure visual harmony and seamless transitions across the entire surface. Your goal is to identify and address any subtle inconsistencies that could disrupt the overall design aesthetic.
Begin your inspection by systematically analyzing the tile layout from multiple perspectives. Understanding various tile layout patterns helps you recognize potential visual interruptions or misalignments. Use natural light to highlight surface variations, checking for lippage between tiles, consistent grout lines, and smooth transitions between different areas. Pay particular attention to corners, edges, and intersections where pattern continuity can be most challenging.
A professional strategy is to take high resolution photographs of your installation from different angles and scrutinize them carefully. Digital images can reveal subtle imperfections that might be less apparent in person. Make incremental adjustments as needed, whether that means slightly repositioning individual tiles, adjusting grout lines, or addressing minor surface irregularities. By dedicating time to this fine tuning process, you transform a good tile installation into an exceptional one that looks intentional and expertly crafted.
Achieve Flawless Tile Designs with Premium Natural Stone
Matching tile patterns can feel overwhelming when trying to balance tile shape, size, orientation, and seamless installation. This article highlights the challenge of ensuring pattern continuity and visual harmony while avoiding disruptive misalignments and awkward cuts. If you are aiming for a polished and sophisticated tile surface that transforms your space with timeless beauty you need high-quality materials that deliver consistency and elegance.
Surfaces Galore expertly supports your design goals with genuine marble and travertine tiles that offer the durability and natural variation needed for flawless pattern matching. From careful selection to nationwide shipping, we empower designers, contractors, and homeowners to create seamless tile flows that impress at every glance.
Discover the difference authentic natural stone makes in your tile arrangements at Surfaces Galore.
Unlock your next project’s full aesthetic potential now by browsing our premium collections. Visit Surfaces Galore to explore options designed to elevate every tile pattern and bring your design vision to life.
Frequently Asked Questions
How can I assess tile characteristics before matching patterns?
To assess tile characteristics, examine important elements like shape, size, color, texture, and finish. Start by creating a layout mockup using sample tiles to see how these attributes work together visually.
What is the best way to plan the pattern direction for my tiles?
Planning tile pattern direction involves considering the room’s dimensions and how different orientations affect visual perception. Sketch a preliminary layout, experimenting with horizontal, vertical, and diagonal placements to find the most appealing look for your space.
How do I dry lay tiles to preview my design?
To dry lay tiles, clear a flat surface and arrange the tiles without adhesive, starting from the center and working outward. Use spacers to keep gaps consistent and take photos of your layout to compare different arrangements before installation.
What should I check for during tile installation to ensure a seamless flow?
During installation, ensure proper alignment and maintain consistent gaps using spacers. Frequently step back to view the setup from multiple angles; this will help catch any misalignments or inconsistencies early on.
How can I fine-tune my tile pattern for continuity after installation?
Inspect your tile layout from different perspectives to identify inconsistencies in alignment and grout lines. Make necessary adjustments, such as repositioning tiles or adjusting grout, to enhance the overall design coherence.
Leave a comment