
How to Replace Broken Tiles: A DIY Repair Guide

TL;DR:
- Replacing broken tiles is an easy DIY task that restores your floor or wall at a low cost.
- Careful removal, proper matching, and correct curing procedures ensure a durable and seamless repair.
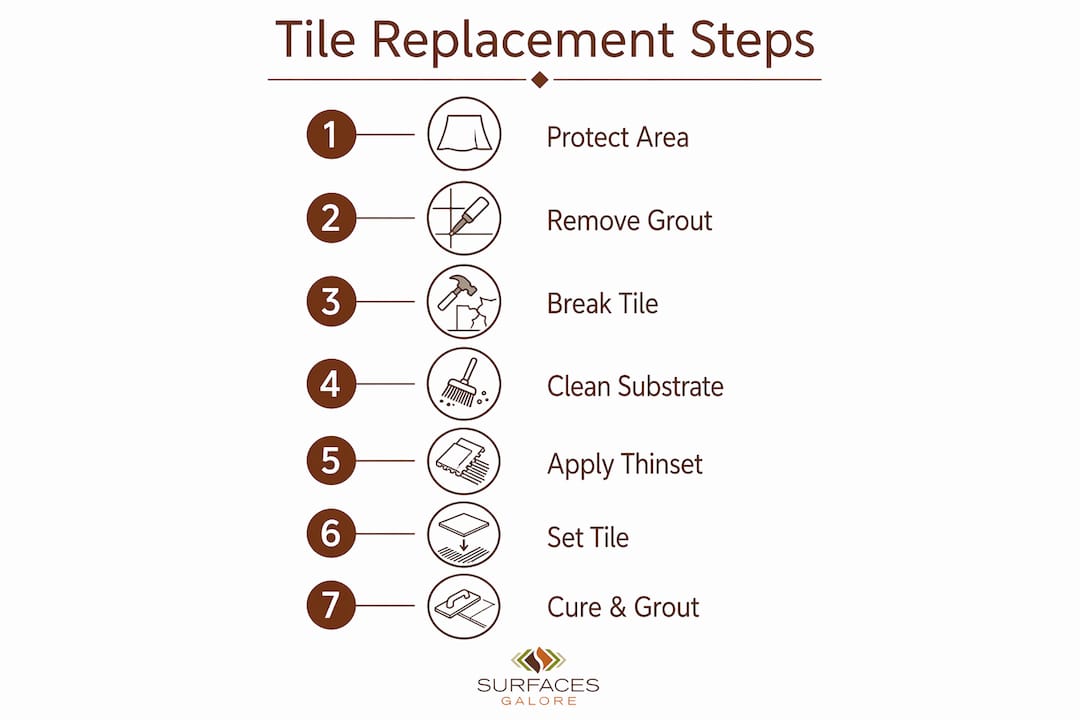
Replacing broken tiles is a straightforward DIY repair that restores your floor or wall to like-new condition without calling a professional. The process, formally called tile replacement or tile repair, follows a clear sequence: remove the damaged tile, prepare the substrate, set the new tile with thinset mortar, and finish with matching grout and sealant. DIY repair costs typically run under $20 per tile, compared to $25–$60 per tile for professional services. That gap makes learning how to replace broken tiles one of the most cost-effective home repair skills you can develop. Natural stone tiles, including marble, limestone, and travertine, require extra care during matching and removal, but the core steps remain the same.
What tools and materials do you need for tile replacement?
The right tools make the difference between a clean repair and a cracked neighboring tile. Gather everything before you start. Stopping mid-job to find a missing tool risks damaging the exposed substrate or letting thinset dry unevenly.
Safety equipment
- Safety goggles (tile shards travel fast)
- Heavy-duty work gloves
- Dust mask or N95 respirator
Tools
- Grout removal tool or oscillating multi-tool with grout blade
- Hammer and cold chisel
- Utility knife
- Putty knife or margin trowel
- Notched trowel (for thinset application)
- Spirit level
- Tile spacers
Materials
- Replacement tile (same size, thickness, and finish as the original)
- Thinset mortar (the best adhesive for tiles on floors and walls)
- Grout matched to existing color
- Grout sealant
- Sponge and clean bucket
- Painter’s tape and dust sheets
Pro Tip: Buy one or two extra replacement tiles beyond what you need. Natural stone tiles vary between production batches, and having spares from the same batch protects you if a tile chips during cutting or installation.
A quick note on tile sourcing: for natural stone surfaces, the tile’s finish, vein pattern, and glaze all affect how visible the repair will be. Surfacesgalore stocks marble, limestone, and travertine tiles across a wide range of finishes, which makes finding a close match far easier than searching general home improvement stores.
How to replace broken tiles without damaging surrounding ones
Safe removal is the step most homeowners rush, and rushing causes the most collateral damage. The goal is to isolate the broken tile completely before applying any force.
Step 1: Protect the work area
Lay dust sheets over nearby flooring and furniture. Apply painter’s tape along the grout lines surrounding the damaged tile. This protects adjacent tiles from tool slips and keeps debris contained.
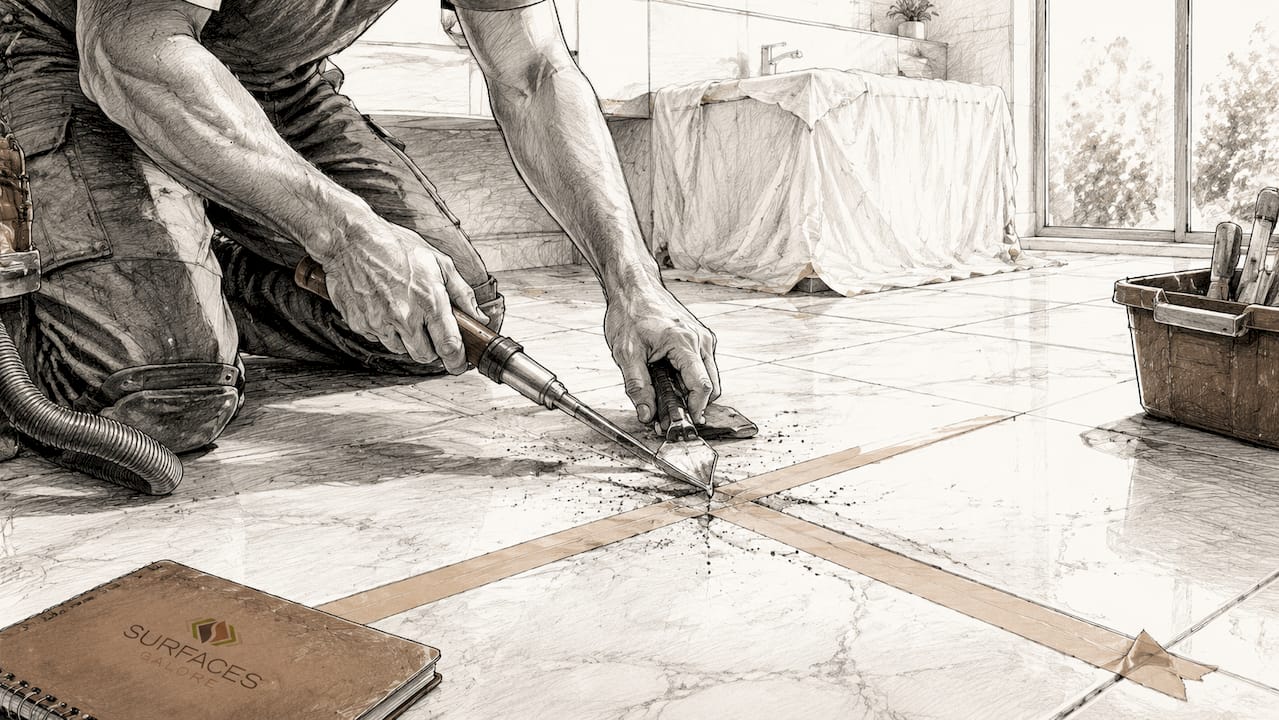
Step 2: Remove the grout fully
Use a grout removal tool or oscillating multi-tool to cut grout around the entire perimeter of the broken tile. Cut to at least 1/8 inch depth before you attempt to pry anything. Insufficient grout cutting is the leading cause of cracked neighboring tiles during removal. The grout joint must be fully open so no mechanical force transfers to adjacent tiles when you lift the broken piece.
Step 3: Break the tile from the center outward
Score an X across the broken tile’s surface with your utility knife or chisel. Place the chisel at the center of the X and strike firmly with the hammer. Work outward from the center, breaking the tile into 4–6 inch pieces. Smaller pieces are easier to lift without prying against neighboring tiles. Never insert a chisel under the tile edge and lever upward. That motion transfers directly to the adjacent tile and cracks it.
Pro Tip: If the tile is already shattered, start removal from the largest open crack at the center. Use needle-nose pliers to pull out small fragments near the grout line instead of chiseling close to neighboring tiles.
Step 4: Clean and inspect the substrate
Once all tile pieces are out, use a putty knife to scrape away old thinset from the substrate. Work carefully and avoid gouging the underlayment. Check the substrate for cracks, soft spots, or moisture damage. Subfloor movement or waterproofing defects are a frequent cause of repeat tile cracking. If the subfloor flexes when you press on it, fix that structural issue before setting a new tile. A new tile over a moving subfloor will crack again within months.
A flat, clean, and stable substrate is the foundation of a lasting repair. Run your level across the exposed area to confirm there are no high spots from leftover adhesive. Grind down any ridges with a small angle grinder or scrape them flat with a stiff putty knife.
How do you find a matching replacement tile for natural stone?
Matching a natural stone tile is harder than matching a ceramic or porcelain tile. Marble, travertine, and limestone each carry unique veining and color variation that changes between production batches. A tile from a different batch can look noticeably different even when the product name is identical.
The most reliable method is to bring a broken tile piece to a specialty stone retailer. Physical samples allow side-by-side comparison under real lighting conditions. Online photos rarely capture the subtle color shifts in natural stone accurately enough for a confident match.
Follow these steps when sourcing a replacement:
- Check your original purchase records for the tile name, finish, and batch number.
- Bring the largest intact fragment you have to the retailer.
- Compare under both natural light and artificial light, since stone reads differently in each.
- Ask the retailer about batch variation and whether current stock comes from the same production run.
- If an exact match is unavailable, consider a contrasting accent tile or a decorative border piece to frame the repair intentionally.
Surfacesgalore’s natural stone collections include marble, limestone, and travertine in a range of finishes and sizes. Their team can help you identify matching tile patterns for your specific surface, which is particularly useful when the original tile is discontinued.
Pro Tip: For discontinued tiles, a small mosaic insert or a contrasting stone medallion can turn a repair into a design feature. This approach works especially well in entryways and bathroom floors.
How do you set a new tile correctly after substrate prep?
Proper installation is where the repair either holds for decades or fails within a year. The sequence matters as much as the materials.
Step 1: Clean and level the substrate
Vacuum all dust and debris from the exposed area. Wipe the substrate with a damp sponge and let it dry completely. Apply a thin skim coat of thinset to fill any low spots and let it cure before proceeding.

Step 2: Apply thinset to the substrate
Use a notched trowel to spread thinset mortar across the substrate. The coverage standard is 100% on floor tiles and 80% on wall tiles. Full coverage on floors prevents voids beneath the tile that cause hollow spots and future cracking.
Step 3: Back-butter the replacement tile
Spread a thin, even layer of thinset across the back of the replacement tile before setting it. Back-buttering fills any surface irregularities on the tile’s back and ensures full contact with the substrate. This step is non-negotiable for natural stone tiles, which tend to have more surface variation on their backs than ceramic tiles.
Step 4: Set and level the tile
Press the tile firmly into position with a slight twisting motion to collapse any air pockets in the thinset. Place tile spacers around all four edges to maintain consistent grout joint width. Lay your spirit level across the new tile and the adjacent tiles to confirm it sits flush. Tap the tile gently with a rubber mallet if any corner sits high.
| Step | Coverage standard | Purpose |
|---|---|---|
| Thinset on floor substrate | 100% | Prevents voids and hollow spots |
| Thinset on wall substrate | 80% | Adequate bond without excess weight |
| Back-butter tile back | Full coverage | Fills tile surface irregularities |
| Curing time before grouting | Minimum 24 hours | Ensures full bond strength |
Pro Tip: Press the tile into place and then lift it immediately to check the thinset transfer. You want at least 80–90% of the tile back covered in thinset. If coverage is low, add more thinset and reset.
Step 5: Allow full curing before grouting
Leave the tile undisturbed for a minimum of 24 hours. Do not walk on it or wet the area during this period. Rushing this step is one of the most common reasons tile repairs fail early.
How do you grout, seal, and finish a repaired tile?
Grouting is the final step that makes the repair invisible or obvious. Color matching and clean application are what separate a professional-looking result from a visible patch.
Selecting and mixing grout
Choose a grout color that matches your existing grout as closely as possible. Bring a photo and, if possible, a small grout sample to the store. Pre-mixed grout is convenient for small repairs. Sanded grout works for joints wider than 1/8 inch; unsanded grout suits narrower joints.
Applying grout
- Remove tile spacers before grouting.
- Dampen the grout joints lightly with a sponge to improve adhesion.
- Press grout into the joints with a rubber grout float, working diagonally across the tile surface.
- Remove excess grout from the tile face with a damp sponge before it hardens.
- Rinse the sponge frequently and wring it nearly dry before each pass.
Pro Tip: Wipe the tile surface in a circular motion first to remove bulk grout, then switch to straight diagonal strokes to avoid pulling grout out of the joints.
Sealing grout and tile
Sealing grout after installation protects against moisture infiltration, staining, and premature wear. Apply grout sealer with a small brush or applicator bottle, working carefully along each joint. Wipe any sealer off the tile face immediately. For natural stone tiles, apply a stone-specific penetrating sealer to the tile surface as well. Marble and travertine are porous and absorb stains quickly without sealer protection.
Allow the grout to cure for 48–72 hours before exposing the area to regular foot traffic or moisture. Check the grout manufacturer’s instructions for the exact timeline, as formulas vary.
Key takeaways
Replacing a broken tile successfully depends on removing grout fully before prying, matching the replacement tile carefully, and allowing adequate curing time at each stage.
| Point | Details |
|---|---|
| Remove grout first | Cut grout to at least 1/8 inch depth before prying to protect adjacent tiles. |
| Break from center outward | Work in 4–6 inch pieces starting at the tile’s center to avoid collateral damage. |
| Match tile with a physical sample | Bring a broken fragment to a specialty retailer for accurate color and glaze comparison. |
| Back-butter and achieve full coverage | Apply thinset to both substrate and tile back for a void-free, lasting bond. |
| Cure before grouting | Wait a minimum of 24 hours after setting before applying grout or walking on the tile. |
What I’ve learned from watching homeowners rush tile repairs
The single most common mistake I see is skipping full grout removal. Homeowners assume a few passes with a utility knife are enough, then wonder why the neighboring tile cracked when they started prying. The physics are simple. Grout that still connects two tiles transfers every bit of force from one to the other. Cut it completely and you isolate the damaged tile. Leave it and you gamble with your entire floor.
The second mistake is ignoring what caused the tile to break in the first place. A tile does not crack randomly. Hollow or loose tiles often signal an adhesive failure or subfloor movement beneath them. If you replace the tile without fixing the root cause, the new tile will crack in the same spot within a year. Press on the tiles around the repair. If they sound hollow when tapped, inject low-viscosity adhesive before committing to a full replacement.
I also think homeowners underestimate how much the matching step matters, especially with natural stone. Marble and travertine carry veining that is unique to each slab and batch. A tile from a different production run can look like a patch even when the product name is identical. The 2026 renovation trend toward intentional mixed-stone designs actually gives you a creative exit here. If you cannot find an exact match, lean into contrast rather than fighting it.
Patience during curing is the last underrated step. Twenty-four hours feels long when you want the bathroom back in service. But curing and grout application done carefully are what determine whether the repair lasts two years or twenty. The tile does not care about your schedule. The thinset does.
— cihan
Natural stone tiles for your next repair, from Surfacesgalore
When the repair calls for a quality replacement tile, the source matters as much as the technique.

Surfacesgalore is a direct importer of premium marble, limestone, and travertine tiles, shipping nationwide from Anaheim, California. Their collections cover a wide range of finishes, sizes, and patterns, making it easier to find a close match for an existing installation or source a complementary stone for a deliberate design update. Whether you need a single replacement tile or are planning a broader renovation, you can shop natural stone tiles and get guidance on tile pattern selection directly through the Surfacesgalore website. Authentic natural stone at accessible prices, backed by real expertise.
FAQ
How much does DIY tile replacement cost?
DIY tile replacement typically costs under $20 per tile for materials, compared to $25–$60 per tile for professional services. The savings depend on tile type and substrate complexity.
Can I replace just one broken tile without disturbing the rest?
Yes. Fully removing the grout around the damaged tile before prying isolates it completely. Breaking the tile from the center outward in 4–6 inch pieces prevents force from transferring to neighboring tiles.
What is the best adhesive for tiles during a repair?
Thinset mortar is the standard adhesive for tile replacement on both floors and walls. Apply it to the substrate with a notched trowel and back-butter the tile’s back for full contact and a lasting bond.
How long does a tile repair take to cure?
The thinset bond requires a minimum of 24 hours before grouting. Grout then needs 48–72 hours before the area returns to normal use. Do not walk on or wet the repair during either curing period.
What should I do if my replacement tile does not match exactly?
Bring a physical fragment of the original tile to a specialty stone retailer for side-by-side comparison. If an exact match is unavailable, a contrasting accent tile or decorative mosaic insert can turn the repair into an intentional design detail rather than a visible patch.
Leave a comment