
How to measure for tile: accurate DIY steps for great results

Ordering too many tiles wastes money. Ordering too few stalls your entire project while you wait for a restock that may not even match your original batch. Bad measurements are the number one reason DIY tile jobs go over budget and over schedule, and the frustrating part is that the fix is simple. This guide walks you through every step of measuring for tile, from gathering your tools to translating square footage into an exact tile count, so you can walk into your renovation with confidence and walk out with a result you’re proud of.
Table of Contents
- What you need before you start measuring
- Step-by-step process for measuring typical rooms
- Special cases: Measuring odd-shaped rooms and curved walls
- Translating measurements to tile quantities
- Checking, marking, and layout: Ensuring accuracy before you cut
- Start your tile project with confidence
- Frequently asked questions
Key Takeaways
| Point | Details |
|---|---|
| Measure twice, cut once | Double-checking your dimensions can prevent costly tile shortages and overruns. |
| Account for waste | Always purchase an extra 10-20% of tiles for cuts, breaks, and future repairs. |
| Tackle tricky shapes | For curved or irregular rooms, use flexible tape and add extra waste to your calculations. |
| Dry-lay for perfection | Preview your tile layout with a dry-lay or a free online calculator to spot issues early. |
What you need before you start measuring
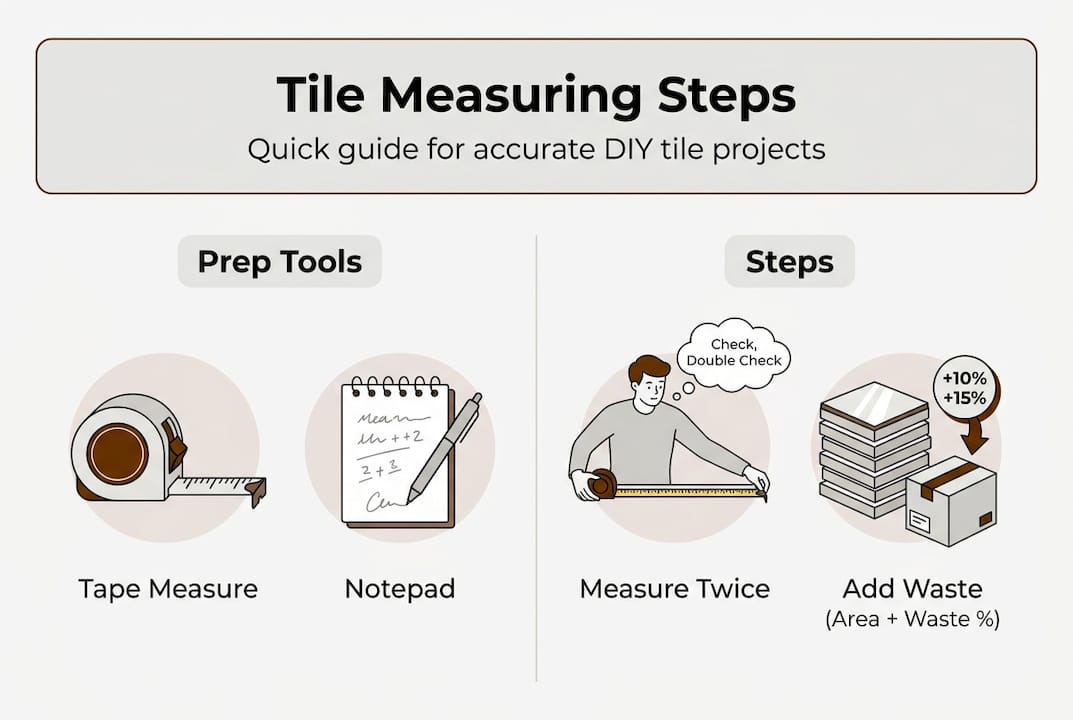
Before you pull out a tape measure, take five minutes to gather everything you need. Stopping mid-measurement to hunt for a pencil or calculator breaks your focus and invites errors.
Here are the core tools for any tile measuring job:
- Tape measure (25-foot retractable works for most rooms)
- Pencil and notepad for recording dimensions on the spot
- Calculator or smartphone for quick area math
- Graph paper or a simple sketch pad to draw your room layout
- Flexible measuring tape or string for curved walls, rounded niches, or arched doorways
- Level and chalk line for marking layout guides on the floor or wall
Surface prep matters too. Make sure the floor or wall is clear of furniture and debris before you start. Measuring over a rug or around a vanity you plan to remove gives you inaccurate numbers.
One detail many DIYers overlook: your tile choice and layout pattern should be decided before you measure. A standard grid layout and a diagonal herringbone pattern require different waste allowances, which changes how much tile you order. As a best practice, plan layout before buying and use online calculators to preview cuts before committing. You can also review tile project planning tips to get your full project scope organized from the start.
| Tool | Best for |
|---|---|
| Standard tape measure | Rectangular rooms, straight walls |
| Flexible tape or string | Curved walls, rounded features |
| Graph paper | Sketching room layout and tile placement |
| Chalk line | Marking straight layout guides on substrate |
Pro Tip: Write every measurement down immediately. Memory is unreliable when you’re juggling multiple dimensions across a room with alcoves, closets, or irregular corners.
Step-by-step process for measuring typical rooms
With your essentials on hand, it’s time to measure your space accurately and confidently.
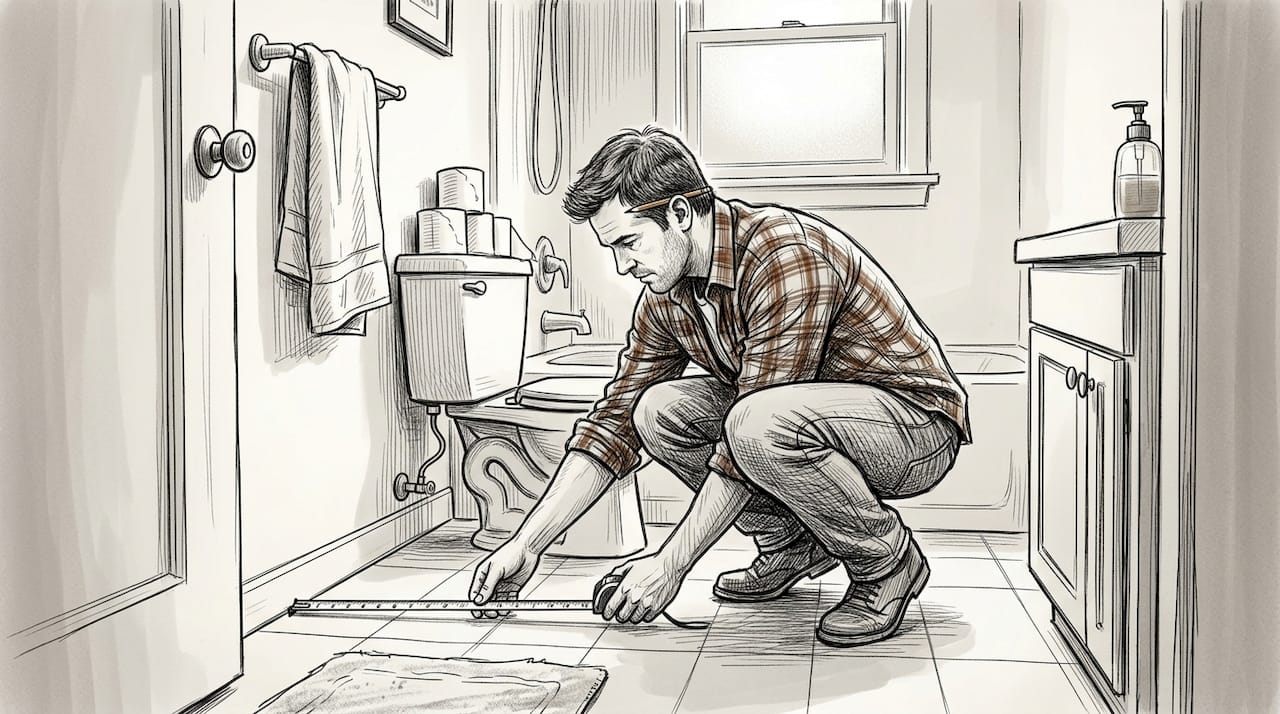
- Sketch the room first. Draw a rough outline of the space on graph paper, noting every wall, doorway, and fixed feature like a toilet or bathtub.
- Measure length and width. For a rectangular room, measure the longest length and the widest width. Multiply them together to get your total square footage.
- Break the room into zones. If the room has a hallway entry, a closet bump-out, or an adjoining nook, measure each section separately and add the areas together.
- Handle fixtures carefully. For large features like a freestanding tub or a kitchen island base, measure and subtract that footprint. For small fixtures like a toilet base, skipping the subtraction is often smarter because the tile you would have saved gets used up in cuts and waste anyway.
- Double-check every number. Measure each wall twice. If your two readings differ, measure a third time and use the middle value.
Here’s a quick reference for waste percentages based on layout complexity:
| Layout type | Recommended waste allowance |
|---|---|
| Standard grid (straight set) | 10% |
| Offset or brick pattern | 10-12% |
| Diagonal or herringbone | 15-20% |
| Irregular or complex room shape | 15-20% |
For a bathroom specifically, the layout sequence matters as much as the math. Walking through a bathroom tile workflow helps you sequence measurements with your design decisions. And if you haven’t locked in your pattern yet, reviewing options for choosing a tile pattern can save you from remeasuring later.
Pro Tip: Always measure in inches first, then convert to square feet by dividing by 144. Working in inches reduces rounding errors that compound across large rooms.
Special cases: Measuring odd-shaped rooms and curved walls
Not all rooms play by the rules. Let’s look at how to handle more complex measuring challenges.
Irregular rooms require a different approach, but the core idea is simple: break every odd shape into smaller rectangles and triangles, measure each one, and add the areas together.
- Curved walls: Lay a flexible tape or a piece of string along the curve, mark the length, then measure the string against a straight ruler.
- Angled corners: Divide the angled section into a right triangle. Measure the two straight sides and use the formula: area equals half the base times the height.
- Alcoves and bump-outs: Treat each one as its own rectangle. Measure separately and add to your total.
- Arched doorways: Measure the rectangular opening and add a small buffer for the arch itself.
For rooms with curves or odd angles, use flexible tape for curves and plan for a 15 to 20 percent waste factor. That extra buffer accounts for the additional cuts required to fit tile around irregular geometry.
A note on complex rooms: Sketch diagrams are not optional here. Drawing each segment with its dimensions labeled prevents you from losing track of which numbers belong to which section, especially when you’re working with five or six separate zones.
| Room type | Suggested waste factor |
|---|---|
| Standard rectangle | 10% |
| Room with one curved wall | 15% |
| Fully irregular or multi-angle room | 20% |
If you’re working with natural stone tiles, calibration and sizing also affect how cuts behave. Reviewing marble tile calibration and understanding stone tile sizes will help you anticipate how your specific tile performs at cut edges.
Translating measurements to tile quantities
Once your room is measured, here’s how to figure out exactly how much tile you need.
- Calculate total room area in square feet by adding all your zone measurements together.
- Check your tile’s coverage. Tile is sold by the square foot or by the box. Each box lists how many square feet it covers.
- Factor in grout joints. Standard grout spacing is 1/16 to 1/8 inch for rectified tiles and up to 3/8 inch for natural stone. Wider joints slightly reduce the number of tiles needed per row, but the difference is minor for most projects.
- Add your waste percentage. For a straight grid layout, add 10 percent. For diagonal or herringbone, add 15 to 20 percent. Multiply your total area by 1.10 or 1.15 to get your final order quantity.
- Round up to the nearest full box. Never round down.
For the most accurate preview, dry-lay or use online calculators before placing your order. Laying tiles out on the floor without adhesive lets you see exactly where cuts fall and whether your layout is balanced.
Buying extra tile is always cheaper than reordering later. Dye lots change between production runs, meaning a tile ordered six months after your original purchase may not match in color or texture, even from the same manufacturer.
For patterned tiles, the math gets more specific. Guides on matching tile patterns and stone tile layout patterns walk you through how repeat patterns affect your total tile count.
Pro Tip: Order at least one full extra box beyond your calculated need. Store it after installation. If a tile cracks or chips a year later, you’ll have an exact match ready.
Checking, marking, and layout: Ensuring accuracy before you cut
Now that you know your tile count, let’s make sure every cut and placement is perfectly planned before committing to adhesive.
- Find the center of the room. Measure and mark the midpoint of each wall, then snap chalk lines connecting opposite midpoints. Where they cross is your starting point.
- Dry-lay a test row. Place tiles along both chalk lines without adhesive to see how the layout falls at the edges. Adjust your starting point if you end up with slivers of tile at the walls.
- Check for balanced cuts. Aim for cut tiles at opposite edges to be equal in size. A 2-inch sliver on one side and a full tile on the other looks unfinished.
- Mark your layout lines clearly. Use a chalk line or pencil to draw your full grid on the substrate before mixing any adhesive.
- Confirm your measurements one final time. Walk the room with your sketch and verify that every marked line matches your recorded dimensions.
As a final check, dry-lay and use online calculators to preview your cuts digitally before making a single physical cut. This step alone can save you from wasting expensive natural stone tiles on avoidable errors.
For pattern-specific layout guidance, the resource on top tile patterns for DIY tiling covers starting points and layout logic for the most popular designs.
Pro Tip: Mark your starting point with a small X in permanent marker, not just chalk. Chalk lines can smear or fade before you finish laying the first section, especially in humid spaces like bathrooms.
Start your tile project with confidence
At Surfaces Galore, we work with homeowners and DIY renovators every day who want beautiful, lasting results without the guesswork. Accurate measuring is the foundation, but having the right tile makes everything else easier.
Our tile solutions at Surfaces Galore include premium marble, travertine, and mosaic options shipped directly to your door from Anaheim, California. Whether you’re tiling a master bath, a kitchen backsplash, or an entryway floor, our team can help you match the right tile size and format to your layout plan. Browse our resource library for guides built specifically for DIYers, or reach out directly if your project involves complex shapes or custom patterns. We’re here to make sure your measurements turn into a finished floor you’ll love for decades.
Frequently asked questions
How do I measure for tile in a bathroom with multiple fixtures?
Measure the total room area first. For small fixtures like a toilet base, skipping the subtraction is often the smarter move because the tile saved gets consumed by cuts and waste anyway.
What’s the safest waste percentage to add for diagonal or herringbone layouts?
Add 15 to 20 percent extra for diagonal or herringbone patterns. These layouts increase cuts and waste significantly compared to a straight grid.
How can I calculate tile for curved or irregular walls?
Use a flexible tape or string to trace the curve, then measure the string flat. Break the full area into smaller rectangles and triangles and calculate each section separately.
Do online tile calculators work for all room shapes?
Most online calculators handle standard rectangular rooms well. For irregular spaces, manual segmentation and a higher waste buffer give you more reliable results.
Is it better to dry-lay tiles before cutting?
Yes. Dry-laying tiles before cutting lets you preview the full layout, catch balance issues at the edges, and avoid costly mistakes before any adhesive is involved.
Recommended
- Planning a Tile Project for Stunning Results– SurfacesGalore
- Master your bathroom tile design workflow for results– SurfacesGalore
- How to Cut Marble Tiles Cleanly for Flawless Results– SurfacesGalore
- Travertine Tiling Process for Stunning and Lasting Floors– SurfacesGalore
- How to Measure for Awnings: Accurate UK Guide
Leave a comment