
Matching Marble Slabs Guide: Achieve Seamless Luxury Surfaces

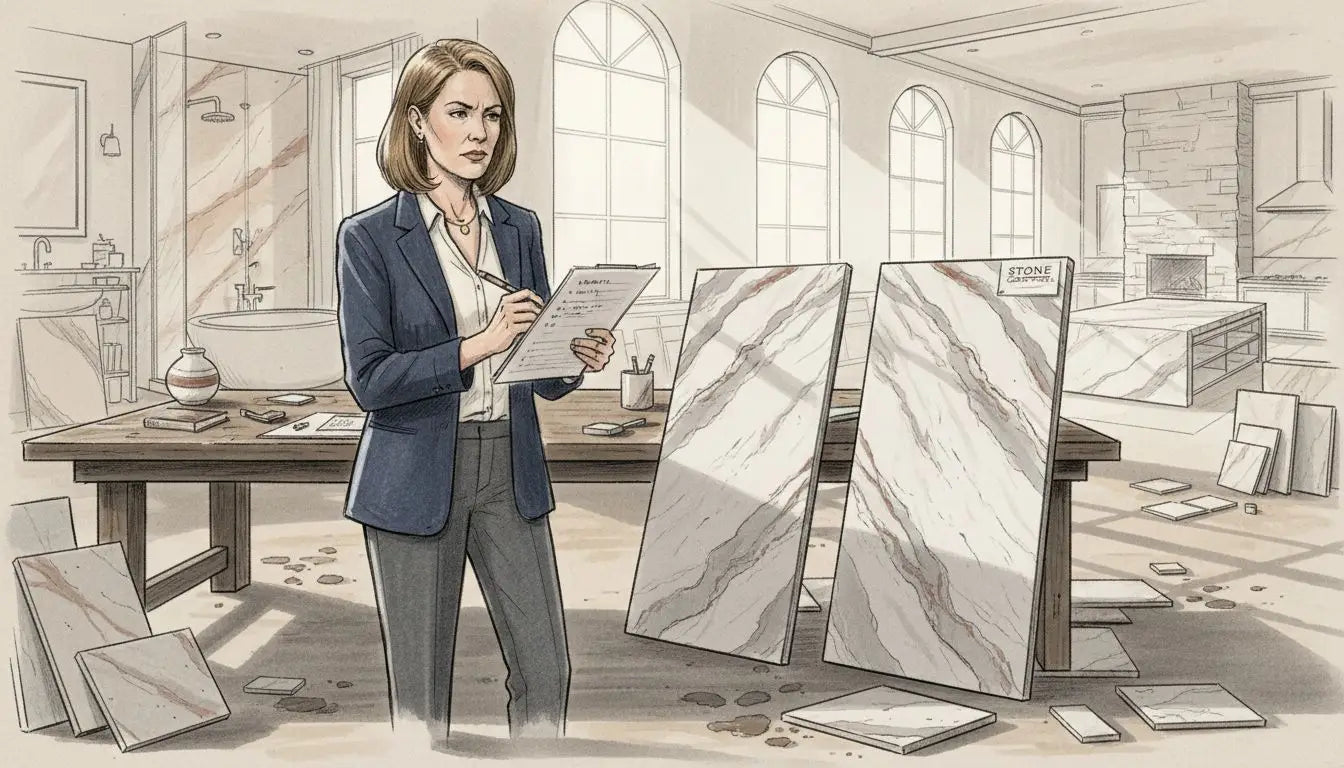
Most American luxury renovations in Southern California rely on perfectly matched marble slabs for stunning visual harmony and long-lasting value. With more than 80 percent of high-end projects experiencing setbacks due to improper stone selection, professional designers know that getting the first steps right is non-negotiable. If you want your marble details to reflect both technical precision and refined taste, understanding the nuances of project assessment, slab compatibility, and subtle aesthetic alignment is the difference between ordinary and exceptional.
Table of Contents
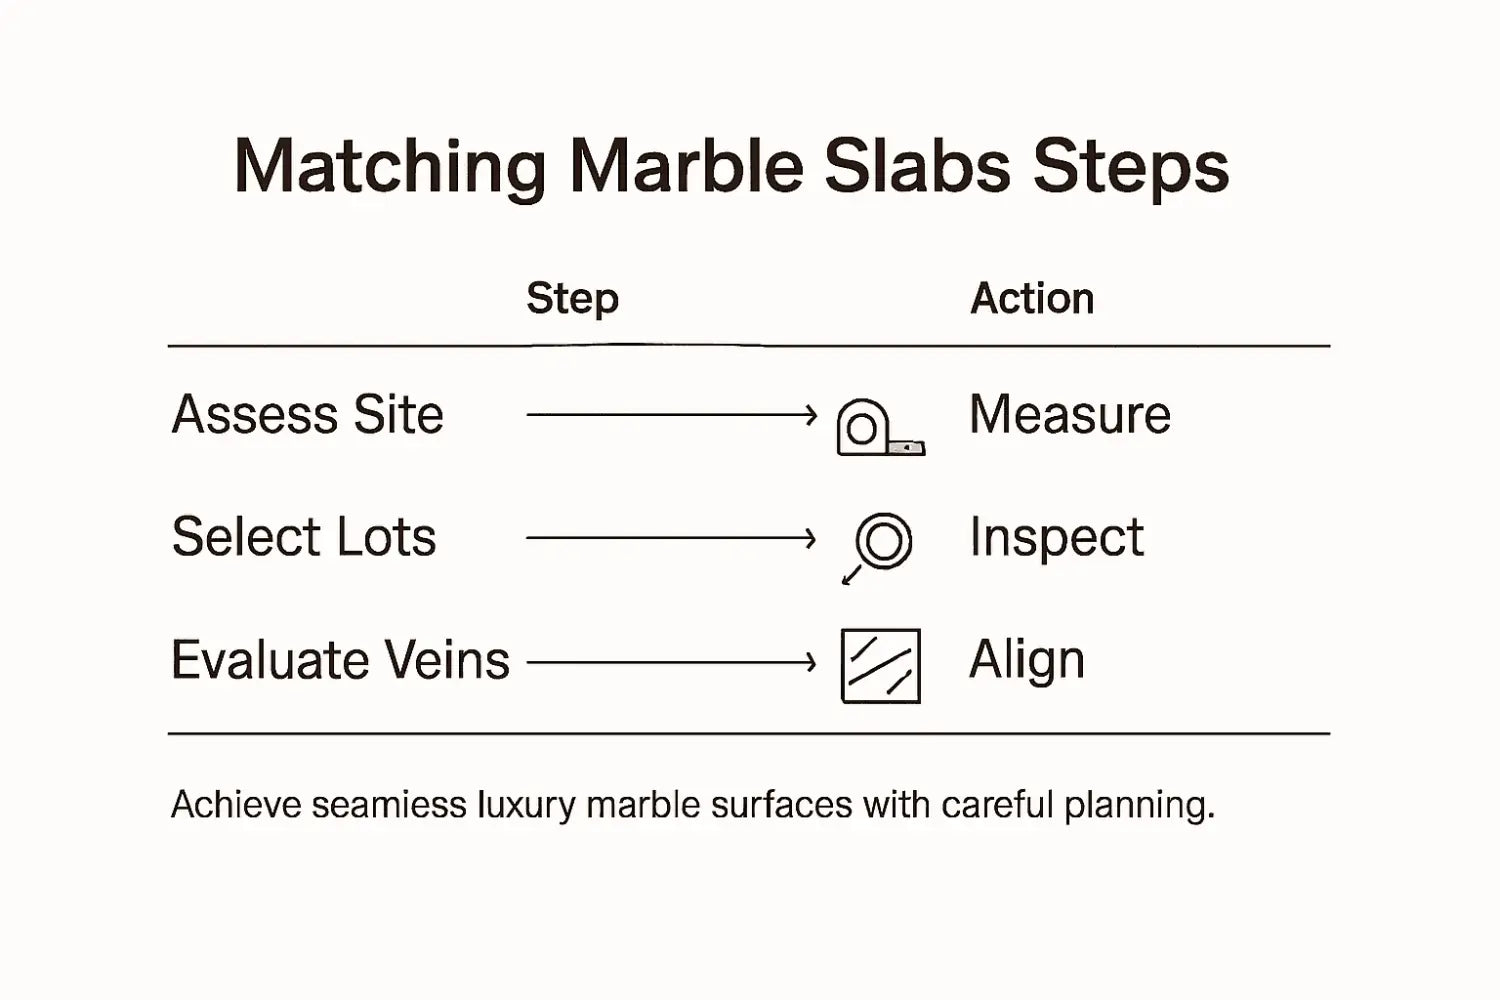
- Step 1: Assess Project Needs And Layout Plans
- Step 2: Select Compatible Marble Slab Lots
- Step 3: Evaluate Vein Patterns And Color Consistency
- Step 4: Arrange Slabs For Optimal Bookmatching
- Step 5: Inspect And Approve Final Seam Alignment
Quick Summary
| Key Takeaway | Explanation |
|---|---|
| 1. Conduct a Thorough Site Survey | A detailed site survey identifies all dimensions and potential constraints, aiding in the effective planning of marble installation. |
| 2. Select Compatible Marble Slabs | Choosing slabs from the same quarry ensures consistency in veining and physical properties, important for achieving visual uniformity. |
| 3. Analyze Vein Patterns and Colors | Careful examination of vein direction and color consistency enhances the overall aesthetic and seamless integration of the marble design. |
| 4. Plan for Bookmatching Precision | Aligning slabs for bookmatching creates stunning visual continuity and requires strategic selection and orientation of the slabs. |
| 5. Finalize Seam Alignment Inspection | Rigorous inspection of seams under various lighting conditions ensures a flawless finish and high-quality installation. |
Step 1: Assess Project Needs and Layout Plans
Successfully matching marble slabs begins with a strategic project assessment that captures every critical detail of your design vision. This crucial initial phase helps architects and designers align technical requirements with aesthetic expectations.
Start by conducting a comprehensive site survey that evaluates layout parameters and architectural constraints. Measure your designated installation area precisely measuring room dimensions wall to wall including any alcoves recesses or architectural features that might impact stone placement. Document ceiling height floor flatness and potential structural limitations that could affect your marble installation. Pay special attention to natural lighting patterns ambient room temperature and potential moisture exposure areas as these factors significantly influence marble selection and long term performance.
Your project assessment should integrate both technical specifications and design aspirations. Collaborate closely with project stakeholders documenting specific aesthetic preferences functional requirements and performance expectations. Involve key decision makers early to ensure accurate alignment of project objectives gathering input on desired marble color veining pattern slab thickness and overall design intent. Create a comprehensive project brief that outlines material specifications performance requirements budget constraints and design vision.
Pro tip: Always create digital and physical mockups of your marble layout to visualize potential variations and ensure seamless integration before final installation.
Step 2: Select Compatible Marble Slab Lots
Selecting compatible marble slab lots represents a critical phase in achieving seamless luxury surfaces that showcase stunning visual continuity. Your goal is to identify and match marble slabs that blend together as if they were cut from the same magnificent stone formation.
Begin by understanding the fundamental technical standards that govern marble slab compatibility. Professional designers evaluate marble lots based on multiple precise criteria including mineral composition veining patterns color consistency and physical properties. Look for slabs originating from the same quarry block which guarantees consistent characteristics like density absorption rates and mineral structure. Examine each potential slab under consistent lighting conditions to accurately assess color variations grain patterns and underlying mineral streaks that contribute to the stones visual character.
Professional marble selection requires a trained eye and systematic approach. Inspect slab edges carefully checking for uniform thickness and structural integrity. Request detailed documentation about each marble lot including its geological origin processing methods and specific physical measurements. Comprehensive industry standards help ensure responsible sourcing and surface quality when selecting marble for high end architectural projects. Pay attention to subtle nuances that distinguish premium marble selections such as consistent crystal structure uniform color gradation and minimal structural irregularities.
Pro tip: Always photograph potential marble slabs under identical lighting conditions and create digital mockups to compare potential lot combinations before making a final selection.
Step 3: Evaluate Vein Patterns and Color Consistency
Perfecting marble selection demands a discerning eye capable of analyzing subtle nuances in natural stone aesthetics. Your objective is to identify marble slabs with harmonious vein patterns and consistent coloration that will create a seamless visual masterpiece.
Technical evaluation methods help designers assess marble’s visual characteristics with scientific precision. Professional designers examine each slab under multiple lighting conditions studying the intricate veining patterns mineral composition and color gradations. Pay close attention to vein orientation examining how mineral streaks flow across the stone surface looking for consistent directional movement that will create visual continuity when multiple slabs are installed together. Some marble varieties feature dramatic diagonal veining while others display more subtle horizontal or branching patterns each requiring careful alignment during selection.
Careful examination goes beyond surface appearance. Comprehensive visual inspections reveal critical details about marble’s structural integrity and aesthetic potential. Look for uniform color saturation minimal color variations and predictable vein structures that will generate a cohesive visual effect. Professional designers often create detailed documentation mapping each slab’s unique characteristics tracking subtle shifts in color tone mineral density and crystalline structure to ensure perfect matching across large installation areas.
Pro tip: Create a digital grid displaying potential marble slabs side by side to simulate real world installation and identify potential visual discontinuities before making final selections.
Step 4: Arrange Slabs for Optimal Bookmatching
Bookmatching marble represents the pinnacle of design sophistication where adjacent stone surfaces create a mesmerizing mirror image effect that transforms ordinary spaces into extraordinary visual experiences. Your goal is to strategically align marble slabs to generate seamless symmetry and breathtaking continuity.
Professional bookmatching techniques require precise geometric alignment and careful slab selection to generate stunning visual effects. Professional designers start by identifying sequential marble slabs cut from the same stone block ensuring that when placed adjacent to each other the veining patterns create a perfect mirrored reflection. Imagine opening a book where each page reveals an identical yet opposite pattern this is the essence of marble bookmatching. Some marble varieties like Calacatta and Carrara offer particularly dramatic veining that creates spectacular results when carefully matched.
Strategic fabrication processes are essential for achieving perfect bookmatched installations across large surface areas. Consider the orientation of each slab carefully examining how mineral veins flow and intersect paying attention to subtle color gradations and directional movements. Experienced designers often create detailed digital mockups simulating the final installation mapping out exact slab placements to predict and optimize visual continuity. Advanced techniques involve rotating slabs 180 degrees to generate symmetric patterns that appear to flow seamlessly across walls countertops or flooring surfaces.
Pro tip: Request sequential slab numbers from your stone supplier to ensure the most precise bookmatching possible and minimize visual interruptions.
Step 5: Inspect and Approve Final Seam Alignment
The final stage of marble installation requires meticulous scrutiny to transform a good project into an extraordinary design masterpiece. Your mission is to conduct a comprehensive visual and technical examination ensuring every seam meets the highest standards of precision and aesthetic excellence.
Professional marble installation standards demand rigorous inspection protocols that go far beyond superficial assessment. Begin by examining seam alignment under multiple lighting conditions both natural and artificial to reveal potential imperfections. Professional designers use specialized lighting techniques that highlight subtle variations in color tone mineral veining and surface continuity. Inspect seam edges for precise alignment checking that adjacent marble slabs create an almost invisible transition with minimal perceptible joint width. Look for consistent color gradation mineral flow and structural integrity across the entire installation surface.
Technical guidelines recommend comprehensive evaluation of surface characteristics before final approval. Carefully run your hands across seam lines feeling for any slight elevation differences or textural inconsistencies that might compromise the installation quality. Use high resolution digital photography to document seam alignment from multiple angles creating a permanent record of the installation precision. Professional designers typically create detailed assessment checklists that cover color matching vein continuity surface flatness and joint tightness ensuring every aspect of the marble installation meets exacting standards.
Pro tip: Bring multiple light sources including flashlights and natural daylight to your final inspection to reveal subtle variations that might be missed under standard lighting conditions.
The following table compares common marble slab selection challenges and recommended professional solutions:
| Challenge | Impact on Project | Recommended Solution |
|---|---|---|
| Inconsistent veining | Disrupted pattern continuity | Select sequential slabs |
| Color variation | Visual mismatch across surfaces | Inspect under consistent lighting |
| Structural defects | Weakened durability | Request supplier documentation |
| Poor seam alignment | Noticeable joint lines | Use detailed digital mockups |
Here’s a summary of key factors to consider at each step of the marble slab selection and installation process:
| Step | Main Focus | Key Consideration | Added Value |
|---|---|---|---|
| 1. Assess Project Needs | Site survey and project brief | Room dimensions, lighting, structural limits | Aligns design and feasibility |
| 2. Select Slab Lots | Sourcing slabs from same block | Mineral composition, color consistency | Ensures material uniformity |
| 3. Evaluate Vein Patterns | Analyzing slab aesthetics | Vein direction, color gradation | Facilitates seamless matching |
| 4. Arrange for Bookmatching | Slab orientation and sequence | Mirrored veining, digital mockups | Achieves visual symmetry |
| 5. Final Inspection | Seam scrutiny and surface check | Alignment, joint width, surface flatness | Guarantees premium finish |
Elevate Your Marble Installations with Expertly Matched Slabs
Achieving seamless luxury surfaces begins with selecting marble slabs that perfectly align in color, veining, and structural quality. The challenges of inconsistent veining, color variation, and poor seam alignment described in the guide call for premium, reliable natural stone choices that bring your design vision to life. At Surfaces Galore, we understand the critical importance of sourcing marble slabs from the same quarry lot to ensure mineral composition and vein patterns create breathtaking visual continuity. Our extensive selection and expert guidance help architects, designers, and contractors overcome common obstacles and create flawless installations.

Discover the difference of working with a direct importer of top-quality marble and travertine who prioritizes authenticity, durability, and elegance at affordable prices. Start building your project with confidence by exploring our collection or contacting our team for personalized support. Don’t let imperfect slabs disrupt your design. Visit Surfaces Galore today and access expert solutions that match the meticulous standards outlined in the Matching Marble Slabs Guide. Let us help you turn your concept into a masterpiece with fine slabs that align perfectly every time.
Frequently Asked Questions
What should I assess before selecting marble slabs?
Begin by conducting a comprehensive site survey to evaluate room dimensions, architectural constraints, and lighting. Measure the installation area accurately to ensure that the selected marble fits your design vision seamlessly.
How can I ensure that the marble slabs I choose are compatible?
Select slabs from the same quarry block to maintain consistency in mineral composition and veining patterns. Inspect each slab under identical lighting conditions to assess color variations and structural integrity before making your final decision.
What steps should I take to evaluate vein patterns and color consistency in marble?
Carefully analyze each slab for harmonious vein patterns and uniform coloration. Use multiple lighting conditions to observe subtle differences and document these characteristics for better matching across installations.
How do I achieve bookmatching for my marble installations?
Position adjacent marble slabs that reflect a mirrored image of each other, ensuring they are cut from the same stone block. Use digital mockups to visualize the arrangement and confirm that the veining patterns align appropriately for striking visual continuity.
What should I inspect during the final seam alignment of marble installation?
Ensure that seam edges are precisely aligned with minimal perceptible joint width. Conduct a thorough visual inspection using various light sources to guarantee that color gradation, vein flow, and surface flatness meet high standards.
Leave a comment