
Step by Step Bathroom Renovation: Your 2026 Guide

TL;DR:
- A step-by-step bathroom renovation involves a structured sequence from planning to finishing to ensure lasting quality. Skipping or rushing phases can cause expensive rework, especially with natural stone tile installations. Proper planning, sequencing, and waterproofing are critical for a successful and durable bathroom remodel.
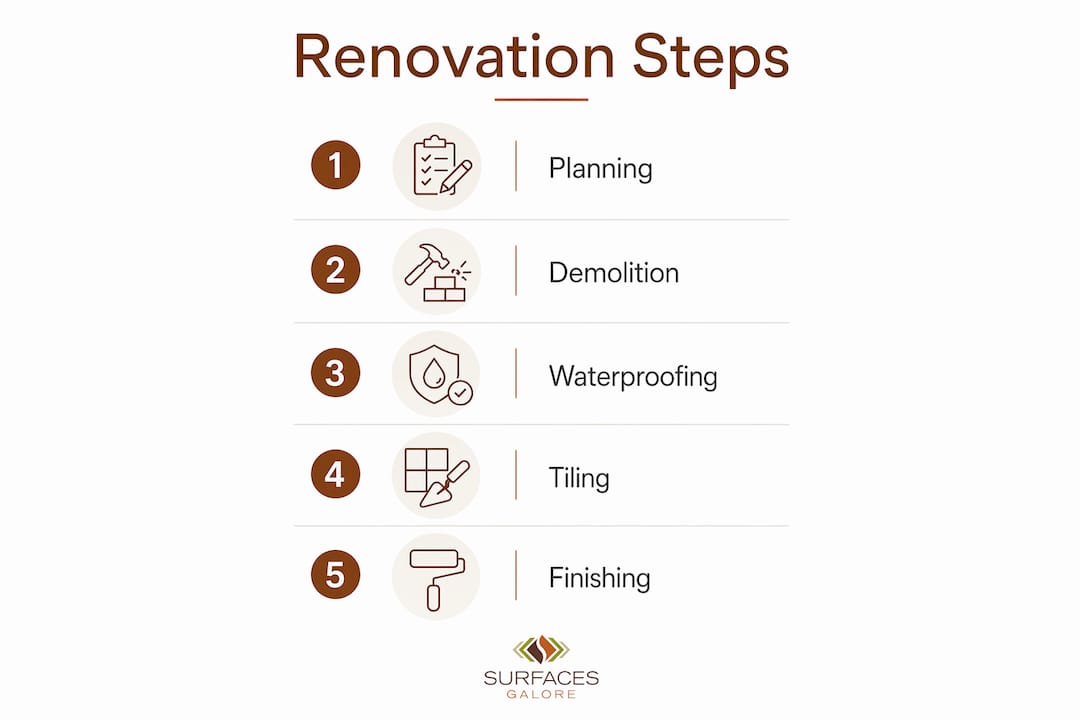
A step-by-step bathroom renovation is the process of remodeling your bathroom by following a structured sequence of planning, demolition, rough-in work, waterproofing, tiling, and finishing phases to produce lasting quality. Skipping or rushing any phase creates expensive rework. The National Kitchen and Bath Association recognizes trade sequencing as one of the top causes of budget overruns in residential remodels. This guide walks you through every phase of the bathroom remodel process, with particular attention to natural stone tile installations, mandatory inspections, and the budget decisions that separate a smooth project from a costly one.
What does a step by step bathroom renovation actually involve?
A bathroom renovation is not a single task. It is a chain of dependent phases where each step must be complete before the next one begins. Professionals call this a “trade sequence,” and violating it is the single most common reason homeowners tear out finished tile to fix a plumbing leak underneath.
The scope of your project determines everything else. A cosmetic refresh, replacing fixtures and repainting, is fundamentally different from a full gut renovation that moves plumbing and replaces the subfloor. Confusing these two scopes causes the most common budget and schedule overruns homeowners experience. Define your scope in writing before you spend a dollar.
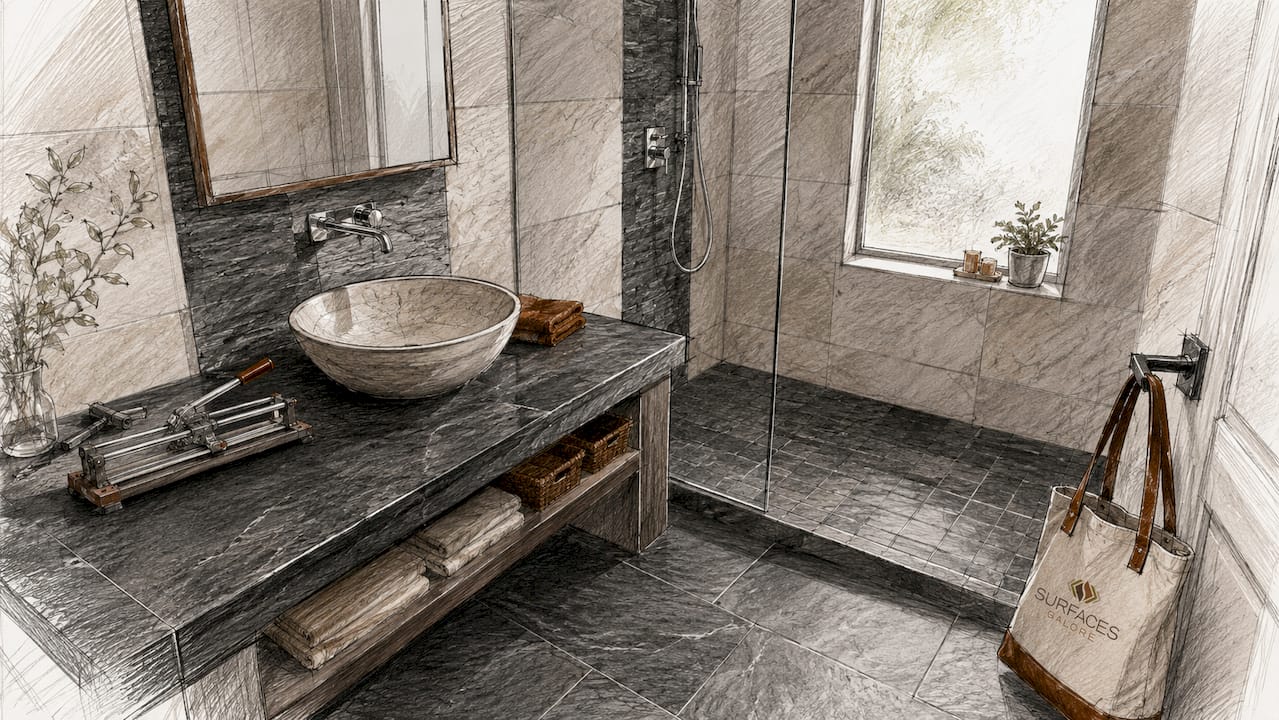
Natural stone tile adds a layer of complexity that standard ceramic tile does not. Marble, limestone, and travertine each require specific substrate preparation, waterproofing membranes, and adhesives. Getting those details right from the start protects your investment for decades.
How to plan and prepare for your bathroom renovation project
Planning is where most DIY bathroom renovation steps either succeed or fail. A weak plan produces mid-project surprises that cost far more to fix than they would have cost to prevent.
Setting a realistic budget
Budget 10–15% of your total project cost as a contingency reserve for hidden problems. That buffer covers the rotted subfloor, outdated wiring, or corroded supply lines that only appear after demolition. For primary bathrooms, industry guidance suggests allocating 5–10% of your home’s total value to the renovation. Secondary bathrooms typically fall in the 3–5% range.
Plumbing location is the single biggest cost driver in any bathroom remodel guide. Keeping fixtures in their existing locations avoids rerouting pipes through floors and walls, which can add several hundred dollars or more to labor and material costs. Unless your layout is genuinely dysfunctional, work with the existing drain and supply locations.
Designing wet and dry zones
Every bathroom has a wet zone, the shower, tub, and toilet area, and a dry zone, the vanity and storage area. Designing these zones deliberately before you select any tile or fixture prevents layout conflicts later. Refining your floor plan early saves money and complexity by reducing plumbing moves and optimizing how the two zones interact.
Natural stone works beautifully in both zones, but the wet zone demands a higher standard of waterproofing. Marble and travertine are porous materials. Without a proper waterproofing membrane beneath them, moisture migrates into the substrate and causes structural damage that is invisible until it becomes catastrophic.
Ordering materials and pulling permits
- Order natural stone tiles, mosaics, and decorative pieces at least four weeks before your start date. Imported stone has longer lead times than domestic ceramic, and a supply delay stops your entire project.
- Pull your building permit before demolition begins. Most municipalities require permits for plumbing, electrical, and structural work.
- Schedule your rough-in inspection appointment at the time you pull the permit, not after the work is done.
- Confirm your tile layout and grout joint width with a dry-lay test before ordering. This prevents short orders and mismatched dye lots.
- Coordinate your stone selection with your fixture finishes. Warm-toned travertine pairs naturally with brushed brass or oil-rubbed bronze. Cool-toned marble reads best with polished chrome or matte black.
Pro Tip: Order 10–15% more tile than your square footage calculation requires. Natural stone has variation between production batches, and matching a dye lot months later is often impossible.
What order should trades and tasks follow during a bathroom renovation?
Trade sequencing is the backbone of any successful bathroom makeover process. Rushing phases almost always causes expensive rework and delays. The correct order is non-negotiable.
1. Demolition and discovery
Remove fixtures, vanity, toilet, and any existing tile or drywall. Work carefully around supply lines and drain connections to avoid damage you will have to repair. Once the walls and floor are open, you can see the actual condition of your substrate, framing, and plumbing.
Post-demolition is your first real decision point. Inspect the substrate and plumbing immediately to catch moisture damage or outdated systems before you proceed. Repairs at this stage cost a fraction of what they cost after tile is installed.
2. Rough-in plumbing and electrical
Move or extend any supply lines, drain lines, and electrical circuits according to your approved plan. This phase typically takes 3–7 days depending on the complexity of the layout. Do not close the walls until the inspector signs off.
Scheduling rough-in inspections before closing walls is mandatory in most jurisdictions. Failing to do so results in destructive inspections, where the inspector requires you to open finished walls, and costly rework that can add 3–7 days or more to your timeline.
3. Waterproofing and substrate preparation
This phase takes 2–4 days and is the most critical step for natural stone tile areas. Natural stone installations require specialized substrate preparation, waterproofing membranes, and appropriate adhesives to perform over time. Cement board or a tile-ready shower pan provides the rigid, moisture-resistant base that stone demands. Apply a sheet membrane or liquid-applied waterproofing system to all wet zone surfaces, including the floor-to-wall transition, before any tile goes down.
4. Tile installation
Install floor tile before wall tile. This sequence allows the wall tile to overlap the floor tile edge, creating a cleaner finish and a better moisture barrier at the joint. Waterproofing and substrate prep takes 2–4 days, tile installation 3–7 days, and finishing work 3–6 days. Each phase must cure fully before the next begins.
| Phase | Duration | Key requirement |
|---|---|---|
| Waterproofing and substrate prep | 2–4 days | Full cure before tiling |
| Tile installation | 3–7 days | Floor before wall; allow mortar cure |
| Grouting and sealing | 1–2 days | Stone requires penetrating sealer |
| Finish work | 3–6 days | Fixtures after tile is fully set |
5. Finish work and final inspection
Install fixtures, vanity, toilet, mirrors, and trim only after tile is fully cured and sealed. Paint before installing trim, and install trim before the toilet and vanity to get clean lines at every junction. Schedule your final inspection before you consider the project complete. A signed final inspection protects your home’s resale value and confirms the work meets local code.
How do you troubleshoot common challenges in bathroom renovations?
Every bathroom renovation uncovers at least one surprise. The homeowners who handle surprises well are the ones who planned for them financially and built buffer time into their schedule.
Substrate and structural damage
Moisture damage in bathroom subfloors and wall framing is far more common than most homeowners expect, especially in homes built before 1990. Inspect the substrate and plumbing post-demolition and add 3–7 days to your timeline if repairs are needed. Trying to tile over a soft or compromised substrate is the fastest way to crack natural stone and void any installation warranty.
Look for these warning signs immediately after demolition:
- Soft or springy subfloor sections that flex underfoot
- Dark staining or visible mold on framing or drywall
- Corroded or galvanized supply lines that need replacement
- Drain connections that do not meet current code
Measurement and ordering errors
Do not order custom fixtures before taking final on-site measurements. Older homes frequently vary by several inches from their original blueprints. A vanity ordered to blueprint dimensions may not fit the actual opening after demolition. Take every critical measurement twice, after the space is fully open, before placing any custom order.
The same rule applies to tile. Measure your actual square footage from the open subfloor, not from the original room dimensions. Account for the thickness of cement board and any changes to the wall framing.
Pro Tip: Photograph every wall cavity, plumbing connection, and electrical rough-in before closing the walls. Those photos save hours of guesswork if you ever need to locate a pipe or wire in the future.
Waterproofing failures and sequencing errors
Incorrect sequencing leads to costly rework such as tearing out tile to fix plumbing leaks underneath. The most common sequencing mistake is installing tile before the rough-in inspection is complete. If the inspector requires a plumbing change after tile is set, you lose the tile, the mortar bed, and the waterproofing layer.
For natural stone specifically, a room makeover process that skips or shortcuts the waterproofing membrane almost always results in efflorescence, the white mineral deposits that appear on stone surfaces when moisture migrates through from behind. Efflorescence is a symptom of a waterproofing failure, not a surface stain, and it cannot be permanently fixed without removing the tile.
What tools, materials, and techniques are essential for natural stone tile installation?
Natural stone tile installation in a bathroom is not the same as installing ceramic or porcelain. The material is heavier, more porous, and less forgiving of substrate movement or moisture intrusion.
Substrate and waterproofing requirements
Marble, limestone, and travertine all require a rigid, deflection-free substrate. The Tile Council of North America (TCNA) specifies that floor deflection must not exceed L/360 of the span for ceramic tile and L/720 for natural stone. That means a stone tile floor needs twice the structural stiffness of a ceramic one. Use 1/2-inch cement board or a mortar bed system, never standard drywall or greenboard, in any wet zone.
Apply a waterproofing membrane rated for stone tile applications. Sheet membranes like those in the TCNA Handbook provide the most reliable moisture barrier at seams and corners. Liquid-applied systems work well on flat surfaces but require careful attention at transitions.
Adhesives, grout, and sealers
| Material | Recommended type | Why it matters for stone |
|---|---|---|
| Adhesive mortar | Large-format, polymer-modified thinset | Prevents lippage on heavy stone tiles |
| Grout | Unsanded or fine-sanded, color-matched | Coarse sand scratches polished stone surfaces |
| Sealer | Penetrating impregnating sealer | Protects porous stone without altering surface finish |
Use a white or light-gray thinset under light-colored marble or limestone. Dark thinset can telegraph through translucent stone and alter the finished appearance. For travertine tiling, fill the natural voids in the stone with grout or a color-matched filler before sealing to prevent moisture from pooling in the pits.
Cutting and measuring
Accurate measurement is the foundation of a clean tile installation. Use a wet saw with a diamond blade rated for natural stone. Dry cutting creates micro-fractures along the cut edge that cause chipping over time. Measure for tile from the center of the room outward, not from a wall, to keep cuts balanced and symmetrical at every edge.
Pro Tip: Make a dry layout of your entire floor or wall before mixing any mortar. This reveals awkward cuts at doorways or corners while you can still adjust the starting point without wasting material.
Surfacesgalore carries marble, limestone, and travertine tiles in formats suited to both large-format floor applications and detailed mosaic work. Their bathroom tile design workflow resource covers adhesive selection, grout joint sizing, and sealer application specific to each stone type.
Key Takeaways
A successful bathroom renovation depends on following the correct trade sequence, planning your budget with a contingency reserve, and choosing materials that match your waterproofing and substrate requirements.
| Point | Details |
|---|---|
| Plan before you spend | Define scope, set a 10–15% contingency budget, and pull permits before demolition begins. |
| Sequence trades correctly | Complete rough-in inspections before closing walls to avoid destructive rework later. |
| Waterproof for natural stone | Stone tile requires a rigid substrate and a rated waterproofing membrane in all wet zones. |
| Measure after demolition | Take all critical measurements from the open space, not from blueprints or original room dimensions. |
| Order materials early | Import natural stone at least four weeks before your start date to prevent supply-driven work stoppages. |
What I’ve learned from renovating bathrooms with natural stone
The single most expensive mistake I see homeowners make is treating the planning phase as optional. They pull up a few tiles, realize the subfloor is soft, and then spend the next two weeks scrambling to find a contractor who can fit them in. That scramble costs more than a thorough pre-demolition inspection would have.
Waterproofing is the other area where I see consistent underinvestment. Homeowners will spend thousands on premium marble and then try to save $200 by skipping a proper sheet membrane. Two years later, the stone is lifting and the framing behind it is rotted. The membrane is not optional. It is the reason the stone lasts 30 years instead of 5.
My strongest advice on inspection scheduling: book your rough-in inspection appointment the same day you pull your permit. Inspectors in most cities are booked 5–10 business days out. If you wait until the rough-in work is done to call, you will sit idle for a week with open walls and a stalled project.
Patience with the timeline protects your investment in premium materials. Natural stone mortar beds need full cure time before grouting, and grout needs full cure time before sealing. Rushing those windows to meet a self-imposed deadline is how you get cracked grout joints and stained stone on day one. Give the materials the time they need.
Surfacesgalore has been a reliable resource for homeowners who want to match stone selections to their specific bathroom conditions. The depth of their product range, from honed limestone for wet zone floors to polished marble for feature walls, means you can find the right material for every surface in the room without compromising on quality.
— cihan
Natural stone tile collections for your bathroom renovation
Choosing the right stone tile is the decision that defines the finished look of your bathroom for decades.

Surfacesgalore imports premium marble, limestone, and travertine tiles directly, which means you get authentic natural stone at prices that work for real renovation budgets. Their collections include large-format floor tiles, wall mosaics, decorative borders, and custom-cut pieces that coordinate across every surface in the room. Whether you are planning a full gut renovation or a focused bathroom wall tile upgrade, Surfacesgalore ships nationwide from Anaheim, California, with expert guidance available to help you match materials to your specific project conditions. Browse the full collection at Surfacesgalore and find the stone that fits your renovation.
FAQ
How long does a full bathroom renovation take?
A full bathroom renovation typically takes 3–6 weeks for a DIY project completed part-time. Professional crews working full-time can complete most standard bathrooms in 2–3 weeks, depending on the complexity of plumbing and tile work.
What is the correct order of trades in a bathroom remodel?
The correct order is demolition, rough-in plumbing and electrical, municipal inspection, waterproofing and substrate preparation, tile installation, grouting and sealing, then fixture installation and finish work. Deviating from this sequence causes costly rework.
Do I need a permit for a bathroom renovation?
Most jurisdictions require permits for plumbing, electrical, and structural work. Skipping permits can result in failed inspections, required demolition of finished work, and complications when selling your home.
What type of tile is best for a bathroom with natural stone?
Marble, limestone, and travertine are the most durable and visually distinctive choices for bathroom surfaces. Each requires a penetrating impregnating sealer and a proper waterproofing membrane beneath it in wet zones to perform over time.
How do I prevent grout staining on natural stone tile?
Apply a penetrating impregnating sealer to the stone surface before grouting. This prevents grout pigment from absorbing into the porous stone face. Seal again after grouting and allow full cure time before exposing the surface to water.
Leave a comment