
Tile Size Guide for Kitchens and Bathrooms in 2026

TL;DR:
- Tile size influences a room’s appearance, maintenance, and installation complexity significantly. Large-format tiles offer a modern look with less grout, while small tiles improve grip and flexibility. Proper planning ensures a balanced, cohesive design suited to each room’s function.
Tile size is defined as the physical dimensions of each tile unit, measured in inches or millimeters, and it directly determines the visual weight, maintenance demands, and functional performance of any kitchen or bathroom surface. A 12x12 inch tile and a 24x48 inch slab create entirely different rooms, even when made from the same marble. Choosing the wrong dimensions wastes money, creates installation problems, and produces spaces that feel off without anyone being able to say exactly why. This guide covers average tile sizes, room-specific recommendations, installation realities, and design strategies so you can make a confident decision before a single tile is set.
What is tile size and why does it matter?
Tile size shapes room atmosphere more than most people expect. Large tiles create visual calm with fewer grout lines, while small tiles add texture and detail but demand more maintenance. That difference in atmosphere is not a matter of taste alone. It affects how easy a surface is to clean, how safe a wet floor feels underfoot, and how much a room appears to expand or contract.
The industry groups tiles into three broad categories. Small-format tiles run below 6x6 inches and include classic subway, penny round, and mosaic formats. Mid-format tiles span roughly 6x6 to 18x18 inches and cover the most common residential floor and wall applications. Large-format tiles start at 24x24 inches and extend to dramatic 48x96 inch slabs used in contemporary interiors. Surfacesgalore carries natural stone options across all three categories, including marble, limestone, and travertine in sizes suited to both compact bathrooms and open-plan kitchen floors.
Understanding where each category performs best is the foundation of every good tile decision. The sections below walk through that logic room by room and layer by layer.
Large-format vs. small-format tiles: which should you choose?
Large-format tiles, generally defined as anything above 24x24 inches, produce a cleaner, more continuous surface. Fewer grout lines reduce cleaning effort by roughly 30–35%, which is a meaningful advantage in kitchens and bathrooms that see daily use. That reduction also means fewer places for mold and bacteria to accumulate in wet areas.
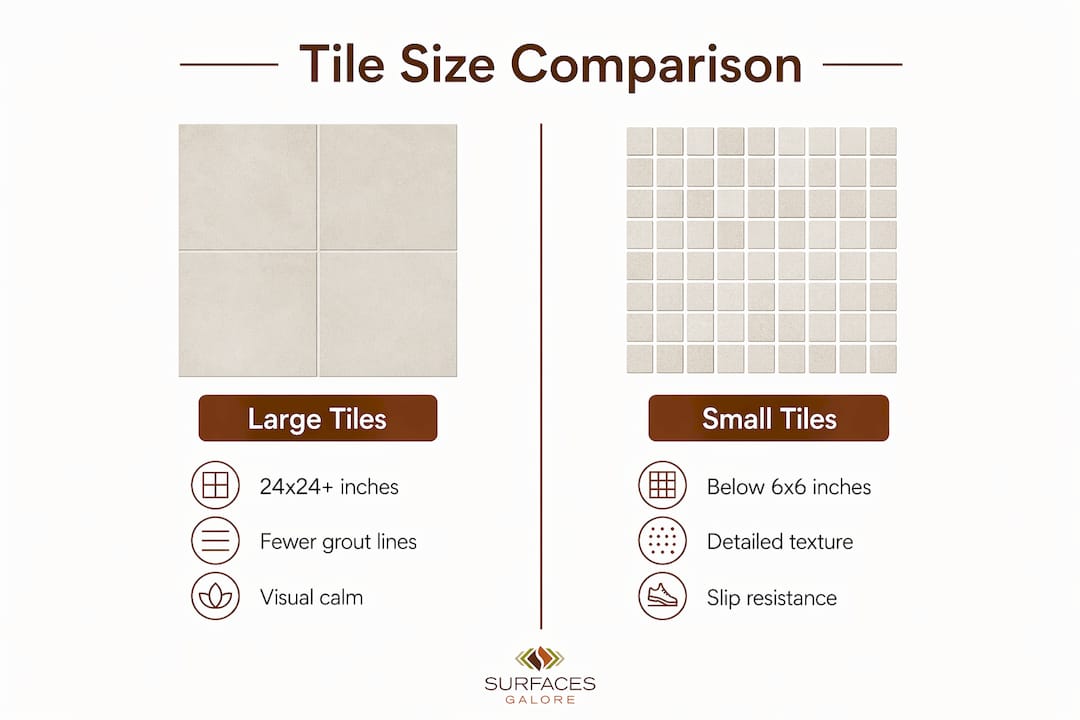
Small tiles bring their own strengths. Mosaic formats and penny rounds provide natural grip on shower floors because the high grout-to-tile ratio creates friction. They also bend around curves and niches that large slabs cannot accommodate. Decorative small tiles on a backsplash or feature wall add visual interest without competing with the rest of the room.
Advantages of large-format tiles
- Fewer grout lines produce a cleaner, more modern look
- Easier to wipe down and maintain in high-traffic kitchens
- Create a continuous visual plane that makes small bathrooms appear larger
- Work well with radiant floor heating because fewer grout joints interrupt heat transfer
- Natural stone slabs in large formats show off the full veining pattern of marble or travertine
Advantages of small-format tiles
- Higher grout density improves slip resistance on wet shower floors
- Flexible enough to tile curved walls, niches, and irregular surfaces
- Easier for DIY installers to handle and cut without specialized equipment
- Mosaic sheets on mesh backing speed up installation in small areas
- Decorative patterns like herringbone and basketweave require smaller individual tiles
Pro Tip: If you love the look of large tiles but have a small bathroom, use them on the floor and extend them partway up the wall. The unbroken vertical line reads as height, not bulk.
Large tiles do carry a real installation burden. For tiles over 800mm on any side, subfloor flatness tolerance tightens to approximately 2mm across any 2-meter span. Standard residential subfloors rarely meet that spec without self-leveling compound. Budget for that prep work before you fall in love with a 48x24 inch travertine slab.
How to choose tile size by room type
Room function drives the best tile dimensions more than any design trend. A kitchen floor needs durability and visual continuity. A shower floor needs grip. A living room hallway needs a format that flows without interruption. Getting the match right between room purpose and tile format is the single most reliable way to avoid regret after installation.
Kitchen floors and backsplashes
Kitchen floors favor large-format tiles for two reasons: visual continuity and durability. A 24x24 inch or 24x48 inch natural stone tile laid across an open kitchen creates a calm, unbroken surface that reads as one cohesive element rather than a patchwork. Mid-sized rectangular tiles around 300x600mm also work well in kitchens with moderate square footage, balancing grout visibility with ease of installation.
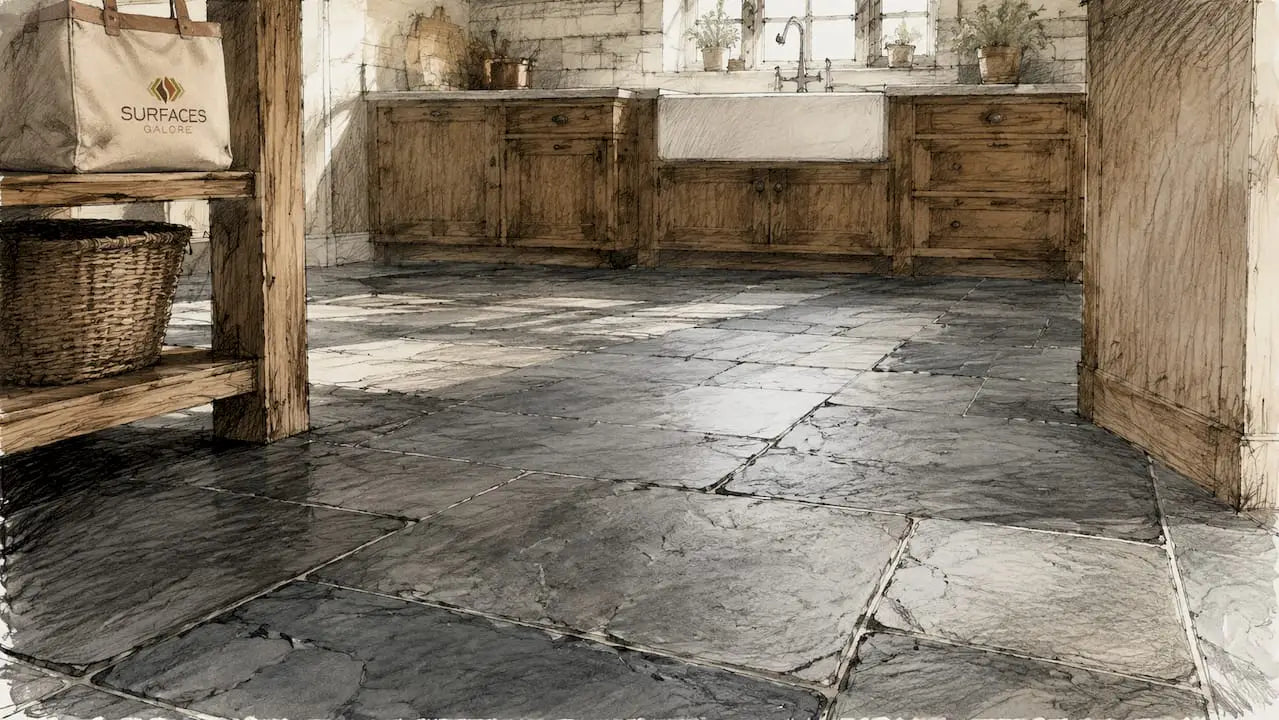
Backsplashes and feature walls are a different story. Floor and backsplash tiles serve different purposes: floors need durability and slip resistance, while backsplashes exist for decorative interest. A 3x6 inch marble subway tile or a small limestone mosaic on a kitchen backsplash adds texture and pattern without competing with the floor. Mixing formats between floor and wall is not only acceptable. It is standard professional practice.
Bathroom floors, walls, and showers
Bathroom tile selection balances slip resistance with style. The table below summarizes the best tile dimensions for each bathroom surface.
| Surface | Recommended size | Key reason |
|---|---|---|
| Bathroom floor | 12x12 to 24x24 inches | Balance of visual scale and manageable installation |
| Shower floor | 2x2 to 4x4 inches (mosaic) | High grout density for slip resistance |
| Shower walls | 4x12 to 12x24 inches | Easy to clean, good visual height |
| Bathroom feature wall | 12x24 to 24x48 inches | Creates a focal point with minimal grout |
| Bathroom vanity backsplash | 2x4 to 4x8 inches | Decorative detail at eye level |
Large-format tiles on bathroom floors and walls create the spa-like atmosphere that many designers target in 2026 renovations. A 24x48 inch marble tile on a bathroom wall with minimal grout produces a surface that reads almost like a continuous stone panel. That effect is difficult to achieve with smaller formats regardless of how carefully they are laid.
Hallways and living spaces
Hallways and living rooms benefit from mid to large formats. A 12x24 inch or 18x18 inch tile laid in a running bond or straight stack pattern creates visual flow through a corridor without making the space feel busy. Very small tiles in a hallway tend to look fussy and are harder to keep clean along the grout lines. Surfacesgalore’s limestone and travertine floor tiles in mid-format sizes work particularly well in transitional spaces because their natural variation reads as calm rather than chaotic.
Technical considerations for installation
Measuring accurately before you order tiles prevents the most common and costly installation mistakes. Professional tile installers measure room perimeters carefully and adjust layout center points to avoid narrow edge cuts. A sliver cut less than half a tile’s width at the room’s edge looks unprofessional and signals poor planning to anyone who notices it.
The installation process for large-format tiles follows a specific sequence that differs from standard tile work.
- Measure the room and find the true center. Snap chalk lines from the midpoints of opposite walls. Lay out tiles dry from the center to check edge cuts before any adhesive is applied.
- Assess subfloor flatness. Use a long straightedge or laser level. For tiles over 800mm, any deviation greater than 2mm over 2 meters requires correction with a self-leveling compound.
- Apply large-format adhesive. Standard thin-set is not sufficient for tiles above 24x24 inches. Use a large-format tile adhesive with a notched trowel sized to the tile weight, and back-butter each tile to eliminate voids.
- Use a tile leveling system. Lippage, the condition where one tile edge sits higher than the adjacent tile, is far more visible on large tiles. Leveling clips and wedges hold tiles flat while the adhesive cures.
- Plan grout joint width carefully. Large natural stone tiles typically use a 1/16 to 1/8 inch grout joint. Wider joints on large tiles look proportionally correct; hairline joints risk cracking as the substrate moves.
Pro Tip: Order 10–15% more tile than your square footage calculation requires. Cuts, breakage, and future repairs all pull from that buffer. Running out of a specific lot mid-project creates color-matching problems that are nearly impossible to solve.
Subfloor preparation is the most underestimated cost in large-format tile projects. Self-leveling compound, additional labor, and extended cure time add to the budget before a single finished tile is placed. Surfacesgalore’s tile measuring guide walks through the measurement and layout process in detail for homeowners planning a DIY approach.
How to mix tile sizes without creating visual chaos
Mixing tile sizes works when each format has a clear, assigned role. Large tiles ground the space. Smaller tiles provide accent, detail, or transition. The moment both sizes compete for the same visual attention, the room starts to feel random rather than designed.
Color and finish consistency is the most reliable tool for unifying mixed tile schemes. Matching grout color across different tile sizes unifies the composition, while contrasting grout colors between formats create a disjointed appearance. If you use a warm gray grout on your large marble floor tiles, carry that same grout into the mosaic shower floor. The eye reads the space as one material family rather than two competing choices.
Successful mixed-size designs follow a few consistent principles:
- Assign a dominant format. One tile size should cover at least 70% of the visible surface. The secondary format is the accent, not the equal partner.
- Align grout lines where possible. When the grout lines of a large floor tile align with the grout lines of a smaller wall tile, the transition reads as intentional.
- Limit the palette. Two tile sizes in two colors is manageable. Three sizes in three colors requires a very experienced eye to pull off without looking cluttered.
- Use natural stone’s variation to your advantage. Marble and travertine carry natural color movement that ties different formats together organically. A large travertine floor and a small travertine mosaic shower floor share the same mineral character even if the sizes differ dramatically.
- Test the combination in the actual space. Lay sample tiles on the floor and wall simultaneously under the room’s lighting conditions before committing to an order.
Floor and wall tiles do not need to match in size. Designers routinely use large tiles for floors and smaller tiles for walls or accents as a deliberate strategy. The key is that the decision looks deliberate, not accidental. A clear size hierarchy, consistent grout color, and shared material family are the three elements that make mixed layouts look professional. For a deeper look at how natural stone tile sizes interact with overall space design, Surfacesgalore’s stone tile sizes guide covers the topic with specific examples.
Key takeaways
Tile size is the single most consequential decision in any kitchen or bathroom renovation because it determines visual scale, maintenance load, and installation complexity simultaneously.
| Point | Details |
|---|---|
| Large tiles reduce maintenance | Tiles above 24x24 inches cut grout line area by roughly 30–35%, lowering cleaning effort. |
| Small tiles improve safety | Mosaic and small-format tiles on shower floors provide grip through higher grout density. |
| Subfloor prep is non-negotiable | Tiles over 800mm require subfloor flatness within 2mm or self-leveling compound before installation. |
| Avoid sliver cuts | Adjust your layout center point so edge cuts remain at least half a tile’s width. |
| Grout color unifies mixed formats | Consistent grout color across different tile sizes makes a mixed layout look intentional. |
What I’ve learned from working with natural stone tile sizes
Most homeowners walk into a tile decision focused entirely on color and material. They pick the marble they love and then ask what size it comes in. That sequence produces a lot of beautiful tiles installed in the wrong format for the room.
The more useful starting point is the room itself. Measure the space. Identify the subfloor condition. Decide how much maintenance you are willing to do. Then choose the material. A 24x48 inch limestone slab is spectacular in a bathroom with a properly prepped concrete subfloor. In a bathroom with a springy wood subfloor that was never leveled, that same tile will crack within two years regardless of how beautiful it is.
The other misconception I see constantly is that large tiles require large rooms. That is simply not true. Large tiles do not require large rooms. The limiting factor is subfloor quality, not square footage. A 5x8 foot bathroom with a flat, properly prepared subfloor can take a 24x24 inch marble tile and look extraordinary. The continuous surface actually makes the room feel bigger, not smaller.
Natural stone adds one more layer to the size decision that ceramic and porcelain do not. Stone tiles carry natural variation in veining, color, and texture. In large formats, that variation becomes a feature. A single 24x48 inch marble tile shows the full sweep of the stone’s character. In small formats, the variation creates rhythm and movement across a mosaic surface. Neither is wrong. Both are intentional when you understand what the material does at each scale.
Surfacesgalore’s collections at surfacesgalore.com include large-format marble and travertine options specifically selected for their veining consistency, which matters enormously when you are covering a large bathroom wall with minimal grout breaks. That level of curation is what separates a finished space that looks designed from one that just looks tiled.
— cihan
Natural stone tile collections at Surfacesgalore
Surfacesgalore imports premium marble, limestone, and travertine tiles directly, which means the selection spans the full range of formats that kitchens and bathrooms actually need.
Whether you are planning a large-format marble floor for an open kitchen or a small travertine mosaic for a shower niche, Surfacesgalore ships nationwide from Anaheim, California to designers, contractors, and homeowners. The collections include tiles sized from small decorative mosaics to dramatic large-format slabs, all sourced for quality and consistency. Browse the full natural stone tile selection and find the right dimensions for your next renovation project.
FAQ
What is the most common tile size for bathroom floors?
The most common tile size for bathroom floors is 12x12 inches, though 12x24 and 18x18 inch formats are increasingly popular in 2026 renovations for their cleaner, more modern appearance.
Do large tiles make a small bathroom look bigger?
Large tiles create a continuous visual plane that reduces the number of grout lines, making small bathrooms appear larger. This effect works best when the same large-format tile runs from floor to wall without interruption.
What tile size works best for a shower floor?
Mosaic tiles in 2x2 or 1x1 inch formats work best on shower floors because the high grout-to-tile ratio provides slip resistance on wet surfaces.
How do I avoid sliver cuts when laying tile?
Adjust your tile layout so the center point of the room falls at the center of a tile rather than a grout joint. This keeps edge cuts at or above half a tile’s width on all sides.
Can I mix different tile sizes in the same room?
Mixing tile sizes works well when one format dominates and a consistent grout color ties the formats together. Matching grout color across different sizes is the most reliable way to keep a mixed layout looking intentional rather than accidental.


Leave a comment