
How to Clean Natural Stone Tile Shower: A Step-by-Step Guide

So, you've got a beautiful natural stone tile shower, and you're wondering how to keep it looking its best. It's not like cleaning your average bathroom tile, that's for sure. Natural stone, like marble or travertine, has this unique charm, but it also needs a little extra TLC. If you've been scrubbing away with harsh cleaners, you might be doing more harm than good. This guide is all about showing you the right way to clean your natural stone tile shower, step-by-step, so it stays gorgeous for years to come. We'll cover what to use, what to avoid, and how to make sure you're not damaging that lovely stone.
Key Takeaways
- Always use pH-neutral cleaners specifically designed for natural stone to avoid damaging the surface.
- Promptly wipe up spills and moisture to prevent stains and mineral deposits on your stone.
- Avoid harsh chemicals, acidic cleaners (like vinegar or lemon juice), and abrasive scrubbers.
- Regularly sealing your natural stone shower is vital for stain and moisture resistance.
- Understand the specific needs of your stone type; marble and travertine have different maintenance requirements.
- For stubborn soap scum, use a cleaner formulated for natural stone and a soft cloth or sponge.
- Ensure good ventilation in your shower to help prevent mold and mildew growth.
- Re-sealing your shower periodically, typically once a year, helps maintain its protective barrier.
Understanding your natural stone shower tile
Choosing natural stone for your shower is a decision that speaks to both enduring style and lasting quality. It’s a material that brings the raw beauty of the earth right into your home, creating a space that feels both luxurious and grounded. When you opt for natural stone, you're not just selecting tiles; you're investing in a piece of art that will age gracefully and add significant value to your property.
The Enduring Appeal of Natural Stone
Natural stone tiles offer a timeless elegance that man-made materials simply can't replicate. Each tile is unique, showcasing the intricate patterns and subtle color variations formed over millennia. This inherent individuality means your shower will have a character all its own, a one-of-a-kind masterpiece that reflects nature's artistry. It’s a choice that transcends fleeting trends, offering a sophisticated aesthetic that remains beautiful year after year. If you're looking to buy marble tiles online in the USA, you're already on the path to creating a truly special space.
Marble and Travertine: Timeless Elegance
Marble and travertine are perhaps the most celebrated natural stones for their classic beauty. Marble, with its luxurious veining and smooth finish, evokes a sense of opulence and grandeur. Travertine, on the other hand, offers a more earthy, rustic charm with its distinctive natural holes and warm tones. Both stones, when properly installed and maintained, provide a durable and stunning surface that enhances any bathroom design. Imagine stepping into a shower clad in the rich textures of travertine or the sophisticated swirls of marble – it’s an experience of pure indulgence.
Why Natural Stone is a Superior Choice
Beyond its undeniable beauty, natural stone stands out for its durability and longevity. Unlike ceramic or porcelain tiles, natural stone is a product of the earth, formed under immense pressure and heat. This makes it incredibly resilient, capable of withstanding daily wear and tear with remarkable grace. For wet areas like showers, stones such as granite and slate offer excellent durability and slip resistance. Choosing natural stone means opting for a material that is not only beautiful but also built to last, offering a sustainable and eco-friendly option for your home.
Assessing Stone Durability for Wet Areas
Not all natural stones are created equal, especially when it comes to the high-moisture environment of a shower. While marble offers unparalleled elegance, it can be more susceptible to etching from acidic substances. Stones like granite and slate are known for their robust durability and resistance to water and stains, making them excellent choices for shower floors and walls. Travertine, while beautiful, is porous and requires diligent sealing to protect against moisture and staining. Understanding these properties helps you select the best stone for your specific needs, ensuring a beautiful and functional shower for years to come.
Understanding Stone Finishes and Edges
The finish and edge profile of your natural stone tiles play a significant role in both the aesthetic and practical aspects of your shower. A polished finish offers a sleek, reflective surface, while a honed finish provides a softer, matte appearance. Tumbled finishes add a rustic, aged look, and brushed finishes offer subtle texture. For edges, straight-cut edges create a clean, modern look, while beveled edges can ease installation. Chiseled edges lend a raw, natural feel. Considering these details ensures your chosen stone not only looks stunning but also performs optimally in a wet environment.
The Unique Character of Each Stone
One of the most compelling aspects of natural stone is its inherent uniqueness. No two tiles are exactly alike. Each piece tells a story, shaped by geological processes over millions of years. This means your shower will be a one-of-a-kind creation, a testament to nature's artistry. Whether it's the subtle veining in marble or the natural pitting in travertine, these variations are not flaws but features that add depth and character to your design. It’s this individuality that makes natural stone such a sought-after material for those who appreciate true authenticity.
Considering Stone Origins and Quality
The origin and quality of your natural stone can significantly impact its appearance, durability, and even its price. Stones quarried from different regions may exhibit distinct color palettes and patterns. High-quality natural stone is characterized by consistent color, minimal flaws, and a well-executed finish. Reputable suppliers will provide information about the stone's origin and ensure it meets high standards for durability and beauty. When you buy natural stone tiles, looking for indicators of quality and understanding the stone's background ensures you're making a wise investment for your home.
Preparing for your natural stone shower installation
Getting ready for your natural stone shower installation is more than just picking out beautiful tiles; it's about building a solid foundation for lasting beauty. Think of it like preparing a canvas before an artist begins. A little extra attention now saves a lot of headaches later. We want your shower to look stunning and stand the test of time, and that starts with the right prep work.
Ensuring a Solid, Level Substrate is Crucial
Your natural stone tiles, whether you've decided to buy marble tiles online USA or opted for something else, need a perfectly flat and stable base. Uneven surfaces can lead to cracked tiles and a shower that just doesn't feel right underfoot. We always recommend checking your subfloor or wall substrate thoroughly. It needs to be clean, dry, and completely level. Any old adhesive, dust, or grease needs to go. If you're working with a floor, a self-leveling compound can be a lifesaver. For wood subfloors, proper underlayment like cement backer board or an uncoupling membrane is a must. This step is non-negotiable for a professional, long-lasting finish.
Checking Material Compatibility for Stone
Not all setting materials play nicely with natural stone. It's super important to use products specifically rated for stone. For instance, avoid premixed mastic adhesives; they just aren't up to the task. Instead, grab a high-quality thin-set mortar made for natural stone. If you're working with lighter colored stones, like some beautiful Carrara marble, definitely opt for a white thin-set mortar. Gray mortar can sometimes show through, giving your light tiles a dingy look. Always read the manufacturer's instructions – they know their products best and how they'll interact with your chosen stone.
Choosing the Right Thin-Set Mortar
This is where the magic happens, or where it can go wrong if you pick the wrong stuff. For natural stone, especially marble and travertine, you need a thin-set mortar that offers excellent adhesion and flexibility. We suggest using a high-quality thin-set specifically formulated for natural stone. This ensures a strong bond that can handle the unique properties of stone. Remember, the right mortar is key to preventing tiles from loosening or cracking down the line.
The Importance of White Thin-Set for Light Stone
We touched on this, but it bears repeating. If your heart is set on those gorgeous light-colored marble tiles, using white thin-set mortar is a game-changer. Gray mortar can sometimes be a bit translucent, and that gray hue can seep through, dulling the pristine white or creamy tones of your stone. White thin-set keeps your light stones looking bright and true to their natural color. It’s a small detail that makes a big visual difference.
Preparing the Subfloor for Stone Tiles
Think of your subfloor as the foundation of your entire shower. It needs to be rock solid. We're talking clean, dry, and perfectly flat. Any dips or bumps can cause your stone tiles to crack under pressure. If you're installing over concrete, a crack-isolation membrane is a smart move to prevent any substrate cracks from showing up on your beautiful stone surface. For wooden subfloors, a sturdy cement backer board or an uncoupling membrane is your best friend. This preparation is what separates a good installation from a great one.
Using Underlayment and Membranes
Underlayment and membranes aren't just fancy words; they're your shower's protective shield. They help with waterproofing, crack isolation, and sound dampening. For natural stone, especially in a wet environment like a shower, these layers are vital. They provide an extra barrier against moisture and help prevent the stone from cracking due to substrate movement. It’s an investment in the longevity and integrity of your beautiful stone shower.
Acclimating Your Natural Stone Tiles
Natural stone, like any material, needs time to adjust to its new environment. Before you even think about mixing mortar, let your tiles sit in the room where they'll be installed for at least 48 hours. This allows them to acclimate to the room's temperature and humidity. This simple step helps prevent issues like expansion or contraction after installation, which can lead to cracks or uneven surfaces. It’s a small step that shows you’re treating your natural stone with the respect it deserves.
Case Study: The Miller Residence Shower Renovation
When the Miller family decided to renovate their master bathroom, they fell in love with a stunning white marble tile. They were eager to get started, but their contractor insisted on a thorough preparation phase. This included meticulously leveling the existing concrete subfloor, which had some minor imperfections, and installing a high-quality waterproofing membrane. They also ensured they used a white thin-set mortar specifically designed for marble. The result? A breathtakingly beautiful and perfectly flat marble shower that has held up flawlessly for over two years, with no signs of cracking or discoloration. Their contractor often says, "The prep work is the unsung hero of any natural stone project."
Proper preparation is the bedrock of a successful natural stone shower installation. Taking the time to ensure a solid, level substrate, using compatible materials, and allowing tiles to acclimate will pay dividends in the long run, resulting in a shower that is as durable as it is beautiful.
Planning your natural stone shower layout
Before you even think about mixing mortar, take a moment to plan. A well-thought-out layout is the foundation of a stunning and functional natural stone shower. This isn't just about aesthetics; it's about making the installation process smoother and ensuring the final result looks professional. Let's get this right from the start.
Dry Laying Tiles for Pattern Visualization
This is your chance to see your vision come to life before committing. Lay out your chosen natural stone tiles on a flat surface, like your bathroom floor. This step is key for understanding how the natural variations in color and veining will play together. You can experiment with different arrangements, ensuring a pleasing flow and avoiding any awkward color clusters. It’s also the perfect time to check for any tile imperfections. If you're considering buy marble tiles online USA, this is where you confirm your selection looks as good in person as it did on screen.
Marking Guidelines for Precise Placement
Once you're happy with your dry layout, it's time to transfer that plan to your shower walls. Use a chalk line or a laser level to create precise guidelines. Starting from the center of your main shower wall and working outwards is a common and effective method. This ensures that your tiles are straight and evenly spaced, preventing a lopsided look. Think of these lines as your roadmap to a perfect installation.
Calculating the Square Footage Needed
Don't guess your tile needs – measure! Accurately calculate the square footage of your shower walls and floor. Always add an extra 10-15% for cuts, potential breakage, and future repairs. Running out of tiles mid-project is a common headache, and finding an exact match later can be tricky due to natural stone's inherent variations. Better to have a little extra than not enough.
Planning for Cuts and Edge Treatments
Showers are rarely perfect rectangles. You'll have corners, curves, and fixtures to work around. Plan where your cuts will fall. Ideally, you want to hide cut edges against walls or behind fixtures. Consider your edge profiles too – a straight cut offers a clean look, while a beveled edge can make installation easier. If you're using a wet saw, practice on a few scrap pieces first to get a feel for it. Cutting stone tiles requires patience.
Considering Tile Spacers for Consistent Joints
Consistent grout lines are vital for a polished look, especially with natural stone. Tile spacers are your best friend here. They ensure uniform gaps between each tile, allowing for proper grout application and preventing tiles from shifting during installation. The size of the spacer will dictate your grout line width, so choose wisely based on the look you want. For many natural stone installations, tight joints around 1/16–1/8 inch are preferred.
Designing with Mosaic Patterns
Ready to add some flair? Mosaic patterns can transform a simple shower into a work of art. Think about using travertine mosaic tiles for a warm, textured feel, or perhaps a classic herringbone pattern. Mosaics are fantastic for shower floors, offering both visual interest and improved slip resistance. They can also be used as decorative accents on walls or to create stunning niche designs. Travertine mosaic designs can add a unique touch.
Incorporating Niche Designs
Shower niches are both practical and stylish. Plan their placement and size carefully. Will it hold shampoo bottles, or is it more for decorative items? Consider how the niche will integrate with your tile layout. Custom-made natural stone niches can perfectly match your shower tiles, creating a cohesive and luxurious look. These built-in features add a spa-like feel to your bathroom. Custom shampoo niches can be a great addition.
Case Study: The Miller Residence Shower Renovation
When the Miller family decided to renovate their master bathroom, they opted for a stunning Carrara marble shower. The initial plan involved a simple subway tile layout. However, during the dry-lay phase, they noticed a few tiles with particularly strong veining. By strategically repositioning these tiles and planning their cuts carefully around the shower valve and niche, they were able to create a focal point with the veining, making the shower look far more high-end than a standard installation. They also decided to incorporate a small mosaic tile border at the base of the shower floor for added texture and slip resistance, a decision made during the layout planning stage that significantly improved the final aesthetic.
Applying adhesive for your natural stone shower
Mixing thin-set mortar correctly
Getting the adhesive right is key. You're working with beautiful, often porous natural stone, so the right mix makes all the difference. Always follow the manufacturer's instructions precisely. Too wet, and it won't hold; too dry, and it'll be difficult to work with and won't bond properly. Aim for a peanut butter consistency – thick enough to hold its shape on the trowel but still spreadable. This ensures a strong, lasting bond for your marble tiles or travertine shower walls.
Using the notched trowel effectively
This is where the magic happens. Use a notched trowel that's appropriate for your tile size. For most natural stone tiles, a 1/4-inch or 1/2-inch notch is standard. Hold the trowel at a consistent 45-degree angle to the surface. This creates uniform ridges in the mortar, which are vital for proper adhesion and air release. Think of it as creating channels for the stone to grip onto. A consistent trowel angle means consistent coverage, which is exactly what you want for a durable shower installation.
Spreading mortar in manageable sections
Don't get ahead of yourself. Natural stone adhesive, or thin-set mortar, has an open time – the period it remains workable before it starts to skin over. You don't want it drying out before you can set your tiles. Work in small, manageable sections, usually about 2 to 3 square feet at a time. This allows you to apply the mortar, comb it with the trowel, and set your tiles before the adhesive loses its tackiness. This methodical approach is critical for a successful tile job.
Achieving proper mortar coverage
This is non-negotiable for natural stone. You need full mortar coverage on the back of every single tile. This means at least 95% adhesion for standard installations, and 100% for wet areas like showers. The ridges created by the notched trowel, combined with a slight wiggle of the tile as you set it, help achieve this. Periodically lift a recently set tile to check for coverage. If you see significant gaps, you need to adjust your technique or trowel size. Proper coverage prevents water from seeping behind the tiles, which can lead to bigger problems down the line.
Ensuring full bond with a slight wiggle
Once you've spread the mortar and placed a tile, don't just press it down. Give it a gentle twist or wiggle. This action helps collapse the mortar ridges, spread the adhesive evenly across the entire back of the tile, and push out any trapped air. It’s this simple step that truly guarantees a full, solid bond between your beautiful stone and the substrate. It’s a small effort for a huge gain in durability.
Checking for hollow spots under tiles
This is part of ensuring that full bond. After setting a tile and giving it that wiggle, it’s a good idea to tap it gently with a rubber mallet or the handle of your trowel. Listen for a solid sound. A hollow or drum-like sound often indicates a void underneath – a hollow spot. These spots are weak points where water can collect, and they increase the risk of the tile cracking later. Address any hollow spots immediately by lifting the tile, removing excess mortar, and resetting it.
The role of leveling clips for large tiles
If you're working with larger format natural stone tiles, like big marble slabs or generous travertine pieces, leveling clips are your best friend. These small plastic devices help ensure that the edges of adjacent tiles sit perfectly flush with each other. This prevents
Setting natural stone shower tiles with precision
Pressing Tiles Firmly into the Mortar
This is where your careful planning pays off. You've got your thin-set mixed just right, and you're ready to lay those beautiful stone tiles. Press each tile firmly into the mortar with a slight wiggle. This action is key to achieving full coverage and a strong bond. It helps eliminate any air pockets, which can lead to problems down the line. Think of it as giving each tile a secure handshake with its new home. We want that mortar to grab hold, creating a bond that lasts. If you're working with larger tiles, like those stunning buy marble tiles online USA you might have picked out, this step is even more important. A good wiggle ensures the entire back of the tile is making contact.
Using Tile Spacers for Uniform Grout Lines
Consistency is everything in a beautiful tile installation. That's where tile spacers come in. These small but mighty tools are your best friend for maintaining even grout lines. Slide them into the gaps between your tiles as you set them. This keeps everything looking neat and professional. Whether you're going for a tight, modern look or a more traditional spacing, spacers ensure uniformity. They prevent tiles from shifting as the mortar cures, giving you a clean, predictable pattern. For marble and travertine, consistent joints really let the natural beauty of the stone shine through without distraction.
Checking for Level Installation Regularly
Lippage – that's when one tile edge sits higher than another – is the enemy of a smooth shower floor and walls. You need to check for level installation regularly. Use a good quality level across multiple tiles. If you notice a tile is too high or too low, now is the time to adjust. A gentle tap with a rubber mallet can help settle a high tile. If a tile is too low, you might need to lift it, add a bit more mortar, and reset it. This attention to detail prevents tripping hazards and creates a visually pleasing, flat surface. It’s a bit of extra work, but the result is a shower that looks and feels professionally done.
Adjusting Tiles with a Rubber Mallet
Sometimes, a tile just needs a little nudge. That's where a rubber mallet is invaluable. After pressing a tile into the mortar, use the mallet to gently tap it into place. This helps to fully embed the tile and level it with its neighbors. It's a controlled way to make minor adjustments without damaging the stone. Remember, natural stone can be beautiful but also a bit delicate, so always use a rubber mallet and a light touch. You're aiming for perfection, not brute force.
Working in Sections for Optimal Results
Don't try to tackle the whole shower at once. Natural stone tiles and thin-set mortar have a working time. Spread the mortar in manageable sections, just enough to set a few tiles before the mortar starts to skin over. This ensures you have enough time to properly set each tile and achieve that full bond. Working in sections also helps you maintain focus and accuracy. It's a methodical process that leads to a much better outcome. For a shower, this might mean working on one wall at a time, or even just a portion of a wall, depending on the size and complexity.
Allowing Mortar to Cure Fully
Patience is a virtue, especially in tile installation. Once your tiles are set, you need to let the mortar cure completely. This typically takes 24 to 48 hours, but always check the manufacturer's recommendations for your specific thin-set. Trying to grout or walk on the tiles too soon can dislodge them or cause unevenness. This curing period is critical for the structural integrity of your shower. It allows the mortar to harden and create a solid foundation for the next steps, like grouting and sealing. This is a key step in the marble shower installation workflow.
Understanding Nominal Tile Sizes
It's important to know that natural stone tiles, especially those with tumbled or chiseled edges, might have slight variations in their actual dimensions compared to their nominal size. Nominal size is the general size designation (e.g., 12x12 inches), while the actual size might be slightly different. This is part of the natural charm and character of stone. When planning your layout and calculating cuts, keep this in mind. It's why using spacers and checking for levelness regularly is so important – it helps accommodate these natural variations for a beautiful, cohesive finish. Always refer to the manufacturer's specifications for precise details on your chosen stone.
Case Study: The Miller Residence Shower Renovation
The Millers wanted to update their master bathroom with a luxurious marble shower. They chose a beautiful Carrara marble tile. Initially, they were concerned about achieving a perfectly level surface due to the natural variations in marble. By carefully following the steps of pressing tiles firmly into the mortar with a slight wiggle and regularly checking for level installation with a rubber mallet, they achieved a flawless finish. They worked in small sections, allowing the mortar to cure fully before moving to the next area. The result was a stunning, spa-like shower that exceeded their expectations, proving that precision in setting tiles is paramount.
Cutting natural stone tiles for a perfect fit
Achieving those clean, precise edges on your natural stone shower tiles is more than just a step; it's an art. When you're working with beautiful materials like marble or travertine, you want every cut to be as flawless as the stone itself. This is where the right tools and a steady hand make all the difference. Rushing this process is a common mistake that can lead to chipped edges or even cracked tiles, and nobody wants that. We're talking about creating a shower that looks and feels custom-made, and that starts with meticulous cutting.
Using a wet saw with a diamond blade
A wet saw is your best friend for cutting natural stone. It uses a continuous water stream to cool the blade and keep dust down, which is a big deal for both safety and the quality of the cut. The diamond blade is what actually does the work, slicing through the stone cleanly. Make sure your blade is sharp and designed specifically for stone. A dull blade will struggle, leading to rough cuts and potential damage to your tile. Think of it like using a sharp knife versus a dull one – the sharp knife makes the job easy and clean.
Selecting the right blade for stone
Not all diamond blades are created equal. For natural stone, you'll want a blade that's designed for the hardness and density of materials like marble, granite, or travertine. Some blades are better for general tile, but for the unique composition of natural stone, a specialized blade is a must. This ensures a smoother cut and reduces the risk of chipping, which is especially important for those visible edges. If you're unsure, ask your supplier for a recommendation – they can help you find the perfect match for the stone you've chosen. You can even find custom-cut marble tiles if you're looking for something truly unique.
Cutting slowly and steadily to prevent chips
This is where patience pays off. When you're cutting, let the saw do the work. Don't force the tile through the blade. Guide it gently and steadily. The water from the wet saw helps lubricate the cut, and the diamond blade is designed to grind through the stone. Pushing too hard can cause the blade to bind, leading to chips, cracks, or even shattering the tile. It’s a bit like slicing a delicate piece of food – you want a smooth, controlled motion. Remember, you can always cut more, but you can't add stone back once it's cut too short.
Ensuring the saw's water feed is functional
This might sound obvious, but it's critical. The water feed on your wet saw isn't just about dust suppression; it's also about cooling the blade. A hot blade wears out faster and is more prone to chipping the stone. Before you start cutting, double-check that the water pump is working and that water is flowing correctly over the blade. Keep an eye on the water level during longer cutting sessions. This simple step protects your blade and guarantees a cleaner cut on your beautiful stone.
Wearing proper safety protection
Safety first, always. When you're cutting stone, you're dealing with sharp edges, flying debris, and potentially water. You absolutely need to wear safety glasses or goggles to protect your eyes. Gloves are also a good idea to protect your hands from sharp edges and the water. If you're concerned about dust, even with a wet saw, a mask is a wise precaution. Think of it as preparing for any DIY project – the right gear keeps you safe and lets you focus on the task at hand.
Hiding cut edges where possible
Smart design means planning your cuts so they're not the focal point. Whenever you can, position cut edges against walls, in corners, or behind fixtures. This not only looks cleaner but also means you don't have to worry as much about achieving a perfectly polished edge. For example, when tiling a shower niche, the cut edges of the tiles inside the niche might be hidden by the shampoo bottles. Planning your layout with cuts in mind can save you a lot of work and make the finished product look more professional.
Sanding or polishing exposed cut edges
Sometimes, a cut edge is unavoidable and will be visible. In these cases, you'll want to smooth it out. You can use sandpaper or a polishing pad designed for stone. Start with a coarser grit and gradually move to finer grits to achieve a smooth, finished look. This step takes your installation from good to great, showing attention to detail. It’s these little touches that really make a natural stone shower shine. If you're looking for custom-cut pieces, we can help with that too.
Case Study: The Bathroom Refresh
Sarah wanted to update her master bathroom with a luxurious marble shower. She had picked out stunning Carrara marble tiles, but the shower had several awkward angles and small spaces that required precise cuts. Initially, she considered trying to cut them herself but worried about damaging the expensive marble. She decided to buy her marble tiles online from a reputable supplier and then hired a local tile installer who specialized in natural stone. The installer used a high-quality wet saw with the correct diamond blade and took his time on each cut. He strategically placed cuts where they would be least visible, often against the shower curb or behind the showerhead. For the exposed edges on the shower bench, he carefully sanded and polished them to a smooth finish. The result was a breathtaking shower that looked like it was professionally designed, with every tile fitting perfectly.
Grouting your natural stone shower tiles
Allowing Adhesive to Cure Completely
Before you even think about grout, give your thin-set mortar ample time to cure. This isn't the time to rush. Proper curing ensures a solid foundation for your grout and prevents future issues. Most manufacturers recommend at least 24 to 48 hours, but always check the product details. This waiting period is vital for the integrity of your entire shower installation.
Mixing Grout According to Instructions
Choosing the right grout is key for natural stone. For wider joints, sanded grout is often the go-to. However, it's always a smart move to test it on a spare tile first to make sure it plays nicely with your stone. Mixing grout can seem straightforward, but follow the manufacturer's directions precisely. Too much water weakens the grout, while too little makes it unworkable. Aim for a consistency like peanut butter – smooth and spreadable.
Applying Grout Diagonally with a Float
Now for the application. Grab your grout float and apply the grout mixture. The trick here is to work diagonally across the tiles. This motion helps push the grout deep into the joints, filling them completely. Don't be shy; you want those gaps packed tight. This step is where you really seal the deal, protecting the stone from moisture.
Filling Grout Joints Thoroughly
As you work with the float, pay close attention to filling every single joint. You don't want any voids or low spots. Think of it as sealing your stone's perimeter. A well-filled grout line is your first line of defense against water penetration. If you're looking for beautiful marble tiles for your shower, remember that proper grouting is just as important as the tile itself.
Removing Excess Grout with the Float
Once the joints are filled, use the edge of your grout float to scrape off the excess grout. Again, keep that float at an angle and move diagonally. This helps remove the bulk of the excess without pulling grout out of the joints you just meticulously filled. It’s a balancing act, but with a little practice, you’ll get the hang of it.
Cleaning Tiles with a Damp Sponge
This is where the magic starts to appear. Take a damp (not soaking wet!) sponge and gently wipe the tile surfaces. Work in a large, sweeping motion. The goal is to remove the grout haze from the tile faces, revealing the beautiful stone underneath. Be careful not to dig into the grout lines themselves – you're just cleaning the tile surface.
Rinsing the Sponge Frequently
This step is non-negotiable for a clean finish. Rinse your sponge in a separate bucket of clean water very frequently. A dirty sponge will just spread grout residue around, making your job harder and leaving a cloudy finish. Change the rinse water often. This attention to detail makes a huge difference in the final look. If you're installing something like travertine, which has natural pits, this cleaning step is especially important to keep those areas clean.
Case Study: The Miller Residence Shower
The Millers wanted a spa-like bathroom featuring Carrara marble. They meticulously followed the grouting steps, using a high-quality, color-matched grout. They allowed the adhesive to cure for the full 48 hours, mixed the grout to the perfect consistency, and applied it diagonally. Their patience during the cleaning phase, rinsing their sponge after every few passes, paid off. The result? A stunning, seamless marble shower that looked professionally installed, proving that attention to detail in grouting truly transforms the space.
Remember, the grout is not just a filler; it's an integral part of your natural stone shower's waterproofing and aesthetic. Take your time and do it right.
Sealing your natural stone shower for protection
After all that hard work installing your beautiful natural stone shower, it’s time for the final, critical step: sealing. Think of sealing as giving your stone a protective shield. It’s not just about making it look good; it’s about keeping it that way for years to come. Without proper sealing, your gorgeous marble or travertine tiles could be vulnerable to stains and water damage. We want to keep that shower looking pristine, right?
Allowing grout to cure before sealing
This is super important. You can’t just slap sealer on right after grouting. The grout needs time to fully cure. This usually takes about 48 to 72 hours, but always check the grout manufacturer’s instructions. Trying to seal too early can trap moisture, which isn't good for anything, especially not your new shower.
Choosing the right stone sealer
Not all sealers are created equal. You need one specifically designed for natural stone. There are penetrating sealers that soak into the stone and protect it from within, and topical sealers that form a protective layer on the surface. For showers, a good quality penetrating sealer is usually the way to go. It won’t change the look of your stone too much and offers great protection. If you're looking for marble tiles, remember to pick a sealer that works well with marble.
Understanding sealer color enhancement options
Some sealers can actually deepen the color of your stone, giving it a richer, more 'wet' look. This can be really nice for darker stones or if you want to make those natural veins pop. However, if you love the exact color your stone is right now, don't worry! There are also clear sealers that won't alter the color at all. It’s all about personal preference and the look you’re going for.
Applying sealer according to manufacturer's instructions
Seriously, read the can. Every sealer is a little different. Most involve applying it with a clean cloth or applicator, letting it soak in for a bit, and then wiping off any excess. You might need a second coat. Work in small sections to make sure you don't miss any spots. It’s not complicated, but paying attention to the details makes all the difference.
Ensuring proper curing time for the sealer
Just like the grout, the sealer needs time to cure properly. This is when it really hardens and becomes effective. Again, check the product label. It might take 24 hours or more. During this time, try to keep the shower dry. This allows the sealer to do its job without interruption.
The importance of sealing for stain resistance
This is where the magic happens. Natural stone, especially porous types like travertine, can easily absorb spills. Think toothpaste, soap scum, or even shampoo. A good sealer acts as a barrier, preventing these liquids from soaking into the stone and causing stains. It makes cleaning so much easier down the line. Case Study: Sarah, a homeowner in Austin, TX, installed beautiful travertine tiles in her shower. Initially, she skipped sealing, thinking it was an unnecessary step. Within months, she noticed dark spots from soap and shampoo. After a professional cleaning and proper sealing, her travertine looked like new again and stayed that way with regular maintenance.
Determining sealing frequency
How often do you need to reseal? It really depends on how much you use the shower and what products you use in it. Generally, once a year is a good rule of thumb for a shower. You can test if it’s time to reseal by dripping a little water on the stone. If it beads up, you’re good. If it soaks in and darkens the stone, it’s time to reseal. Don't forget to check out our travertine tiles collection for more ideas on beautiful, durable stone options.
Finalizing your natural stone shower installation
Performing a Final Cleaning After Sealing
Your natural stone shower is almost ready! A final, thorough cleaning is the last step before you can truly enjoy your beautiful new space. This isn't just about making it look good; it's about removing any lingering installation dust, residue from sealers, or stray smudges. A clean finish makes all the difference, highlighting the natural beauty of your stone. We recommend using a pH-neutral cleaner specifically designed for natural stone. This ensures you don't damage the stone or grout while getting it sparkling clean. For those looking to buy marble tiles online in the USA, ensuring a pristine finish after installation is key to showcasing their elegance.
Removing Any Residual Sealer or Dirt
After the sealing process, it's common to have a slight haze or residue left on the tile surfaces. This is especially true if any sealer dripped or wasn't wiped up immediately. Gently wipe down all surfaces with a clean, damp cloth. For tougher spots, a bit of your pH-neutral stone cleaner can help. Make sure to get into the corners and edges where dust can settle. This attention to detail is what separates a good installation from a great one.
Inspecting Tiles and Grout Lines for Imperfections
Now, take a close look. Walk around your shower and examine every tile and grout line. Are there any chips you missed? Any grout that didn't fill properly? Any tiles that seem uneven? This is your chance to catch any minor issues before they become bigger problems. A quick inspection now can save you a lot of hassle down the line. Remember, natural stone is unique, and sometimes small variations are part of its charm, but significant flaws should be addressed.
Making Necessary Repairs for a Flawless Finish
If you found any imperfections during your inspection, now's the time to fix them. Small chips can sometimes be repaired with stone epoxy. Grout lines that are uneven or have holes can be touched up. If you're unsure about making repairs yourself, it's always best to consult with a professional installer. A flawless finish is the goal, and these final touches ensure your shower looks professionally done. For example, a client in Austin, Texas, had a small chip on a travertine tile near the floor; a quick epoxy fill made it disappear, saving them from replacing the whole tile.
Ensuring All Tools Are Clean
Before you pack up, give all your tools a good cleaning. Mortar and grout can harden and become difficult to remove if left on tools. Cleaning them now will ensure they're ready for your next project. This simple step prolongs the life of your tools and keeps them in good working order. It’s a small detail, but it shows professionalism.
Following Manufacturer Instructions for All Materials
We've mentioned this throughout the process, but it bears repeating: always follow the manufacturer's instructions for every product you used – the thin-set, the grout, and especially the sealer. Each product has specific curing times, application methods, and care requirements. Adhering to these guidelines is vital for the longevity and performance of your natural stone shower. For instance, improper sealing can lead to staining, which is why sealing grout lines effectively is so important.
Wearing Safety Equipment Throughout the Process
Safety first, always! Even during the final stages, make sure you're still using appropriate safety gear. This includes gloves to protect your hands from cleaning solutions and possibly safety glasses if you're doing any minor touch-ups. A safe installation is a successful installation. It's a good habit to maintain from start to finish.
Maintaining the beauty of your natural stone shower
Your natural stone shower is a statement of luxury and enduring style. To keep it looking its best, a little regular care goes a long way. Think of it as pampering your investment. We're talking about preserving that unique character and timeless appeal that only natural stone can offer.
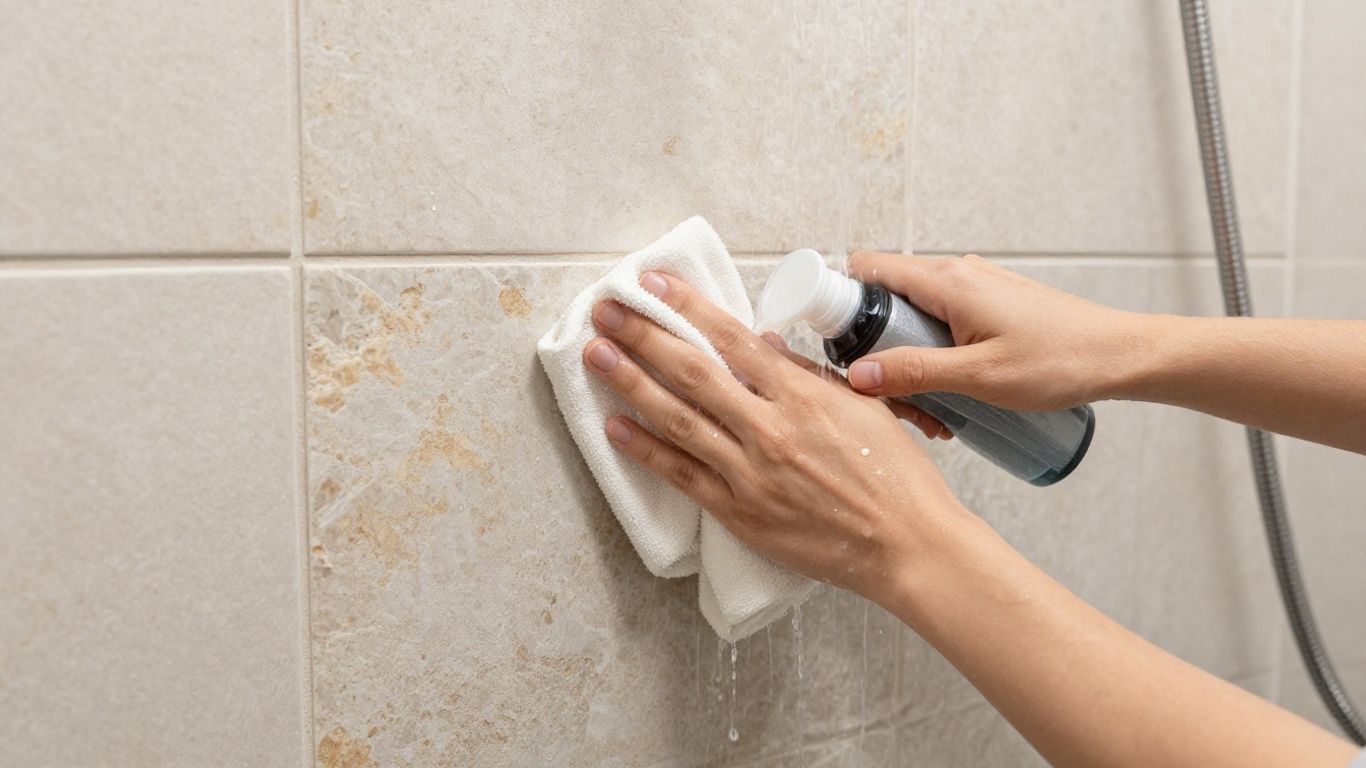
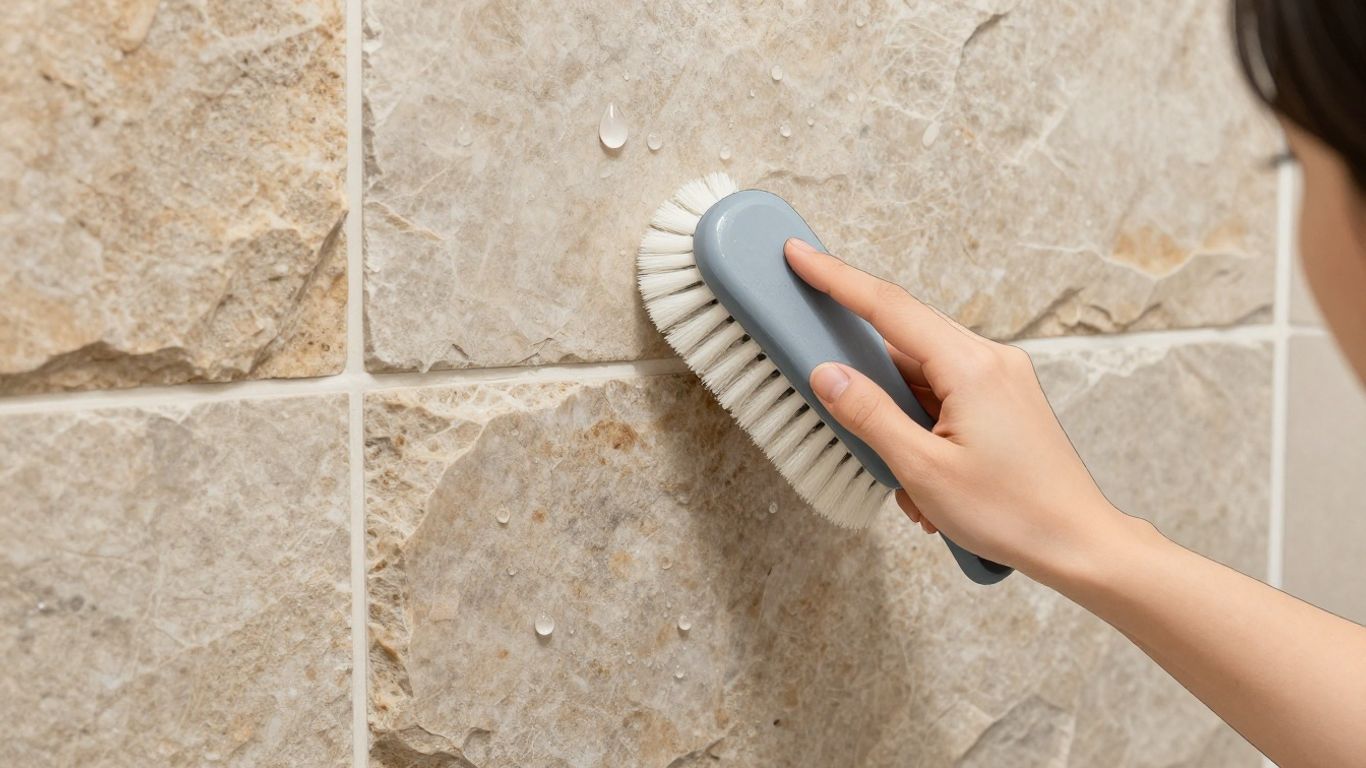
Regular Cleaning with pH-Neutral Cleaners
Daily upkeep is your first line of defense. For routine cleaning, stick to products specifically designed for natural stone. A pH-neutral cleaner is your best friend here. It gets the job done without stripping away the stone's natural seal or causing damage. Spray it on, let it sit for a few minutes to work its magic, and then gently scrub with a soft brush. This simple step prevents buildup and keeps your stone looking fresh. For those looking to buy marble tiles online in the USA, remember that proper care is key to their longevity.
Promptly Wipe Up Spills to Prevent Stains
Natural stone, especially materials like marble and travertine, can be porous. This means spills, if left unattended, can seep in and cause stains. Wipe up any water or product spills immediately. This is especially important for colored liquids. A quick wipe-down after each use can make a huge difference in preventing permanent marks.
Avoid Harsh Chemicals and Acidic Cleaners
This is a big one. Harsh chemicals, abrasive cleaners, and anything acidic (like vinegar or lemon-based products) can etch and dull your natural stone. They can break down the sealant and even damage the stone itself. Always check the label of your cleaning products. If it says 'acidic' or 'abrasive,' put it back on the shelf. Sticking to gentle, stone-specific cleaners is the safest bet for maintaining that beautiful finish.
Understanding the Maintenance Needs of Your Stone
Different stones have different personalities. Marble, for instance, is softer and more prone to etching than granite. Travertine has natural pits that might need occasional filling. Knowing your specific stone type is half the battle. For example, if you've chosen elegant marble for your shower, you'll want to be extra mindful of its maintenance requirements. We offer a wide range of natural stones, including premium marble and travertine, each with its own care guide to help you buy marble tiles online USA.
Re-sealing Your Shower as Needed
Sealing is vital for protecting your natural stone from stains and moisture. Over time, the sealant can wear down, especially in a high-moisture environment like a shower. How often you need to re-seal depends on the type of stone and how much it's used, but typically, once a year is a good starting point. A simple water test can tell you if it's time: if water beads up on the surface, your seal is good; if it soaks in, it's time to re-apply. This is a critical step for stain resistance.
The Benefits of Professional Cleaning
While regular DIY maintenance is effective, sometimes your shower might need a deeper clean. Professional stone cleaners have specialized tools and knowledge to tackle tough stains, grout discoloration, or dullness without damaging your stone. They can also assess the condition of your sealant and advise on the best course of action. Think of it as a spa day for your shower!
Keeping Your Shower Looking Its Best
Ultimately, maintaining your natural stone shower is about consistency. By following these simple steps – using the right cleaners, being mindful of spills, and re-sealing when necessary – you'll preserve the stunning beauty and integrity of your stone for years to come. It’s an investment in your home's aesthetic and value. For instance, a well-maintained marble shower can significantly boost a home's appeal, making it a worthwhile endeavor for any homeowner.
Case Study: The Miller Residence
The Millers installed a beautiful travertine shower last year. Initially, they were worried about maintenance, but by following a simple routine of weekly cleaning with a pH-neutral spray and re-sealing every 8-10 months, their shower still looks as good as new. They found that promptly wiping down any soap scum buildup prevented any hard water spots from forming, keeping the grout lines clean and the travertine looking warm and inviting. They even shared that a small red wine spill was easily wiped up before it could stain, thanks to their quick action.
Case Study: Sarah's Marble Oasis
Sarah opted for a luxurious white marble shower. She was diligent about using only marble-specific cleaners and avoided any acidic products. She noticed that after about 10 months, water started to soak into the marble rather than bead up. She purchased a quality stone sealer and followed the manufacturer's instructions for application. After sealing, the marble regained its rich luster, and water once again beaded on the surface, giving her peace of mind that her investment was protected. She mentioned, "It felt like giving my shower a fresh coat of protection, and the difference was immediate." Understanding sealer color enhancement options was key for her to maintain the marble's bright white appearance.
Choosing the right natural stone for your shower
Selecting the perfect natural stone for your shower is a big decision. It's not just about looks; it's about finding a material that can handle the moisture, last for years, and fit your style. Let's break down what you need to consider.
Assessing Durability for Wet Environments
Showers are, well, wet. So, durability is key. Some stones handle constant moisture better than others. Granite, for instance, is super tough and resistant to water damage. Slate is also a great choice, known for its durability and natural slip-resistance. You want a stone that won't degrade or stain easily with regular exposure to water and soap.
Considering Slip-Resistance Properties
Safety first! A slippery shower floor is a hazard. Look for stones with a naturally textured or honed finish. Slate and certain types of travertine are excellent for this. A tumbled finish can also add texture and reduce slipperiness. We want your shower to be a sanctuary, not a skating rink.
Evaluating Aesthetic Preferences
This is where the fun begins! Natural stone offers unparalleled beauty. Do you love the classic, luxurious look of marble? Or perhaps the warm, earthy tones of travertine? Maybe the rugged, natural feel of slate? Each stone has its own unique character, veining, and color palette. Think about the overall design of your bathroom and what kind of atmosphere you want to create. For a truly unique look, consider exploring options like buy marble tiles online USA.
Understanding the Maintenance Requirements of Different Stones
Let's be real, some stones need more TLC than others. Marble is gorgeous but can be prone to etching from acidic cleaners or even certain soaps. It requires regular sealing and careful cleaning. Granite is much lower maintenance. Travertine, while beautiful, has natural pits that might need filling and also requires sealing. Be honest about how much time you're willing to dedicate to upkeep.
Marble's Elegance Versus Its Maintenance Needs
Marble is the epitome of luxury. Its veining and polished finish can make any shower feel like a high-end spa. However, its porous nature means it can stain and etch if not properly cared for. If you're set on marble, commit to using pH-neutral cleaners and sealing it regularly. It's a trade-off between ultimate elegance and a bit more hands-on care.
Travertine's Natural Charm and Suitability
Travertine brings a warm, rustic charm that's incredibly inviting. Its natural pits and variations give it a unique character you won't find in manufactured tiles. It's a good option for showers, especially if you opt for a honed or tumbled finish for better grip. Travertine is generally more affordable than marble and offers a beautiful, natural aesthetic. You can find stunning travertine mosaic tiles that add texture and visual interest.
Granite's Robust Durability for Showers
If durability is your absolute top priority, granite is a powerhouse. It's incredibly hard, resistant to scratches, heat, and moisture. This makes it a very practical choice for a shower environment. While often associated with countertops, granite tiles can create a sleek, modern, or even rustic look in a shower, depending on the finish and color. It's a low-maintenance option that stands up to the rigors of daily use.
Case Study: The Miller Residence Shower Renovation
The Millers wanted a spa-like master bathroom. They loved the look of marble but were concerned about maintenance in a high-moisture area. After discussing their needs, we recommended a honed-finish Carrara marble for the walls and a tumbled travertine for the shower floor. The honed marble offered a softer, less slippery surface than polished, while the tumbled travertine provided excellent slip resistance and a warm contrast. They committed to using a specific pH-neutral cleaner and resealing annually. The result? A stunning, luxurious shower that perfectly balances aesthetics and practicality.
Choosing the right stone involves balancing beauty, function, and your lifestyle. Don't be afraid to ask questions and explore different options. The perfect natural stone is out there waiting to transform your shower into a personal oasis.
Exploring different natural stone finishes
Polished Finishes for a Sleek Look
A polished finish is like giving your natural stone a high-gloss makeover. It’s super smooth, reflective, and really makes the colors and patterns pop. Think of it as the red carpet treatment for your stone. It’s perfect for creating a luxurious, modern vibe in your shower. Just imagine light bouncing off a polished marble surface – it’s pure elegance. However, polished stone can be a bit slippery when wet, so it’s something to keep in mind for shower floors. It also shows water spots and fingerprints more easily, meaning it needs a bit more attention to keep it looking its best.
Honed Finishes for a Matte Appearance
If you prefer something a little more understated, a honed finish is your go-to. It’s smooth, but without the shine. This gives the stone a soft, matte look that feels more natural and less formal. Honed finishes are fantastic for shower areas because they offer better slip resistance than polished ones. They also hide minor scratches and water spots better, making them a more practical choice for daily use. It’s a sophisticated look that’s still very livable.
Tumbled Finishes for a Rustic, Aged Feel
Want that old-world charm? A tumbled finish is the way to go. The process involves tumbling the stone with abrasive materials, which softens the edges and gives it a worn, antique look. It’s like the stone has a history. This finish is great for creating a cozy, rustic bathroom atmosphere. The texture adds character, and the softened edges mean it’s generally quite slip-resistant, making it a safe and stylish option for shower floors. It’s a look that never goes out of style.
Brushed Finishes for Subtle Texture
A brushed finish gives the stone a bit of texture without being too rough. It’s achieved by brushing the surface with wire brushes, which creates a slightly uneven, tactile feel. This finish can add depth and visual interest to your shower walls or floors. It’s less slippery than polished and offers a more natural feel underfoot. It’s a great middle ground if you want some texture but not the pronounced look of a tumbled finish.
Split Face for a Natural, Raw Look
For a truly dramatic and natural appearance, consider a split face finish. This is where the stone is split along its natural grain, revealing a rough, quarry-like surface. It’s very textural and adds a strong, organic element to your design. This finish is often used for accent walls or features rather than entire shower floors, as the uneven surface can be challenging to clean. It’s a bold choice that makes a statement.
Understanding How Finishes Affect Maintenance
Each finish has its own maintenance needs. Polished surfaces require regular cleaning with pH-neutral cleaners to maintain their shine and avoid dulling. Honed and tumbled finishes are generally more forgiving with daily use and water spots. Split face finishes might need a bit more attention to keep the textured surfaces clean. No matter the finish, remember that natural stone is porous and benefits from regular sealing to protect against stains and moisture.
Choosing a Finish That Complements Your Design
When selecting a finish, think about the overall style you want for your shower. A polished finish screams modern luxury. A honed or tumbled finish brings warmth and a more relaxed feel. A brushed finish adds subtle texture, while split face offers a bold, natural statement. Consider how the finish will look when wet and how it will feel underfoot. For shower floors, prioritizing slip resistance with honed, tumbled, or brushed finishes is often a wise choice. You can even mix finishes – perhaps a polished marble on the walls and a honed travertine on the floor for a beautiful contrast and practical application. Explore options like buy marble tiles online USA to see how different finishes look in real-world applications.
Understanding natural stone edges and profiles
The edge profile of your natural stone tile might seem like a small detail, but it plays a big role in the overall look and feel of your shower. It's not just about aesthetics; the edge can affect installation and even how the tile holds up over time. Let's look at the options.
Straight Cut Edges for Seamless Installations
This is your go-to for a clean, modern look. Straight cut edges, also called squared edges, are precisely sawn for a sharp, contemporary finish. They create a very tight grout line, almost giving the appearance of a solid slab. This style is perfect if you're aiming for a minimalist or very sleek design. It makes the tile installation look really put together.
Beveled Edges for Easier Installation
Beveled edges have a slight angle cut into them, usually between 15 and 45 degrees. This isn't just for looks; it actually makes installation a bit simpler. The slight angle helps to ease the transition between tiles, reducing the chance of sharp edges meeting awkwardly. It can also make the grout lines appear a bit more forgiving. If you're looking for a practical edge that still looks good, this is a solid choice. You can find these on many types of tiles, including natural stone ones.
Chiseled Edges for a Raw, Natural Look
Want that rustic, old-world charm? A chiseled edge is the way to go. It looks like the stone was just quarried and roughly cut, giving it a very natural, almost unfinished appearance. This style is fantastic for creating a spa-like, organic feel in your shower. It adds a lot of character and texture. Think of it as embracing the raw beauty of the stone. It’s a bold choice that really makes a statement.
Vein Cut for Emphasizing Natural Patterns
When you choose a vein cut, you're highlighting the natural patterns within the stone itself. This method involves sawing the stone along its natural veins, creating a surface with continuous, often straight lines. It really brings out the unique character of materials like marble or travertine. If you appreciate the natural artistry of stone, a vein cut edge can make those patterns pop, giving your shower a sophisticated and dynamic look. It’s a way to let the stone’s natural beauty shine through.
The edge profile you choose can significantly impact the final look and installation process of your natural stone shower.
Here’s a quick comparison:
| Edge Profile | Aesthetic | Installation Benefit |
|---|---|---|
| Straight Cut | Modern, minimalist, clean | Creates tight, uniform grout lines |
| Beveled | Subtle transition, slightly softer look | Eases installation, reduces sharp edge feel |
| Chiseled | Rustic, natural, aged, textured | Adds significant character and visual interest |
| Vein Cut | Emphasizes natural stone patterns, linear | Highlights the stone's inherent beauty |
When you're looking to buy marble tiles online in the USA, consider how these edge profiles will work with your chosen stone and overall design. It's all about the details that make your shower unique.
The benefits of natural stone in your bathroom
Unmatched Durability and Longevity
When you choose natural stone for your shower, you're investing in a material that's built to last. Unlike manufactured tiles, natural stone like granite or marble has stood the test of time for millennia. It's incredibly tough, resisting chips and scratches that can mar other surfaces. This means your shower will look stunning for years, even with daily use. Think about it: ancient structures are still standing today, built with stone. That's the kind of longevity we're talking about for your bathroom.
Timeless Aesthetic and Unique Beauty
Every piece of natural stone is a work of art. No two slabs are exactly alike. You get unique veining, color variations, and textures that simply can't be replicated by man-made materials. This individuality brings a sense of luxury and character to your bathroom that feels truly special. Whether you're drawn to the classic elegance of marble or the rustic charm of travertine, natural stone offers a sophisticated look that never goes out of style. If you're looking to buy marble tiles online in the USA, you'll find a world of unique beauty waiting for you.
Increasing Home Value
Upgrading your bathroom with natural stone isn't just about aesthetics; it's a smart financial move. Homes featuring natural stone elements, especially in key areas like bathrooms and kitchens, are often valued higher by potential buyers. It signals quality, luxury, and good taste. It’s a feature that can really make your property stand out in the market.
Eco-Friendly Building Material
Natural stone is a sustainable choice. It's quarried from the earth and requires minimal processing compared to synthetic alternatives. This means a lower environmental impact from production to installation. Choosing stone is a way to bring the beauty of nature into your home responsibly. It’s a material that’s abundant and doesn’t rely on energy-intensive manufacturing processes.
Natural Resistance to Heat and Moisture
Stone is a champion in wet environments. It naturally handles moisture and heat exceptionally well, making it ideal for shower applications. Unlike some materials that can warp or degrade with humidity, natural stone maintains its integrity. This makes it a practical and beautiful choice for a high-moisture area like a shower. You can trust it to perform beautifully day after day.
Creating a Luxurious Spa-Like Atmosphere
There's something inherently calming and luxurious about natural stone. The cool touch, the subtle patterns, the sheer elegance – it all contributes to a spa-like feel right in your own home. Imagine stepping into your shower and feeling like you're in a high-end retreat. Natural stone tiles can transform a mundane bathroom into a sanctuary of relaxation and beauty. It’s an investment in your daily well-being.
The Tactile and Visual Appeal of Stone
Beyond just looking good, natural stone feels amazing. The smooth, cool surface underfoot or against your hand is a sensory experience that manufactured materials often lack. The visual depth and complexity of the stone's patterns invite you to look closer. It adds a layer of richness to your bathroom that’s both sophisticated and grounding. It’s a material that engages multiple senses, making your bathroom a more enjoyable space.
Case Study: The Miller Residence Bathroom Renovation
The Miller family wanted to update their master bathroom, aiming for a luxurious, spa-like feel that would also increase their home's value. They chose a honed travertine tile for the shower walls and floor. The natural pits and variations in the travertine gave the space a warm, earthy, and sophisticated look. They also opted for a custom marble niche for shampoo and soap storage. The result was a stunning transformation. The natural stone not only looked incredible but also held up beautifully against the daily moisture. The homeowners reported that the bathroom felt significantly more upscale and that potential buyers had specifically commented on the beautiful stone during an open house shortly after the renovation. This project highlighted how natural stone can deliver both aesthetic appeal and tangible value.
Choosing natural stone for your shower is more than just a design decision; it's an investment in lasting beauty, durability, and a touch of everyday luxury. It’s a material that connects your home to the natural world while offering practical benefits that stand the test of time.
Common challenges and solutions in natural stone showers
Preventing water spots and mineral deposits
Water spots and mineral deposits are common annoyances in any shower, but they can be particularly stubborn on natural stone. These marks are left behind when water evaporates, leaving behind dissolved minerals. The best defense is a good offense. Wipe down your shower walls and floor after each use. This simple habit prevents water from sitting and evaporating. For tougher spots, use a soft cloth with a pH-neutral cleaner specifically designed for natural stone. Avoid abrasive scrubbers or harsh chemicals, as these can damage the stone's surface. If you have hard water, consider installing a water softener for your home. This is a long-term solution that benefits all your plumbing fixtures.
Addressing grout discoloration
Grout can be a magnet for soap scum and mildew, leading to unsightly discoloration. Regular cleaning is key here. Use a grout brush and a pH-neutral cleaner to gently scrub the grout lines. For stubborn stains, a paste of baking soda and water can be effective. Always rinse thoroughly. If discoloration persists, it might be time to re-grout. This is a more involved process, but it can completely refresh the look of your shower. Remember, sealing your grout after installation and re-sealing periodically is your best bet against future discoloration.
Dealing with potential etching from acidic substances
Natural stones, especially marble, are susceptible to etching from acidic substances like lemon juice, vinegar, or certain cleaning products. Etching isn't a stain; it's a dulling or roughening of the stone's surface. The golden rule is to clean up spills immediately. If etching does occur, it can be a tricky fix. For minor etching, a marble polishing powder might help restore the shine. For more significant damage, professional restoration might be necessary. This is why choosing a more durable stone like granite for high-use areas, or being extra vigilant with marble, is important. If you're looking to buy marble tiles online in the USA, consider the finish – honed marble is less prone to showing etching than polished marble.
Managing soap scum buildup
Soap scum is another common shower foe. It's a combination of soap residue and mineral deposits. Regular cleaning with a non-acidic, pH-neutral cleaner is the best way to manage it. A soft brush or a microfiber cloth usually does the trick. Avoid using abrasive cleaners or steel wool, as they can scratch the stone. For persistent buildup, a specialized soap scum remover for natural stone can be used, but always test it in an inconspicuous area first. Proper ventilation in your bathroom also helps reduce humidity, which can contribute to soap scum.
Repairing minor chips or cracks
Accidents happen, and small chips or cracks can occur. For minor issues, a color-matched epoxy or stone repair kit can often do the job. These kits usually involve mixing a resin with a colorant to match your stone and then applying it to the damaged area. For larger or more complex repairs, it's best to consult a professional stone restoration specialist. They have the tools and expertise to make the repair virtually invisible. Remember, the quality of the initial installation plays a big role in preventing these issues.
Ensuring proper ventilation to prevent mold
Mold and mildew thrive in damp, poorly ventilated environments. Your shower is a prime candidate! Good ventilation is non-negotiable for natural stone showers. Use an exhaust fan during and after showers to remove moisture. If you don't have a fan, open a window or the bathroom door. Regularly clean grout lines and corners where mold tends to grow. Keeping the shower dry between uses also helps significantly. This prevents not only mold but also helps reduce water spots and soap scum.
The importance of prompt spill cleanup
We've touched on this for etching, but it bears repeating for all types of damage. Natural stone is porous. Spills, whether water, soap, or something more colorful, can penetrate the surface if left unattended. Promptly wiping up any spills with a soft cloth prevents stains and potential damage. This is especially true for colored liquids like wine or juice. For a truly worry-free experience, ensure your stone is properly sealed. A good quality sealer acts as a barrier, giving you more time to clean up messes. If you're considering buying natural stone tiles, remember that proper sealing is part of the long-term care plan.
Case Study: The Etching Incident
Sarah, a homeowner in Arizona, recently installed a beautiful Carrara marble shower. She loved the luxurious look but was dismayed when she noticed dull spots on the floor after a few weeks. She realized she had accidentally spilled some bathroom cleaner containing mild acids. Initially, she tried scrubbing it, which only made it worse. After consulting with a local stone specialist, she learned about etching and the importance of using only pH-neutral cleaners. The specialist was able to polish the marble, restoring its shine, but Sarah now diligently wipes down her shower daily and uses only stone-safe products. This experience taught her the value of understanding her material's needs.
Natural stone shower niche integration
Customizing Niches to Match Your Tile
Want a shower that looks like it came straight from a high-end design magazine? Integrating a natural stone niche is a fantastic way to add both style and function. It’s not just about having a place for your shampoo; it’s about creating a cohesive, luxurious look. We can help you craft niches that perfectly complement your chosen marble tiles or travertine mosaics. Imagine a niche that mirrors the veining of your shower walls – that’s the kind of detail that makes a space truly special. We offer custom-cut natural stone pieces, so your niche will fit your design perfectly.
Choosing the Right Size for Your Needs
Size matters when it comes to shower niches. Too small, and it won't hold your essentials. Too large, and it might overpower the shower space or create structural issues. We help you figure out the ideal dimensions. Standard sizes work well for many, but custom sizing is where the magic happens. Think about what you’ll store: multiple bottles, large containers, or decorative items? We can guide you on selecting the right shower niche sizes and dimensions that balance utility and aesthetics.
Ensuring Proper Waterproofing of the Niche
This is non-negotiable. A beautiful niche is useless if it leads to water damage. Proper waterproofing is key to a long-lasting installation. This involves using the right membranes and sealants around the niche before tiling. It’s a critical step that protects your investment and prevents future headaches. Always prioritize waterproofing for any shower installation.
Seamlessly Integrating Niches into the Shower Wall
Integration is all about making the niche look like it was always meant to be there. This means precise cuts, careful tile placement, and attention to grout lines. When done right, the niche becomes a natural extension of your shower design, not an afterthought. We can help you plan the layout so that cuts are minimized or hidden where possible, creating that smooth, built-in look.
Using Niches for Stylish Organization
Let’s be honest, shower clutter isn’t exactly relaxing. A well-designed niche tames the chaos. It provides a dedicated spot for all your bathing products, keeping your shower floor clear and your surfaces tidy. Think of it as built-in shelving that looks fantastic. You can even use different stone finishes within the niche for a unique touch.
The Aesthetic Appeal of Built-in Niches
Beyond function, niches add architectural interest. They break up flat surfaces and offer opportunities for design flair. Whether you choose a simple rectangular opening or a more complex design, a niche adds depth and sophistication. It’s a design element that speaks to quality and attention to detail. For inspiration, check out how others have used stone in their showers in our customer installations showcase.
Handmade Niches for a Unique Touch
For those seeking something truly special, handmade niches are the way to go. Crafted from 100% natural stone, these pieces offer unparalleled character. They can be customized to match your specific marble or travertine, ensuring a perfect match. These aren't just functional elements; they're works of art that add a bespoke luxury to your bathroom. Many are locally made, supporting craftsmanship and quality.
Case Study: The Spa Retreat
A client wanted to transform their master bathroom into a spa-like sanctuary. They opted for large-format Calacatta Gold marble tiles for the shower walls. We designed and fabricated a custom-sized niche, also in Calacatta Gold, to house their premium toiletries. The niche was precisely integrated, with the marble veining flowing uninterrupted across its edges. Waterproofing was meticulously applied, and the grout lines were kept minimal to highlight the stone. The result was a stunning, cohesive shower that felt both luxurious and incredibly functional, proving that a well-executed niche is a game-changer.
Case Study: The Modern Farmhouse
Another project involved a modern farmhouse aesthetic, using a tumbled travertine for the shower walls and floor. The client requested a niche for practicality. We suggested a niche clad in the same tumbled travertine, but with a slightly darker grout to emphasize the texture. The niche was sized to fit standard shampoo bottles comfortably. The integration was straightforward, and the natural variations in the travertine gave the niche a warm, organic feel that perfectly complemented the rustic charm of the bathroom. This showed how even simple materials can achieve a high-end look with thoughtful integration.
Mosaic patterns for natural stone showers
Ready to add a touch of artistry to your shower? Mosaic patterns in natural stone can transform a functional space into a true design statement. These intricate designs offer a unique way to express your style, bringing texture, color, and visual interest to your shower walls and floors. Think beyond the ordinary; mosaics are your canvas for creativity.
Exploring travertine mosaic designs
Travertine mosaics offer a warm, earthy elegance that’s hard to beat. Their natural variations in color and texture create a rich, inviting look. Whether you prefer the rustic charm of a tumbled finish or the smooth sophistication of a honed one, travertine mosaics bring a timeless appeal. They are incredibly versatile, fitting beautifully into both classic and contemporary bathroom designs. Imagine stepping onto a shower floor crafted from beautiful travertine tiles, each piece telling a story of natural beauty.
Herringbone, hexagon, and subway patterns
These classic patterns get a stunning upgrade when rendered in natural stone mosaics. The herringbone pattern offers a dynamic, V-shaped flow that adds movement and depth. Hexagon mosaics bring a modern, geometric flair, while subway patterns provide a clean, linear look with a sophisticated edge. Each pattern, when executed with natural stone, feels both grounded and luxurious. These are not just tiles; they are elements of design that can completely redefine your shower space.
Using pebble mosaics for texture
For a truly unique and tactile experience, consider pebble mosaics. These mosaics feature smooth, rounded stones that create a natural, spa-like feel underfoot. They are excellent for shower floors, providing a slip-resistant surface that’s also incredibly comfortable. The organic shapes and varied textures of pebble mosaics bring an element of nature directly into your bathroom, creating a serene and grounding atmosphere. It’s like bringing a riverbed into your shower.
Creating unique shower floor designs
Your shower floor is a prime opportunity to make a bold design statement. Mosaic patterns allow for incredible customization. You can mix different stone types, colors, and finishes to create a one-of-a-kind look. Consider a custom pattern that flows from the wall to the floor, or a striking geometric design that acts as a focal point. The possibilities are virtually endless when you work with natural stone mosaics. This is where you can truly let your personal style shine through.
The versatility of mosaic tiles
Mosaic tiles aren't just for floors. They are perfect for creating eye-catching shower walls, elegant backsplashes, or decorative accent strips. Their smaller size allows them to conform to curves and intricate details, making them ideal for shower niches or around fixtures. This adaptability means you can achieve a cohesive look throughout your bathroom, tying different elements together with a shared material and design language. You can even find custom mosaic options to perfectly match your vision.
Adding decorative accents with mosaics
Even a small application of mosaic tile can make a big impact. Use them to create a decorative border around your shower, highlight a shampoo niche, or add a band of intricate pattern to a plain tile wall. These accents draw the eye and add a layer of sophistication without overwhelming the space. It’s a smart way to incorporate luxury and detail into your design. Think of them as the jewelry for your shower.
Achieving a cohesive look with mosaics
When planning your mosaic pattern, consider how it will integrate with the rest of your bathroom. The goal is a harmonious design. You can achieve this by selecting mosaic tiles that complement your main wall tiles in color and tone. For instance, a marble mosaic can beautifully accent a larger marble tile installation. This thoughtful integration ensures that your mosaic pattern feels like a natural extension of the overall design, rather than an afterthought. It’s about creating a unified and beautiful space. For inspiration on how to achieve this, exploring shower tile design ideas can be very helpful.
Case Study: The Serene Spa Shower
A homeowner wanted to transform their master bathroom into a personal spa retreat. They opted for a large-format travertine tile for the main shower walls, providing a clean, neutral base. For the shower floor and a striking accent niche, they chose a tumbled travertine pebble mosaic. The natural texture and varied earthy tones of the pebble mosaic created a grounding, spa-like feel underfoot, while the accent niche became a beautiful focal point. The result was a shower that felt both luxurious and deeply connected to nature, proving that the right mosaic pattern can truly elevate a space.
Professional installation considerations
When to call a professional installer
Look, sometimes you just know when a job is bigger than your weekend warrior skills. Natural stone showers, especially those using marble or travertine, demand a certain level of finesse. If you're staring at a pile of beautiful, expensive tiles and feeling a knot of anxiety, it's probably time to call in the pros. Trying to DIY a natural stone shower without the right experience can lead to costly mistakes, like uneven tiles, water damage, or worse. For those intricate patterns or large format tiles, a professional touch makes all the difference. It’s about protecting your investment and getting that flawless finish you’ve dreamed of.
The value of experienced natural stone installers
Why settle for just any installer when you can have someone who truly understands natural stone? Experienced installers know the quirks of different stones – how marble behaves, the best way to handle travertine's natural holes, and the precise techniques needed for a watertight seal. They’ve seen it all and have the tricks up their sleeves to overcome common installation challenges. This isn't just about laying tiles; it's about creating a durable, beautiful, and long-lasting shower that stands the test of time. Think of it as hiring an artist for your bathroom canvas. If you're looking to buy marble tiles online in the USA, pairing them with a seasoned installer is a smart move.
Ensuring proper waterproofing techniques
This is where the real magic (and potential disaster) happens. A beautiful tile job is useless if water finds its way behind the walls. Professionals are well-versed in the latest waterproofing systems and membranes. They know how to properly seal corners, transitions, and around fixtures to create a truly watertight barrier. This step is non-negotiable for a natural stone shower that won't develop mold, mildew, or structural damage down the line. A solid waterproofing job is the foundation of a successful shower installation, preventing future headaches and expensive repairs. It’s a key part of any shower pan installation.
Understanding installation warranties
When you hire a professional, you're often investing in peace of mind. Many reputable installers offer warranties on their workmanship. This means if something goes wrong with the installation itself (not the materials), they'll come back and fix it. It’s a sign of confidence in their skills and a safety net for you. Always ask about warranty details before you commit. It’s another layer of protection for your beautiful new natural stone shower, ensuring your investment is secure.
The cost-benefit of professional installation
Let's talk brass tacks. Professional installation isn't cheap, but it's often worth every penny. Consider the cost of potential mistakes if you DIY: wasted materials, extra tools, and the sheer frustration. Then factor in the time you'll spend learning and correcting. A professional installer brings efficiency, skill, and speed to the project. They can often complete the job faster and with fewer errors than an amateur. When you weigh the cost of professional installation against the risk of costly repairs or a less-than-perfect result, it often makes financial sense. It’s about getting it right the first time, saving you money and stress in the long run.
Finding qualified local installers
So, how do you find these stone-whispering pros? Start with recommendations from friends, family, or colleagues who have had similar projects done. Check online reviews and look for installers who specialize in natural stone. Don't be afraid to ask for references and see examples of their previous work, perhaps even in a customer installations showcase. A good installer will be happy to share their portfolio and discuss your project in detail. Look for someone who communicates clearly and seems genuinely invested in your project's success. A well-executed tile shower installation starts with the right team.
Trusting experts for complex projects
Some shower designs are simply more complex. Think intricate mosaic patterns, custom niche integrations, or showers with unique layouts. These aren't beginner projects. Relying on the expertise of seasoned professionals for these kinds of jobs is a smart decision. They have the specialized tools, the advanced knowledge, and the problem-solving skills to tackle challenging installations. Entrusting these complex projects to experts ensures that your vision is realized beautifully and functionally, creating a shower that’s both a work of art and a durable space.
Long-term care for your natural stone shower
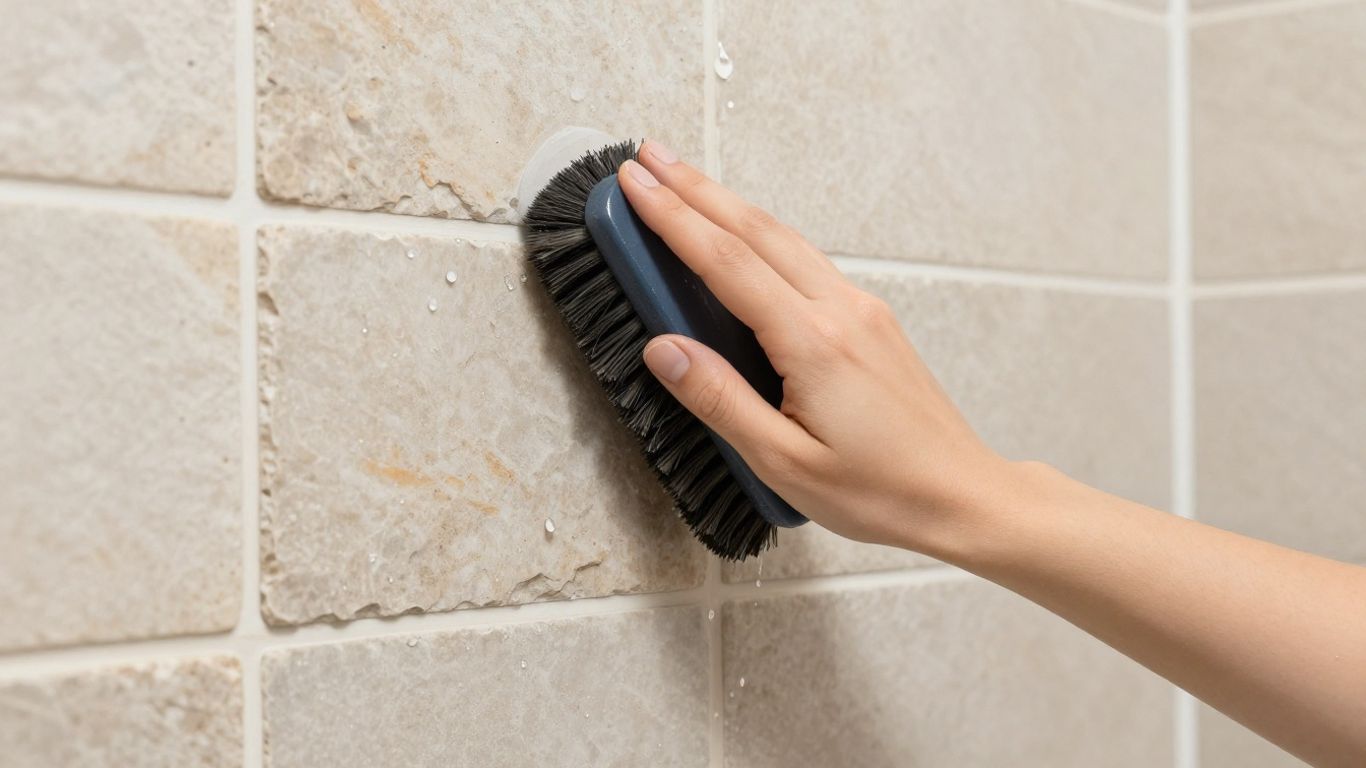
Deep cleaning techniques for natural stone
Keeping your natural stone shower looking its best means more than just a quick wipe-down. For a truly deep clean, you'll want to use products specifically made for natural stone. These are usually pH-neutral, meaning they won't etch or dull the surface like harsh chemicals can. Think of it like giving your stone a spa treatment. You can find these specialized cleaners online or at most home improvement stores. When you buy marble tiles online USA, make sure to also pick up the right cleaner. Always test any new cleaner in an inconspicuous spot first, just to be safe. A soft cloth or a non-abrasive sponge is your best friend here. Avoid anything that could scratch, like steel wool or stiff brushes. For tougher spots, a poultice made from baking soda and water can work wonders on stains. Just apply it, let it sit, and then gently wipe away. It’s a bit of effort, but the results are worth it.
Restoring shine and luster
Over time, even the most beautiful natural stone can lose a bit of its sparkle. Don't worry, you can bring back that showroom shine! For polished stones like marble, a good quality stone polish can work wonders. Apply it according to the product's instructions, usually with a soft cloth, and buff gently. You'll see the difference almost immediately. For honed or matte finishes, the goal isn't high gloss, but a clean, even appearance. Sometimes, just a thorough cleaning with the right products is enough to restore its natural beauty. If you're dealing with cultured marble, remember to avoid abrasive cleaners and harsh scrubbing pads. Proper care ensures the gel coat remains protected and the shower looks new for longer. This approach helps maintain that fresh look.
Identifying when re-sealing is necessary
Sealing is your stone's first line of defense against stains and moisture. But how do you know when it's time to re-apply? It's actually pretty simple. Do the water test: sprinkle a little water on the stone surface. If the water beads up and sits on top, your sealer is still doing its job. If the water soaks in and darkens the stone, it's time to reseal. This usually needs to happen about once a year, but it really depends on how much you use your shower and what kind of stone you have. For example, stone shower floors might need sealing more often due to constant moisture exposure. Don't wait until you see stains to reseal; prevention is key!
Protecting against daily wear and tear
Your shower is a high-use area, so protecting it from daily wear and tear is smart. Promptly wiping up any spills, especially water, is a simple habit that makes a big difference. This prevents water spots and mineral deposits from forming. Also, be mindful of the products you use in the shower. Shampoos and soaps can sometimes contain harsh chemicals that might affect the stone or grout over time. Using a squeegee after showering can help remove excess water and reduce the chances of soap scum buildup. It’s all about consistent, gentle care.
The role of regular maintenance in longevity
Think of regular maintenance as an investment in your shower's future. Natural stone is incredibly durable, but it's not indestructible. Consistent cleaning and timely sealing mean your stone will look beautiful for decades. Skipping maintenance can lead to issues like staining, etching, or grout discoloration, which are much harder and more expensive to fix later. It’s about preserving the natural beauty and value of your investment. When you buy marble tiles online USA, you're investing in a material that, with proper care, will last a lifetime.
Addressing specific stain types
Different stains require different treatments. For organic stains (like mildew or food stains), a solution of water and a mild bleach or ammonia can sometimes work, but always test first and rinse thoroughly. For oil-based stains (like grease), you might need a poultice made with baking soda or a commercial stone cleaner designed for oil. For rust stains, a specific rust remover for natural stone is usually the best bet. Always identify the stain type before attempting to remove it. If you're unsure, it's best to consult a professional stone care specialist. Remember, patience is key when dealing with stubborn stains.
Keeping your shower a sanctuary
Ultimately, long-term care is about more than just preserving the stone; it's about maintaining your shower as a beautiful, relaxing sanctuary. A well-maintained natural stone shower adds a touch of luxury and tranquility to your home. By following these simple care tips, you ensure that your shower remains a place of peace and beauty for years to come. It’s about enjoying the natural elegance you’ve brought into your home, day after day.
Keeping your natural stone shower looking its best is simple with the right care. Regular cleaning and sealing will protect the stone from stains and water damage, ensuring it stays beautiful for years to come. For more tips on how to maintain your shower's shine, visit our website today!
A Sparkling Shower Awaits
So there you have it – a step-by-step look at how to keep your natural stone tile shower looking its absolute best. It might seem like a bit of work at first, but honestly, taking these simple steps makes a huge difference. You’ll protect your investment and keep that beautiful stone shining for years to come. Remember, a little regular care goes a long way, and your shower will thank you for it. If you're looking for premium marble or travertine tiles to start with, or just need some advice, Surfaces Galore in Anaheim is a great place to check out. They can ship across the country, so no matter where you are, you can get quality stone for your home.
Frequently Asked Questions
What kind of natural stone is best for a shower?
For showers, it's best to choose stones that can handle moisture and are less likely to get slippery. Marble and travertine are popular choices because they look beautiful and can be made more slip-resistant with certain finishes. Granite is also a very durable option. Always make sure the stone is sealed properly to protect it.
How often should I seal my natural stone shower?
You should plan to seal your natural stone shower about once a year. However, how often you need to do it can depend on how much you use the shower and the type of stone. If water starts to soak into the stone instead of beading up, it's probably time to seal it again.
What's the best way to clean a natural stone shower?
Always use a cleaner that is gentle and doesn't have harsh chemicals or acids, as these can damage the stone. A pH-neutral cleaner is ideal. Wipe down the shower walls and floor regularly, and clean up any spills right away to prevent stains.
Can I use regular soap in my natural stone shower?
It's better to avoid harsh soaps or soaps that leave a lot of residue. Some soaps can build up on the stone over time and create a dull film. Using a mild, natural soap or a cleaner specifically made for natural stone is a good idea.
What should I do if I see water spots or mineral buildup?
Water spots and mineral buildup happen when hard water dries on the stone. You can usually remove them gently with a soft cloth and a cleaner made for natural stone. Make sure to dry the shower thoroughly after each use to help prevent this.
Is it okay to use a wet saw to cut natural stone tiles for my shower?
Yes, a wet saw with a diamond blade is the best tool for cutting natural stone tiles. It helps keep the dust down and makes cleaner cuts. Always cut slowly and steadily to avoid chipping the stone, and wear safety glasses and gloves.
What's the difference between a polished and a honed finish for stone tiles?
A polished finish gives the stone a shiny, smooth look, almost like a mirror. A honed finish is more matte, meaning it's not shiny. Honed finishes can be less slippery than polished ones, which is often a good choice for shower floors.
Why is using white thin-set mortar important for light-colored stones?
If you're using light-colored marble or travertine, it's important to use white thin-set mortar. Gray mortar can sometimes show through lighter stones, changing their color. White thin-set ensures the true color of your beautiful stone shines through.
How do I prevent grout from staining or discoloring?
The best way to keep grout looking good is to seal it after it cures, just like the stone. Also, clean up any spills quickly. If you notice discoloration, use a grout cleaner recommended for natural stone settings.
Can I install natural stone tiles myself, or should I hire a professional?
While it's possible to install natural stone tiles yourself if you have experience, it can be tricky. Natural stone is heavy and can be brittle. For a shower, where waterproofing is critical, hiring a professional installer who knows how to work with natural stone is often the best choice to ensure a lasting, beautiful result.
What are the benefits of using marble or travertine in a shower?
Marble and travertine offer a luxurious and timeless look that can make your bathroom feel like a spa. They are natural materials, meaning each piece is unique. When properly installed and maintained, they are very durable and can add significant value to your home.
How do I deal with soap scum buildup on my natural stone shower?
Soap scum can be tough on natural stone. Avoid abrasive cleaners. Instead, try a mild, pH-neutral cleaner specifically designed for natural stone. For stubborn buildup, you might need a specialized soap scum remover for stone, or consider a professional cleaning.
Leave a comment