
How to Repair Cracked Marble: A Homeowner's Guide

TL;DR:
- Proper assessment of marble cracks is essential to determine if DIY repair is suitable or if professional evaluation is necessary for structural issues. Using a precise 10:1 resin-to-hardener epoxy mixture and thorough surface preparation ensures durable, invisible repairs that blend seamlessly with the original marble. Completing honing and polishing after filling restores the shine and uniformity of the surface, while sealing provides ongoing protection against future damage.
Marble crack repair is the process of filling and restoring cracks using specialized epoxy treatments that bond to natural stone and recreate its surface integrity. Knowing how to repair cracked marble correctly separates a lasting fix from a patch that fails within months. Most homeowners can handle hairline and cosmetic cracks at home using color-matched epoxy kits, acetone-based cleaners, and diamond polishing pads. Structural cracks are a different story. This guide covers every stage of the process: crack assessment, material selection, step-by-step filling, and finishing techniques that make repairs invisible. Whether you are repairing marble countertops in a kitchen or restoring a bathroom floor, the same core principles apply.
How to repair cracked marble: assess the damage first
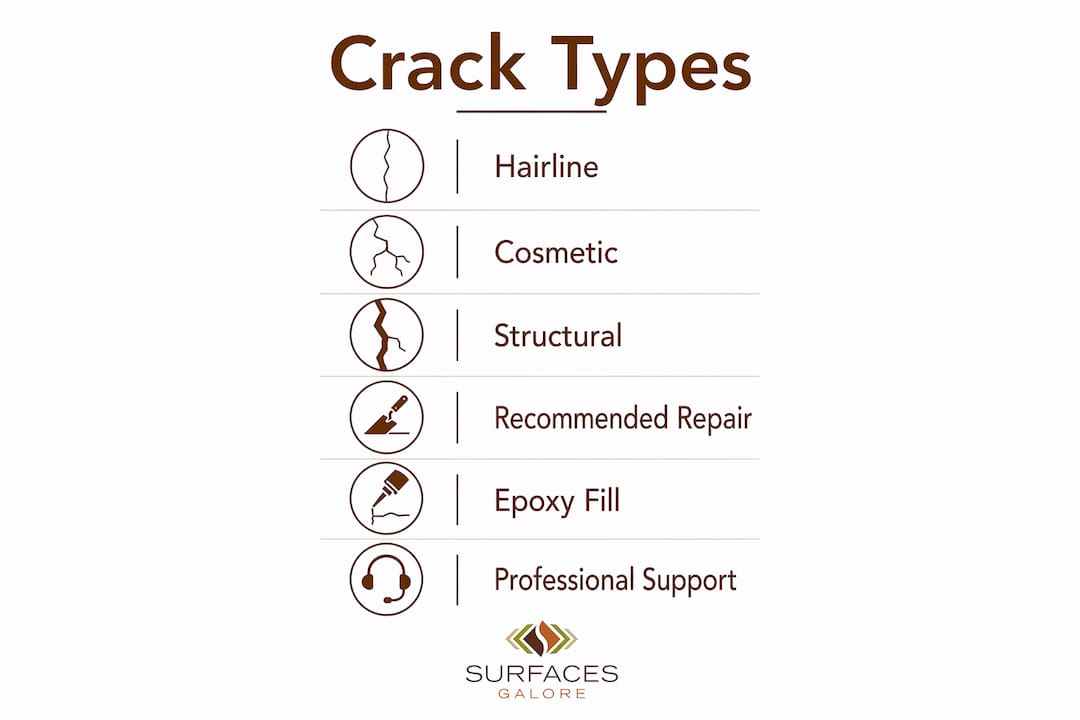
Not every crack in marble calls for the same response. The industry distinguishes between three categories: hairline cracks, cosmetic surface cracks, and structural cracks. Getting this assessment right before you buy a single product saves time, money, and the risk of making things worse.
Hairline cracks are surface-level fractures less than 1/16 inch wide. They do not affect the stone’s load-bearing capacity. These are the most common result of thermal expansion, minor impacts, or settling. A standard marble repair kit handles these well.
Cosmetic surface cracks run slightly deeper and may have visible edges. They are still confined to the surface layer and do not compromise the slab. Color-matched epoxy fills these effectively with proper prep.
Structural cracks run through the full thickness of the slab or appear in load-bearing areas like countertop spans or floor tiles under heavy foot traffic. DIY repair kits are recommended only for minor cracks; cracks larger than 1/8 inch or structural damage require professional evaluation to avoid failure. This is not a conservative guideline. It reflects the reality that structural cracks require internal reinforcement with rods or mesh, and DIY repair alone can fail under weight or stress due to missing proper backing support.
Crack type comparison table
| Crack Type | Width | Location | Recommended Repair |
|---|---|---|---|
| Hairline | Less than 1/16 inch | Surface only | DIY epoxy kit |
| Cosmetic surface crack | 1/16–1/8 inch | Surface layer | DIY color-matched epoxy |
| Structural crack | Greater than 1/8 inch | Full slab depth | Professional evaluation required |
| Spalled or chipped edge | Varies | Edge or corner | DIY kit for small chips; pro for large pieces |
Use this table as your starting point. If the crack flexes when you press on either side of it, or if the slab shifts at all, stop and call a professional stone restoration contractor. No epoxy kit fixes a slab that lacks structural support beneath it.
What tools and materials do you need for marble repair?
Gathering the right materials before you start is the single biggest factor in a clean result. Improvising with the wrong adhesive or skipping surface prep produces repairs that yellow, shrink, or fall out within a year.
Core materials list
- Acetone or isopropyl alcohol: Cleans the crack and removes oils, wax, and residue before filling
- Epoxy resin and hardener: The primary fill material; use a two-part stone epoxy formulated for marble
- Color tinting pigments: Mixed into the resin to match your marble’s base color and veining
- Diamond tooling or a rotary tool: Opens and cleans the crack edges for better epoxy adhesion
- Plastic mixing cups and stir sticks: Dedicated to epoxy mixing only
- Razor blade or plastic scraper: Levels excess epoxy after curing
- Wet/dry sandpaper: Grits from 220 up to 1500 for progressive smoothing
- Polishing compound and buffing pad: Restores gloss after sanding
Epoxy mixing and color matching
The correct epoxy mixing ratio is typically 10:1 resin to hardener. An improper mix leads to weak bonds and discoloration, which defeats the entire repair. Measure by weight, not volume, for accuracy. Before you add the hardener, mix color pigments into the resin first. This gives you adequate working time to adjust the color before the curing process begins.
Color matching is where most DIY repairs go wrong. Test your tinted epoxy on a scrap piece or an inconspicuous area before filling the visible crack. Marble veining is complex, and a single flat color rarely blends perfectly. Use a fine artist’s brush to drag thin lines of a darker pigment through the wet epoxy to simulate veining.
Pro Tip: Always mix a small test batch of tinted epoxy and let it cure on a piece of white tile before applying it to your marble. Epoxy shifts slightly in color as it cures, so what looks right wet may look off once dry.
Data table: recommended tools and materials
| Item | Purpose | Notes |
|---|---|---|
| Two-part stone epoxy | Fill and bond crack | Use marble-specific formulas |
| Acetone | Surface degreasing | Apply with lint-free cloth |
| Color pigment set | Tint matching | Mix into resin before hardener |
| Diamond rotary bit | Crack preparation | Opens edges for adhesion |
| Wet/dry sandpaper (220–1500 grit) | Leveling and smoothing | Work progressively through grits |
| Polishing compound | Final gloss restoration | Match to marble finish type |
Step-by-step guide to fixing cracks in marble
This is where preparation pays off. Follow these steps in order. Skipping any stage, especially cleaning and curing time, is the most common reason repairs fail.
Step 1: clean the crack thoroughly
Remove all loose debris from the crack using a soft brush or compressed air. Wipe the entire area with acetone on a lint-free cloth. Let it dry completely before touching the surface again. Any oil, wax, or cleaning product residue left in the crack will prevent the epoxy from bonding to the stone.

Step 2: open and prepare the crack edges
For hairline cracks, lightly score the edges with a diamond rotary bit to create a slightly wider channel. This sounds counterintuitive, but a crack that is too narrow will not accept enough epoxy for a durable fill. Cracks should be cleaned and opened with diamond tooling if needed, then filled with color-matched epoxy applied under vacuum for deep penetration. For home repairs without vacuum injection equipment, use a slow-cure epoxy and apply it in thin layers to allow full penetration.
Step 3: mix and tint the epoxy
Measure your resin and hardener at the 10:1 ratio by weight. Add your color pigments to the resin first and stir thoroughly. Then add the hardener and mix for a full two minutes. Work quickly once the hardener is added, as pot life is typically 10–15 minutes for most stone epoxies.
Step 4: fill the crack
Apply the tinted epoxy into the crack using a plastic spreader or a syringe for narrow cracks. Slightly overfill the crack. Do not try to level it perfectly at this stage. Over-sanding marble repair fills can create dips, so slightly overfilling and then shaving the excess carefully before polishing maintains surface evenness. Press the epoxy firmly into the crack to eliminate air pockets.
Step 5: cure the repair
Most epoxy fills achieve handling strength within 1 hour and full curing strength within 4–8 hours. Do not sand or disturb the repair during this window. Structural repairs may require up to 24 hours of clamping. If you are repairing a countertop that has separated at a seam, use clamps or tape to hold the pieces together for the full curing period.
Step 6: shave and sand the fill
Once fully cured, use a sharp razor blade held flat against the surface to shave the excess epoxy down close to the marble level. Apply no downward pressure. Let the blade’s weight do the work. Follow with wet/dry sandpaper, starting at 220 grit and working progressively through 400, 600, 800, and 1200 grit. Keep the sandpaper wet throughout to prevent heat buildup and surface scratching.
Step 7: polish to match the original finish
Apply a marble polishing compound with a buffing pad. Work in circular motions and check your progress frequently. The goal is to blend the repaired area into the surrounding stone so the fill becomes invisible.
Pro Tip: Use a bright flashlight held at a low angle to the surface while sanding. This raking light reveals any high or low spots in the repair that are invisible under normal overhead lighting.
Common mistakes to avoid
- Skipping acetone cleaning before filling
- Mixing epoxy by volume instead of weight
- Filling the crack in one thick pass instead of thin layers
- Sanding before the epoxy reaches full cure strength
- Using a single flat color without simulating veining
How do you match and protect the repaired area?
Filling a crack is only half the job. Repair stabilizes cracks, but restoration through honing and polishing is needed to make repairs invisible and match the marble’s original finish. This distinction matters. Many homeowners stop after the fill and wonder why the repair is still visible.
Honing vs. polishing: what is the difference?
Honing is a mechanical process that uses abrasive pads to flatten and refine the surface to a consistent matte or satin finish. Polishing follows honing and uses finer compounds to bring the surface to a gloss. Professional restoration includes honing before polishing. Polishing alone over etches or scratches fails because the gloss wears off quickly unless the surface is honed first. This applies directly to crack repairs. If you skip honing and go straight to a polishing compound, the repaired area will look different from the surrounding stone within weeks.
Finishing steps for an invisible repair
- Start with a 400-grit diamond hand pad to hone the repaired area and blend it with the surrounding stone
- Progress through 800 and 1500 grit diamond pads, keeping the surface wet
- Apply a marble polishing powder or compound with a felt pad to restore gloss
- Buff to match the sheen of the surrounding surface
For restoring marble shine after a repair, the same progressive grit sequence used in professional restoration applies at the DIY level. The difference is equipment. Professionals use floor machines and angle grinders. For a countertop repair, hand pads and a variable-speed drill with a polishing attachment produce comparable results on small areas.
Sealing after repair
Seal the repaired area and the surrounding marble once polishing is complete. Use a penetrating stone sealer, not a topical coating. Apply it with a soft cloth, let it absorb for 5–10 minutes, then wipe off the excess. Sealing prevents staining and moisture from entering the repaired crack. For ongoing marble surface protection, reseal the entire surface every 12–18 months depending on use and traffic.
Key takeaways
Successful marble crack repair requires accurate crack assessment, proper epoxy mixing at a 10:1 ratio, progressive sanding, and honing before polishing to achieve a finish that matches the original stone.
| Point | Details |
|---|---|
| Assess crack type first | Cracks wider than 1/8 inch or structural damage require professional evaluation, not a DIY kit. |
| Mix epoxy precisely | Use a 10:1 resin-to-hardener ratio by weight; add color pigments to resin before hardener. |
| Overfill, then shave | Slightly overfill the crack and shave excess after curing to avoid surface dips from over-sanding. |
| Hone before you polish | Mechanical honing before polishing produces durable gloss; polishing alone over a repair wears off fast. |
| Seal after finishing | Apply a penetrating stone sealer after polishing to protect the repair and prevent future staining. |
What i’ve learned after years of watching marble repairs go wrong
The most common mistake I see is treating repair and restoration as the same thing. They are not. Repair fills the crack and stabilizes the stone. Restoration makes the repair invisible. Homeowners who stop after the fill step are always disappointed with the result, and they blame the epoxy when the real issue is skipping the finishing work.
The second mistake is color matching too early. Most people mix their tint, look at the wet epoxy next to the marble, and think they have a match. They do not. Epoxy shifts color as it cures, sometimes significantly. Always cure a test patch first. This single habit eliminates the most frustrating part of the entire process.
I also want to be direct about structural cracks. No epoxy kit, regardless of how it is marketed, replaces proper backing support in a load-bearing slab. If your countertop has a crack that runs through its full thickness near a sink cutout or an unsupported span, the risk of catastrophic failure under weight is real. Get a professional assessment before you fill anything.
For homeowners who want to do this right, quality materials matter more than technique. A cheap, hardware-store epoxy mixed incorrectly will fail faster than a properly mixed professional-grade product applied with basic tools. Surfacesgalore works with homeowners who take their stone seriously, and that starts with understanding what the material actually needs.
One more thing: troubleshooting marble floors after a repair often reveals that the original crack was caused by a substrate issue, not the stone itself. If your marble keeps cracking in the same spot, look at what is underneath it before you repair the surface again.
— cihan
Repair your marble with confidence, starting here

Surfacesgalore supplies premium natural marble tiles, mosaics, and decorative stone to homeowners and designers across the United States. Whether you are repairing an existing surface or planning a full replacement, the quality of the stone you start with determines how well it holds up over time. Surfacesgalore’s catalog includes Calacatta, Carrara, and Emperador marble in a range of finishes suited to kitchens, bathrooms, and living spaces. Explore the full natural stone collection to find the right material for your project, or browse repair and maintenance guidance to keep your existing surfaces looking their best for years to come.
FAQ
Can cracked marble be repaired at home?
Yes, hairline and cosmetic surface cracks less than 1/8 inch wide can be repaired at home using a two-part color-matched epoxy kit. Cracks wider than 1/8 inch or those that run through the full slab thickness require professional evaluation.
What is the best epoxy for marble crack repair?
Use a two-part stone epoxy formulated specifically for marble or natural stone, mixed at a 10:1 resin-to-hardener ratio by weight. Adding color pigments to the resin before the hardener gives you better working time and a more accurate color match.
How long does marble epoxy take to cure?
Most stone epoxy fills reach handling strength within 1 hour and full curing strength within 4–8 hours. Structural repairs held with clamps may need up to 24 hours before the clamps can be safely removed.
Do i need to seal marble after repairing a crack?
Sealing after repair is necessary. Apply a penetrating stone sealer once polishing is complete to prevent moisture and staining from entering the repaired area. Reseal the full surface every 12–18 months for lasting protection.
Why does my marble repair look different from the surrounding stone?
The most common cause is skipping the honing step before polishing. Polishing alone over a repaired area produces a gloss that wears off quickly and does not blend with the surrounding stone. Hone the repaired area with progressive diamond pads before applying any polishing compound.
Leave a comment