
How to Choose the Right Marble Tile for Your Project: A Step-by-Step Guide

Picking out the right marble tile for your home can feel like a big decision. It's a material that can really change the look and feel of a room, you know? But don't worry, we're going to break down how to choose the best marble tile for your project, step by step. This guide is all about making it simple, so you can get that beautiful marble look without any fuss. We'll cover everything from understanding what makes marble special to getting it installed just right. Let's get started on making your space look amazing!
Key Takeaways
- Marble tiles offer timeless elegance and can significantly boost property value, making them a worthwhile investment for various home areas.
- Consider the specific area of your project (high-traffic floors, bathrooms, kitchens) to select marble that balances beauty with necessary durability and moisture resistance.
- Different finishes like polished (shiny) and honed (matte) offer distinct looks, and understanding marble colors and veining is key to achieving your desired aesthetic.
- Accurately measure your space, adding extra for cuts and waste, to ensure you order the correct amount of marble tiles for a smooth installation process.
- Proper preparation of the substrate, choosing the right setting materials (like white thin-set for light marble), and correct installation techniques are vital for a long-lasting, beautiful finish.
Understanding Marble Tile Characteristics
The Timeless Elegance of Marble
Marble isn't just a building material; it's a statement. For centuries, this natural stone has graced palaces, museums, and luxury homes, symbolizing sophistication and enduring beauty. When you choose marble tiles, you're not just selecting a surface; you're investing in a piece of art crafted by nature. Its unique veining and natural variations mean no two tiles are exactly alike, offering a truly bespoke look for your project. Imagine the classic appeal of Carrara marble tiles or the dramatic flair of Nero Marquina – each brings a distinct personality to your space. If you're looking to buy marble tiles online in the USA, you're tapping into a legacy of luxury that never goes out of style.
Assessing Marble's Durability and Suitability
While marble is undeniably beautiful, it's also a natural material with specific characteristics to consider. It's a relatively soft stone compared to granite, meaning it can be more susceptible to scratching and etching from acidic substances. This doesn't mean it's not durable – far from it! Marble is incredibly strong and can last for generations with proper care. However, understanding its properties is key to selecting the right marble for the right place. For high-traffic areas like entryways or busy kitchens, you might opt for a more resilient finish or consider a different stone. But for bathrooms, feature walls, or areas where its unique beauty can be showcased without excessive wear, marble is an exceptional choice. Think about the long-term value and aesthetic appeal it brings to your home.
Exploring Marble's Aesthetic Appeal and Variations
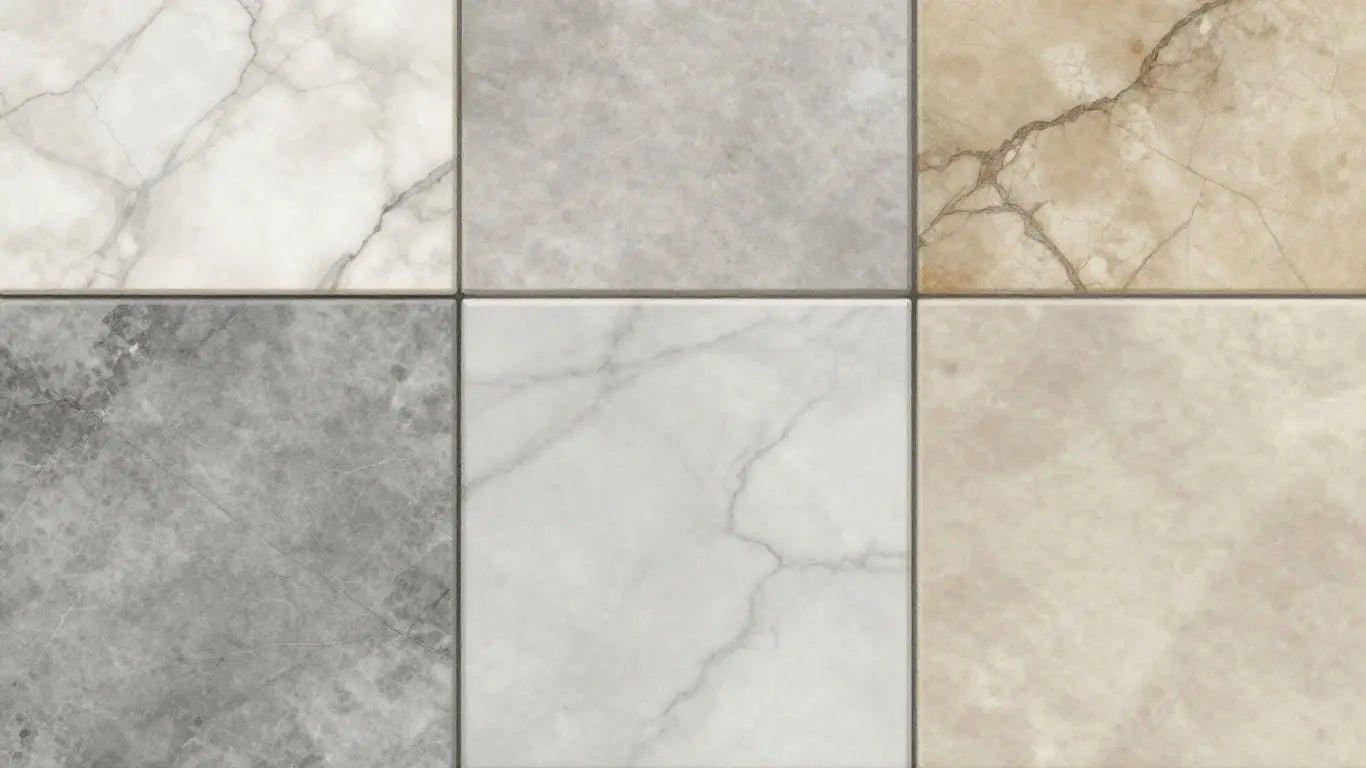
What truly sets marble apart is its incredible aesthetic range. From the crisp whites and soft grays of Carrara and Atlantic Gray marble to the deep blacks of Nero Marquina and the warm beiges of Crema Marfil, there's a marble to match virtually any design vision. The veining is where the magic truly happens – subtle wisps, bold dramatic streaks, or intricate patterns, all formed over millennia. This natural variation is a feature, not a flaw, and it's what gives each marble installation its unique character. Whether you're drawn to the classic look of white marble or the sophisticated tones of gray marble, exploring these variations is part of the exciting journey of choosing your perfect tile. Remember, the natural color and vein variations are part of what makes your marble installation one-of-a-kind.
Case Study: A Luxurious Bathroom Transformation
A homeowner in Scottsdale, Arizona, wanted to update their master bathroom. They chose Calacatta Gold marble tiles for the floor and shower walls, opting for a polished finish to maximize the stone's natural sheen. The dramatic veining of the Calacatta Gold created a spa-like retreat, while the polished surface reflected light beautifully, making the space feel larger and more luxurious. Despite initial concerns about marble's suitability for a bathroom, the homeowner was advised on proper sealing and routine cleaning. Today, the bathroom remains a stunning example of marble's timeless elegance, proving that with the right selection and care, marble can thrive even in moisture-prone areas. This project highlights how selecting the right marble, like the popular Calacatta Gold, can completely transform a space.
Selecting Marble for Specific Project Areas
Choosing the right marble tile isn't just about looks; it's about performance. Different areas of your home have unique demands, and selecting marble that meets those needs ensures lasting beauty and functionality. Let's explore how to pick the perfect marble for every space.
Choosing Marble for High-Traffic Flooring
High-traffic areas like entryways, hallways, and living rooms see a lot of foot traffic. You need a marble that can stand up to the daily grind without losing its luster. While all marble is beautiful, some varieties are naturally harder and more resistant to wear and tear. Consider options like Tundra Gray Marble or Atlantic Gray Marble, known for their durability and elegant, understated tones. These stones offer a sophisticated look that can handle the demands of busy households. When you buy marble tiles online USA, look for descriptions that highlight durability for flooring applications. A well-chosen marble floor can last for generations, adding significant value to your home.
Case Study: The Miller family wanted a grand entryway that felt both welcoming and durable. They chose a polished Carrara marble in a checkerboard pattern for their foyer. Despite heavy use from kids and pets, the floor still looks stunning after five years, thanks to regular sealing and prompt spill cleanup.
Marble Applications in Bathrooms and Kitchens
Bathrooms and kitchens present unique challenges: moisture, potential spills, and the need for slip resistance. In bathrooms, especially shower areas, moisture resistance is key. For kitchens, durability against stains and heat is important, though marble is generally more suited for decorative elements or low-traffic kitchen areas rather than primary prep surfaces. Consider honed finishes for bathrooms to reduce slipperiness. For kitchens, think about using marble for backsplashes or as accents rather than the main countertop if heavy use is expected. Always ensure you buy marble tiles online USA that are suitable for wet areas and use appropriate sealers. Remember, natural stone requires specific care, especially in environments prone to moisture and staining.
When selecting marble for kitchens and bathrooms, prioritize finishes that offer better grip and are easier to maintain. Honed or tumbled finishes can provide a more secure footing in wet areas compared to highly polished surfaces.
Case Study: Sarah wanted a spa-like master bathroom. She opted for honed Thassos White marble tiles for her shower walls and floor. The matte finish provided a safe, non-slip surface, and the clean white marble created a serene, luxurious atmosphere. She diligently sealed the grout and marble annually, keeping it looking pristine.
Decorative Uses for Marble Tiles and Mosaics
Marble truly shines when used for decorative purposes. Think stunning backsplashes, elegant fireplace surrounds, or intricate mosaic designs. Marble mosaic tiles offer incredible versatility, allowing for complex patterns and unique artistic expressions. Whether it's a herringbone pattern in a kitchen backsplash or a custom mosaic in a shower niche, marble adds a touch of luxury that synthetic materials can't replicate. Explore options like Carrara marble mosaics or Calacatta Gold for a high-end look. These decorative applications are less about heavy wear and more about visual impact, making them perfect for showcasing marble's natural beauty. You can find beautiful marble mosaic tiles to complement any design aesthetic.
- Backsplashes: Add a touch of elegance behind your stove or sink.
- Fireplace Surrounds: Create a warm and sophisticated focal point.
- Accent Walls: Introduce a luxurious texture and visual interest.
- Shower Niches & Inlays: Add a custom, high-end detail to your bathroom.
Case Study: The Chen family wanted to update their kitchen backsplash. They chose a Calacatta Gold marble mosaic tile in a basketweave pattern. The intricate design and the rich veining of the marble transformed their kitchen from ordinary to extraordinary, becoming a true conversation piece.
Exploring Marble Tile Finishes and Styles
Choosing the right marble tile finish is key to achieving your desired look and feel. It's not just about the color or pattern; the surface treatment dramatically impacts the overall aesthetic and even how the tile performs. Let's explore the most popular finishes and styles to help you make the perfect choice for your project. When you're ready to buy marble tiles online USA, remember that the finish is as important as the stone itself.
Polished Marble for a Luxurious Sheen
Want that high-end, glamorous look? Polished marble is your answer. This finish is achieved by grinding and buffing the stone until it has a high-gloss, mirror-like surface. It reflects light beautifully, making spaces feel larger and more opulent. Think of the grand halls of historic buildings or luxury hotel lobbies – that's the polished marble effect.
- Pros: Unmatched elegance, reflects light, makes spaces feel grand.
- Cons: Shows scratches and etches more easily, can be slippery when wet.
Case Study: A homeowner in Miami wanted to create a spa-like master bathroom. They opted for polished Carrara marble tiles on the floor and walls. The high shine amplified the natural light, making the relatively small bathroom feel expansive and incredibly luxurious. It’s a look that truly wows.
Honed Marble for a Sophisticated Matte Look
Honed marble offers a softer, more understated elegance. Instead of a high gloss, this finish has a smooth, matte appearance. It's less reflective than polished marble, which means it hides minor imperfections and water spots better. This makes it a fantastic choice for busy areas or for those who prefer a more natural, less flashy look. It’s a sophisticated choice that brings a calm, refined atmosphere to any room.
- Pros: Less slippery, hides minor imperfections, offers a natural, elegant look.
- Cons: Doesn't reflect light as much as polished, may require more frequent sealing.
Case Study: A designer in Chicago was working on a modern kitchen renovation. They chose honed Calacatta marble for the countertops and backsplash. The matte finish provided a chic, contemporary feel that complemented the sleek cabinetry without being overpowering. It offered the beauty of marble with a more practical, subdued elegance.
Understanding Marble Mosaic Tile Designs
Marble mosaic tiles are where artistry meets practicality. These small, often intricately arranged tiles can create stunning visual effects. They come in countless patterns – from classic herringbone and basketweave to modern geometric shapes and arabesques. Mosaics are perfect for adding detail and personality to backsplashes, shower floors, accent walls, or even entire floors. They allow for incredible design flexibility, letting you create unique focal points.
- Patterns: Herringbone, Hexagon, Basketweave, Penny Round, Arabesque, and custom designs.
- Applications: Backsplashes, shower floors, accent walls, borders, and feature areas.
- Finishes: Available in polished, honed, and tumbled finishes to match your overall design.
Case Study: A restaurant owner wanted to add a unique touch to their entryway. They commissioned a custom marble mosaic featuring the restaurant's logo. The intricate design, laid out with various shades of marble, created a memorable first impression and a true statement piece that guests still talk about.
The choice between polished and honed finishes often comes down to balancing desired aesthetics with practical considerations like traffic and maintenance. Both offer distinct advantages, allowing you to tailor the marble's appearance to your specific needs and style preferences.
Considering Marble Tile Colors and Veining
Classic White Marble Selections
White marble. It’s the classic choice for a reason. Think Carrara, Calacatta, Statuario. These stones bring a clean, bright elegance that just can’t be beat. They work in almost any space, from a modern kitchen to a traditional bathroom. The subtle veining in white marble adds character without overwhelming your design. If you want that timeless, luxurious feel, you really can't go wrong with white marble tiles. We have a fantastic selection if you're looking to buy marble tiles online in the USA.
Exploring Beige and Gray Marble Tones
Not all marble is white, and that's a good thing! Beige and gray marbles offer a different kind of warmth and sophistication. Tundra Gray, for example, brings cool, refined tones that are perfect for a modern look. Atlantic Gray offers soft grays with intricate veining, blending beautifully into both contemporary and classic designs. These neutral tones are incredibly versatile, acting as a perfect backdrop for your decor. They’re great for flooring in high-traffic areas because their subtle patterns can hide minor wear and tear better than stark white. You can find these beautiful options on our site.
Understanding Natural Color and Vein Variations
Marble is a natural stone, and that means every piece is unique. You'll see variations in color and veining from tile to tile, and even from slab to slab. This isn't a flaw; it's what makes marble so special! It’s like owning a piece of art. When you're choosing your marble, especially if you're buying marble tiles online, always look at samples and understand that your final product will have its own distinct personality. This natural variation is part of the charm that makes marble so sought after. It’s why we always recommend ordering samples or viewing the actual tiles before making a final decision. It’s also why ordering a little extra, say 10-15%, is a smart move to ensure you have tiles that match well if you need replacements down the line.
Case Study: The Miller Residence
The Millers wanted a kitchen that felt both luxurious and welcoming. They chose a creamy beige marble with subtle, warm veining for their flooring. The result? A space that felt instantly more inviting and sophisticated. The natural variations in the marble meant each tile told a slightly different story, adding depth and character to the entire room. They were thrilled with how the marble tied their design elements together, creating a cohesive and elegant look that buyers often notice and appreciate.
Case Study: The Chen Bathroom
For their master bathroom renovation, the Chens opted for a classic white Carrara marble with striking gray veining for their shower walls and floor. They wanted a spa-like retreat, and the marble delivered. The clean white base with the dramatic veining created a high-end, timeless feel. They were initially concerned about the variations, but after a dry lay, they saw how the different patterns complemented each other, creating a beautiful, natural flow. The polished finish added that extra touch of luxury they were looking for.
Calculating Marble Tile Quantities
Alright, let's talk numbers. Getting the right amount of marble tile is super important. Too little, and you're stuck with a half-finished project and a frustrating search for more. Too much, and you've wasted money. We want to get this just right, so your beautiful marble project goes off without a hitch.
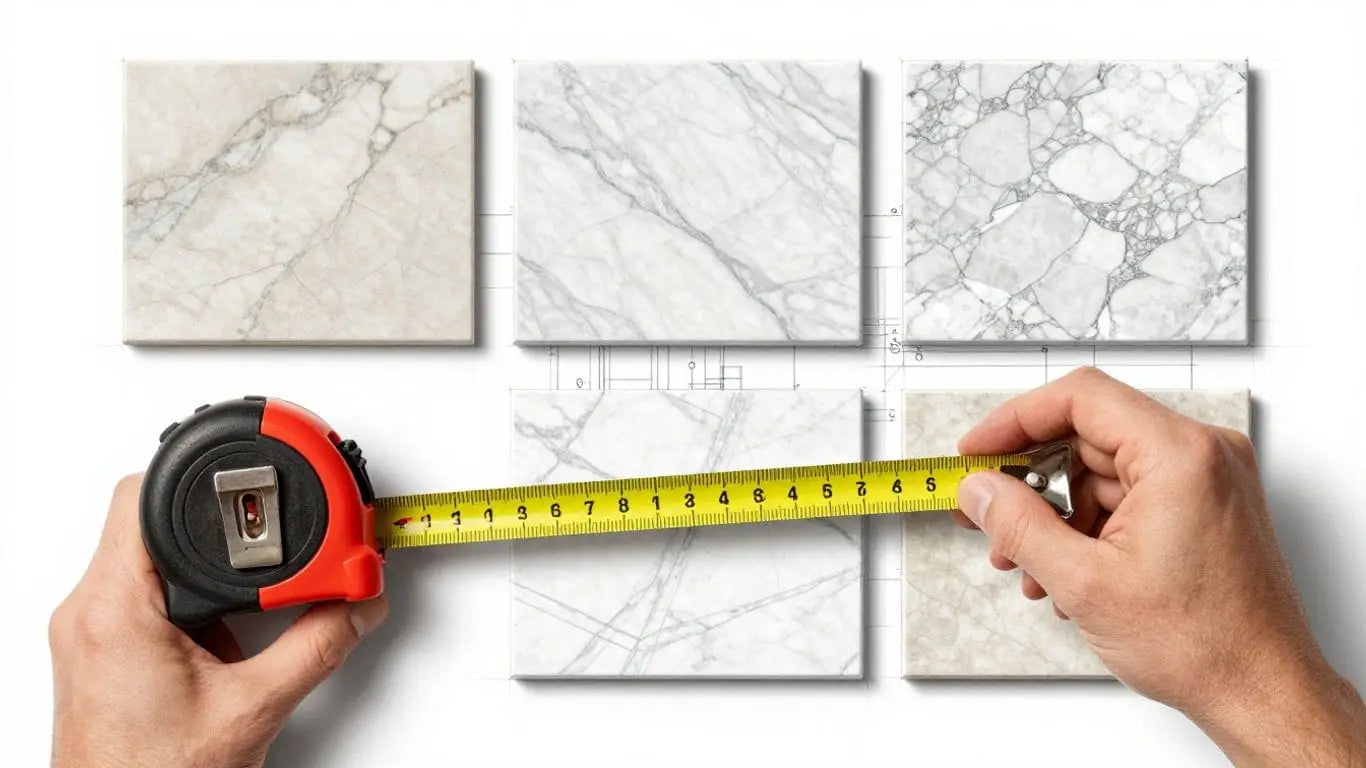
Measuring Your Project Area Accurately
First things first, grab that tape measure. You need to know the exact size of the space you're tiling. Measure the length and width of the room or area. Then, multiply those two numbers together. This gives you the total square footage. For example, if your room is 10 feet long and 12 feet wide, that's 120 square feet. Simple, right? Accurate measurements are the foundation of a successful tile order. If you're tiling an irregularly shaped room, break it down into smaller rectangles or squares, measure each one, and add them all up. Don't forget to measure any other areas you're tiling, like a backsplash or a shower niche. If you're looking to buy marble tiles online in the USA, having these precise measurements ready will make your shopping experience a breeze.
Accounting for Cuts and Waste
Now, here's where a little extra planning comes in. You're not just laying down whole tiles, are you? You'll have edges, corners, and maybe some tricky cuts around doorways or fixtures. These cuts mean you'll need more tile than your exact square footage. It's standard practice to add about 10-15% extra to your total square footage to account for these cuts and potential breakage during installation. Think of it as your 'insurance policy' against running short. For a 120 sq ft room, adding 10% means you'd need 12 extra square feet, bringing your total to 132 sq ft. If you're working with a complex layout or a lot of cuts, leaning towards 15% is a safer bet.
The Importance of Ordering Extra Material
Why is ordering that extra 10-15% so vital? Well, natural stone like marble has variations. You might find a few tiles with slight differences in veining or color that you don't want in a prominent spot. Plus, accidents happen – a tile might chip during cutting, or you might drop one. Having extra on hand means you can swap out any imperfect tiles without disrupting your project timeline. It also ensures that if you ever need to make a repair down the line, you have matching material. Trying to find a perfect match for marble years later can be incredibly difficult, if not impossible. So, that little bit of extra tile is worth its weight in gold for future peace of mind. It's a small investment that prevents big headaches. For instance, if you're installing a beautiful Statuary White Marble floor, having a few extra tiles ensures that any future repairs will blend in perfectly, maintaining that luxurious look for years to come.
Case Study: The Kitchen Backsplash Blunder
Sarah was redoing her kitchen backsplash with stunning Carrara White Marble subway tiles. She measured carefully, calculated her square footage, and decided to only buy the exact amount needed, thinking she'd save a few bucks. Big mistake. When it came time to cut tiles for the outlets and the edges, she ended up with more waste than she anticipated. Worse, one tile chipped badly right in the center of the main wall. She couldn't find any more of that exact batch, and the new tiles she bought had a slightly different veining pattern. The result? A noticeable patch of mismatched tiles that constantly bothered her. If she had just added that extra 10%, she would have had a perfect, seamless finish and avoided the stress and extra cost of trying to fix it later.
Preparing Your Substrate for Marble Installation
Before you even think about laying those gorgeous marble tiles, you absolutely must get your foundation right. Think of it like building a house – a shaky base means trouble down the road. We're talking about making sure your floor or wall is solid, level, and clean. This isn't the part to skimp on if you want your beautiful marble to last and look its best for years. A properly prepped surface is the secret to a flawless finish and prevents headaches like cracked tiles or unevenness later on.
Ensuring a Solid and Level Foundation
Marble is beautiful, but it's also heavy and can be a bit unforgiving. It needs a surface that won't flex or shift. For floors, this means checking your subfloor's stiffness. If you're working with wood, you might need to add an extra layer of plywood or a proper underlayment like cement backer board. Concrete slabs are usually pretty stable, but they can develop hairline cracks. To prevent these from showing up in your grout lines, we highly recommend using a crack-isolation membrane. It's like a flexible shield for your tiles. We also need to make sure everything is perfectly level. Low spots or high spots can cause tiles to sit unevenly, leading to chips or a bumpy feel underfoot. Using a self-leveling compound or a good patching material can fix these imperfections. Remember, a little extra effort here saves a lot of potential problems later.
Substrate Cleanliness and Stability
This step is pretty straightforward but super important. Whatever you're tiling over – concrete, wood, drywall – it needs to be completely clean. We're talking no dust, no grease, no old adhesive, no paint splatters. Anything left behind can mess with how the thin-set mortar bonds to the surface. A weak bond means tiles can come loose. So, give it a good sweep, vacuum, and maybe even a wipe-down with a cleaner appropriate for your substrate. Stability is key too. If the surface feels loose or wobbly, it needs to be secured before you start. You want a surface that feels rock-solid.
Underlayment and Crack Isolation Membranes
When it comes to underlayment, think of it as a crucial middle layer. For wood subfloors, cement backer board is a popular choice because it's stable and moisture-resistant. Another excellent option is an uncoupling membrane. These membranes not only provide a stable surface but also help prevent cracks in the subfloor from traveling up into your tile installation. This is especially important for natural stone like marble. For concrete slabs, a crack-isolation membrane is your best friend. It acts as a barrier, absorbing movement and preventing those tiny substrate cracks from becoming visible issues in your beautiful tile work. Choosing the right underlayment and membrane sets the stage for a durable and long-lasting marble installation. If you're looking to buy marble tiles online in the USA, make sure you're also considering these vital preparation steps for a professional outcome.
Case Study: The Uneven Entryway
Sarah wanted a grand marble entryway. She picked out stunning white marble tiles, but her contractor rushed the prep. He didn't check the concrete slab for levelness, and there was a slight dip right in the center. After the tiles were installed and grouted, the difference was noticeable. The tiles in the middle looked lower, and it created an awkward transition. Plus, a few tiles near the edges started to chip within months because they weren't fully supported. If the contractor had used a self-leveling compound and a crack-isolation membrane, Sarah's entryway would have been perfect and problem-free. It’s a classic example of how skipping substrate prep can lead to costly repairs and disappointment.
Choosing the Right Setting Materials
Getting your beautiful marble tiles installed correctly is just as important as picking the perfect stone. The materials you use to set them play a huge role in how they look and how long they last. Think of it like building a house – a strong foundation and the right tools make all the difference. We've got the best setting materials to make sure your marble project shines.
Selecting Appropriate Mortars and Adhesives
When it comes to marble, you can't just grab any old adhesive. Natural stone needs special care. We recommend high-quality thin-set mortars specifically designed for natural stone. These ensure a strong bond without damaging the delicate beauty of your marble. Forget those premixed mastics; they just don't cut it for stone. You want something that's going to hold up and keep your tiles looking great for years to come. It's a small detail that makes a big impact on the final result.
Using White Thin-Set for Light Marble
This is a pro tip that makes a world of difference, especially if you're working with classic white marble or other light-colored stones. Using a gray thin-set mortar can actually show through lighter tiles, causing discoloration or a muddy appearance. That's why we always suggest opting for a white thin-set mortar when installing light marble. It keeps the true color of your stone vibrant and pure. It’s a simple switch that guarantees a cleaner, more elegant finish. You can find great options for white thin-set when you buy marble tiles online USA.
Compatibility with Adjacent Finishes
Your marble tiles won't be installed in a vacuum. They'll be next to walls, other flooring, or perhaps decorative trim. It's super important that your setting materials play nice with everything else. Make sure the mortar or adhesive you choose is compatible with any adjacent finishes. This prevents issues like peeling, cracking, or discoloration where different materials meet. We've got products that work well with all sorts of combinations, so your whole design flows together perfectly. It’s all about creating a cohesive look that lasts.
Case Study: The Elegant Entryway
A homeowner in Chicago wanted a stunning entryway using Carrara marble tiles. They initially considered a standard gray thin-set but were advised to switch to white thin-set for their light marble. The result? A bright, airy, and flawless floor that truly showcased the marble's natural beauty. The installer noted that the white thin-set prevented any unwanted color bleed-through, making the veining pop exactly as intended. This small change made a significant difference in the final aesthetic, proving the importance of choosing the right setting materials for your project.
Best Practices for Marble Tile Installation
Getting your beautiful marble tiles installed correctly is just as important as choosing them. A flawless installation means your marble will look stunning for years, adding value and elegance to your home. We’ve put together some key steps to make sure your project goes smoothly. Think of this as your pro guide to a perfect finish, whether you're installing a marble tile backsplash or a grand marble floor. If you're looking to buy marble tiles online in the USA, starting with the right installation practices is key.
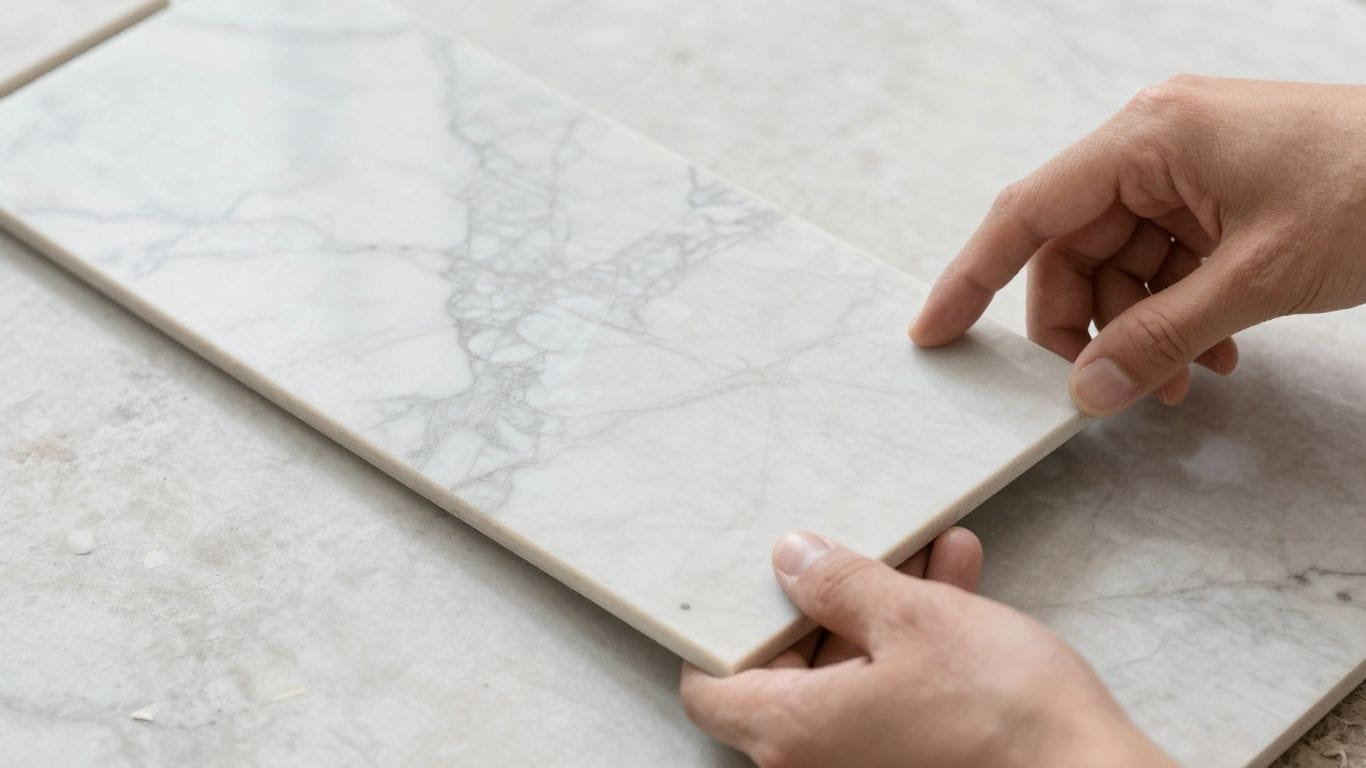
Inspect Tiles Before Installation
Before any tile hits the adhesive, give each one a good look. Marble is a natural stone, and that means every piece is unique. You might find slight variations in color or pattern, which is part of its charm! But it's also important to check for any chips, cracks, or warping. Setting a tile is usually seen as accepting its quality, so take a moment to inspect. If something doesn't look right, set it aside or talk to your supplier. It’s better to catch a problem before it’s permanently in place.
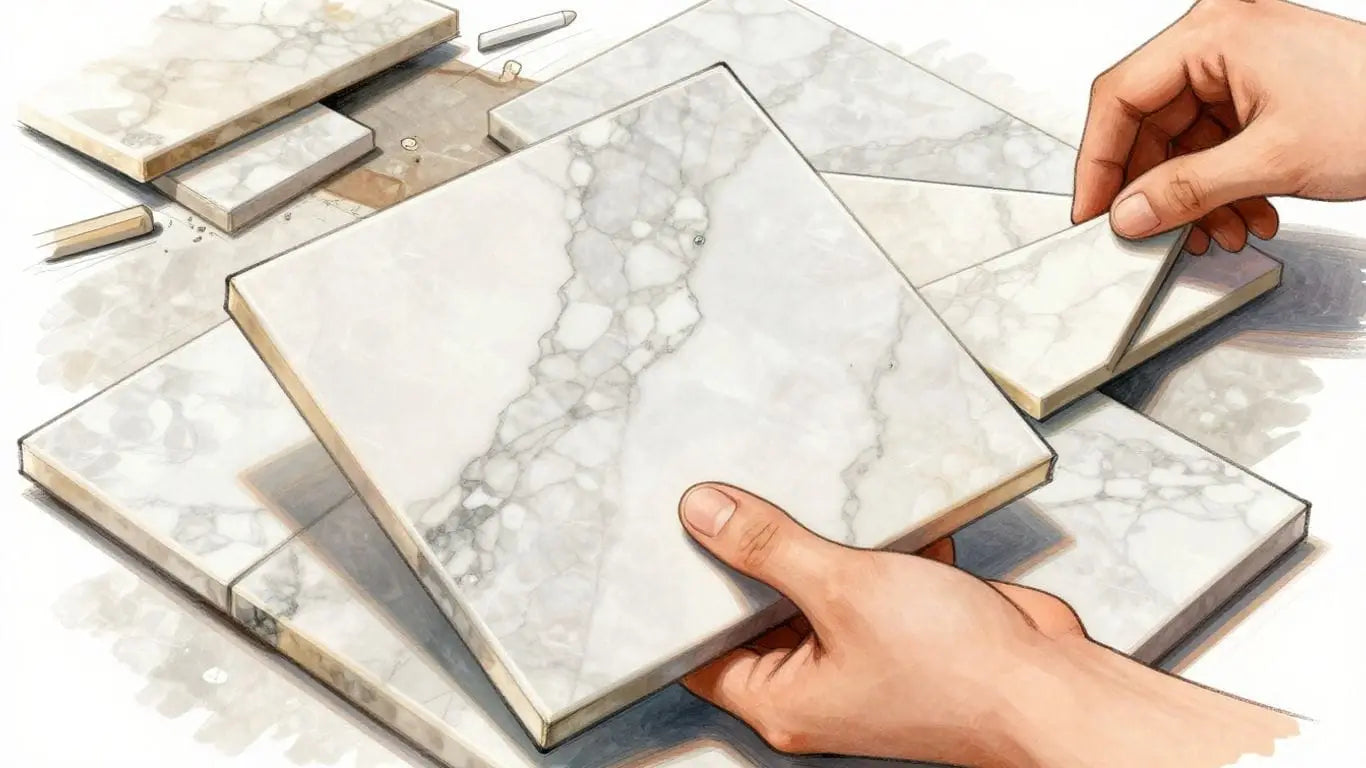
Plan Your Layout with Dry Laying
This step is a game-changer. Before you mix any mortar, lay out your tiles on the floor or wall without adhesive. This is called 'dry laying.' It lets you see how the colors and veining will flow together. Since marble has natural variations, pulling tiles from different boxes and arranging them helps create a balanced, pleasing look. You can also figure out the best placement to avoid awkward cuts near edges or corners. This planning stage is where you really get to visualize the final result and make sure it’s exactly what you envisioned. For a beautiful marble tile backsplash, this step is especially important to blend the natural variations. See tile layout ideas.
Proper Tools and Setting Techniques
Using the right tools and techniques makes all the difference. When you're ready to set the tiles, use a notched trowel that’s the right size for your tiles to spread the thin-set mortar evenly. Work in small sections so the mortar doesn’t dry out. Press each tile into the mortar with a gentle wiggle to make sure you get full coverage on the back – no one wants hollow spots! It’s also a good idea to occasionally lift a tile to check. Use tile spacers to keep your grout lines consistent and a level to ensure the surface is flat. For larger or heavier tiles, consider using a leveling system to keep everything flush. This attention to detail prevents issues like lippage (uneven tile edges) down the road.
Cutting and Shaping Marble Tiles
Cutting natural stone requires care. A wet saw with a diamond blade is your best friend here. Always use a sharp blade designed for stone to avoid chipping. Take your time; rushing a cut is a common mistake that can lead to broken tiles. Always wear safety glasses and gloves. If you have cut edges that will be visible, you might need to sand or polish them for a smooth finish. Planning your cuts so they’re hidden against walls or in corners can save you a lot of work.
Grouting and Sealing Your Marble Installation
Once the mortar is fully cured (usually 24-48 hours), it’s time for grout. Use a grout float to apply it, working diagonally across the tiles to fill the joints. Clean off the excess with a damp sponge, rinsing it often. Be careful not to pull grout out of the joints. After the grout has cured according to the manufacturer's instructions (typically 48-72 hours), it’s time to seal. Sealing is super important for marble because it’s porous. A good quality sealer will protect your beautiful tiles from stains and moisture. Always follow the sealer’s instructions for application and drying times. This step is vital for the longevity of your marble floor.
Case Study: The Elegant Entryway
A homeowner in Scottsdale wanted a grand entryway that made a statement. They chose a classic white marble tile with subtle gray veining. After carefully dry-laying the tiles to ensure a perfect flow of the natural patterns, they meticulously installed each piece using a high-quality thin-set mortar. The result? A breathtaking entryway that felt both luxurious and timeless. The homeowner mentioned how the dry-lay process was key to achieving the desired visual balance, and how taking the extra time to inspect each tile prevented any potential issues. This project truly showcased how proper installation techniques can transform a space.
Case Study: The Spa-Like Bathroom
For a bathroom renovation in Austin, the client selected a beautiful honed marble tile for the floor and shower walls. The installer paid close attention to the substrate preparation, ensuring a perfectly level and stable surface. During installation, they used a white thin-set mortar to prevent any discoloration of the light marble. After grouting with a fine-grained grout and sealing the entire area, the bathroom was transformed into a serene, spa-like retreat. The client was thrilled with the seamless look and the durability of the marble, noting that the installer's expertise in handling natural stone was evident throughout the project. Buy marble tiles online USA for your next project and achieve similar stunning results.
Cutting and Shaping Marble Tiles
Using the Right Tools for Stone Cutting
Cutting marble tiles might seem intimidating, but with the right tools and a little know-how, you can achieve professional results. For precise cuts, especially on intricate patterns or edges, a wet saw with a diamond blade is your best friend. This tool keeps the blade cool and minimizes dust, which is great for both the stone and your workspace. If you're working on simpler cuts or smaller projects, a good quality manual tile cutter can also do the job, though it requires a bit more finesse with natural stone.
Techniques to Avoid Chipping
Marble is beautiful, but it can be brittle. The key to avoiding chips and cracks is patience and technique. Always cut slowly and steadily. Rushing the process is the quickest way to ruin a tile. For wet saws, ensure the water reservoir is full and the blade is sharp. When using a manual cutter, score the tile firmly and then snap it with a controlled motion. Always plan your cuts to hide any cut edges against walls or in corners whenever possible. This not only looks better but also saves you the extra step of finishing those edges.
Finishing Cut Edges for Exposed Areas
Sometimes, you just can't hide a cut edge. This is common around doorways, countertops, or decorative inlays. For these exposed areas, you'll want to smooth and finish the cut edge. You can achieve this with a rubbing stone or a specialized edge polishing tool. A fine-grit sandpaper or a polishing pad can also work wonders for a smooth, professional look. This step really makes a difference, turning a raw cut into a polished detail that matches the rest of your beautiful marble.
Case Study: The Kitchen Backsplash Upgrade
Sarah wanted a unique marble backsplash for her kitchen. She found a stunning mosaic online but realized she needed to cut some pieces to fit around her outlets. Initially worried about damaging the delicate marble, she rented a wet saw. By taking her time, measuring carefully, and making slow, deliberate cuts, she successfully shaped the mosaic pieces. The result? A custom-fit backsplash that looked professionally installed, proving that with the right approach, even complex cuts are manageable.
Case Study: The Bathroom Floor Transformation
Mark was renovating his bathroom and decided on large format marble tiles. He needed to cut several tiles to fit the perimeter of the room and around the vanity. He opted for a high-quality manual tile cutter and a diamond hand file for edge finishing. He dry-laid all the tiles first to plan his cuts, then proceeded with cutting. He found that scoring the tile twice with light pressure was more effective than one hard score. The finished floor looked seamless, with clean, sharp edges where needed, showcasing his attention to detail.
Grouting and Sealing Your Marble Installation
Applying Grout Correctly
Once your beautiful marble tiles are set and the adhesive has cured, it's time for grouting. This step fills the gaps between your tiles, not only completing the look but also adding a layer of protection. For marble, it's really important to get this right. You want a grout that complements your stone, not competes with it. Many people opt for sanded grout for wider joints, but for those tight, elegant lines often seen with marble, unsanded grout is usually the way to go. Always check the grout manufacturer's recommendations for your specific tile type. When you're ready to mix, follow the instructions precisely. A common mistake is adding too much water, which weakens the grout. Mix it to a peanut butter consistency – thick enough to hold its shape but spreadable.
Use a grout float to spread the grout, working it into the joints diagonally. This technique helps fill the gaps completely and avoids pulling grout out of the joints. Work in manageable sections, especially if you're working with a large area or in warm conditions. After applying, use the float to scrape off the excess grout from the tile surface. Don't let the excess grout dry on the tiles; it's much harder to remove later.
Allowing Grout to Cure Properly
This is where patience really pays off. After grouting, the grout needs time to harden and gain strength. This curing process is critical for the longevity and performance of your tile installation. Most cement-based grouts require at least 24 to 72 hours to cure, but always check the specific product's instructions. During this time, avoid walking on the tiles or exposing them to excessive moisture. You might see a slight haze form on the tiles as the grout cures – this is normal and can be cleaned off once the grout is fully cured. Rushing this step can lead to weak grout lines that are prone to cracking or crumbling down the road. Think of it as letting your new marble floor really settle in and get comfortable.
The Importance of Sealing Marble Tiles
Marble is a natural stone, and like most natural stones, it's porous. This means it can absorb liquids, which can lead to staining or etching if not protected. Sealing your marble tiles creates a barrier that helps prevent these issues. It's a vital step in maintaining the pristine look of your marble for years to come.
Sealing is your marble's best defense against everyday spills and wear.
When choosing a sealer, opt for one specifically designed for natural stone. There are penetrating sealers that soak into the stone and grout, and topical sealers that form a protective layer on the surface. For most marble installations, a penetrating sealer is recommended. Application is usually straightforward: apply with a clean cloth or applicator pad, let it soak in according to the manufacturer's directions, and then wipe off any excess. You'll typically need to reseal your marble every 1-3 years, depending on traffic and usage. Regular sealing is key to keeping your marble looking its best. If you're looking to buy marble tiles online in the USA, make sure to factor in the cost and availability of quality sealers.
Case Study: The Kitchen Countertop Transformation
Sarah wanted a luxurious kitchen, and she chose stunning white marble for her countertops. She meticulously installed them herself, but after a few months, she noticed a faint ring from a coffee cup and a slight discoloration where red wine had spilled. She hadn't sealed the marble properly after installation. After a bit of research, she learned about the importance of sealing. She purchased a high-quality penetrating sealer and carefully applied it to her countertops, following the instructions. Within a day, the rings and discoloration were gone, and her marble looked as good as new. This experience taught her that while marble is beautiful, proper sealing is non-negotiable for maintaining its elegance, especially in a busy kitchen environment. She now recommends sealing to everyone considering marble for their homes.
Case Study: The Bathroom Floor Resilience
Mark installed Bardiglio Imperiale Marble tiles in his master bathroom. He was worried about moisture and potential soap scum buildup. He made sure to use a white thin-set mortar suitable for natural stone and then carefully grouted the tiles. Before sealing, he let the grout cure for the full 72 hours. He then applied a premium impregnating sealer. Two years later, his bathroom floor still looks fantastic. Despite daily use and exposure to steam, the tiles remain stain-free and easy to clean. The sealer has held up remarkably well, proving that taking the time for proper grouting and sealing makes a significant difference in the long-term beauty and durability of marble in high-moisture areas. He often tells friends, "Don't skip the sealing step; it's the best investment you'll make for your marble."
Maintaining the Beauty of Your Marble Tiles
Routine Cleaning and Care
Keeping your marble tiles looking their best is simpler than you might think. Regular cleaning prevents dirt and grime from dulling that gorgeous sheen. For everyday upkeep, a soft broom or a vacuum cleaner with a soft brush attachment is your best friend. When it's time for a deeper clean, use a pH-neutral cleaner specifically designed for natural stone. Avoid harsh chemicals or acidic cleaners, as these can etch the surface. Think of it like this: you wouldn't use a harsh scrub on your favorite silk blouse, right? Your marble deserves that same gentle treatment. A quick wipe-down after spills is also a lifesaver – marble is porous, so addressing messes promptly stops them from becoming permanent. For those looking to buy marble tiles online USA, remember that proper care is key to their longevity.
Understanding Sealer Application and Frequency
Sealing your marble tiles is like giving them a protective shield. It helps prevent stains and moisture from penetrating the stone. Most natural stones, including marble, need to be sealed. How often? It really depends on the type of marble and how much traffic it sees. Generally, sealing once a year is a good rule of thumb. You can test if your tiles need sealing by dripping a little water on them. If the water beads up, your sealer is still doing its job. If it soaks in and darkens the stone, it's time to reapply. Always follow the sealer manufacturer's instructions for application and drying times. Choosing the right sealer is important, and we have a great selection available.
Addressing Stains and Etching
Accidents happen, but don't panic if you encounter a stain or etching on your marble. The key is to act fast. For most common stains, a poultice made from an absorbent material (like baking soda or diatomaceous earth) mixed with water can work wonders. Apply it to the stain, cover it with plastic wrap, and let it sit for 24-48 hours before gently scraping it away. Etching, which looks like a dull spot caused by acidic substances, is a bit trickier. Mild etching might be buffed out with a marble polishing powder. For deeper etching or stubborn stains, it might be best to consult a professional stone restoration specialist. Remember, a little proactive care goes a long way in keeping your marble looking pristine.
Case Study: The Miller Residence
The Miller family invested in stunning white marble tiles for their kitchen backsplash and bathroom floors. Initially, they were worried about maintenance, especially with two young children. Following our advice, they implemented a routine of daily wiping and annual sealing. When a red wine spill occurred in the kitchen, they immediately blotted it and used a baking soda poultice, successfully removing the stain without any lasting damage. Their bathroom floors, despite daily use, continue to look as radiant as the day they were installed, thanks to consistent sealing and gentle cleaning. They often tell us how their marble tiles are the highlight of their home, proving that with the right care, marble is both beautiful and practical.
Proper maintenance is not just about cleaning; it's about understanding the unique nature of marble and treating it with the respect it deserves. This ensures its enduring beauty for years to come.
Keeping your marble tiles looking their best is easier than you think! A little regular care goes a long way in preserving their natural shine and elegance. Simple cleaning routines and avoiding harsh chemicals will help maintain their beauty for years to come. Want to learn more about the best ways to care for your marble? Visit our website for detailed guides and tips!
Wrapping Up Your Marble Tile Choice
So, picking out the right marble tile might seem like a big deal, and honestly, it is. But by taking it step-by-step, thinking about where it's going, what it needs to handle, and what look you're going for, you can totally nail it. Remember, marble is a natural material, so a little variation is part of its charm. Don't forget to check out Surfaces Galore for a huge selection and maybe even grab some samples to see them in person before you commit. Getting the right tile makes all the difference, and with a little planning, your project will look amazing for years to come.
Frequently Asked Questions
What makes marble tiles so special?
Marble tiles are loved because they look super fancy and timeless. Each piece is unique with its own cool lines and colors, like a work of art for your floors or walls. They can make any room feel more elegant and add a touch of luxury.
Is marble good for busy areas like kitchens or hallways?
Marble is beautiful, but it can scratch or get stained more easily than some other stones. For busy spots, it's often better to use it for decoration or in areas that don't get a lot of foot traffic. If you do use it on floors, make sure to seal it well and be ready for a bit more cleaning.
What's the difference between polished and honed marble?
Polished marble is super shiny and smooth, giving a really bright, glamorous look. Honed marble has a more muted, matte finish, which looks sophisticated and is a bit less slippery. Think of polished like a mirror and honed like a smooth, soft stone.
How do I know how much marble tile to buy?
First, measure the total area you want to cover in square feet. Then, add about 10% to 15% extra. This extra bit is important because you'll need it for cutting tiles to fit around corners and edges, and sometimes a tile might break.
Can I see marble samples before I buy a lot?
Absolutely! It's a great idea to get samples. Since marble is natural, the colors and patterns can look a little different from what you see online or in a catalog. Seeing a sample lets you check the exact color and texture in your own home's lighting.
What kind of grout should I use with marble?
For lighter colored marble, it's best to use white or a light-colored grout. This stops any dark grout color from showing through the stone or making it look dull. Always check the grout's instructions to make sure it's safe for natural stone.
How do I keep my marble tiles looking good?
Cleaning marble is pretty simple: use a soft cloth and a mild, pH-neutral cleaner. Avoid harsh chemicals or acidic cleaners, as they can damage the stone. It's also important to seal your marble regularly, usually once a year, to protect it from stains.
Is travertine a good alternative to marble?
Yes, travertine is often a more affordable choice that still offers a beautiful natural stone look. It has a charming, earthy feel with unique holes and textures. While it's durable, like marble, it also needs to be sealed properly to keep it looking its best.
Leave a comment