
A Step-by-Step Guide to Installing a Travertine Tile Backsplash

Thinking about a travertine tile backsplash? It’s a great choice for adding natural beauty and durability to your kitchen. Installing one yourself might seem a little daunting, but with the right steps, it’s totally doable. This guide will walk you through the whole process, from picking out your tiles to the final sealing. We’ll cover everything you need to know to get that beautiful, natural stone look in your home. Let's get started on your backsplash project!
Key Takeaways
- Prepare your wall and gather all necessary tools and materials before you begin installing travertine tile backsplash.
- Plan your tile layout carefully and consider dry-laying to visualize the final look and identify any potential issues.
- Use the correct type of adhesive, typically a thin-set mortar specifically designed for natural stone, and apply it evenly with a notched trowel.
- Set each travertine tile with care, using spacers for consistent grout lines and a level to ensure a flat surface.
- Cut travertine tiles accurately using a wet saw with a diamond blade, taking precautions to minimize chipping.
- Apply grout after the adhesive has fully cured, working diagonally and cleaning excess carefully.
- Allow the grout to cure before applying a quality stone sealer to protect your new travertine tile backsplash from stains and moisture.
- Regular cleaning and periodic resealing are important for maintaining the beauty and longevity of your installed travertine tile backsplash.
Preparing for your travertine tile backsplash installation
Understanding the beauty and durability of travertine
Travertine is a natural stone, and that's part of its charm. It brings a unique, earthy elegance to any kitchen. Unlike manufactured materials, each piece has its own character, with subtle variations in color and texture. This natural beauty means your backsplash will be truly one-of-a-kind. Plus, travertine is known for its durability. It holds up well to daily use, making it a practical choice for a busy kitchen environment. When you buy marble tiles online USA, you're investing in a material that adds lasting value and timeless appeal to your home.
Gathering essential tools and materials for the project
Before you start, make sure you have everything you need. This includes the travertine tiles themselves, of course. You'll also need thin-set mortar specifically designed for natural stone – using the wrong adhesive can cause problems down the line. Don't forget a notched trowel for spreading the mortar, tile spacers for consistent grout lines, and a wet saw with a diamond blade for cutting. Safety gear like gloves and eye protection is a must. Having all your supplies ready makes the installation process much smoother.
Ensuring your wall substrate is ready for tile
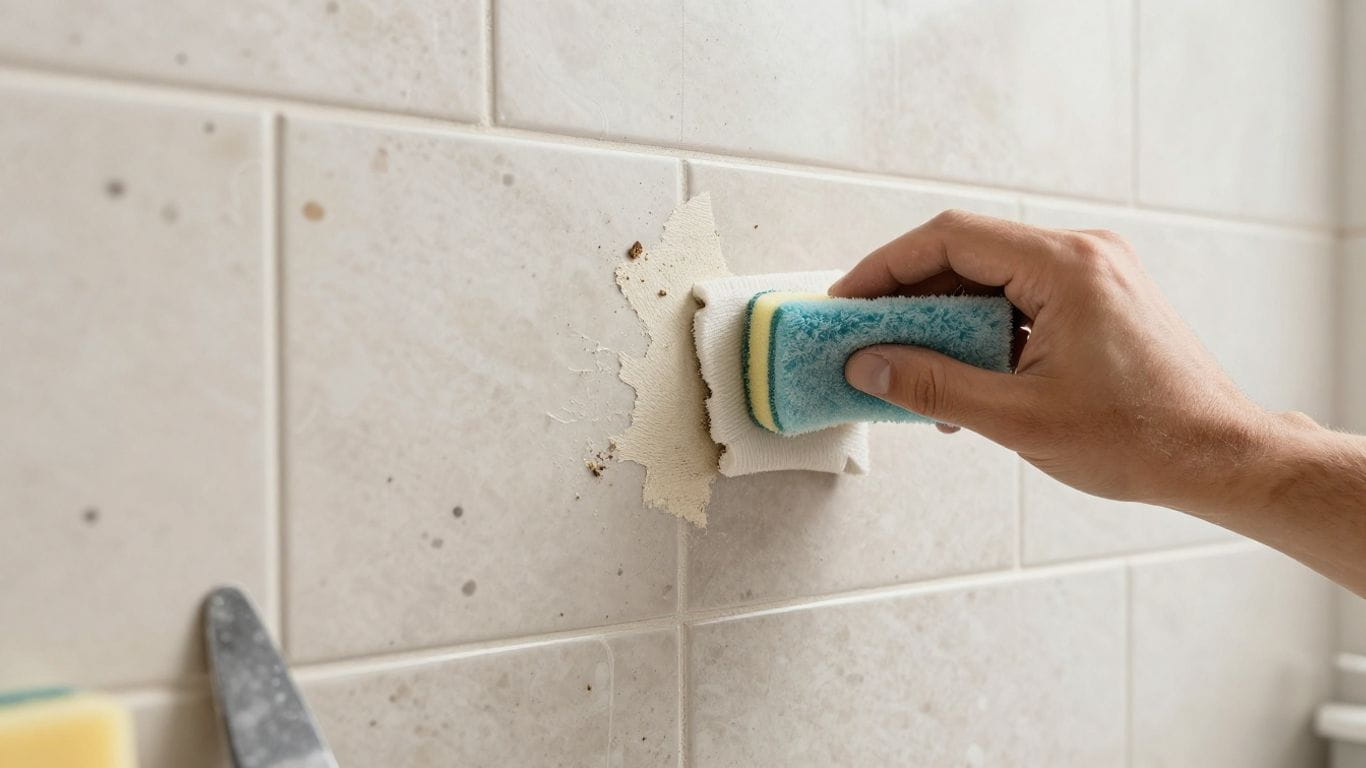
Your wall needs to be a solid foundation. It should be clean, dry, and free of any dust or grease. Any unevenness or damage needs to be addressed before you begin. A stable, smooth surface is key for the tiles to adhere properly and for the finished backsplash to look its best. Think of it like preparing a canvas before painting – a good base makes all the difference. A well-prepared wall prevents future issues like tiles loosening or grout cracking.
Acclimating your travertine tiles to the room environment
Natural stone needs time to adjust. Let your travertine tiles sit in the room where they'll be installed for at least 48 hours before you start. This allows them to adapt to the room's temperature and humidity. Skipping this step can lead to problems later, like tiles expanding or contracting after installation, which can cause them to crack or shift. It’s a simple step that helps ensure a stable, long-lasting installation.
Planning your travertine tile layout for a seamless look
This is where you get to visualize the final result. Before you mix any adhesive, lay out your tiles on the floor or a large surface. This 'dry lay' helps you plan the pattern, decide where cuts will be needed, and ensure a pleasing distribution of color and veining. It's also the best time to identify any tiles that might have significant imperfections. Planning your layout carefully helps avoid awkward cuts at the edges and ensures a professional, cohesive appearance. You can explore different tile layout ideas at Surfaces Galore to get inspired.
Selecting the right adhesive and grout for natural stone
Not all adhesives and grouts are created equal, especially when it comes to natural stone. You need products specifically formulated for marble and travertine. For lighter colored stones, opt for white thin-set mortar to prevent any gray undertones from showing through. Always check the manufacturer's recommendations to ensure compatibility with your chosen tiles and substrate. Using the correct materials is vital for a strong, durable bond that lasts. This is where quality matters, and investing in the right products from the start saves headaches later.
Protecting yourself with proper safety equipment
Safety first! Working with tiles and tools can be hazardous. Always wear safety glasses to protect your eyes from dust and debris, especially when cutting tiles. Gloves are important to protect your hands from the adhesive, grout, and sharp edges. If you're working on your knees for extended periods, consider knee pads. A dust mask is also a good idea when cutting stone. Being prepared ensures you can focus on the job without risking injury.
Case Study: The Miller Residence The Millers wanted a kitchen backsplash that felt both luxurious and natural. They chose a tumbled travertine for its rustic charm. After carefully acclimating the tiles and planning their layout with a dry lay, they used a high-quality natural stone thin-set mortar. The result was a stunning backsplash that perfectly complemented their kitchen's warm, inviting atmosphere. They reported that the preparation steps were key to their success, making the installation process manageable and the final look exceptional.
Mastering the art of cutting travertine tiles
Cutting travertine tiles might seem daunting, but with the right approach, you can achieve professional-looking results. It’s all about precision and using the correct tools. Don't let the natural beauty of travertine intimidate you; mastering these cuts will make your backsplash installation truly shine.
Choosing the Correct Cutting Tool for Natural Stone
For travertine, a wet saw is your best friend. This tool uses a diamond blade and a water-cooling system to make clean, precise cuts. Trying to use a standard tile cutter designed for ceramic can lead to chipping and frustration. If you're looking to buy marble tiles online in the USA, remember that the cutting tools needed are similar for most natural stones.
Techniques for Achieving Clean Cuts with a Wet Saw
Using a wet saw effectively is key. Always ensure the water reservoir is full to keep the blade cool and minimize dust. Slowly guide the tile through the blade, letting the saw do the work. Rushing the cut is the quickest way to get a chipped edge. For intricate cuts, like around outlets, you might need to make multiple passes. A well-maintained wet saw can make all the difference.
Safely Handling and Cutting Delicate Travertine Pieces
Travertine, while durable, can be brittle. Always wear safety glasses and gloves when cutting. Support the tile on both sides of the blade to prevent it from cracking as it's cut. If you're cutting a small piece, consider using a tile nipper for minor adjustments, but for most cuts, the wet saw is superior.
Minimizing Chipping and Breakage During Cuts
Chipping is a common issue with natural stone. To minimize it:
- Use a sharp, stone-specific diamond blade.
- Ensure the wet saw's water feed is functioning properly.
- Cut slowly and steadily.
- Support the tile on both sides of the blade.
- Consider using a backing material for very small cuts.
Planning Cuts to Conceal Edges Whenever Possible
Smart planning can hide less-than-perfect cuts. Whenever possible, position cut edges against walls, cabinets, or other fixtures. This way, any minor imperfections will be out of sight. Think about your layout beforehand to maximize the use of full tiles and strategically place cuts where they won't be noticeable.
Finishing Cut Edges for a Polished Appearance
If a cut edge will be visible, you'll want to finish it. A light sanding with a fine-grit sandpaper or a rubbing stone can smooth out rough edges. For a more professional look, you can use a specialized edge polishing tool. This step adds a refined touch to your backsplash.
Importance of a Sharp, Stone-Specific Diamond Blade
A dull or incorrect blade will make cutting travertine a chore and increase the risk of chipping. Invest in a high-quality diamond blade designed specifically for cutting natural stone. This will not only make the job easier but also yield cleaner, more precise cuts, saving you time and frustration. It’s a small investment for a significant improvement in your project's outcome.
Case Study: The Kitchen Backsplash Transformation
Sarah, a homeowner in Austin, Texas, wanted a unique travertine backsplash. She purchased beautiful tumbled travertine tiles from Surfaces Galore. Initially, she was nervous about cutting the tiles to fit around her stove hood. She rented a basic tile saw, but the results were rough, with noticeable chips. After switching to a proper wet saw with a diamond blade, she found the cuts were much cleaner. She learned to take her time, supporting the tile and letting the saw do the work. The final result was a stunning, custom-fit backsplash that transformed her kitchen. She mentioned, "I almost gave up on cutting the tiles myself, but the right tool made all the difference. It looked so much more professional."
Another client, Mark, was installing a honed travertine backsplash in his modern kitchen. He was concerned about the sharp edges of the cut tiles showing. He planned his cuts carefully, ensuring most were hidden behind cabinet edges. For the visible cuts, he used a rubbing stone to smooth the edges, achieving a clean, polished look that complemented the sleek design of his kitchen. He found that planning the layout to minimize visible cuts was as important as the cutting technique itself.
Applying adhesive for a strong travertine bond
Getting the adhesive right is key to a backsplash that lasts. For travertine, you need a bond that's as strong and beautiful as the stone itself. We're talking about a bond that holds up to daily life, keeping your tiles looking great for years.
Mixing thin-set mortar to the correct consistency
This is where the magic starts. You'll want to use a high-quality thin-set mortar specifically designed for natural stone. Mixing it is like baking – precision matters. Too wet, and it won't hold; too dry, and it'll be crumbly and weak. Aim for a consistency like peanut butter or thick cake batter. It should hold its shape on the trowel but still be spreadable. Always follow the manufacturer's instructions on the bag – they know their product best.
Using the right notched trowel for optimal coverage
Don't just grab any trowel. The size of the notches matters. For travertine, a 1/4-inch or 3/8-inch V-notch or square-notch trowel is usually a good bet. This ensures you get full coverage on the back of each tile, which is vital for a strong bond. Think of those notches as creating channels for the mortar to grip the stone. You can find a great selection of notched trowels for adhesive application to get the job done right.
Spreading mortar in manageable sections
Work smart, not hard. Spread the thin-set mortar in small sections, about 2-3 square feet at a time. Why? Because this stuff dries fast, especially in warmer conditions. You want to lay your tiles while the mortar is still wet and sticky, ready to grab them. This prevents you from having to rush or, worse, ending up with dried-out mortar that won't bond properly.
Creating ridges with the trowel for better adhesion
This is a pro tip that makes a big difference. Hold your notched trowel at about a 45-degree angle to the wall. Comb the mortar in one direction, creating consistent ridges. These ridges aren't just for show; they help release trapped air and allow the tile to press down evenly, maximizing contact and creating a super strong bond. It’s all about surface area!
Pressing tiles firmly into the mortar with a slight twist
Once the mortar is spread, it's time to set the tile. Don't just slap it on there. Press each travertine tile firmly into the mortar. A slight wiggle or twist as you press helps collapse those ridges and ensures the entire back of the tile is covered. This is what prevents those annoying hollow spots that can lead to cracked tiles down the road.
Checking for full mortar coverage on the tile back
This is a critical step that many DIYers skip. Periodically, lift a tile you've just set to check the mortar coverage on its back. You're looking for at least 90% coverage, especially on the edges. If you see large gaps, you need to adjust your trowel size or your technique. Full coverage means a durable installation.
Working methodically to prevent adhesive drying
Remember that bit about working in small sections? It’s worth repeating. Stay organized and work your way across the backsplash systematically. Keep your tools clean, and have everything you need within reach. This methodical approach not only prevents the adhesive from drying out but also helps you maintain consistent spacing and alignment, leading to a professional-looking finish. If you're looking for the perfect travertine tiles to complement your work, check out our Scabos Travertine tiles.
Case Study: The Miller Residence Backsplash
The Millers wanted a kitchen backsplash that was both durable and elegant. They chose a beautiful tumbled travertine. By carefully mixing their thin-set to the perfect consistency and using the correct notched trowel, they achieved excellent mortar coverage on every tile. They worked in manageable sections, ensuring the adhesive stayed workable. The result? A stunning, long-lasting backsplash that perfectly complements their kitchen's rustic charm. They mentioned that checking the mortar coverage on the back of each tile was a game-changer for their confidence in the installation's strength.
Setting travertine tiles with precision
Now for the satisfying part: placing your beautiful travertine tiles! This stage requires a steady hand and a keen eye to achieve that professional, polished look. Getting this right means your backsplash will not only look stunning but will also stand the test of time. Let's get those tiles set perfectly.
Placing Tiles According to Your Planned Layout
Remember that dry-lay you did? Now's the time to bring that plan to life. Start from your marked guidelines, usually the center of your backsplash area, and work outwards. Each tile placement is a step towards your finished masterpiece. If you're looking for a specific pattern, like a checkerboard, now is when you execute it flawlessly. For those seeking unique accents, consider marble and travertine borders and listellos to frame your design.
Using Tile Spacers for Consistent Grout Lines
Consistency is key! Tile spacers are your best friend here. Place them at each intersection where four tiles meet. This simple step guarantees uniform grout lines, which makes a huge difference in the final appearance. It prevents tiles from shifting as the adhesive sets and ensures a clean, orderly look. We recommend spacers that match the desired grout width for your design.
Ensuring Tiles Are Level and Free of Lippage
Lippage, those uneven tile edges, can be a real eyesore and a tripping hazard. Use your level frequently as you set each tile. Gently press each tile into the mortar with a slight wiggle to ensure full contact and a strong bond. If a tile sits a bit too high, a gentle tap with a rubber mallet can help settle it. Conversely, if it's too low, you might need to lift it, add a bit more mortar, and reset it.
Employing Leveling Clips for Larger or Heavier Tiles
For larger format tiles or heavier stones like some travertine options, standard leveling might not be enough. Consider using a tile leveling system. These clips and screws help pull tiles together, ensuring they are perfectly flush with each other. This is especially helpful for creating a smooth, monolithic look, particularly if you're working with tiles that have slight variations in thickness.
Making Minor Adjustments with a Rubber Mallet
Don't be afraid to make small adjustments. A rubber mallet is perfect for gently tapping tiles into place. A few light taps can settle a tile that's slightly too high or ensure it's fully seated in the mortar. Always use a rubber mallet, never a metal hammer, to avoid cracking or damaging the stone.
The Importance of a Slight Wiggle for Full Contact
When you press a tile into the fresh mortar, give it a slight wiggle or twist. This action helps to spread the mortar evenly across the entire back of the tile, eliminating air pockets. Full mortar coverage is vital for a strong, lasting bond and prevents issues like hollow spots, which can lead to tile failure down the road. It's a small step that makes a big difference.
Allowing Adequate Cure Time Before Grouting
Patience is a virtue, especially in tile installation! Once your tiles are set, you must let the adhesive cure completely. This typically takes 24 to 48 hours, but always check the manufacturer's instructions for your specific thin-set mortar. Rushing this step can compromise the entire installation. A fully cured adhesive provides a solid foundation for the next stage: grouting.
Case Study: The Miller Kitchen Backsplash
The Miller family wanted a kitchen backsplash that felt both timeless and durable. They chose a beautiful honed travertine tile from Surfaces Galore. During the setting phase, they meticulously used tile spacers to ensure perfectly even grout lines, a detail that truly made the natural stone variations pop. They also employed a leveling system for their larger tiles, which resulted in a remarkably flat and smooth surface, free of any lippage. The result? A stunning, professional-looking backsplash that has become the heart of their kitchen, proving that precision in setting makes all the difference.
Taking the time to set each travertine tile with care, ensuring it's level and properly adhered, is the foundation for a backsplash that you'll admire for years to come. Don't cut corners here; the longevity and beauty of your natural stone depend on it.
Ready to find the perfect travertine for your project? Explore the stunning collections at Surfaces Galore, where quality meets natural beauty. Buy travertine tiles online USA and start your transformation today!
Grouting your travertine tile backsplash
Allowing the adhesive to cure completely
Before you even think about grout, give that adhesive plenty of time to do its job. This isn't the time to rush. Travertine is a natural stone, and it needs a solid foundation. Most thin-set mortars require at least 24 to 48 hours to cure fully. Check the manufacturer's instructions for your specific product. Trying to grout too soon can lead to tiles shifting, which is a headache you don't need. A well-cured adhesive means your beautiful travertine tiles are locked in place, ready for the next step.
Mixing grout to the recommended consistency
Getting your grout mix just right is key. You're aiming for a consistency like peanut butter or thick cake batter – smooth and lump-free. Too watery, and it won't hold; too dry, and it'll be crumbly and hard to work with. Mix in small batches so it doesn't dry out before you can use it. This is where you really start to see your backsplash come together. If you're looking for grout options, consider what works best with your chosen stone. For example, when you buy marble tiles online USA, you'll want to pair them with compatible grout.
Applying grout diagonally across the tiles
Now for the satisfying part: filling those gaps! Grab your grout float and start applying the grout. The trick here is to work diagonally across the tiles. This motion helps push the grout deep into the joints without pulling it out. Don't be shy; make sure every little space is filled. You're building the structure that holds your stunning travertine together. It’s a technique that ensures a strong, lasting bond.
Using a grout float to fill joints effectively
Your grout float is your best friend in this stage. Hold it at about a 45-degree angle to the tile surface. This angle allows you to press the grout firmly into the joints, ensuring complete coverage. Work in a consistent pattern, moving the float back and forth. The goal is to pack those joints tightly. After filling, use the edge of the float to scrape off the excess grout from the tile faces. This makes the cleanup much easier later on.
Removing excess grout with the float
Once the joints are filled, it's time for the initial cleanup. Use the grout float held at a steeper angle (almost perpendicular to the tiles) to skim off the bulk of the excess grout. Again, work diagonally. This step is crucial for minimizing the amount of grout you'll need to sponge off later. Think of it as a rough clean-up pass. It’s amazing how much difference a good float can make in getting a clean finish.
Cleaning tiles with a damp sponge
This is where your backsplash really starts to shine. Use a damp (not soaking wet!) sponge to gently wipe away the remaining grout haze from the tile surfaces. Rinse your sponge frequently in a clean bucket of water. It's important to be gentle here; you want to clean the tile faces without digging grout out of the joints. A slightly damp sponge is perfect for this. You'll be amazed at how the true color of your travertine begins to show through.
Avoiding removal of grout from the joints
This is a critical point. As you wipe with your sponge, always move diagonally across the grout lines. If you wipe parallel to the joints, you risk pulling the grout out, creating uneven lines or even voids. Think of it as polishing the tiles rather than scrubbing them. A little patience here goes a long way in achieving that professional, finished look. You've worked hard on this travertine backsplash; don't let a rushed cleanup spoil it.
Case Study: The Miller Residence Backsplash
The Millers wanted a kitchen backsplash that felt both luxurious and durable. They chose a beautiful tumbled travertine tile. After carefully installing the tiles, they were ready for grouting. They mixed a high-quality, sand-colored grout to the perfect peanut butter consistency. Working in manageable sections, they applied the grout diagonally, ensuring every joint was filled. They used a damp sponge, rinsing it frequently, and always wiped diagonally to avoid disturbing the grout. The result? A stunning, seamless backsplash that perfectly complements their kitchen, proving that attention to detail in grouting makes all the difference.
Proper grouting is the bridge between a collection of tiles and a cohesive, beautiful surface. It's the step that locks everything in place and provides the final aesthetic polish. Taking your time and using the right techniques here will pay dividends in the longevity and appearance of your travertine backsplash.
Curing and sealing your new backsplash
Now that your beautiful travertine tiles are in place, it's time for the final, critical steps: curing and sealing. This isn't just about making things look finished; it's about protecting your investment and ensuring your backsplash stays stunning for years to come. Think of it as giving your natural stone the spa treatment it deserves.
Understanding grout cure times
Before you even think about sealing, you need to let that grout do its job. Grout is like the glue holding your masterpiece together, and it needs time to harden properly. Rushing this step can lead to weak joints and potential problems down the line. Most cementitious grouts need at least 48 to 72 hours to cure fully. Always check the manufacturer's instructions for the specific grout you used, as times can vary based on humidity and temperature. Patience here pays off big time.
Selecting the right stone sealer
Travertine is a natural stone, and like all natural stones, it's porous. This means it can absorb liquids, leading to stains and discoloration. A good quality stone sealer acts like a protective shield, repelling spills and making cleaning a breeze. When choosing a sealer, look for one specifically designed for natural stone, especially travertine. There are penetrating sealers that soak into the stone and topical sealers that form a protective layer on the surface. For backsplashes, a penetrating sealer is often preferred as it doesn't alter the natural look and feel of the stone. We recommend checking out options that are known for their durability and ease of application. If you're looking to buy marble tiles online in the USA, make sure the sealer you choose is compatible with marble too, as many natural stones require similar protection.
Applying sealer evenly to protect the travertine
Application is key to getting the most out of your sealer. Start by making sure your tiles and grout are completely clean and dry. Any dirt or moisture trapped underneath the sealer will be locked in. Work in small, manageable sections. Use a clean applicator, like a brush, roller, or a clean cloth, and apply the sealer evenly. Don't let it pool on the surface. You want a consistent, thin coat. For a backsplash, this is especially important to prevent grease and food splatters from penetrating the stone. A well-sealed backsplash is much easier to clean and maintain.
Following manufacturer instructions for application
Every sealer product is a little different. Some might require a second coat after a certain waiting period, while others are a one-and-done deal. Always, always read and follow the manufacturer's instructions. This includes recommended application methods, drying times, and any specific curing requirements. For instance, some sealers need a specific temperature range to cure properly. Getting this right ensures the sealer performs as intended and provides maximum protection. It’s a small step that makes a huge difference in the longevity of your beautiful travertine.
Allowing the sealer to cure properly
Once applied, the sealer needs time to cure. This is when it hardens and forms its protective barrier. While it might feel dry to the touch relatively quickly, it often takes 24-72 hours, or sometimes even longer, for the sealer to fully cure and reach its maximum protective capabilities. During this curing period, try to keep the area dry and avoid heavy use. This allows the sealer to bond effectively with the stone and grout. Proper curing is non-negotiable for long-term protection.
The role of sealing in stain and moisture resistance
Sealing is your first line of defense against everyday kitchen mishaps. Spills from cooking, splashes from the sink, or even just humidity can affect natural stone over time. A properly sealed travertine backsplash resists stains from common culprits like oil, wine, and tomato sauce. It also helps prevent moisture from seeping into the stone, which can lead to discoloration or even damage in freeze-thaw cycles (though less of a concern for indoor backsplashes). Think of it as giving your backsplash a durable, invisible shield.
Reapplying sealer periodically for ongoing protection
Sealing isn't a one-time job. Depending on the type of sealer used and the amount of wear and tear your backsplash experiences, you'll need to reapply it periodically. A good rule of thumb is to reseal your travertine backsplash at least once a year. You can test if it's time by sprinkling a little water on the surface. If the water beads up, your sealer is still doing its job. If it soaks in, it's time to reseal. Regular resealing keeps your travertine looking its best and protects your beautiful investment.
Case Study: The Miller Family Kitchen
The Miller family recently installed a stunning tumbled travertine backsplash in their kitchen. Initially, they were worried about maintaining its natural beauty, especially with two young children. After completing the installation, they followed our advice and applied a high-quality penetrating sealer. Six months later, during a busy holiday cooking session, red wine spilled directly onto the backsplash. To their amazement, the wine beaded up on the surface. A quick wipe with a damp cloth removed the spill completely, leaving no stain behind. This experience solidified their belief in the importance of proper sealing for their beautiful natural stone.
Case Study: Sarah's Chic Apartment
Sarah wanted a sophisticated look for her apartment kitchen and chose a honed travertine tile backsplash. She was concerned about potential grease stains from cooking. After letting the grout cure, she applied a reputable topical sealer, following the manufacturer's instructions precisely. She found the application straightforward and the finish subtle, not altering the stone's natural appearance. A year later, she resealed it as recommended. Her backsplash remains easy to clean, and she often receives compliments on its timeless elegance, proving that a little sealing goes a long way in preserving the stone's appeal.
Final touches and inspection of your installation
Performing a Final Cleaning of the Backsplash
Alright, you've made it to the finish line! Before you step back and admire your handiwork, give your newly installed travertine backsplash a thorough cleaning. Use a soft cloth and a pH-neutral cleaner specifically designed for natural stone. This step removes any lingering dust, grout haze, or adhesive residue, revealing the true beauty of your stone. It’s amazing how a good clean can make everything pop.
Inspecting All Tiles and Grout Lines for Imperfections
Now, take a good, long look. Walk along the backsplash, checking each tile and every grout line. Are there any tiles that seem a bit off? Any grout lines that aren't quite uniform? Look for chips, cracks, or any spots where the grout might not have filled in completely. This is your chance to catch any minor issues before they become bigger problems. Remember, natural stone like travertine has unique variations, but we're looking for actual installation flaws here.
Making Any Necessary Minor Repairs
Found a small chip or a grout line that needs a touch-up? No worries. For minor chips, you might be able to use a stone repair epoxy. If a grout line is sparse, you can carefully add a little more grout to fill it in. Just be sure to work carefully and match the existing grout color as closely as possible. If you're dealing with something more significant, like a cracked tile, it might be time to consider replacing it. It’s always better to fix these small things now.
Ensuring a Clean and Professional Finished Look
This is where your hard work really shines. Wipe down the edges where the backsplash meets your countertops and cabinets. Make sure there's no stray adhesive or grout. The goal is a crisp, clean line that makes your backsplash look like it was professionally installed. A clean finish makes all the difference in the overall appearance and really elevates the look of your kitchen.
Admiring Your Newly Installed Travertine Backsplash
Step back. Take it all in. You did it! You've successfully installed a beautiful travertine tile backsplash. Look at the natural patterns, the rich colors, the way the light catches the stone. This isn't just a backsplash; it's a piece of art that you created. It adds warmth, character, and a touch of timeless elegance to your kitchen. Think about how this will be a focal point for years to come. It’s a fantastic upgrade that truly transforms the space. For inspiration on how others have used travertine, check out the customer installations showcase.
Understanding the Long-Term Benefits of Natural Stone
Beyond the immediate beauty, remember the lasting value you've added. Travertine is known for its durability and longevity. With proper care, your backsplash will continue to look stunning for decades. It’s a smart investment in your home, offering both aesthetic appeal and practical resilience. Unlike some man-made materials, natural stone like travertine offers a unique character that simply can't be replicated. It’s a choice that speaks to quality and timeless style, making your kitchen a more enjoyable and valuable space. A well-maintained travertine backsplash can last for decades, potentially a lifetime, showcasing its enduring appeal as a classic kitchen trend [0553].
Case Study: The Miller Kitchen Transformation
The Miller family wanted to update their kitchen, which felt a bit dated. They decided on a tumbled travertine backsplash for its rustic charm and durability. After a weekend of careful work, following a similar step-by-step process, they were thrilled with the result. "It completely changed the feel of our kitchen," Sarah Miller shared. "It feels so much warmer and more inviting now. We get so many compliments on it!" They found the process manageable and the final look exceeded their expectations, proving that a DIY travertine backsplash is achievable and incredibly rewarding.
The satisfaction of completing a project like this yourself is immense. It's not just about the finished product, but the pride in knowing you created something beautiful and functional with your own hands. This backsplash is a testament to your effort and a source of enjoyment every day.
Choosing the perfect travertine for your backsplash
Selecting the right travertine for your backsplash is where the real magic begins. It’s not just about picking a tile; it’s about choosing a piece of natural art that will define your kitchen's personality. Travertine offers a unique blend of earthy elegance and lasting durability, making it a fantastic choice for a high-traffic area like your backsplash.
Exploring different travertine finishes
Travertine comes in a few distinct finishes, each offering a different vibe. Think about the look you're going for. Do you want something that feels smooth and modern, or do you prefer a more rustic, lived-in appearance? The finish you choose will significantly impact the overall aesthetic of your kitchen.
Understanding the appeal of tumbled travertine
Tumbled travertine is tumbled with pebbles and other materials, giving it a soft, rounded edge and a slightly worn look. This finish is perfect for creating a warm, rustic, or old-world feel in your kitchen. It’s forgiving with minor imperfections and adds a lot of character. If you're aiming for a cozy, farmhouse, or Mediterranean style, tumbled travertine is a strong contender.
Appreciating the smooth finish of honed travertine
Honed travertine, on the other hand, has a smooth, matte surface. It’s been polished to a flat finish but without the high shine of a polished stone. This gives it a sophisticated, understated elegance that works beautifully in contemporary or transitional kitchens. It’s also less prone to showing fingerprints and smudges than a polished finish. Many homeowners looking for a clean, modern look opt for honed travertine tiles.
Considering mosaic travertine for intricate designs
Travertine mosaics are fantastic for adding intricate details and visual interest. They come in various patterns like herringbone, subway, or penny rounds, all made from travertine. These are perfect for creating a statement backsplash that really pops. You can use them for the entire backsplash or as a decorative accent. The smaller pieces allow for more complex designs and can really highlight the natural variations in the stone. If you want to buy marble tiles online USA, you'll find similar mosaic options that offer a different kind of luxury.
Selecting colors like Ivory, Noce, or Scabos
Travertine colors range from light, creamy ivories to rich, earthy browns and even golden hues.
- Ivory Travertine: Offers a light, airy feel, perfect for brightening up your kitchen. It’s a classic choice that pairs well with almost any cabinet color.
- Noce Travertine: Features deeper, warmer tones, often with streaks of brown and reddish-brown. This adds a cozy, inviting atmosphere.
- Scabos Travertine: Known for its vibrant mix of colors, including reds, browns, golds, and yellows. It’s a more dynamic and visually striking option that brings a lot of personality to a space.
Matching travertine to your kitchen's aesthetic
Think about your existing kitchen. What color are your cabinets? What’s the style of your countertops? Travertine’s natural variations mean it can complement a wide range of styles. A light ivory might look stunning with dark wood cabinets, while a richer Noce could be perfect for a more traditional kitchen. Don't be afraid to mix and match colors or use different finishes to create a unique look. For instance, a Scabos Travertine backsplash can add a burst of warm color to an otherwise neutral kitchen.
The unique character of natural stone variations
One of the most beautiful aspects of travertine is its natural variation. No two tiles are exactly alike. You'll find subtle differences in color, veining, and even small natural pits (which are characteristic of travertine). This is what gives natural stone its charm and makes your backsplash truly one-of-a-kind. Embrace these variations; they are a sign of authenticity and add depth to your design. When you buy travertine tiles, you're investing in a piece of nature's artistry.
Case Study: The Miller Residence
The Miller family wanted a kitchen backsplash that felt both timeless and inviting. They chose a honed Ivory Travertine tile for its smooth, elegant finish and light color, which made their relatively small kitchen feel more spacious. They complemented this with a subtle travertine mosaic border in a herringbone pattern just above the cooktop for a touch of detail. The result was a sophisticated yet warm backsplash that perfectly tied their cream cabinets and granite countertops together. They mentioned how the natural variations in the ivory tiles gave the backsplash a depth they hadn't expected, making it a true focal point.
Case Study: The Chen Project
For a more rustic kitchen renovation, the Chen family opted for a tumbled Noce Travertine backsplash. They loved the textured, slightly imperfect look of the tumbled finish, which paired beautifully with their dark cherry cabinets and a farmhouse sink. The mix of browns and reddish tones in the Noce travertine added a cozy, earthy feel to the space. They found that the tumbled finish was also very forgiving, hiding minor splatters and wear easily. Their designer noted that the natural pits in the travertine added to its authentic charm, making the kitchen feel more grounded and welcoming.
Choosing your travertine is a personal journey. Take your time, consider the different finishes and colors, and think about how the stone's natural variations will contribute to your kitchen's unique character. The right travertine will not only look beautiful but also stand the test of time.
Essential tools for installing travertine tile

Notched trowel for adhesive application
To get a strong bond with your travertine tiles, you need the right tool for spreading adhesive. A notched trowel is your best friend here. The notches create ridges in the thin-set mortar, which helps with even coverage and a solid grip on the stone. The size of the notches matters, so check the recommendations for your specific thin-set and tile size. Using the correct trowel means fewer callbacks and a backsplash that lasts.
Wet saw with a diamond blade for cutting
Travertine is natural stone, and cutting it requires precision. A wet saw equipped with a diamond blade is the professional's choice. This tool makes clean, accurate cuts, which are vital for a polished look, especially around outlets or corners. Don't skimp on the blade; a good quality, stone-specific diamond blade will make all the difference in preventing chips and ensuring smooth edges. If you're looking to buy marble tiles online in the USA, remember that cutting them requires similar care.
Grout float for spreading and cleaning grout
Once your tiles are set and the adhesive has cured, it's time for grout. A grout float is designed to press grout into the joints between your travertine tiles effectively. Its firm, flexible edge helps fill every gap. After filling, you'll use it to scrape off the excess grout from the tile faces. Getting this right means no patchy spots and a clean finish.
Level and tape measure for accuracy
Precision is key in any tile project, and travertine is no exception. A reliable level is non-negotiable for ensuring your tiles are flat and free of lippage – that's when one tile edge sits higher than another. A tape measure is, of course, for all your measuring needs, from calculating square footage to marking cut lines. These simple tools prevent costly mistakes.
Sponges and buckets for cleaning
Throughout the installation process, especially during grouting, you'll need clean water and sponges. Having a couple of buckets on hand is smart – one for rinsing your tools and sponges, and another for fresh water. Clean sponges are vital for wiping away excess grout without smearing it across your beautiful travertine. It’s a bit of elbow grease, but it pays off.
Safety glasses and gloves for protection
Working with stone and tools can be hazardous. Always protect yourself. Safety glasses are a must when cutting tiles to keep dust and debris out of your eyes. Gloves will protect your hands from the adhesive, grout, and any sharp edges. Don't take chances with your well-being; proper safety gear is a small price to pay for peace of mind.
Rubber mallet for adjustments
Sometimes, tiles don't sit perfectly on the first try. A rubber mallet is your gentle persuader. Tapping lightly on a tile with a rubber mallet can help set it firmly into the adhesive or make minor adjustments to ensure it's level with its neighbors. It’s much kinder to the stone than a standard hammer.
Case Study: Sarah's Kitchen Backsplash
Sarah wanted a stunning travertine backsplash for her kitchen. She gathered all her tools, including a notched trowel, a wet saw, and a good level. She meticulously planned her layout and dry-laid the tiles first. When it came to applying the thin-set, she used the notched trowel correctly, ensuring full coverage. Her careful cutting with the wet saw meant minimal waste and a perfect fit around her stove. The result? A professional-looking backsplash that transformed her kitchen. She mentioned how having the right tools made the process much smoother than she expected.
Preparing your workspace and having the correct tools readily available is half the battle won. It streamlines the process and significantly reduces the chances of errors, leading to a more satisfying and professional outcome for your travertine installation.
Preparing the wall surface for installation
Before you even think about laying a single tile, let's talk about the foundation: your wall. A solid, well-prepared wall is the secret to a backsplash that looks amazing and lasts for years. Skipping this step is like building a house on sand – it's just asking for trouble down the line.
Cleaning the existing wall thoroughly
First things first, let's get that wall sparkling clean. You need to remove any grease, grime, or old adhesive. Think of it as giving your wall a spa treatment before its big makeover. A clean surface means your new travertine tiles will bond properly. We're talking about a surface that's free from anything that could get between the tile and the wall. A good scrub with a degreaser and some elbow grease usually does the trick. For stubborn spots, a gentle scraper might be needed. Remember, a clean wall is a happy wall, ready for its beautiful new travertine skin.
Ensuring the wall is smooth and free of debris
Once it's clean, we need to make sure it's smooth. Any bumps, ridges, or loose bits of paint need to go. Travertine tiles, especially honed or polished finishes, will show every imperfection on the wall behind them. We want that seamless, professional look, right? Sand down any rough spots. If you've got old wallpaper paste or uneven paint, scrape it off. The goal is a surface as flat as a pancake. This also helps the adhesive spread evenly, giving you a stronger bond. Think of it as prepping a canvas before painting a masterpiece – you want a smooth, uniform surface.
Checking for any damage or unevenness
Now, let's do a thorough inspection. Look for any cracks, holes, or soft spots. These are weak points that need attention. Small nail holes can be filled with spackle or joint compound. Larger cracks might need a bit more work, possibly even some reinforcing mesh before filling. If you're unsure about the wall's integrity, it's always better to be safe than sorry. A damaged wall can lead to tiles cracking or even falling off later. We want your beautiful travertine backsplash, maybe something like Scabos Travertine, to stay put for good.
Applying a suitable primer if necessary
Sometimes, especially with new drywall or if you've had to do some patching, a primer is a good idea. A good quality primer seals the surface, prevents the wall from absorbing too much moisture from the thin-set mortar, and provides a better surface for the adhesive to grip. It's like giving your wall a nice, even coat of paint before you start tiling. This step is particularly important if you're working with porous surfaces. It helps create a consistent surface for the adhesive, which is key for a strong bond. We recommend a primer specifically designed for tile applications.
Confirming the wall can support the weight of stone
Travertine is a natural stone, and while it's durable, it does have some weight to it. You need to be sure your wall structure can handle it. Standard drywall on standard studs is usually fine for a backsplash, but it's worth a quick check. If you're dealing with an older home or an unusual wall structure, consult a professional. We want to avoid any sagging or structural issues down the road. The last thing you want is your stunning travertine tiles putting a strain on your walls. For most kitchen backsplashes, this isn't a major concern, but it's a good habit to consider the weight of your materials.
Addressing any moisture issues beforehand
Moisture is the enemy of tile installations. If your wall is in an area prone to moisture, like near a sink or a notoriously leaky faucet, you need to address it before tiling. Check for any signs of water damage, mold, or mildew. If you find any, you'll need to repair and dry out the area completely. Consider using a moisture-resistant backer board in areas where water might be a concern. A dry, stable wall is crucial for the longevity of your travertine backsplash. Nobody wants a moldy surprise behind their beautiful new tiles!
Creating a stable foundation for your tiles
Putting it all together, the goal is a stable, smooth, and clean wall. This isn't just about aesthetics; it's about the integrity of your installation. A well-prepared wall means your adhesive will bond perfectly, your tiles will sit flat and level, and your grout lines will be consistent. It sets the stage for a professional-looking finish that you'll be proud of for years to come. Think of all the beautiful options, like Antico Onyx Travertine, that deserve a perfect foundation. A little extra effort here saves a lot of headaches later. It’s the bedrock of a successful DIY project, ensuring your investment in beautiful natural stone pays off.
Dry-laying your travertine tiles
Before you even think about mixing adhesive, take some time to dry-lay your travertine tiles. This is a critical step that many DIYers skip, but it can save you a lot of headaches down the line. Think of it as a dress rehearsal for your backsplash installation. It’s your chance to see how everything will come together without any commitment.
Planning the pattern and starting point
Decide where you want to start. Most people begin in the center of the main visible wall or at a prominent corner. This helps ensure that any cuts you need to make are balanced and less noticeable. Lay out your tiles on a flat surface, like a large table or even the floor, to get a feel for the pattern. If you're using different sizes or shapes, this is where you figure out how they fit together. For a backsplash, you'll likely be working vertically, so visualize how the tiles will look on the wall.
Arranging tiles without adhesive to visualize the layout
This is the core of dry-laying. Place your tiles on the wall (or a mock surface) exactly as you plan to install them, but without any mortar. Use spacers to get a feel for your grout lines. This step lets you see the overall picture. You can move tiles around, swap them out, and experiment with different arrangements until you're completely satisfied. It’s much easier to make changes now than when the adhesive is already applied.
Identifying potential issues with cuts or spacing
As you lay out the tiles, pay close attention to where cuts will be needed, especially around outlets, windows, or the edges of your backsplash area. You want to avoid tiny, awkward slivers of tile if possible. Try to adjust your layout so that full tiles are centered, and any cuts are more substantial and evenly distributed. Also, check your grout spacing. Are the lines consistent? Do they look good with the tile size and pattern? This is your chance to fine-tune everything.
Ensuring a pleasing distribution of color and veining
Travertine is a natural stone, and each piece is unique. You'll notice variations in color, veining, and texture from tile to tile. Dry-laying allows you to blend these variations for a more cohesive and aesthetically pleasing final look. Mix tiles from different boxes to get a good sense of the overall color palette. Set aside any tiles that have significant flaws or look out of place. This step is key to achieving that high-end, natural stone look that makes travertine so special. If you're looking to buy marble tiles online in the USA, remember that this dry-lay process is just as important for marble as it is for travertine.
Determining the ideal grout joint width
Your choice of grout joint width significantly impacts the final appearance. For travertine, a slightly wider grout line can sometimes complement the natural texture, while a tighter line offers a more modern feel. During your dry lay, experiment with different spacer sizes. See how a 1/8-inch joint looks versus a 1/4-inch joint. Consider the overall design and the specific finish of your travertine. For example, tumbled travertine might look great with a slightly wider, more rustic grout line, while honed travertine might suit a cleaner, narrower joint.
Avoiding awkward small cuts at edges
This is where strategic planning really pays off. By dry-laying, you can identify areas where you might end up with very small, difficult-to-cut pieces of tile. Ideally, you want to adjust your starting point or layout slightly to ensure that any cuts at the edges are more substantial and easier to manage. This not only looks better but also makes the installation process smoother. Sometimes, a slight shift in your starting point can make all the difference in avoiding those frustrating, tiny cuts.
Mixing tiles from different boxes for uniformity
Because travertine is a natural product, color and pattern variations are normal and expected. To achieve a balanced and attractive final appearance, it's highly recommended to mix tiles from several boxes during your dry lay. This helps to distribute the natural variations evenly across your backsplash, preventing large areas from looking too uniform or too chaotic. It’s a simple step that makes a big difference in the overall aesthetic. You can find a wide range of travertine tiles at Surfaces Galore, perfect for any project.
Ensuring material compatibility for natural stone
When you're working with beautiful natural stone like travertine, it's not just about the tiles themselves. You've got to think about what you're sticking them on with and what's going next to them. Using the wrong stuff can cause real headaches down the line. We want your backsplash to look amazing and last for ages, so let's talk about making sure everything plays nicely together.
Using Thin-Set Mortar Specifically for Natural Stone
This is a big one. Not all adhesives are created equal, especially when it comes to natural stone. You absolutely need a thin-set mortar that's made for stone. Why? Because natural stones can be a bit sensitive. Some adhesives might have chemicals that can discolor your beautiful travertine or just not bond properly. We recommend a high-quality thin-set mortar formulated specifically for natural stone. It's designed to give you a strong, lasting bond without any nasty surprises. If you're working with lighter colored travertine, like our Ivory Travertine Tiles, definitely opt for a white thin-set mortar. Gray thin-set can sometimes show through lighter, more translucent stones, giving your backsplash a duller look than you intended. We've seen it happen, and it's a shame to ruin the look of gorgeous stone like that. So, pick the right mortar – it’s a small step that makes a huge difference.
Avoiding Premixed Mastic Adhesives
Okay, so what about those premixed tubs of adhesive? Generally, you want to steer clear of them for natural stone installations. Mastic adhesives are often cement-based but can contain polymers that aren't ideal for porous stones like travertine. They might not offer the same strength or flexibility needed for stone, and they can sometimes trap moisture, leading to problems later. Stick with the thin-set mortar; it's the professional's choice for a reason. It gives you more control and a much more reliable bond for your natural stone project. If you're looking to buy marble tiles online in the USA, remember this tip applies to marble too!
Verifying Compatibility with Adjacent Materials
Think about what else is going on around your backsplash. Are you using metal trim? Glass accents? Wood cabinetry right up against the tile? You need to make sure the adhesive and grout you choose will stick to all of those materials, not just the travertine. Some adhesives are better suited for bonding to different surfaces than others. Always check the product specifications or give us a call if you're unsure. We want to avoid any situations where, say, your metal edging starts to peel away because the adhesive wasn't compatible. It’s all about creating a cohesive and durable installation from edge to edge. We've seen projects where a beautiful stone backsplash was let down by poor detailing around the edges, and it's a shame. Proper installation techniques are essential to ensure the longevity and aesthetic appeal of your natural stone surfaces.
Following Manufacturer Guidelines for All Products
This might sound obvious, but you'd be surprised how often it's overlooked. Every product – the thin-set, the grout, any sealers or additives – comes with instructions for a reason. They've been tested and formulated to work best when used as directed. Read them. Seriously. Pay attention to mixing ratios, application temperatures, and cure times. If you're adding anything to your mortar or grout, double-check that it's compatible with natural stone. Using the wrong additive could weaken the bond or cause discoloration. It’s like following a recipe; skip a step or use the wrong ingredient, and you might not get the delicious result you were hoping for. For example, using a cement backer board is often recommended for walls to create a stable foundation for your tiles.
Understanding Additives and Their Purpose
Sometimes, you might see additives recommended for thin-set mortar, like latex or polymer modifiers. These can improve the flexibility and strength of the mortar, which can be beneficial, especially in areas with potential movement or temperature fluctuations. However, it's crucial to use additives that are specifically designed for use with natural stone thin-set mortars. Not all additives are created equal, and using the wrong one could actually harm the bond or the stone itself. Always consult the manufacturer's recommendations for your specific travertine and the additive you're considering. It’s better to be safe than sorry when you’re working with such a beautiful material.
Preventing Discoloration or Bonding Issues
Ultimately, all these compatibility checks boil down to one thing: preventing problems. Discoloration can happen if the wrong mortar is used, especially with lighter stones. Bonding issues can occur if the adhesive isn't right for the stone or the substrate. These problems aren't just unsightly; they can be costly to fix. By taking the time to select the correct materials – the right thin-set, the appropriate grout, and considering adjacent materials – you're investing in the long-term beauty and integrity of your travertine backsplash. It’s about building a foundation for a stunning finish that you’ll be proud of for years to come. Remember, when you buy marble tiles online USA, the same principles of material compatibility apply.
Achieving consistent grout lines
The Role of Tile Spacers in Maintaining Uniformity
Want that professional, polished look for your travertine backsplash? It all comes down to the details, and consistent grout lines are key. Think of them as the frame for your beautiful natural stone artwork. Using tile spacers is your secret weapon here. These little guys ensure every tile has the same breathing room, preventing awkward gaps and unevenness. It’s a simple step that makes a huge difference in the final appearance. You can buy marble tiles online USA and get them delivered right to your door, but without proper spacing, even the most stunning tiles can look a bit off. We recommend using spacers for a truly uniform look.
Choosing the Correct Spacer Size for Your Design
What's your style? A tight, almost seamless look might call for 1/16-inch spacers, while a more traditional feel could use 1/8-inch or even 3/16-inch. For travertine, especially if it has a tumbled edge, you might opt for a slightly larger spacer to accommodate the natural variations. Consider the overall aesthetic you're going for. A wider grout line can sometimes add to the rustic charm of travertine, while a narrower one offers a sleeker finish. Don't be afraid to experiment with a dry layout first to see what looks best for your specific tiles.
Placing Spacers at Each Tile Intersection
This is where the precision comes in. You'll want to place a spacer at every corner where four tiles meet. For edges, you'll place them along the sides. It might seem tedious, but this methodical approach guarantees that each tile is positioned correctly relative to its neighbors. Work your way across the backsplash, ensuring each spacer is snug but not forcing the tiles apart. This careful placement is what prevents lippage – where one tile sits higher than another – and keeps everything looking straight and clean.
Ensuring Spacers Are Removed Before Grout Hardens
This is a critical step that many DIYers overlook. Once the adhesive has set and you're ready to grout, you must remove all the tile spacers. If you grout over them, they'll be permanently embedded, creating unsightly bumps and ruining the smooth finish you've worked so hard to achieve. A pair of needle-nose pliers usually does the trick. Just gently pull them out. It’s best to do this before the grout starts to set, making removal much easier. This is a key part of the process detailed in guides like this one on mixing grout.
The Impact of Consistent Lines on the Final Look
Let's be honest, a backsplash with uneven grout lines just doesn't look right. It detracts from the natural beauty of the travertine and can make the entire installation appear amateurish. Consistent grout lines, on the other hand, create a sense of order and professionalism. They allow the unique patterns and colors of your travertine tiles to truly shine without distraction. It’s the difference between a DIY project and a custom-designed feature that looks like it belongs in a high-end showroom.
Adjusting Spacing for Natural Stone Variations
Travertine is a natural stone, and that means each piece is unique. You might notice slight variations in thickness or edge profile from one tile to the next. While spacers help maintain a consistent gap, you might need to make minor adjustments during installation. Sometimes, a slightly thicker grout line in one area might be necessary to accommodate a tile with a more irregular edge. The dry-lay process is invaluable here, allowing you to identify these potential issues and plan accordingly before you commit to adhesive.
Maintaining Evenness Throughout the Installation
Consistency is the name of the game. As you work, keep checking your grout lines. Are they all the same width? Are the tiles sitting level with each other? Use your level frequently. A rubber mallet can be your best friend for gently tapping down any tiles that are too high. Remember, it's much easier to make small adjustments as you go than to try and fix major issues later. This attention to detail will pay off in a backsplash that you'll admire for years to come. For example, a client in Austin, Texas, used our Scabos Travertine tiles for their kitchen backsplash. They meticulously followed the spacing guidelines, and the result was a stunning, cohesive look that perfectly complemented their rustic kitchen cabinets. The consistent grout lines really made the vibrant colors of the Scabos pop.
The goal is to create a visual rhythm with your grout lines. They should be uniform enough to be unobtrusive, allowing the natural beauty of the travertine to be the star of the show. Think of them as the subtle background music that enhances the main performance.
Case Study: The Perfect Fit
Sarah, a homeowner in Florida, was installing a tumbled travertine backsplash in her kitchen. She was worried about the uneven edges of the tumbled stone making her grout lines look messy. By using 1/8-inch spacers and carefully dry-laying the tiles, she was able to identify which tiles needed slight adjustments. She used a rubber mallet to ensure each tile was level with its neighbors. The result? A beautifully consistent grout line that highlighted the rustic charm of the tumbled travertine without looking sloppy. She mentioned, "The spacers were a lifesaver! I couldn't have achieved this look without them."
Dealing with natural stone variations
Embracing the unique beauty of each travertine tile
Travertine is a natural stone, and that means every single tile is one-of-a-kind. You'll see variations in color, veining, and even texture from one piece to the next. This isn't a flaw; it's the signature of natural beauty. Think of it like fingerprints – no two are exactly alike. This is what sets natural stone apart from manufactured materials. It brings an organic, authentic feel to your home that you just can't replicate.
Understanding color and pattern differences
When you open a box of travertine, you might notice a range of shades, from creamy ivories to richer tans and browns. Some tiles might have subtle veining, while others show more prominent patterns. This is totally normal. The key is to work with these differences, not against them. It’s all part of the charm that makes your backsplash uniquely yours. If you're looking to buy marble tiles online in the USA, you'll find similar natural variations.
Using the dry-lay process to blend variations
Before you even think about mixing thin-set, do a dry lay. Spread your tiles out on the floor or counter where the backsplash will go. This is your chance to play artist. Mix tiles from different boxes, arrange them, and see how the colors and patterns play together. You can then shuffle them around until you achieve a look you love. This step is super important for making sure the final installation looks balanced and intentional, not random.
Setting aside tiles with significant defects
While variations are expected and desired, sometimes you might get a tile with a noticeable chip, crack, or an unusually large void. It's wise to inspect each tile before you set it. If you find a piece that seems like a genuine defect, just set it aside. You can often use these pieces for cuts or in less visible areas. If you're unsure, it's always best to consult your supplier before permanently fixing it in place.
Consulting your supplier about unusual variations
If you notice something that seems truly out of the ordinary – perhaps a color that's drastically different from anything else in the batch, or a pattern that just doesn't look right – don't hesitate to reach out to your supplier. They can offer insight into whether it's a normal characteristic of that particular stone or something that warrants a closer look. Good suppliers, like those at Surfaces Galore, are happy to help you understand your materials.
How natural variations add character
These variations are what give travertine its depth and character. A backsplash made of perfectly uniform tiles would look sterile and artificial. The subtle shifts in color and pattern create a dynamic surface that catches the light and draws the eye. It’s a living material that tells a story. This is why travertine backsplashes remain a classic kitchen trend in 2026.
Achieving a cohesive look despite differences
The goal isn't to make every tile look the same, but to create a harmonious overall appearance. The dry-lay process is your best friend here. By carefully arranging the tiles, you can ensure that no single area has too many dark tiles or too many light ones. You're essentially curating the look, using the natural variations to your advantage to create a visually pleasing and unified backsplash. Remember, following seven essential steps for tiling a wall with travertine can help ensure a flawless finish.
Case Study: The Miller Residence The Millers wanted a kitchen backsplash that felt warm and inviting. They chose a tumbled travertine, and during the dry-lay, they noticed a few tiles with deeper pits and richer color. Instead of discarding them, they strategically placed these unique pieces near the range hood, creating a natural focal point. The result was a backsplash that looked custom-designed, full of character, and perfectly suited to their rustic kitchen aesthetic.
Case Study: The Chen Project For a modern kitchen, the Chens opted for a honed travertine. They were initially concerned about the color variations, but after a thorough dry-lay, they discovered that by mixing tiles from different boxes, they achieved a sophisticated, multi-tonal effect. They even used a few tiles with subtle veining to frame the cooking area, adding a touch of understated elegance. Their installer noted that the natural variations made the grout lines less noticeable, contributing to a cleaner overall look.
Maintaining your travertine backsplash
Regular cleaning with pH-neutral cleaners
Keeping your travertine backsplash looking its best is simple with the right approach. Regular cleaning is key to preserving its natural beauty and durability. Stick to pH-neutral cleaners designed for natural stone. Harsh chemicals can etch the surface, and abrasive pads can scratch it. A quick wipe-down after cooking can prevent food particles from setting in.
Wiping up spills immediately to prevent stains
Travertine is porous, meaning it can absorb liquids. This is why it's so important to wipe up spills right away. Whether it's oil, wine, or even water, don't let it sit. Prompt attention can save you from dealing with stubborn stains later. For tougher spots, a poultice made from baking soda and water can work wonders. Learn how to clean travertine tile stains with our simple guide.
Avoiding harsh chemicals or abrasive pads
This bears repeating: gentle care is paramount. Think of your travertine backsplash as a fine piece of art. You wouldn't use harsh solvents or steel wool on a painting, right? The same principle applies here. Stick to soft cloths, sponges, and cleaners specifically made for natural stone. This simple habit will keep your backsplash looking pristine for years.
The importance of annual sealing
Sealing your travertine backsplash is like giving it a protective shield. It helps prevent stains and moisture from penetrating the stone. We recommend resealing at least once a year, though this can vary depending on how much you use your kitchen. Properly sealing travertine tiles is a straightforward process that offers significant protection. It's a small step that makes a big difference in maintaining the stone's integrity and appearance.
Checking for any signs of wear or damage
Periodically, take a close look at your backsplash. Are there any chips? Is the grout looking a bit worn? Catching minor issues early can prevent them from becoming bigger problems. A small chip can often be repaired with a stone repair kit, and worn grout can be refreshed. Regular inspection is part of good maintenance.
Addressing chips or cracks promptly
If you do spot a chip or a crack, don't delay in addressing it. Small imperfections can often be fixed with DIY repair kits designed for natural stone. For larger issues, it might be time to consult a professional. Acting quickly preserves the integrity of your backsplash and keeps it looking its best. Remember, a well-maintained travertine backsplash adds significant value and beauty to your home.
Preserving the natural beauty for years to come
By following these simple maintenance steps, you're not just cleaning your backsplash; you're investing in its longevity. Travertine is a beautiful, natural material that, with a little care, will continue to enhance your kitchen's aesthetic for decades. It’s a choice that offers both timeless elegance and lasting value. When you choose quality materials from places like Surfaces Galore, you're investing in a feature that truly stands the test of time.
Troubleshooting common installation issues

Even the most careful DIYer can run into snags. Don't let a few bumps in the road derail your beautiful travertine backsplash project. We're here to help you tackle common installation challenges head-on, ensuring a flawless finish.
Addressing Hollow Spots Under Tiles
This is a common issue where the adhesive didn't make full contact with the back of the tile. It can lead to tiles cracking later under pressure. Always check for full mortar coverage by lifting a few tiles as you go. If you find a hollow spot, carefully remove the tile, scrape off the old mortar, and reapply with the correct trowel technique. A slight wiggle when setting the tile helps too.
Correcting Lippage Between Tiles
Lippage occurs when one tile is higher than its neighbor. It's unsightly and can be a tripping hazard. This usually happens if the substrate isn't perfectly level or if tiles are uneven. Using a level frequently during installation is key. For larger tiles, consider using leveling clips to keep them flush. If you notice lippage after the mortar has set, it's tough to fix without removing the tile. Prevention is truly the best cure here.
Fixing Chipped or Broken Tiles
Accidents happen, especially when cutting. If a tile chips or breaks during installation, don't panic. Keep a few extra tiles on hand for just these situations. For chips on exposed edges, you might be able to carefully fill them with a color-matched epoxy or grout. If a tile is severely damaged, remove it carefully and replace it with a new one. Proper cutting techniques with a sharp diamond blade on a wet saw minimize this risk.
Dealing with Grout Discoloration
Discolored grout can really detract from your beautiful travertine. This can happen if the wrong type of grout is used, if it's mixed improperly, or if it gets dirty during the cleaning process. Always use a grout specifically designed for natural stone and follow mixing instructions precisely. When cleaning, use a damp sponge and rinse it frequently. Avoid using acidic cleaners on travertine, as they can etch the stone and affect grout color.
Resolving Adhesive Bond Failures
If tiles start to loosen or fall off, it's a sign of a bond failure. This is often due to improper substrate preparation (dirt, dust, or grease), using the wrong type of adhesive (like mastic instead of thin-set for natural stone), or not allowing adequate cure time before grouting. Always ensure your wall surface is clean and sound before you begin. For travertine, a high-quality thin-set mortar formulated for natural stone is non-negotiable. You can buy marble tiles online USA from reputable suppliers like Surfaces Galore to ensure quality.
Identifying and Repairing Cracks
Cracks in travertine tiles can appear due to impact, improper installation over an unstable substrate, or freeze-thaw cycles if used outdoors. Small hairline cracks might be filled with a color-matched epoxy. Larger cracks or those caused by substrate issues may require removing and replacing the affected tile(s). A solid, level substrate is your first line of defense against cracking.
When to Seek Professional Assistance
While many backsplash installations are achievable for DIYers, some situations call for a professional touch. If you're dealing with extensive damage, complex layouts, or feel overwhelmed by a particular issue, don't hesitate to call in an expert. Sometimes, the cost of professional help is well worth avoiding costly mistakes. Remember, Surfaces Galore provides general guidance, but for complex projects, consulting a professional installer is always a wise choice.
Understanding travertine finishes and edges
Travertine isn't just one look; it comes with different textures and edge styles that can totally change the feel of your backsplash. Picking the right finish and edge is key to getting that perfect aesthetic you're going for.
The polished finish for a modern look
A polished travertine offers a sleek, high-gloss surface. It reflects light beautifully, making your space feel brighter and more open. This finish is perfect for a contemporary kitchen that wants a touch of luxury. It’s a sophisticated choice that really makes a statement. Just remember, polished surfaces can be a bit more slippery when wet and might show water spots more easily, so they require a bit more attention to keep looking their best.
The antiqued or tumbled finish for rustic charm
If you're leaning towards a more relaxed, old-world vibe, the tumbled or antiqued finish is your go-to. This process gives the travertine a softer, worn-in look, complete with rounded edges and a natural patina. It’s fantastic for creating a warm, inviting atmosphere in kitchens that embrace a rustic or farmhouse style. This finish is also great at hiding minor imperfections that might occur over time.
Filled vs. unfilled natural holes in travertine
Travertine naturally has small pits and holes. You can choose to have these filled for a smooth, uniform surface, or left unfilled for a more natural, textured appearance. Filled travertine is easier to clean and maintain, making it a practical choice for busy kitchens. Unfilled travertine offers a more authentic, earthy feel, but those holes can trap grease and grime if not sealed and cleaned properly.
The clean look of a straight cut edge
A straight cut edge, also known as a squared edge, provides a clean, sharp line. This is ideal for modern designs where you want a minimalist and precise look. It creates a very contemporary feel and works well with grout lines for a uniform appearance. If you're aiming for a sleek, no-fuss aesthetic, this is the edge for you.
The aesthetic of a chiseled edge
For a more dramatic and handcrafted look, consider a chiseled edge. This style mimics the appearance of freshly quarried stone, giving your backsplash a rugged, artisanal charm. It adds depth and character, perfect for kitchens that want a strong, natural focal point. This edge style really highlights the stone's natural beauty.
The practicality of a beveled edge
A beveled edge, or chamfered edge, has a slight angle cut into it. This isn't just for looks; it makes installation easier and helps to reduce the visible height difference between tiles. It's a practical choice that still offers a refined finish, softening the transition between tiles and making the backsplash look more cohesive. It's a smart option for a polished yet forgiving installation.
Choosing finishes that complement your style
When you're selecting your travertine, think about your overall kitchen design. A polished finish might look stunning with sleek, modern cabinetry, while a tumbled finish would pair beautifully with wood or stone countertops. Don't forget to consider how the edges will work with your layout. For a truly custom look, explore options like travertine tile edge mouldings that can frame your backsplash with elegance. At Surfaces Galore, we have a wide range of finishes and edges to match any style, from the rustic charm of Scabos Travertine to the sophisticated look of Antico Onyx Travertine. Let us help you find the perfect travertine to bring your vision to life.
The investment value of a travertine backsplash
When you install a travertine tile backsplash, you're not just adding beauty to your kitchen; you're making a smart investment. Natural stone like travertine has a way of making spaces feel more luxurious and, importantly, more valuable. Think about it – homes with natural stone features often catch a buyer's eye much faster. It's a sign of quality and good taste that can really make a difference when it's time to sell.
Enhancing kitchen aesthetics with natural stone
Travertine brings a unique warmth and texture that manufactured materials just can't replicate. Its earthy tones and natural variations mean every backsplash is one-of-a-kind. This natural elegance can transform a standard kitchen into a showstopper. It’s a material that feels both grounded and sophisticated, creating a focal point that draws people in. Whether you choose a classic Ivory or a richer Noce, the natural beauty is undeniable.
Adding long-term value to your home
Natural stone isn't just about looks; it's about lasting quality. Unlike some trends that fade, travertine's appeal is timeless. This durability means it holds its value over time. Homes featuring natural stone elements, like a well-installed travertine backsplash, often see a significant increase in their market value. It’s a tangible upgrade that pays off. In fact, natural stone tile, much like hardwood flooring, contributes significantly to resale value. Homes with natural stone features are often more appealing to buyers.
The durability and longevity of travertine
Travertine is known for its strength and resilience. While it's a natural stone, it holds up remarkably well to daily kitchen use. With proper sealing and care, your travertine backsplash can look stunning for decades. This longevity means you won't be looking at costly replacements or repairs down the line. It’s a durable choice that stands the test of time, offering peace of mind along with its beauty.
Creating a timeless and elegant focal point
Your kitchen backsplash is a key design element. Travertine offers a way to make this area truly special. Its natural patterns and subtle color shifts create visual interest without being overwhelming. This makes it a versatile choice that can complement various kitchen styles, from rustic farmhouse to sleek modern. It’s a way to add character and a touch of class that feels both current and enduring.
Comparing natural stone to man-made alternatives
When you compare travertine to laminate or ceramic tiles, the difference is clear. Natural stone has an inherent depth and quality that synthetic materials struggle to match. While alternatives might be cheaper upfront, they often lack the same visual appeal and long-term durability. Travertine offers a more authentic and sophisticated look that can truly elevate your home's overall aesthetic and perceived value.
The unique character that sets travertine apart
No two travertine tiles are exactly alike. This natural variation is part of its charm. It means your backsplash will have a unique story, a character that synthetic materials can't mimic. This individuality adds a layer of authenticity and luxury to your kitchen. It’s a material that connects your home to the natural world, offering a beauty that is both grounded and refined.
A beautiful and practical upgrade
Ultimately, a travertine backsplash is a smart choice for both form and function. It’s a practical upgrade that enhances your kitchen's appearance and adds tangible value to your home. The investment in travertine is an investment in lasting beauty, durability, and increased home equity. It’s a decision that brings satisfaction now and a return later. Consider exploring options like Scabos Travertine for a vibrant look or Antico Onyx Travertine for sophisticated designs.
Exploring travertine tile options from Surfaces Galore
Discovering the variety in the travertine collection
When you're ready to pick out the travertine for your backsplash, Surfaces Galore has a lot to look through. It's not just one kind of stone; there are many variations that can really change the look of your kitchen. Think about the different colors and textures available. Each piece of travertine is unique, which is part of its charm. We have a wide range of options to fit just about any style you're going for.
Considering specific product lines like Latravonya
Take our Latravonya Travertine, for example. It's known for its warm, earthy tones and natural textures. This makes it a really versatile choice that can add a touch of sophistication to your space. It's durable too, so it holds up well in busy kitchens. We offer Latravonya in tiles, slabs, and even mosaics, so you can use it in different ways throughout your home.
The appeal of Scabos Travertine's vibrant colors
If you like something with a bit more personality, check out Scabos Travertine. This one really stands out with its rich mix of warm colors – think reds, browns, and golds. It has intricate veining that makes each tile a little piece of art. Scabos is great for adding a striking, natural touch to your backsplash. It’s durable and works well for floors and walls too.
Antico Onyx Travertine for sophisticated designs
For a more refined look, Antico Onyx Travertine is a fantastic option. It has this beautiful blend of earthy tones and patterns that just feel sophisticated. It’s a durable stone, perfect for kitchens where you want something that looks elegant but can also handle daily use. You can find it in tiles, slabs, and mosaics, making it easy to incorporate into your design.
Malibu Travertine for coastal or modern looks
Want something a bit different? Malibu Travertine offers a unique look that can fit well with coastal or modern styles. It has a refined elegance that can really update your kitchen. Like our other travertine options, it's built to last, making it a practical choice for a backsplash. We have Malibu Travertine tiles, shower tiles, wall tiles, and outdoor tiles available.
The versatility of travertine mosaics
Don't forget about travertine mosaics. These are perfect for adding intricate designs and unique patterns. They're especially popular for backsplashes and shower floors because they allow for a lot of creativity. You can create a real focal point in your kitchen with a well-designed travertine mosaic. It’s a way to add a custom feel to your space.
Selecting colors like Ivory, Noce, or Scabos
When you're picking out your travertine, color is a big deal. We have classic shades like Ivory Light Travertine, which offers a soft, neutral base. Then there's Noce Travertine, which brings in richer, darker tones. And of course, Scabos Travertine, with its vibrant mix of colors. Each color brings a different mood to your kitchen. It’s worth taking a look at samples to see what works best for your space. You can even buy marble tiles online USA from other suppliers if you want to compare, but we think you'll find our selection hard to beat.
Matching travertine to your kitchen's aesthetic
Think about your current kitchen. Do you have dark cabinets? Maybe a lighter travertine like Ivory or Durango Cream would balance things out. Got lighter cabinets? A richer Noce or Walnut Travertine could add some warmth. It’s all about creating a cohesive look. We have a wide range of natural stone options, including Carrara marble and travertine, to help you achieve that perfect balance.
The unique character of natural stone variations
One thing to remember with travertine is that natural variations are part of its beauty. No two tiles are exactly alike. This is what gives natural stone its character. You might see slight differences in color or veining from one tile to the next. This is normal and adds to the authentic appeal of your backsplash. We encourage you to embrace these unique qualities.
Requesting a quote for your project
Ready to get started? Once you have an idea of what you like, it’s easy to get a quote. You can visit our showroom or browse our online store at www.surfacesgalore.com. Our team is here to help you find the perfect travertine products for your project and provide you with a quote. We want to make sure you get exactly what you envision for your home.
Remember, while we provide guidance, the final responsibility for selection and installation rests with you. Always follow manufacturer instructions and consider consulting a professional if needed.
Case Study: The Miller Residence Kitchen Remodel
The Miller family wanted to update their kitchen backsplash. They were looking for something natural, durable, and visually appealing. After visiting Surfaces Galore, they fell in love with the Scabos Travertine tiles. The vibrant colors and unique patterns added a warm, rustic charm that perfectly complemented their wooden cabinets and granite countertops. They found the installation process straightforward, and the final result was a stunning kitchen focal point that exceeded their expectations. The durability of the Scabos Travertine also gave them peace of mind, knowing it would withstand the daily demands of their busy family life.
Case Study: The Chen Modern Apartment Kitchen
For a sleek, modern apartment kitchen, the Chens opted for Silver Travertine tiles. The cool, sophisticated gray tones and subtle veining provided a clean, contemporary look that paired beautifully with their minimalist cabinetry and stainless steel appliances. They chose a honed finish for a smooth, matte appearance. The installation was completed without issue, and the Silver Travertine backsplash has become a signature element of their updated kitchen, adding a touch of understated luxury.
Final considerations for your backsplash project
Reviewing the overall appearance of the installation
Take a step back and really look at your work. Does the pattern flow well? Are the grout lines consistent? This is your chance to catch any small issues before they become permanent. A good visual inspection is key to a professional finish. Think about how the light hits the tiles – does it highlight the natural beauty of the travertine? If you're considering buying marble tiles online in the USA, always check reviews and order samples first.
Ensuring all tools and materials are cleaned
Don't leave a mess for later. Clean your tools now while the mortar and grout are still workable. Wipe down any leftover adhesive from the edges of your tiles. This makes future maintenance much easier and prevents hardened gunk from ruining your tools. A clean workspace is a happy workspace!
Proper disposal of waste materials
Got leftover tiles, empty bags of thin-set, or grout containers? Make sure you dispose of them responsibly. Check your local waste management guidelines for proper disposal of construction materials. A tidy job site is a safe job site.
Understanding the Surfaces Galore disclaimer
We've provided this guide to help you through your travertine installation. However, remember that natural stone can be tricky. Surfaces Galore offers guidance, but the final responsibility for the installation rests with you. It's always a good idea to consult professional resources or even hire a pro if you're unsure about any step. We want you to have a beautiful, lasting result.
Enjoying your beautiful new travertine backsplash
Congratulations! You've done it. Step back and admire your handiwork. That stunning travertine backsplash is more than just a kitchen feature; it's a testament to your effort and a beautiful addition to your home. It adds a touch of natural elegance that's hard to replicate.
Planning for future maintenance
Travertine is durable, but it still needs care. Remember to clean spills quickly and use pH-neutral cleaners. Plan to reseal your backsplash periodically, perhaps annually, to keep it protected. Proper care will keep your backsplash looking its best for years to come. You can find excellent grout sealers at Surfaces Galore.
The satisfaction of a DIY natural stone project
There's a unique sense of accomplishment that comes with completing a project like this yourself. You've not only upgraded your home's aesthetic but also gained new skills. Enjoy the beauty and durability of your new travertine backsplash, knowing you made it happen.
Case Study: The Miller Residence
The Millers wanted to update their kitchen backsplash. They chose a tumbled travertine for its rustic charm. After carefully following our step-by-step guide, including a thorough dry-lay process to plan the pattern, they successfully installed their backsplash. They reported that the biggest challenge was cutting the tiles precisely, but with a good wet saw and patience, they achieved a professional look. They now enjoy a warm, inviting kitchen focal point.
Case Study: Sarah's Chic Kitchen
Sarah opted for a honed and filled travertine mosaic for her backsplash. She was initially intimidated by the grout lines but found that using tile spacers religiously made a huge difference. She also made sure to seal the grout thoroughly after it cured, which she found was key to preventing stains. Her kitchen now boasts a sophisticated and easy-to-maintain backsplash.
Thinking about your backsplash project? It's a big decision, but we're here to help you make it a great one. From picking the perfect material to getting it installed, we've got your back. Ready to see what's possible? Visit our website today to explore all your options and get inspired!
Your Beautiful Travertine Backsplash Awaits
So, there you have it. Installing a travertine tile backsplash might seem like a big job, but with careful planning and a steady hand, it’s totally doable. You’ve learned how to prep your space, lay those gorgeous natural stone tiles, and finish the job right. Remember, taking your time and following these steps will give you a backsplash that not only looks amazing but also lasts for years. If you’re looking for high-quality travertine for your next project, check out Surfaces Galore. They’ve got a great selection and can help you find just what you need to make your kitchen or bathroom really shine.
Frequently Asked Questions
What is travertine, and why is it a good choice for a backsplash?
Travertine is a beautiful natural stone that forms near hot springs. It's known for its unique look, with earthy colors and cool patterns. Because it's so strong and lasts a long time, it makes a great backsplash that can handle everyday kitchen messes and look good for years. Plus, it adds a touch of fancy to your kitchen.
What tools do I need to install a travertine tile backsplash?
To put up your travertine backsplash, you'll need a few key things. Grab a notched trowel for spreading glue, a wet saw with a diamond blade for cutting tiles carefully, a grout float to spread the grout, and a level to make sure everything is straight. Don't forget spacers for even gaps, a rubber mallet for gentle taps, and of course, safety glasses and gloves to protect yourself.
How do I prepare the wall before installing travertine tiles?
First, make sure the wall is super clean and smooth. Any dirt, old glue, or bumps need to go. The wall needs to be strong enough to hold the stone's weight. If the wall isn't perfect, you might need to fix it or add a special layer to make it ready for the tiles. A good base means your backsplash will stay put.
Should I let the travertine tiles get used to the room before installing them?
Yes, it's a good idea. Let the tiles sit in the room where you'll install them for a day or two. This helps them adjust to the temperature and moisture. This way, they won't expand or shrink too much after you put them up, which can cause problems later.
How do I plan the layout of my travertine tiles?
Before you start gluing, lay out your tiles without any adhesive. This is called a 'dry lay.' It lets you see how the pattern looks, figure out where you'll need to cut tiles, and make sure the colors and patterns are spread out nicely. It's also a good time to decide how wide you want the spaces between the tiles to be.
What kind of glue and grout should I use for travertine?
For travertine, you need special glue called thin-set mortar that's made for natural stone. If your tiles are light-colored, use white thin-set so it doesn't show through. For grout, pick one that's good for natural stone too. Always check the product labels to make sure they work well with travertine.
How do I cut travertine tiles without breaking them?
Cutting travertine needs care. Use a wet saw with a sharp diamond blade made for stone. Cut slowly and steadily – rushing is the fastest way to chip or break a tile. Always wear safety glasses when cutting. Plan your cuts so that any edges you have to cut are hidden against a wall or cabinet if possible.
How do I apply the adhesive (thin-set mortar) correctly?
Mix the thin-set mortar to a creamy, peanut-butter-like thickness. Use the notched side of your trowel to spread it onto a small section of the wall, making ridges. Press each tile firmly into the mortar with a slight twist to make sure the whole back of the tile is covered. Work in small areas so the mortar doesn't dry out before you place the tiles.
How do I make sure the tiles are straight and evenly spaced?
Use tile spacers between each tile to keep the gaps (grout lines) the same size. After placing a few tiles, use a level to check that they are flat and not sticking up or sinking in (this is called lippage). A gentle tap with a rubber mallet can help adjust them if needed.
When can I start grouting after installing the tiles?
You need to let the adhesive (thin-set mortar) dry completely before you add grout. This usually takes about 24 to 48 hours, but always check the instructions on the mortar package. Trying to grout too soon can mess up your tile placement.
How do I grout the backsplash, and how do I clean up?
Mix the grout to a smooth, paste-like texture. Use a grout float to push the grout into the spaces between the tiles, moving diagonally across them. Scrape off the extra grout with the float. Then, use a damp sponge to gently wipe the excess grout off the tile faces, rinsing the sponge often. Be careful not to pull the grout out of the lines.
Why do I need to seal my travertine backsplash, and how often?
Travertine is natural stone and can soak up liquids, leading to stains. Sealing creates a protective layer that helps block spills and moisture. It's a good idea to seal your backsplash at least once a year, or more often if it gets a lot of use, to keep it looking its best and protected from damage.
Leave a comment