
Avoid These Common Installation Mistakes with Marble, Limestone, and Travertine

Installing marble, limestone, and travertine can really elevate a space, but let's be honest, it's not always a walk in the park. You see those perfect floors and walls online, and you think, 'I can do that!' But then you get into it, and suddenly you're dealing with chipped tiles, uneven grout lines, or worse. There are definitely some common installation mistakes that can turn your dream project into a headache. We're going to talk about how to avoid those pitfalls so your beautiful natural stone looks amazing for years to come. Think of this as your friendly guide to getting it right the first time.
Key Takeaways
- Always check your tiles before you start laying them, and do a dry run first to plan your layout and make sure the colors look good together.
- Make sure your floor or wall is super solid, level, and stiff. This is a big one for preventing cracks later on.
- Use the right kind of glue – white thin-set for light stones is key – and make sure it covers the whole back of the tile.
- When cutting, go slow with a wet saw and a diamond blade. Safety first, always.
- Grout needs to be applied carefully, cleaned up promptly, and allowed to cure before you seal the whole thing.
Pre-Installation Due Diligence
Getting your marble, limestone, or travertine project off to a smooth start isn’t just about picking pretty tiles. Skip the prep, and you’ll pay for it later—literally. Here’s how to dodge the most common (and costly) mistakes in the earliest phase.
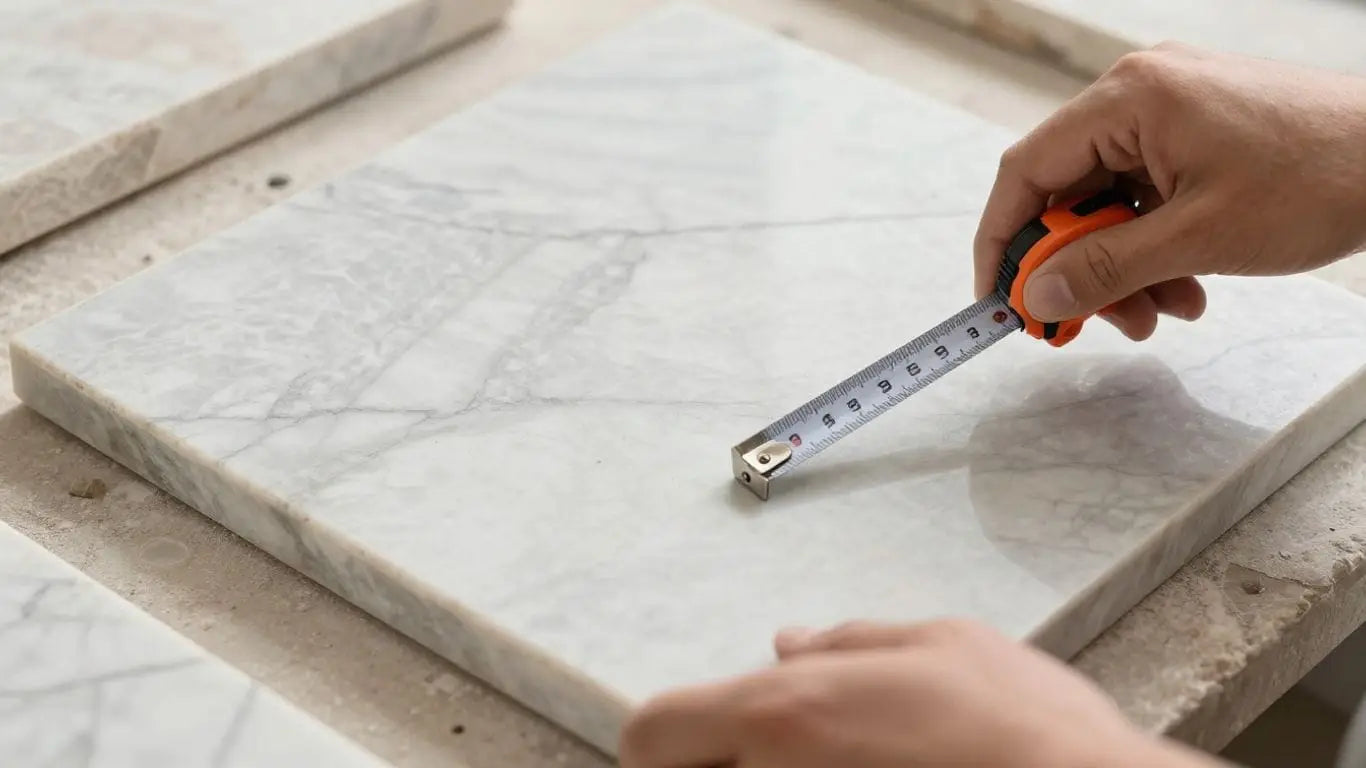
Inspect Tiles Before Installation
First things first: check every single tile. That means opening all the boxes, not just the top one. Why does this matter? Natural stone is famous for its color variation and unique details, but those quirks should work for your design, not against it. Inspect for:
- Chips and cracks
- Excessive warping
- Uneven edges or major color differences
If you spot something off, set that tile aside and talk to your supplier—especially if you’re planning to buy marble tiles online USA. A quick call can save a whole lot of regret once tiles are cemented to your floor.
Skipping the inspection phase is a classic disaster. We've seen a boutique hotel in Miami have to rip up an entire lobby floor because no one bothered to check for runny dye in their white marble shipment.
Plan Your Layout and Dry-Lay
Lay out your stone tiles on the floor dry—this extra step can make or break your finished look. Arrange tiles from different boxes to blend color and pattern, and play with placement so veining and tones flow naturally. Try not to leave any awkward, tiny cuts by the edges. Most pros recommend mixing tiles before setting them in thin-set for this very reason.
Steps for a Foolproof Dry-Lay:
- Mix tiles from all boxes.
- Lay them out in your planned pattern—pay attention to color flow.
- Mark any necessary cuts or adjustments.
A dry-lay catches mistakes before they’re set in stone—literally.
Verify Material Compatibility
This one is non-negotiable: make sure your adhesives, mortars, and grouts are specifically designed for natural stone. Using the wrong setting material can lead to staining, discoloration, and poor bonding.
Always test a small section to confirm compatibility with both your stone and intended finish. For more on checking compatible adhesives and grouts, see the expert tips in further recommendations for adhesive use.
Here’s a quick guide:
| Stone Type | Recommended Setting Material |
|---|---|
| Marble | White thin-set mortar |
| Limestone | Premium, flexible thin-set |
| Travertine | Stone-specific adhesive, white mortar |
A real-life example: a new-build luxury home in Dallas had gray thin-set show through bianco marble tiles, ruining the look. A simple pre-check would have avoided months of hassle and expensive replacement.
Get these three steps right, and you’ve already avoided most rookie errors that can plague stone installations. If you’re shopping online or using a new supplier, don’t be shy—order samples, ask questions, and double-check every detail before the first tile goes down.
Substrate Preparation Essentials
Think of your beautiful marble, limestone, or travertine tiles as the crown jewels of your project. Now, imagine placing those jewels on a wobbly, uneven surface. Not ideal, right? That’s why getting your substrate ready is absolutely key. It’s the foundation for everything, and skipping steps here is a fast track to problems down the road. We’re talking cracked tiles, loose tiles, and a finish that just doesn’t look right. Let’s make sure your stone installation is built to last.
Ensure a Solid and Level Substrate
This is non-negotiable. Your subfloor or wall needs to be rock solid, clean, and perfectly flat. Any dirt, old adhesive, or grease will mess with the bond. Low spots? Fill them. High spots? Grind them down. For floors, especially wood ones, you might need an extra layer of cement board or an uncoupling membrane. This isn't just about looks; it's about preventing your expensive natural stone from cracking under pressure. A stable base means your tiles stay put and look great for years. If you're looking to buy marble tiles online in the USA, remember that even the most stunning tiles won't perform well on a shaky foundation.
Address Subfloor Stiffness Requirements
Natural stone, particularly marble and travertine, is heavier and can be more brittle than ceramic tile. This means your subfloor needs to be extra stiff. A flexible subfloor can cause the stone to flex too, leading to cracks. Industry standards often call for a stiffer subfloor for natural stone than for other tile types. Don't guess on this – check the requirements for your specific stone and application. A little extra reinforcement now saves a lot of headaches later. Think of it as giving your stone the sturdy support it deserves.
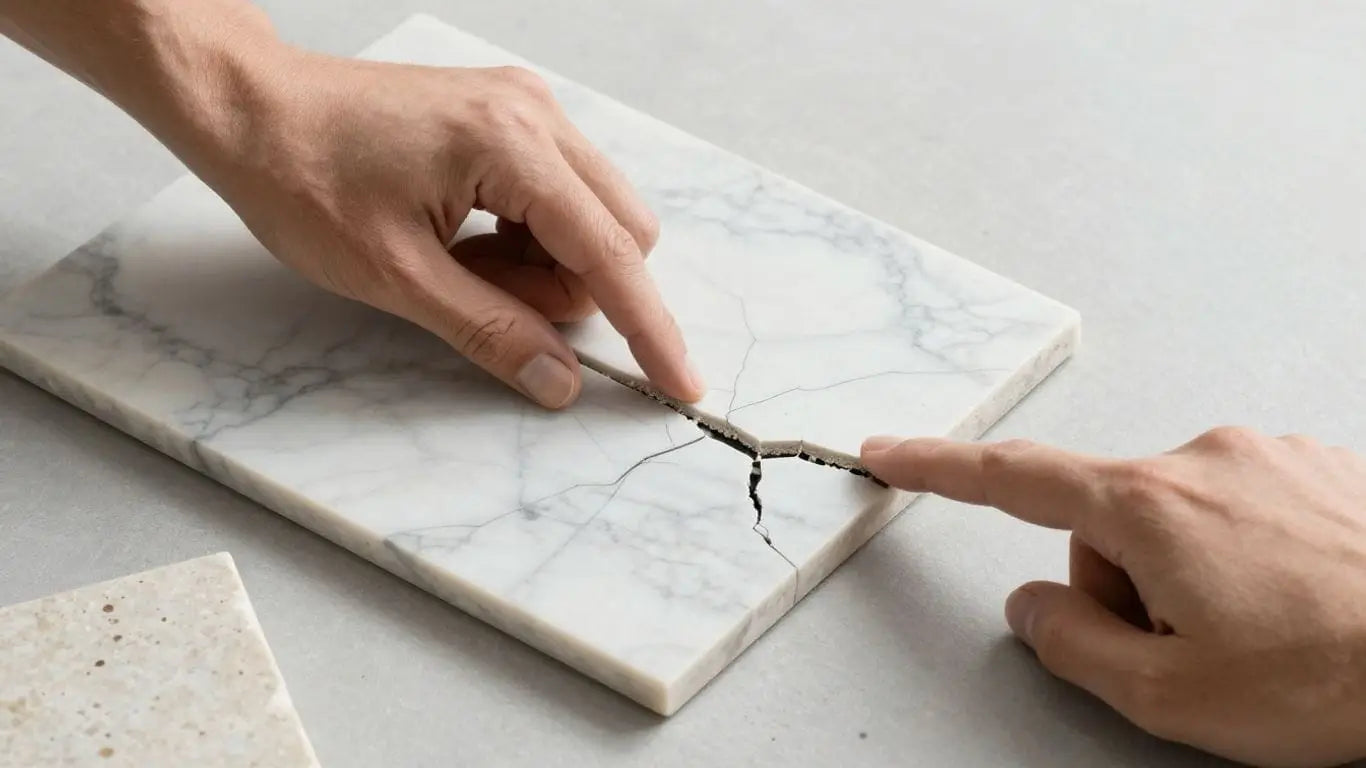
Implement Crack Isolation Membranes
Concrete slabs, especially those that might experience movement or have existing hairline cracks, need a crack isolation membrane. This layer acts like a buffer, absorbing minor substrate movement and preventing those cracks from traveling up through your beautiful tile installation. It’s a smart move for any concrete subfloor, protecting your investment from the ground up. It’s a small step that offers significant peace of mind, especially when you've invested in premium materials like those you can buy from us.
Case Study: The Foundation Fiasco
Sarah wanted a stunning marble bathroom. She hired a contractor who rushed the substrate prep on her concrete floor. A few months later, hairline cracks started appearing in her expensive marble tiles, right where the concrete had shifted slightly. The contractor hadn't used a crack isolation membrane. The fix? Tearing out the tiles and starting over, costing Sarah double. A proper substrate prep, including a crack isolation membrane, would have saved her time, money, and a lot of stress.
Choosing the Right Setting Materials
Getting your marble, limestone, or travertine installation right starts with the materials you use to set them. This isn't the place to cut corners. Using the wrong mortar or adhesive can lead to discoloration, poor adhesion, and ultimately, a failed project. We want your beautiful natural stone to last for ages, looking just as stunning as the day it was installed.
Select Mortars and Adhesives for Natural Stone
This is super important. Not all mortars are created equal, and many common ones just won't cut it for natural stone. You need something specifically designed for stone. Look for high-quality thin-set mortars that are formulated for marble, travertine, and limestone. These are usually cement-based and offer superior bonding and flexibility. Avoid premixed mastic adhesives at all costs; they can cause staining and don't offer the strength needed for these beautiful, but sometimes heavy, stones. Think of it like this: you wouldn't use a basic glue to hold together a delicate sculpture, right? Same idea here. For a solid foundation, check out high-quality thin-set mortars.
Utilize White Thin-Set for Light-Colored Stone
This is a pro tip that can save you a lot of headaches, especially if you're working with lighter stones like white marble or pale travertine. Gray thin-set mortar can sometimes show through lighter, more translucent stones, causing a dull or discolored appearance. It's a real bummer when that happens after all your hard work. Always opt for a white thin-set mortar when installing light-colored natural stone. This ensures the true color of your stone shines through without any unwanted undertones. It’s a small detail that makes a huge visual difference.
Confirm Compatibility with Adjacent Finishes
Your natural stone tiles won't be installed in a vacuum. They'll likely meet other materials – metal trim, glass accents, wood, or even different types of tile. It's vital to make sure your setting materials are compatible with all these surfaces. Some adhesives might not stick well to metal, or could react negatively with certain sealants used on adjacent materials. Always read the manufacturer's instructions for your mortar and any additives. If you're unsure, it's always best to consult with your supplier or a professional installer. Getting this right means a cohesive, long-lasting installation where everything stays put.
Case Study:
A homeowner in Scottsdale, Arizona, was installing a beautiful Ivory Travertine floor. They initially considered using a standard gray thin-set mortar to save a bit of money. However, after consulting with a local tile expert, they learned that the lighter travertine could show the gray undertones. They switched to a white thin-set mortar, and the result was a warm, consistent, and stunning floor that perfectly showcased the natural beauty of the travertine. This small change prevented a potential aesthetic disaster and ensured the homeowner was thrilled with their investment.
Proper Tile Setting Techniques
Getting your beautiful marble or travertine tiles set correctly is where the magic truly happens. It’s not just about sticking them down; it’s about creating a lasting foundation for that natural stone elegance. Mess this part up, and you’re looking at potential cracks, uneven surfaces, or tiles that just don’t sit right. We want your floors and walls to look amazing for years, and that starts with the right setting techniques.
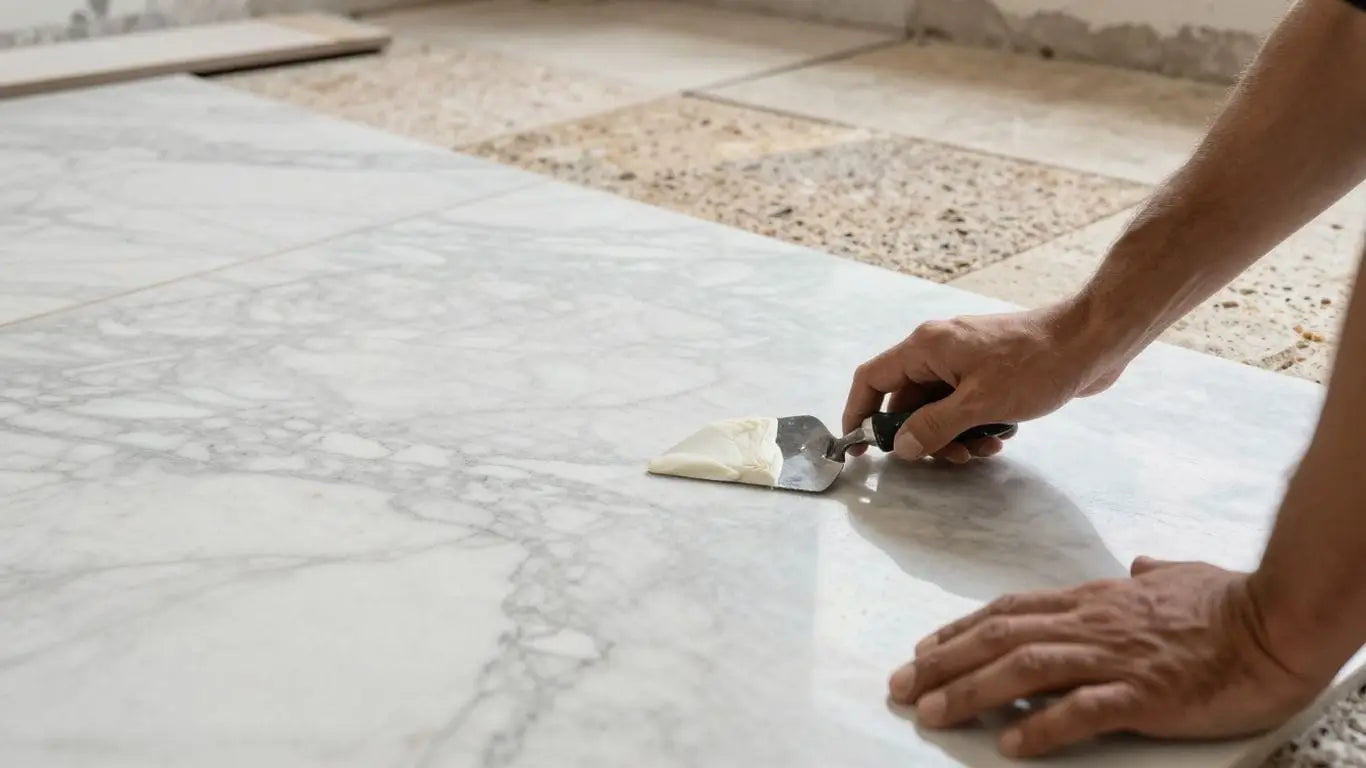
Apply Thin-Set Mortar Evenly
Think of the thin-set mortar as the glue holding your masterpiece together. You need to spread it evenly, and that means using the right tool – a notched trowel. The size of the notches matters, so check what’s recommended for your specific stone and mortar. You want to comb the mortar in one direction to create consistent ridges. This helps the air escape when you press the tile down, giving you a solid bond. Don't just slap it on; take your time to get it right. A little extra effort here prevents hollow spots, which can lead to cracked tiles down the line. If you're looking for premium marble tiles, you can buy marble tiles online USA and ensure you have the right materials to set them.
Ensure Full Coverage and Bond
This is super important. When you set a tile, press it down firmly with a slight wiggle. This action helps collapse those mortar ridges and ensures the entire back of the tile makes contact with the mortar. You want a full, solid bond. Periodically, lift a corner of a recently set tile to check. See that the mortar is spread across the whole back? Good. If you see bare spots, you need to adjust your technique or the amount of mortar. This full coverage is what prevents movement and potential damage later on. It’s the difference between a floor that lasts and one that starts to fail.
Maintain Consistent Grout Joints
Those little gaps between your tiles? They’re called grout joints, and keeping them consistent is key to a professional look. Use tile spacers to hold everything in place while the mortar cures. For marble and travertine, you often want tight joints, maybe 1/16 to 1/8 inch, but always check the manufacturer's recommendations. Uneven joints make the whole installation look sloppy, and they can create weak points. A level installation is also critical to avoid lippage – where one tile edge sits higher than the next. This is not only a tripping hazard but also looks terrible. Using leveling systems can be a lifesaver for larger tiles.
Case Study: The Uneven Entryway
Sarah and Tom were so excited to install their new travertine tiles in their entryway. They were eager to finish quickly, so they skimped a bit on spreading the thin-set, not really checking for full coverage. A few months later, they noticed one of the tiles near the door felt loose. Then another. It turned out that several tiles had hollow spots underneath because the mortar hadn't been spread evenly or the tiles weren't pressed down properly. This led to cracks and eventually loose tiles, making their beautiful entryway look worn and damaged much sooner than expected. They ended up having to re-do the entire floor, costing them more time and money.
Proper setting isn't just about aesthetics; it's about the structural integrity of your natural stone installation. Taking the time to apply mortar correctly and ensure full coverage prevents future failures and keeps your stone looking its best for decades.
Cutting Stone Tiles Safely and Accurately
Cutting natural stone like marble and travertine might seem daunting, but with the right approach, you can achieve clean, precise edges that make your installation look professionally done. Don't let the fear of chipping or breaking your beautiful tiles hold you back. We're here to guide you through the process, ensuring your cuts are as stunning as the stone itself.
Use a Wet Saw with a Diamond Blade
For marble and travertine, a standard tile cutter just won't cut it. You need the power and precision of a wet saw equipped with a high-quality diamond blade. This isn't just about making a cut; it's about making a clean cut that preserves the integrity of the stone. A good diamond blade, specifically designed for natural stone, will slice through the material smoothly, minimizing the risk of chipping or cracking. Remember, when you're looking to buy marble tiles online in the USA, pairing them with the right cutting tools is just as important as the tile choice itself.
Case Study: The Kitchen Backsplash Project
Sarah was installing a stunning marble subway tile backsplash. She initially tried a manual tile cutter, but the edges were rough, and she chipped several tiles. Frustrated, she rented a wet saw. The difference was night and day. The wet saw, with its continuous water flow to cool the blade and reduce dust, made clean, precise cuts, allowing her to achieve a seamless look around her outlets and windows. It transformed her project from a potential headache into a beautiful success.
Cut Slowly and Steadily
This is where patience pays off. Rushing the cutting process is one of the most common mistakes that leads to damaged tiles. Let the saw do the work. Guide the tile through the blade at a consistent, moderate pace. Listen to the sound of the saw; it will tell you if you're pushing too hard or too fast. A slow, steady cut ensures the blade has time to work through the stone without creating stress points that can lead to breakage.
Prioritize Safety and Edge Finishing
Safety first, always! When operating a wet saw, wear safety glasses to protect your eyes from water and stone debris. Gloves are also a good idea. Ensure the saw's water reservoir is full to keep the blade cool and dust down. After cutting, inspect the edges. If any cut edges will be visible, you might need to lightly sand or polish them for a smooth finish. This attention to detail makes a huge difference in the final appearance. For those intricate cuts or custom shapes, consider our custom fabrication services to get perfect results without the hassle.
Pro Tip: Always plan your cuts to hide any cut edges against walls or in corners whenever possible. This not only saves time but also ensures a cleaner look.
Grouting and Sealing Procedures
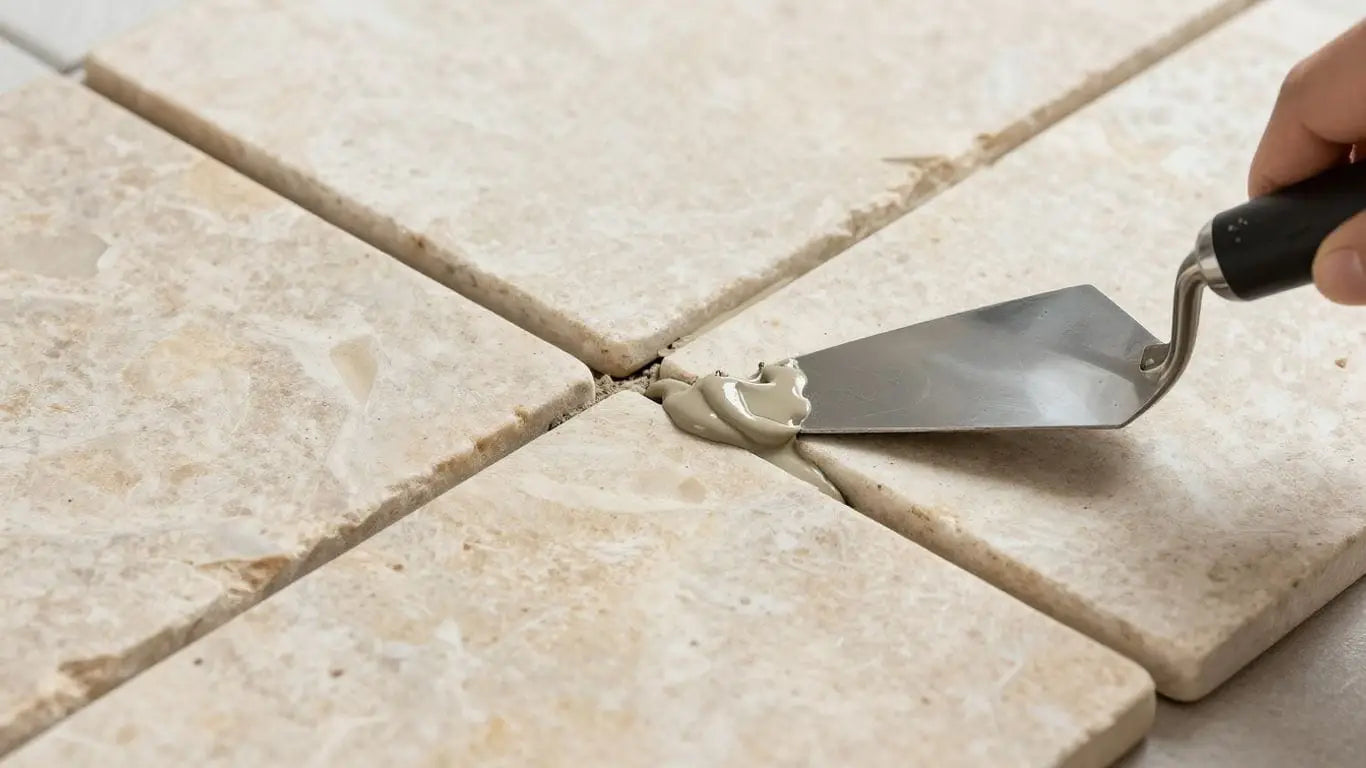
Apply Grout Diagonally
This is where your beautiful stone tiles get their final definition. Applying grout diagonally across the tiles is key. It helps push the grout firmly into the joints, creating a solid bond and a clean look. Use a grout float for this, working in manageable sections. Don't rush this step; precision here prevents future issues like crumbling grout or uneven lines. For the best results, consider the grout color carefully – it can dramatically change the final appearance of your marble or travertine. A darker grout can highlight the stone's natural patterns, while a lighter one offers a more subtle finish. If you're unsure about grout color, ordering samples of your chosen stone and grout is a smart move. You can even buy marble tiles online USA from reputable suppliers who offer this service.
Clean Excess Grout Promptly
Once the grout is in the joints, it's time for cleanup. You'll want to wipe away the excess grout from the tile surfaces right away. Use a damp sponge, rinsing it frequently in clean water. The trick is to clean diagonally across the tiles, just like you applied the grout. This method helps avoid pulling grout out of the joints. Be thorough, but gentle. Leaving excess grout on the tiles can lead to a hazy, difficult-to-remove residue once it dries. This is a critical step for achieving that polished, professional finish you're after. Remember, promptness is your best friend here.
Allow Grout to Cure Before Sealing
Patience is a virtue, especially when it comes to your new stone installation. Before you even think about sealing, you need to let that grout cure completely. This usually takes about 48 to 72 hours, but always check the grout manufacturer's recommendations. Sealing too early can trap moisture, compromising the grout's integrity and potentially damaging the stone. Once the grout is fully cured, it's time to seal. Sealing protects your porous marble and travertine from stains and moisture, keeping them looking beautiful for years to come. It's a vital step in protecting your investment. If you're looking to buy marble tiles online USA, make sure to ask about recommended sealers.
Case Study: The Miller Residence
The Miller family was installing a stunning travertine floor in their kitchen. They were eager to finish quickly and decided to seal the tiles just 24 hours after grouting. Unfortunately, they noticed a cloudy film developing on the tiles a few days later. This was due to sealing before the grout had fully cured, trapping moisture. They had to carefully remove the sealer and reapply it after waiting the full 72 hours. This taught them the importance of following the curing times precisely for a flawless finish.
Post-Installation Inspection and Care
After all the careful measuring, cutting, and installing, you’d think the job ends with the last tile. But here’s the thing: your investment’s real reward comes from how you treat it in those first few days and for years after. Whether you went for marble, limestone, or travertine, a bit more diligence transforms a stunning surface into a long-lasting one. Let’s break it down:
Perform a Final Cleaning
Don’t let dust and grout haze dull your hard work. Grab a soft, damp cloth or a pH-neutral stone cleaner and wipe every surface thoroughly. Skip harsh chemicals—they can scratch or stain natural stone. Check all corners, grout lines, and tile faces for sticky spots. A clean finish really shows off the veins and warmth of those new marble tiles.
Inspect for Imperfections
You want to catch mistakes while they’re still easy to fix. Walk the area slowly, feeling for lippage (uneven spots), hollow sounds (which mean poor adhesion), or missing grout. Most installers check for these issues right away so any tiles that need replacing or grouting can be handled before the space goes into daily use. For some inspiration (or just to see what perfection looks like), browse through inspiring customer installations that nail every detail.
Understand Ongoing Sealing Needs
Natural stone may look tough, but it’s still porous. Without sealing, stains and moisture become real headaches. How often? Here’s a handy table for reference:
| Stone Type | Sealing Frequency |
|---|---|
| Marble | Every 12-18 months |
| Travertine | Every 12-24 months |
| Showers/Wet | Every 6-12 months |
| High-traffic | As needed, check regularly |
If you buy marble tiles online USA, don’t skip sealing—especially for white or light colors. Check product recommendations, and pay extra attention to wet or ‘busy’ areas.
Caring for your natural stone from day one stops small issues from turning into expensive headaches. A little attention goes a long way!
Quick Success Story
Take the case of a Los Angeles homeowner who installed ivory travertine across a large family room. After sealing right on schedule and performing a quick annual inspection, their floors are still pristine five years later—despite whirlwind weekends, two dogs, and clumsy kids. Meanwhile, their neighbor skipped sealing and saw oil stains ruin a bright white marble entry. The lesson? Routine care matters.
The Bottom Line
Like any home upgrade, marble, limestone, and travertine need attention after install. Clean up, double-check the details, and embrace a sealing schedule. Your stone’s beauty will thank you every single day. If you need more details on stone care, reach out to your supplier or installer—and never underestimate the peace of mind a few minutes of follow-up can offer.
Understanding Natural Stone Variations
Natural stone is never identical from one tile to the next. Marble, limestone, and travertine aren't manufactured in a factory, which means every piece tells its own story. When you buy marble tiles online USA, you’re choosing a unique slice of nature for your space.
Embrace Color and Pattern Differences
Every stone tile you unbox brings its own personality. Marble might show sweeping veins, while travertine boasts earthy swirls and pits. Limestone can reveal subtle, chalky bands. Variation isn’t a defect—it's the beauty buyers pay for when picking natural stone over synthetic options.
Here's what real customers have learned:
- Linda ordered a white marble floor for her entryway, expecting a pure tone. Instead, the mix of creams, grays, and soft golds brought her foyer to life, impressing every visitor.
- James installed a vein-cut travertine wall in his bathroom and at first worried about color shifts tile by tile. After grouting, those variations blended for a dramatic, spa-style finish he never expected.
- An office renovation in Chicago with limestone floors at first seemed too varied. After the project team rearranged the dry-laid tiles to balance the look, the end result was a custom, high-end impression every guest complimented.
Most homeowners are surprised how much natural change in stone looks even better once fully installed and sealed—natural character beats a uniform look every time.
Recognize Natural Pits and Imperfections
Travertine and limestone are famous for their pits, holes, and fossils. These natural features don’t mean your tile is damaged. They're part of how you know you’re getting the real thing, not a basic ceramic replica. Some tiles come filled; others are left raw for a rustic vibe. Ask your retailer about the finish you want, especially if you’re looking for tiles for high-traffic spaces or wet areas.
- Fillings can be re-touched over time if needed.
- Exposed pits add grip, though can hold dust (so plan on a little extra cleaning in busy rooms).
Order Samples for Accurate Representation
Don’t trust your entire project to online photos alone. Order samples first, especially with natural stone. It’s the only way to know exactly what those marble veins or travertine swirls look like in your home's actual light.
- Request individual tile samples from a retailer before you decide.
- Lay them out on site and imagine your space after installation.
- This tiny investment up front can save huge headaches if you—or your client—are particular about color, finish, or pattern.
| Step | Action |
|---|---|
| 1 | Order free or discounted samples from an online store |
| 2 | Inspect in daylight, under your home’s lighting |
| 3 | Compare with wall/paint/furniture and make your pick |
When you’re ready to buy, factor in variation and always build some extra into your order (usually 10-15%) so you can cherry-pick the best pieces for main focal points.
In the world of natural stone, variety is the mark of authenticity and luxury. This weekend, I walked a finished travertine patio that looked like it cost twice the budget—just because the installer used smart planning and embraced each tile's quirks, not fighting nature but celebrating it. Choose real stone, plan with care, and your space will stand out from the crowd every time.
Avoiding Common Material Mistakes
Choosing the right materials is just as important as the installation itself. Using the wrong products can lead to a host of problems down the line, from discoloration to outright failure. Let's make sure you're set up for success from the start.
Do Not Use Premixed Mastic Adhesives
This is a big one. Premixed mastic adhesives are convenient, but they're often not suitable for natural stones like marble, limestone, and travertine. These stones are porous and can react poorly with the binders in mastics, leading to discoloration or a weak bond. Always opt for a high-quality thin-set mortar specifically formulated for natural stone. It's the professional's choice for a reason – it provides superior adhesion and durability. If you're looking to buy marble tiles online in the USA, make sure the recommended adhesive is compatible.
Case Study: A homeowner in Arizona used a premixed mastic for their travertine tile backsplash. Within a year, the tiles started to yellow, and some even detached. The issue was traced back to the mastic reacting with the porous travertine, causing the discoloration and bond failure. A proper thin-set mortar would have prevented this entirely.
Select Appropriate Thickness for Application
Natural stone tiles come in various thicknesses, and using the right one for your project is key. Thicker tiles are generally more durable and suitable for high-traffic areas or applications where more wear is expected. Thinner tiles might be fine for low-traffic decorative areas or wall applications. For flooring, a common thickness is 3/8" to 1/2", while countertops typically use thicker slabs. Always check the manufacturer's recommendations and consider the intended use of the space.
| Application | Recommended Thickness | Notes |
|---|---|---|
| Flooring (Low Traffic) | 3/8" | Suitable for residential bathrooms, etc. |
| Flooring (High Traffic) | 1/2" or thicker | Ideal for hallways, kitchens, commercial |
| Wall Cladding | 3/8" | Standard for most wall applications |
| Countertops | 3/4" - 1-1/4" | Typically slabs, not tiles |
Consider Stone Hardness for High-Traffic Areas
Not all natural stones are created equal when it comes to durability. Softer stones like marble and limestone can scratch or etch more easily than harder stones like granite or quartzite. If you're installing in a high-traffic area, such as a kitchen floor or a busy entryway, choose a stone that can stand up to the wear and tear. Travertine is a good middle ground, offering a beautiful look with decent durability when properly sealed. For the absolute toughest applications, consider granite or quartzite. When you buy marble tiles online USA, be sure to understand their hardness rating and suitability for your intended space.
Pro Tip: Always order samples before committing to a large purchase. Natural stone has inherent variations, and seeing a sample in your own lighting conditions will help you make the best choice for your project and avoid costly mistakes. You can find great samples at Surfaces Galore.
Case Study: A restaurant owner opted for polished marble flooring in their main dining area, a high-traffic zone. Despite regular sealing, the constant foot traffic, dropped cutlery, and chair movement led to significant etching and scratching within a year, diminishing the stone's luxurious appeal. Switching to a honed finish or a harder stone like granite would have been a more practical choice for that environment.
Leveraging Professional Expertise
Look, installing natural stone like marble, limestone, or travertine can be tricky. It's beautiful, sure, but it's also a material that demands respect and the right know-how. Trying to DIY a project without the proper experience can lead to costly mistakes, like cracked tiles, uneven surfaces, or permanent stains. That's where bringing in the pros really pays off.
Consult Suppliers for Doubts
Got questions about the best adhesive for your specific marble tiles? Unsure if that travertine is suitable for your bathroom floor? Don't guess. Your supplier is a goldmine of information. They know their products inside and out. Ask them about material compatibility, recommended installation methods, and even maintenance tips. They can guide you toward the right products, like ensuring you buy marble tiles online USA that are perfect for your project. They can also help you figure out how much material you actually need – usually, you'll want to add about 10-15% extra for cuts and waste.
Seek Professional Installation Advice
Even if you're a seasoned DIYer, natural stone installation has its quirks. Substrate preparation is key – it needs to be solid, level, and stiff enough to support the stone. Then there's the mortar application, ensuring full coverage, and dealing with those precise cuts. A professional installer has the tools, the experience, and the trained eye to handle these details. They know how to avoid common pitfalls, like using the wrong thin-set or not properly preparing the subfloor. This is especially important when working with delicate materials or complex patterns. For instance, if you're considering limestone molding for a decorative touch, a professional can ensure it's installed flawlessly.
Utilize Custom Fabrication Services
Sometimes, your design calls for something beyond standard tile sizes. Maybe you need custom-cut thresholds, unique mosaic patterns, or specific shapes for a feature wall. This is where custom fabrication services shine. Companies specializing in natural stone can cut, shape, and finish pieces to your exact specifications. This ensures a perfect fit and a high-end look that’s hard to achieve with off-the-shelf components. It’s a way to truly personalize your space and make it unique.
Don't let installation worries dim the natural beauty of your stone choice.
Case Study 1: The Kitchen Countertop Calamity
A homeowner decided to install a marble countertop themselves, thinking it would be a straightforward job. They skipped consulting the supplier about the specific sealant needed for their chosen marble. After installation, spills from cooking and cleaning caused immediate staining, which proved difficult to remove from the unsealed surface. The homeowner ended up having to hire a professional stone restorer, costing them more in the long run than if they had sought advice upfront.
Case Study 2: The Uneven Bathroom Floor
Another homeowner attempted to tile their bathroom floor with travertine. They didn't adequately check the subfloor's levelness, leading to an uneven installation with noticeable lippage (edges of tiles not being flush). This not only looked unprofessional but also created a tripping hazard. A professional installer would have identified the uneven substrate and used a self-leveling underlayment to create a perfectly flat surface before laying the tiles.
Tap into the knowledge of seasoned pros. Our team has years of experience in the field, ready to guide you. We understand the details that matter and can help you make the best choices for your project. Let our experts show you the way to success. Visit our website today to learn more and get personalized advice!
Wrapping Up Your Installation
So, we've gone over a few things that can really mess up your marble, limestone, or travertine installation. It's easy to get excited about these beautiful stones, but taking a little extra time to prep right and follow the steps makes a huge difference. Checking your tiles before you start, making sure your base is solid, and using the right stuff for the job are key. If you do run into trouble or just want to make sure you're getting the best materials, remember Surfaces Galore is here to help. We ship all over the country and have a great selection to get your project looking just right. Don't hesitate to reach out to us with any questions or to check out our stock.
Frequently Asked Questions
What should I do before I start putting down the tiles?
Before you begin, always check each tile to make sure it's not cracked or damaged. It's also a good idea to lay out the tiles without glue first to see how they look together and to plan where your cuts will go. This helps make sure the colors and patterns look nice all over.
How do I make sure the floor is ready for the stone tiles?
The surface where you'll lay the tiles needs to be strong, flat, and clean. Any bumps or dips should be smoothed out. If you're putting tiles on a wooden floor, you might need an extra layer, like a cement board, to make it stronger so the stone doesn't crack later.
What kind of glue or mortar should I use for marble and travertine?
You need to use special glues, called thin-set mortar, that are made for natural stone. If your tiles are light-colored, use white thin-set mortar so the color doesn't show through. Always check that the glue works with both the stone and what's underneath it.
How do I stick the tiles down properly?
Spread the mortar evenly on a small area at a time using a notched trowel. Press each tile firmly into the mortar with a little twist to make sure the whole back of the tile is covered. This helps prevent empty spaces under the tiles.
What's the best way to cut stone tiles?
Use a wet saw with a diamond blade made for cutting stone. Cut slowly and carefully to avoid chipping the edges. Always wear safety glasses and gloves when cutting.
When should I fill the gaps between the tiles (grout)?
After the tiles are set and the mortar has dried for about a day or two, you can add the grout. Apply it diagonally across the tiles to fill the gaps, then wipe off the extra. Let the grout dry completely before sealing the stone.
Why do marble and travertine tiles look different from each other?
Marble, travertine, and limestone are natural stones, meaning they come from the earth. No two pieces are exactly alike! They have natural differences in color, patterns, and sometimes small holes or marks. This is part of their unique beauty.
Can I use just any glue for my stone tiles?
No, you can't use just any glue. Avoid sticky glues like mastic, as they might not be strong enough or could damage the stone. Always use a thin-set mortar specifically made for natural stone to ensure a lasting installation.
Leave a comment