
How to Restore Marble Shine: A DIY Home Guide

TL;DR:
- Marble surfaces degrade quickly from foot traffic and household cleaners, requiring proper polishing to restore their shine.
- DIY polishing with appropriate powders, careful preparation, and consistent technique can improve dull or lightly etched marble but deeper damage needs professional restoration.
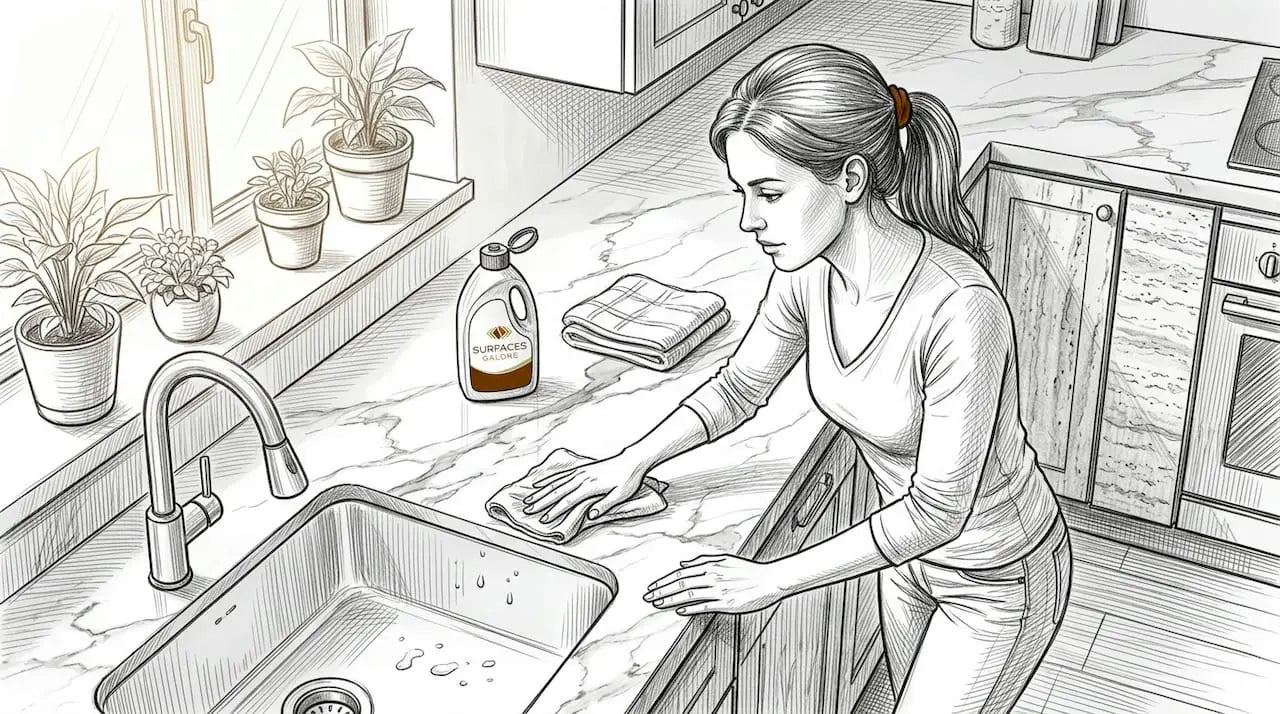
Marble surfaces lose their luster, and it happens faster than most homeowners expect. Regular foot traffic, common household cleaners, and even plain water can leave your floors or countertops looking flat and chalky. Knowing how to restore marble shine properly, without causing more harm, is what separates a successful DIY project from a costly mistake. This guide walks you through the exact steps to prepare, polish, and protect your marble, plus gives you an honest look at when to call in a professional.
Table of Contents
- Key takeaways
- How to restore marble shine: preparation first
- Step-by-step DIY marble polishing process
- Maintenance best practices after restoration
- When DIY is not enough
- My honest take on marble care
- Discover premium marble at Surfacesgalore
- FAQ
Key takeaways
| Point | Details |
|---|---|
| Polish, don’t seal | Sealers protect marble from stains but never create shine; polishing is what restores gloss. |
| Work in small sections | Polish 3x3 foot areas at a time to maintain even pressure and consistent results. |
| Avoid acidic cleaners | Vinegar, lemon juice, and bleach cause permanent etching that standard DIY polishing cannot fix. |
| Know your damage level | Light dullness suits DIY powder polishing; deep scratches and heavy etching require professional restoration. |
| Seal on a schedule | High-traffic marble needs sealing every 6 to 12 months; lower-traffic surfaces every 1 to 2 years. |
How to restore marble shine: preparation first
Before you pick up a polishing powder or a buffing pad, the quality of your preparation will decide your results. Rushed prep is the number one reason homeowners end up with uneven shine or a hazy finish after all their effort.
Tools and materials you will need
Gather everything before you start. Running out of a product mid-polish and leaving a section partially buffed can cause visible inconsistencies.
- Microfiber mop or soft cloth for dust removal and gentle washing
- pH-neutral stone cleaner designed specifically for marble and natural stone
- Marble polishing powder (tin oxide or aluminum oxide work best for DIY use)
- White buffing pads or a soft polishing pad for hand or low-speed orbital use
- Soft rubber gloves and a dust mask if working indoors with powder
- Wet/dry vacuum or clean towels for slurry management during polishing
- Plastic sheeting or tape to protect baseboards and adjacent surfaces
Polishing powder options matter more than most guides admit. Tin oxide gives a finer, higher-gloss result on polished marble. Aluminum oxide is slightly more aggressive and works better on honed or semi-matte finishes. Using the wrong one won’t ruin your marble, but it can mean extra buffing time.
Pro Tip: Always spot-test your chosen polishing powder on an inconspicuous area, like inside a closet or behind an appliance, before working on a visible surface. This confirms product compatibility and lets you gauge how much pressure gives the best result without risking your main surface.
Cleaning before polishing
Deep cleaning before any polishing step is non-negotiable. Grit and residue act like sandpaper under a buffing pad, leaving fine scratches instead of shine. Sweep or dust mop the entire surface with a dry microfiber tool first. Then wet-clean with a pH-neutral stone cleaner diluted according to the product label. Avoid all-purpose cleaners, vinegar, or anything labeled “fresh citrus.” Acidic substances etch marble chemically, creating dull white marks that no polish powder can reverse at home.
| Cleaner type | Safe for marble? | Effect |
|---|---|---|
| pH-neutral stone cleaner | Yes | Cleans without etching or stripping |
| Dish soap (diluted) | Sometimes | Leaves residue that dulls shine over time |
| Vinegar or citrus cleaner | No | Causes permanent chemical etching |
| Bleach | No | Discolors and weakens stone surface |
| Ammonia-based cleaners | No | Strips sealant and dulls finish |
Let the surface dry completely before moving to polishing. Any remaining moisture affects how polishing powder bonds to the surface and can interfere with the slurry formation you need for wet polishing.
Step-by-step DIY marble polishing process
This section covers DIY polishing with powder for light dullness, minor surface etching, and general loss of sheen. It is not a fix for deep scratches, cracks, or heavy etching. If you are unsure which category your marble falls into, skip to the section on professional restoration to assess first.
The step-by-step polishing method
-
Divide your surface into sections. Work in 3x3 foot areas to maintain control over pressure and polish distribution. Larger areas dry unevenly and produce patchy results.
-
Apply polishing powder to a damp pad. Lightly mist the buffing pad or the marble surface with water. Sprinkle a small amount of polishing powder directly onto the damp surface. You need just enough to create a light slurry when you begin working, not a thick paste.
-
Buff with circular motions. Using moderate, consistent pressure, work the powder in small overlapping circles across the section. Keep your strokes smooth and your pressure even. Pressing harder in one spot does not speed things up. It creates uneven gloss and can cause swirl marks.
-
Manage the slurry as you work. A light, milky slurry forms as the powder works against the marble. This is normal and is actually doing the polishing. Drying slurry left in pores causes a hazy, cloudy finish that is difficult to remove without starting over. Wipe excess slurry with a clean damp cloth every few minutes, or use a wet/dry vacuum to pull it away without spreading it.
-
Wipe and inspect the section. Use a clean, dry microfiber cloth to remove the remaining slurry and dry the area. Step back and look at the surface from an angle, checking for consistent gloss. Areas that look flat still may need another pass.
-
Repeat if needed before moving on. Do not move to the next section until the current one has reached your target gloss level. Unfinished sections left to dry while you work elsewhere can create visible seams between polished and less-polished areas.
-
Buff dry to a final shine. Once all sections are done, do a final dry buff with a clean microfiber cloth across the entire surface. This removes any residual haze and brings out the final gloss.
Pro Tip: For countertops, restoring dull marble countertops by hand with a folded microfiber cloth gives you better pressure control than any power tool. The risk of burning or gouging a countertop edge with a spinning pad is real, and the countertop’s smaller area makes hand polishing completely practical.
A common mistake at this stage is expecting too much from a single session. Chemical polishes or waxes provide only temporary shine, and the same is true of hasty powder polishing. True marble gloss comes from refining the surface at the microscopic level. That means consistent circular pressure, proper slurry management, and patience across each section.
Maintenance best practices after restoration
You have done the work. Now the goal is protecting that result for as long as possible. This is where most homeowners quietly undo everything they just accomplished.
Daily and weekly habits that preserve shine
- Dust mop every day with a dry microfiber pad. Grit tracked in on shoes is abrasive and fine enough to scratch marble with routine foot traffic.
- Wet clean weekly using only a pH-neutral stone cleaner. Avoid general household floor cleaners, even the ones labeled “gentle” or “multi-surface.” Acidic chemicals cause permanent marble etching regardless of how diluted they are.
- Blot spills immediately rather than wiping them. Wiping spreads the liquid and increases the surface area that contacts the marble. Wine, coffee, and citrus drinks are the most common culprits for rapid staining and etching.
- Use mats at entryways and felt pads under furniture legs. Both of these reduce abrasion significantly and are cheap compared to re-polishing costs.
- Consider a no-shoe policy in marble-floored rooms, particularly in kitchens and entryways. Outdoor shoe soles pick up sand and grit that scratches marble with every step.
You can find a detailed breakdown of daily marble care routines at Surfacesgalore that covers both floors and countertops.
Sealing schedule and why it matters
Sealing is protection, not polish. This distinction matters enormously because many homeowners apply sealer hoping to bring back gloss and are disappointed when the marble still looks dull. Sealers fill pores to protect marble from stain penetration and moisture. They do not affect surface reflectivity at all. If you apply sealer over a dull surface, you seal in the dullness.
Always polish first, then seal. For high-traffic floors like entryways or kitchens, seal every 6 to 12 months. For lower-traffic areas such as guest bathrooms or decorative countertops, every 1 to 2 years is sufficient. Use a penetrating impregnating sealer specifically formulated for natural stone, apply it to a clean dry surface, and wipe off excess before it dries on the surface.
![]()
When DIY is not enough
Some marble damage genuinely cannot be fixed with polishing powder and a microfiber cloth. Recognizing this early saves you time, money, and the frustration of working hard and seeing no improvement.
Signs that point to professional restoration
Deep scratches that catch a fingernail, heavy white etch marks that cover significant surface area, lippage (where tiles sit at uneven heights), and cloudy patches that remain after thorough polishing are all signs that you need professional help. These issues require equipment and skill that go well beyond consumer-grade products.
Professional marble restoration uses diamond abrasives applied in progressively finer grits, moving from coarse grinding through honing to a final polish. This process can take one to two days per residential floor and produces a result that is genuinely not replicable with DIY tools. The mirror-like shine comes from mechanical polishing at the microscopic level, not from coatings or products applied on top.
| Damage type | DIY fix possible? | Recommended action |
|---|---|---|
| Light surface dullness | Yes | Polishing powder with hand or soft pad |
| Minor surface etching | Partial | Polishing powder, may need professional finishing |
| Deep scratches | No | Professional honing and polishing required |
| Heavy etch marks | No | Professional re-honing required |
| Lippage or unevenness | No | Professional diamond grinding required |
Pro Tip: Before hiring a professional, ask specifically whether they use a planetary diamond grinder or a single-disc buffer. Planetary systems cover more surface area evenly and are what experienced marble restoration contractors use. A single-disc buffer is closer to what you could rent yourself, and the results will show.
DIY rental buffers cannot replicate professional finishes and carry real risk if misused. Consistent pressure and motion are critical to avoiding swirl marks and uneven gloss, and high-speed machines amplify every small error. If the damage warrants professional work, budget for it rather than risk worsening it with equipment you are not trained on.
My honest take on marble care
I have watched a lot of homeowners approach marble the same way: they assume it is tough because it looks impressive, and they treat it like ceramic tile until something goes wrong. What I have learned over years of working around natural stone is that marble rewards patience and consistency far more than it rewards effort.
The single biggest mistake I see is people reaching for vinegar or a “natural” cleaner to tackle stubborn stains. There is a persistent myth that natural means safe. For marble, acidic home remedies are some of the most reliably destructive things you can apply. Vinegar etches marble on contact, and those white haze marks are not stains you can clean off. They are physical damage to the surface itself.
I have also seen the aftermath of rental buffer experiments. A homeowner spends a weekend trying to save a few hundred dollars on professional polishing, applies inconsistent pressure, and ends up with visible swirl patterns across the entire floor. Fixing that costs significantly more than the original polishing quote. In my experience, the calculus is simple. DIY polishing with powder and hand tools is genuinely achievable and can produce good results on lightly dulled surfaces. Anything deeper than that deserves a professional.
What I find most useful to tell people is this: your sealer does not make marble shine. Your polish does. Get that in order first, then protect the result. Sealers applied on polished marble are invisible and effective. Sealers applied on dull marble just lock the problem in place.
Marble is not high-maintenance. It is specific-maintenance. Learn what it needs, give it that consistently, and it will hold its beauty for decades.
— cihan
Discover premium marble at Surfacesgalore
If you are investing time in restoring and maintaining marble surfaces, the quality of the stone itself matters just as much as the care you give it. Surfacesgalore is a direct importer of premium natural marble, limestone, and travertine tiles, with collections suited to every room and design style.
Based in Anaheim, California and shipping nationwide, Surfacesgalore works with homeowners, designers, and contractors who want authentic natural stone at accessible prices. Whether you are sourcing marble tiles for a new installation or looking for guidance on caring for existing surfaces, the team brings direct-import expertise that most retailers simply cannot match. Browse the marble tile collection to find options that fit your project and aesthetic. You will also find a full library of maintenance guides and product-specific care advice to support every stage of your natural stone investment.
FAQ
What is the best way to restore marble shine at home?
Apply a marble polishing powder (tin oxide or aluminum oxide) to a damp surface and buff in circular motions over small 3x3 foot sections. This method works well for light dullness and minor etching on properly cleaned marble.
Can I use vinegar to clean dull marble?
No. Vinegar etches marble on contact, creating permanent dull white marks that require professional re-honing to remove. Use only pH-neutral stone cleaners on marble surfaces.
Does sealing marble restore its shine?
Sealing does not restore or create shine. Sealers protect marble from moisture and staining by filling surface pores, but gloss comes only from mechanical polishing. Always polish first, then seal.
How often should marble floors be polished?
Light polishing with powder can be done as needed when dullness appears, typically once or twice a year for high-traffic floors. Professional restoration is a less frequent, deeper process tied to the level of wear and damage present.
When should I call a professional instead of polishing myself?
Call a professional when you see deep scratches that catch a fingernail, heavy or widespread etch marks, uneven tile height, or when DIY polishing leaves consistent haze or swirl marks after multiple attempts.
Leave a comment