
St. Croix 16x24 Limestone: A Comprehensive Guide to Installation and Maintenance

So, you're thinking about using St. Croix 16x24 limestone for your next project? Smart move. This stone has a certain charm that just works, whether you're going for a modern vibe or something more classic. It’s not just about looks, though. Limestone is pretty tough, but like anything natural, it needs a little know-how to get it installed right and keep it looking good. This guide is here to walk you through everything, from picking the spot to giving it a good clean down the road. We'll cover the tools you'll need, how to actually lay the tiles, and what to do if things get a bit tricky. Let's get your St. Croix 16x24 limestone looking its best.
Key Takeaways
- St. Croix 16x24 limestone offers a natural, timeless look that fits many design styles.
- Proper preparation of the installation area and substrate is vital for a lasting finish.
- Careful planning, including dry laying, helps manage natural stone variations and achieve a pleasing layout.
- Sealing the limestone after installation and periodically thereafter protects it from stains and moisture.
- Regular cleaning with mild agents and prompt spill cleanup are key to maintaining the stone's beauty.
Understanding St. Croix 16x24 Limestone
The Enduring Appeal of Limestone
Limestone has been a building material for ages, and for good reason. It brings a natural, earthy feel to any space. Think ancient structures that still stand strong – that’s the kind of lasting beauty limestone offers. It’s not just about looks; it’s about a connection to history and a sense of permanence. When you choose limestone, you’re choosing a material that has proven its worth over centuries. It’s a choice that speaks of quality and timeless style.
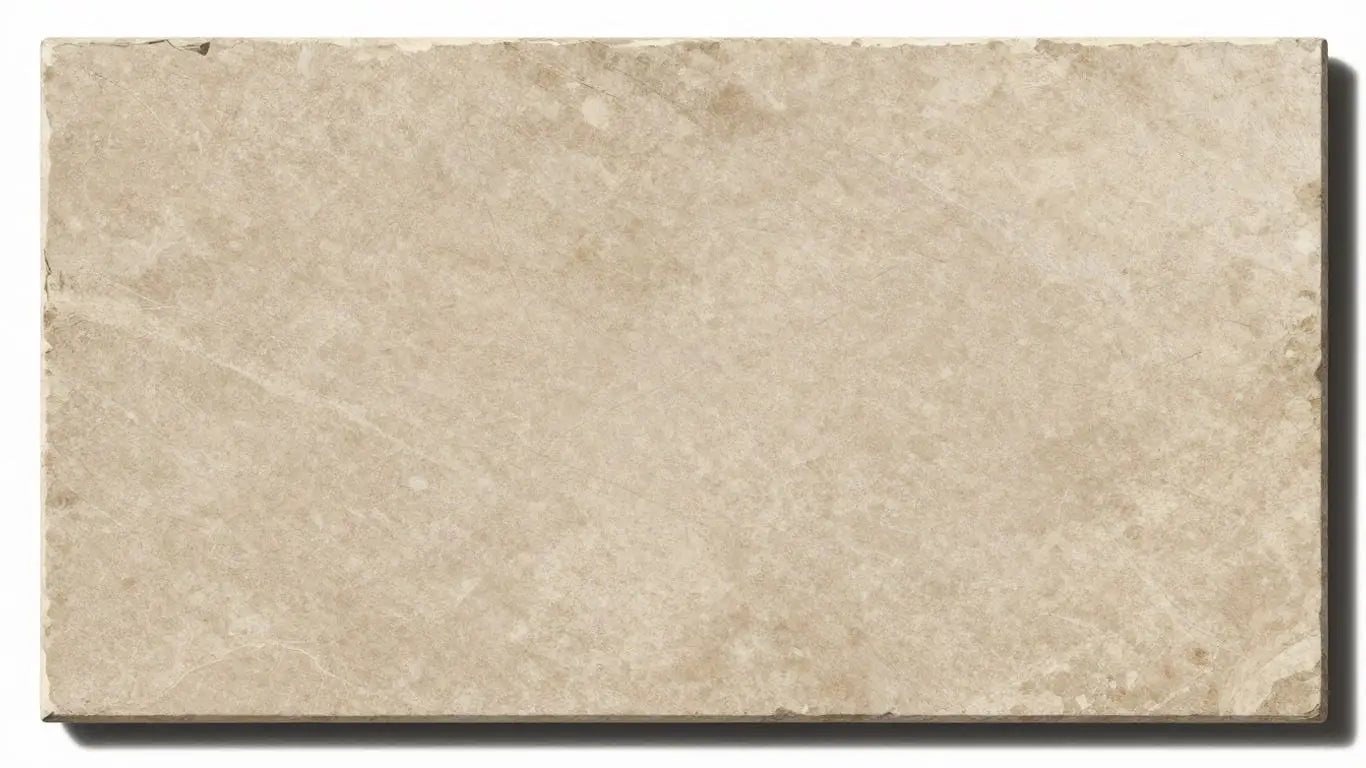
Key Characteristics of St. Croix 16x24 Limestone
St. Croix 16x24 Limestone is special. It’s known for its subtle, natural color variations and its smooth, yet textured surface. This isn't a stone that shouts; it whispers elegance. The 16x24 size is particularly versatile, making installation more straightforward and offering a clean, modern look without being overly busy. It’s a material that feels grounded and sophisticated.
- Natural Beauty: Each tile has unique patterns and tones.
- Durable: Stands up well to daily use.
- Versatile Size: 16x24 is great for many room layouts.
- Soft Aesthetic: Offers a calming, natural look.
Why Choose Limestone for Your Project
Choosing limestone, especially a quality option like St. Croix 16x24, is a smart move for many reasons. It offers a look that’s both luxurious and down-to-earth, fitting into a wide range of design styles. It’s a material that adds real value to your home. Plus, it’s a natural product, meaning you’re bringing a piece of the earth’s artistry into your living space. If you’re looking to buy limestone tiles online in the USA, you’re investing in a material that offers a fantastic balance of beauty, durability, and timeless appeal. It’s a choice that pays off in both aesthetics and long-term satisfaction.
Case Study: A Modern Farmhouse Kitchen
A homeowner in Austin, Texas, wanted to update their kitchen. They opted for St. Croix 16x24 Limestone for the flooring. The subtle, neutral tones of the limestone complemented the white shaker cabinets and the warm wood accents of the island. The large format tiles created a spacious feel, and the natural texture provided a practical, non-slip surface. The result was a kitchen that felt both modern and inviting, a perfect blend of style and everyday function. The homeowner reported that the limestone was easy to clean and has held up beautifully even with kids and pets.
Limestone is a sedimentary rock formed over millions of years, often containing fossilized marine organisms. This natural history gives each piece its unique character and subtle variations in color and texture, making every installation one-of-a-kind.
Selecting the Ideal Location for Your Limestone
Suitability for Interior Applications
St. Croix 16x24 Limestone brings a touch of natural elegance indoors. Think about your living room, dining area, or even a cozy bedroom. This stone works well on floors and walls, creating a warm, inviting atmosphere. It’s a great choice if you want a sophisticated look without being too flashy. For kitchens and bathrooms, it’s best to use it in areas with less direct water exposure or ensure it's properly sealed. It’s not the hardest stone out there, so maybe skip it for a super high-traffic entryway if you’re worried about wear. But for most indoor spaces, it’s a fantastic option. You can find beautiful limestone tiles online in the USA if you're looking to buy.
Considerations for Exterior Use
While limestone is beautiful, using it outside needs a bit more thought. St. Croix 16x24 Limestone can be used for patios or walkways, but it’s softer than some other outdoor materials. It holds up okay, but it might show wear faster in harsh weather or areas with lots of foot traffic. If you do use it outdoors, make sure it’s sealed well to protect against moisture and freeze-thaw cycles. It’s a good idea to check the specific product details for outdoor suitability. For areas like pool decks, you might want something with a bit more grip, as limestone can get slick when wet.
Matching Limestone to Room Functionality
When deciding where to put your St. Croix 16x24 Limestone, think about how you use each room. For a master bathroom, it offers a spa-like feel, especially in a shower or as a vanity surround. In a formal dining room, it adds a touch of class that’s hard to beat. However, for a busy family mudroom or a commercial kitchen, its porosity and softer nature might mean more maintenance than you’re looking for. It’s perfect for creating a serene backdrop in a home office or a quiet reading nook.
Case Study: The Miller Residence
The Miller family wanted a natural, calming feel for their master bathroom. They chose St. Croix 16x24 Limestone for the floor and shower walls. The subtle variations in the stone created a luxurious, spa-like environment. They made sure to seal it thoroughly, and with regular cleaning, it still looks stunning years later. They found the perfect tiles after browsing options online and were happy with the result.
Choosing the right spot for your limestone is key. It’s a natural material, and like all natural things, it has its strengths and best uses. Thinking about how a room is used will help you pick the perfect place for your beautiful St. Croix limestone.
Essential Tools and Materials for Installation
Getting ready to lay your beautiful St. Croix 16x24 Limestone? Awesome! Having the right gear makes all the difference. Think of it like a chef with their knives – you need the right tools for a perfect finish. We're talking about making sure your limestone looks stunning for years to come. Let's get you set up for success.
Gathering Necessary Tools
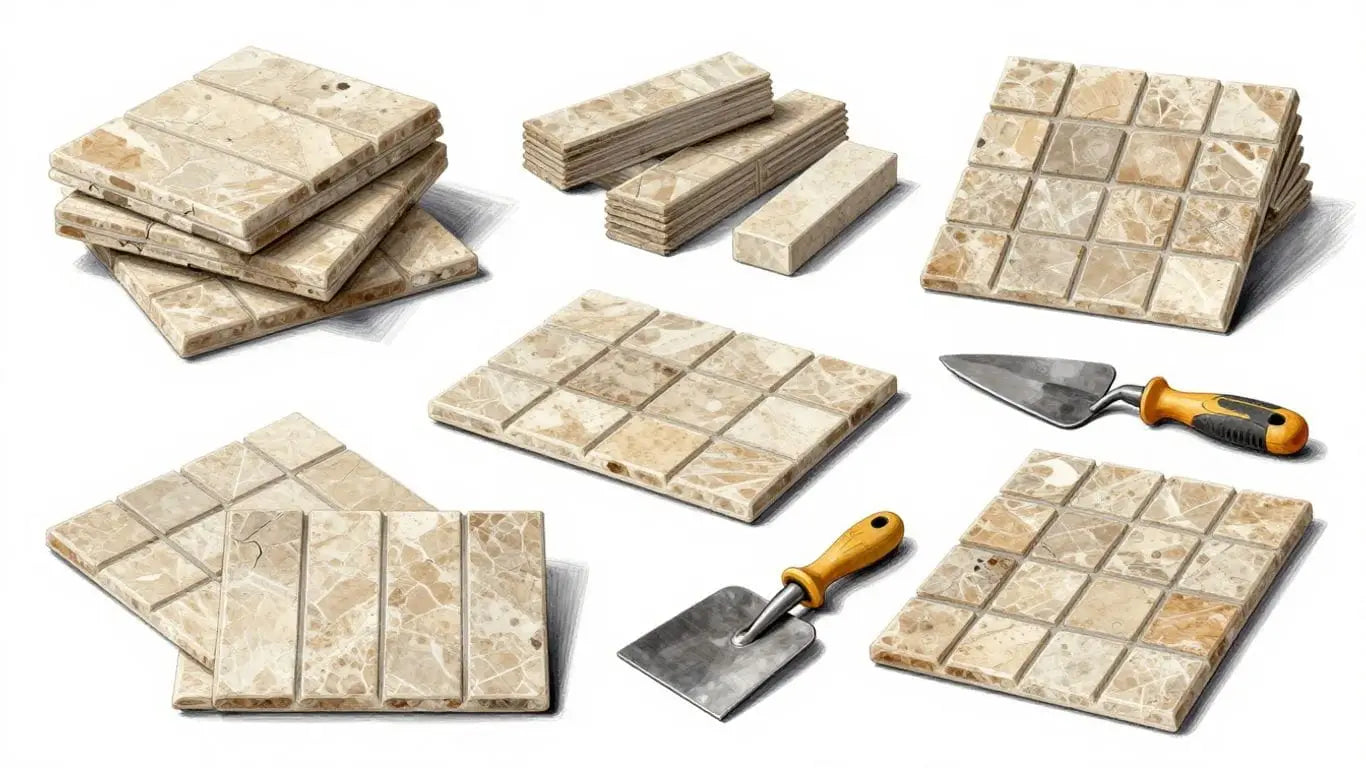
Before you even think about opening those boxes of St. Croix Limestone, make sure you have these on hand. It’s better to have them ready than to stop mid-project. You'll want to buy marble tiles online USA if you're looking for quality, but for installation, here's your checklist:
- Measuring Tape: For accurate measurements, obviously.
- Level: To make sure everything is perfectly flat. Nobody likes a wobbly floor.
- Notched Trowel: This is key for spreading adhesive evenly. The notch size matters, so check your adhesive recommendations.
- Tile Spacers: For consistent grout lines. Don't eyeball it!
- Rubber Mallet: For gently setting tiles and ensuring good contact with the adhesive.
- Wet Saw or Tile Cutter: For those precise cuts around edges and obstacles. A wet saw is usually best for natural stone.
- Buckets and Sponges: For mixing adhesive and grout, and for cleanup.
- Safety Gear: Always wear safety glasses, gloves, and knee pads. Stone dust can be harmful, and your knees will thank you.
Selecting the Right Adhesive and Grout
This is where you don't want to cut corners. The wrong adhesive or grout can lead to problems down the line. For St. Croix Limestone, you need products that are specifically designed for natural stone.
- Adhesive: Look for a high-quality, polymer-modified thin-set mortar. This type offers superior bond strength and flexibility, which is important for natural stone. Make sure it's suitable for limestone and the specific area (e.g., interior, potentially wet areas).
- Grout: Choose a grout that complements your limestone. For a seamless look, a color-matched grout works wonders. If you're going for a more rustic feel, a contrasting color can be striking. Consider sanded grout for wider joints and unsanded for very narrow ones. Always check the manufacturer's recommendation for natural stone.
Preparing Your Substrate
This step is non-negotiable. A solid, clean, and level substrate is the foundation for a beautiful and long-lasting limestone installation. Think of it as preparing the canvas before painting.
- Cleanliness: The subfloor must be free of dust, dirt, grease, and any old adhesive. Any debris can compromise the bond.
- Levelness: Uneven surfaces lead to lippage (where one tile edge is higher than another) and can cause tiles to crack. Use a leveling compound if necessary.
- Moisture: Ensure the substrate is dry. Excessive moisture can affect the adhesive and potentially damage the stone over time. If you're installing in a bathroom or kitchen, consider a waterproofing membrane.
A well-prepared substrate is the secret to a professional-looking limestone installation.
Case Study: The Miller family in Austin, Texas, wanted a timeless kitchen backsplash using St. Croix Limestone. They meticulously prepared their drywall substrate, ensuring it was perfectly smooth and clean. This attention to detail meant their limestone tiles adhered beautifully, creating a stunning focal point that has held up perfectly for over two years, with no signs of grout discoloration or tile shifting. They mentioned how crucial that prep step felt, even though it wasn't the 'fun' part.
Preparing the Installation Area
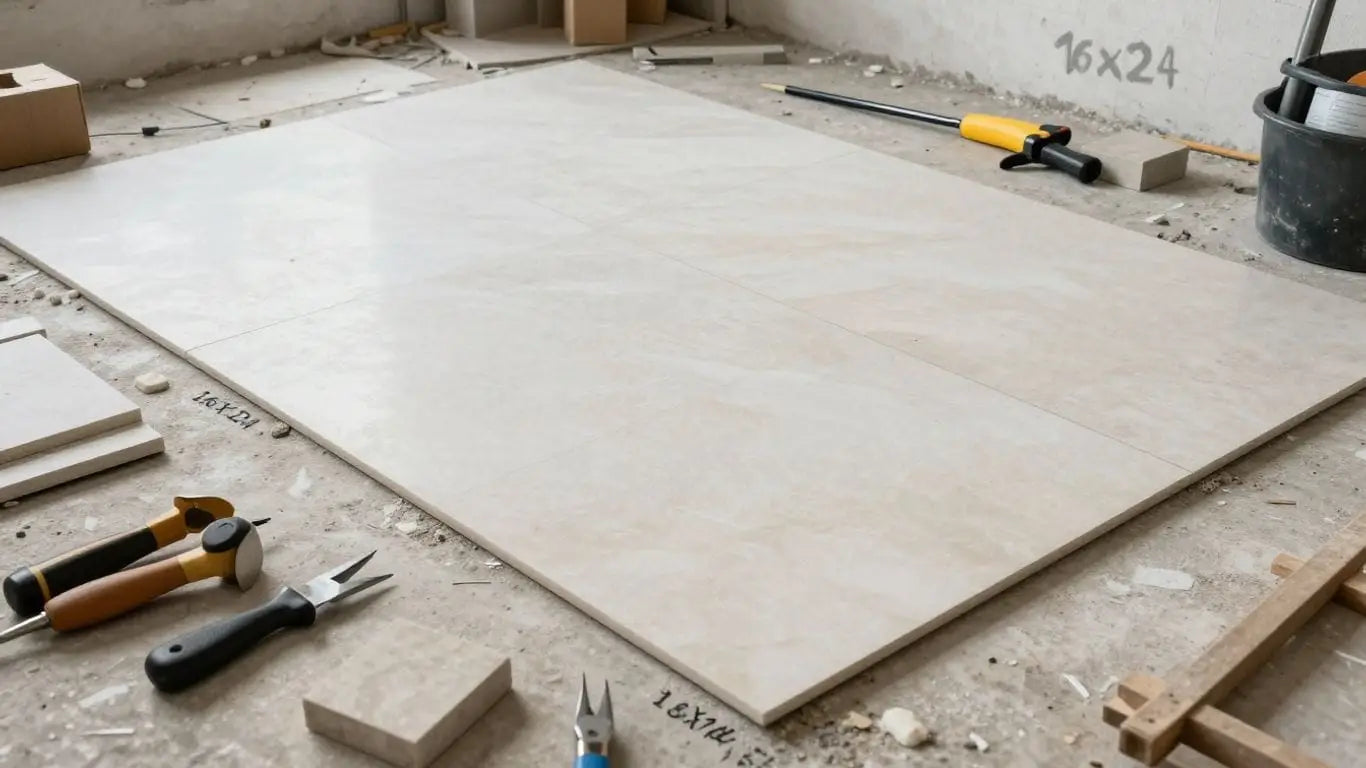
Before you even think about laying a single St. Croix 16x24 Limestone tile, you need to get your space ready. This step is super important. A good prep job means a beautiful, long-lasting floor. Think of it like building a house – you wouldn't start without a solid foundation, right? The same goes for your limestone. Let's make sure your area is perfect.
Ensuring a Clean and Level Surface
First things first: cleanliness. Any dust, debris, or old adhesive needs to go. A clean surface is key for the new adhesive to bond properly. You don't want anything getting between your limestone and the subfloor. After cleaning, check for levelness. Uneven spots can lead to cracked tiles or an unstable floor down the line. Use a good quality leveling compound if needed. A perfectly flat surface is your goal here.
Moisture and Substrate Considerations
Moisture is the enemy of good tile installation. Make sure your subfloor is completely dry. If you're installing in a bathroom or kitchen, consider a waterproofing membrane. Limestone is porous, and you don't want moisture seeping through to the subfloor or causing issues with the stone itself. Always check the manufacturer's recommendations for your specific substrate.
Planning the Layout and Dry Laying
This is where your design vision really comes to life before the adhesive is even out of the bag. Take the time to plan your layout. Start from the center of the room and work your way out. This helps ensure that any cuts you need to make are balanced and less noticeable. Then, do a dry lay. This means placing the tiles on the floor without any adhesive. It lets you see how the pattern looks, check for color variations, and figure out where you might need to make cuts. It’s a game-changer for getting a professional look. You can even mix tiles from different boxes during the dry lay to get the best blend of natural tones. This step is vital for achieving that cohesive, high-end look you're after when you buy marble tiles online USA or any natural stone for that matter.
Case Study: The Miller Residence
The Millers wanted a timeless kitchen floor using St. Croix Limestone. They meticulously planned their layout, dry-laying every tile in their 200 sq ft kitchen. This allowed them to identify a few tiles with slight color variations and strategically place them where cabinet kick plates would later hide them, resulting in a perfectly uniform appearance. They also discovered a slight dip in one corner of their subfloor during the dry lay, which they corrected with a leveling compound before proceeding. The result? A flawless, professional finish that has held up beautifully for years.
The St. Croix 16x24 Limestone Installation Process
Applying Adhesive and Setting Tiles
This is where your vision starts to take shape. Proper adhesive application is key to a lasting installation. Use a high-quality thin-set mortar specifically designed for natural stone. Apply it evenly to the substrate using the notched side of your trowel, creating consistent ridges. This ensures full coverage and a strong bond.
Now, gently press each St. Croix 16x24 Limestone tile into the adhesive with a slight twisting motion. This helps to embed the tile and eliminate any air pockets. Work in small, manageable sections to prevent the mortar from drying out before you can set the tiles. Remember, patience here pays off in the long run.
Maintaining Consistent Grout Lines
Uniform grout lines are the hallmark of a professional installation. Use tile spacers to maintain even spacing between each limestone tile. The standard recommendation for limestone is often a 1/16 to 1/8-inch grout joint, but always check the specific product recommendations. Consistent spacing not only looks better but also allows for proper grout fill and accommodates natural stone movement.
Take a moment to check your alignment as you go. A quick glance down the rows can catch any slight shifts before the adhesive sets. This attention to detail makes a big difference in the final appearance of your St. Croix limestone floor.
Cutting and Fitting Around Obstacles
Natural stone requires precise cuts, especially around doorways, cabinets, or other fixed elements. You'll likely need a wet saw with a diamond blade for clean, accurate cuts on your St. Croix 16x24 Limestone. Measure carefully and mark your cut lines clearly. Always wear safety glasses and follow the saw manufacturer's instructions.
Don't be afraid to make test cuts on a spare tile if you're unsure. It's better to practice on a piece that won't be seen than to ruin a tile that's destined for your floor. For intricate cuts, like around a curved doorway, you might need a jigsaw with a diamond blade or even a grinder. Planning these cuts during your dry lay phase is highly recommended. This allows you to visualize the final layout and minimize difficult cuts during the actual installation. If you're looking to buy marble tiles online in the USA, remember that similar cutting techniques apply to most natural stones.
Case Study: A Bathroom Transformation
Sarah and Tom wanted to update their master bathroom. They chose the St. Croix 16x24 Limestone for its elegant, natural look. The biggest challenge was fitting the tiles around a custom-built vanity and a curved shower niche. By carefully measuring and using a wet saw for straight cuts and a grinder for the niche, they achieved a professional finish. They even used some of the off-cuts to create a small mosaic accent behind the sink, showcasing how thoughtful cutting can minimize waste and add unique design elements. The result was a spa-like retreat that exceeded their expectations.
Proper planning and the right tools are your best friends when tackling cuts. Don't rush this step; precision here ensures a flawless finish that will be admired for years to come.
Grouting and Sealing Your Limestone
Now that your beautiful St. Croix 16x24 Limestone tiles are set, it’s time to finish the job right. Grouting and sealing are the final steps that truly bring your project together, protecting your investment and ensuring lasting beauty. Don't skip these vital stages – they make all the difference.
Applying Grout for a Seamless Finish
Grouting fills the spaces between your tiles, creating a unified surface and preventing dirt and moisture from getting underneath. For St. Croix Limestone, a good quality grout is key. Choose a color that complements your stone – a subtle contrast can highlight the tile's natural beauty, while a matching shade creates a more monolithic look.
- Work in small sections: This prevents the grout from drying out before you can work with it.
- Use a grout float: Hold it at a 45-degree angle to push the grout into the joints, working diagonally across the tiles.
- Wipe away excess: As you go, use the float to scrape off the bulk of the excess grout from the tile surface. Be careful not to pull grout out of the joints.
Proper Grout Curing Times
Patience is a virtue, especially when it comes to grout. Allowing the grout to cure properly is non-negotiable for a durable installation. Rushing this step can lead to cracking or a weak bond. Most cementitious grouts need at least 24 to 72 hours to cure, but always check the manufacturer's instructions for the specific product you're using. During this time, keep foot traffic off the newly grouted area.
The Importance of Sealing Limestone
Limestone, while stunning, is a porous material. This means it can absorb liquids, leading to stains and potential damage over time. Sealing creates a protective barrier, making your limestone more resistant to spills and everyday wear. Think of it as giving your beautiful stone a shield.
- Choose a quality sealer: Opt for a penetrating sealer specifically designed for natural stone. Some sealers can slightly darken the stone, giving it a richer, 'wetter' look, while others maintain the original color. Decide which look you prefer.
- Apply evenly: Use a clean applicator pad or cloth and apply the sealer in thin, even coats. Avoid puddling.
- Follow manufacturer instructions: Each sealer has its own application and drying times. Adhering to these will give you the best protection.
Case Study: The Miller Residence Kitchen
The Miller family wanted a timeless kitchen backsplash using St. Croix Limestone tiles. After installation, they opted for a light grey grout to subtly define each tile. They then applied a high-quality penetrating sealer. Six months later, a red wine spill that would have typically stained other materials wiped away cleanly, leaving the limestone looking as good as new. This highlights how proper grouting and sealing can save your project from common household accidents.
Case Study: The Downtown Loft Bathroom
For a modern loft bathroom, the designer chose St. Croix Limestone for the shower walls and floor. A near-white grout was used for a seamless, spa-like feel. After the grout cured, a color-enhancing sealer was applied. This not only protected the porous limestone from moisture and soap scum but also deepened the stone's natural tones, giving the bathroom a luxurious, high-end finish that has held up beautifully against daily use.
Sealing your limestone isn't just about preventing stains; it's about preserving the natural character and longevity of the stone. A well-sealed surface is easier to clean and maintain, ensuring your St. Croix Limestone remains a source of beauty for years to come. If you're looking to buy marble tiles online in the USA or other natural stone options, remember that proper sealing is a universal step for maintaining their elegance.
Calculating Material Needs and Waste Factor
Estimating Square Footage Requirements
Before you even think about ordering, you need to know exactly how much St. Croix 16x24 Limestone you'll need. It's not just about the main area; think about hallways, entryways, and any other spaces you're tiling. Measure everything carefully. A simple calculation of length times width for each section will give you the square footage. Don't guess – accuracy here saves you headaches later. If you're buying marble tiles online in the USA, having precise measurements is key to getting the right amount delivered.
Accounting for Cuts and Breakage
This is where the 'waste factor' comes in. Natural stone, like our beautiful St. Croix Limestone, isn't always perfectly uniform. You'll have cuts around doorways, corners, and any irregular shapes. Plus, sometimes tiles can chip or break during transport or cutting. A good rule of thumb is to add 10-15% extra for standard layouts. If your project has a lot of intricate cuts or you're working with a more complex pattern, you might want to bump that up to 20%. This extra bit is your insurance policy against running short.
Ordering Extra for Future Repairs
Think of it like this: if a tile gets damaged years down the line, you don't want to be hunting for a perfect match from a discontinued batch. Ordering a little extra upfront means you'll have matching tiles on hand for any future repairs or even small expansions. It's a small investment that pays off in maintaining the consistent beauty of your St. Croix Limestone installation for years to come. It’s always better to have a few extra tiles than to be short when you need them most.
Case Study: The Miller Residence
The Miller family was installing St. Croix Limestone in their kitchen and dining area, a space totaling 400 square feet. They calculated their basic needs and added a 15% waste factor, bringing their order to 460 square feet. During installation, they encountered several complex cuts around a custom island and a bay window. Fortunately, the extra 60 square feet they ordered covered these needs perfectly, and they even had a few tiles left over for future touch-ups. This foresight prevented delays and ensured a flawless finish.
Accurate material calculation isn't just about avoiding extra trips to the store; it's about ensuring a smooth installation process and the long-term integrity of your beautiful stone floor. Planning ahead prevents costly mistakes and ensures your project looks its best from start to finish.
Maintaining the Beauty of Your Limestone
Daily Cleaning Practices
Keep your St. Croix 16x24 Limestone looking its best with simple daily care. A quick sweep or vacuum removes grit that can scratch the surface. For spills, blot them up immediately. A clean surface is a happy surface.
Deep Cleaning and Stain Removal
For a more thorough clean, use a pH-neutral cleaner specifically made for natural stone. Avoid harsh chemicals or acidic cleaners, as they can damage the limestone. For stubborn stains, a poultice made from baking soda and water can often do the trick. Always test any cleaning solution in an inconspicuous area first.
Re-sealing for Ongoing Protection
Limestone is porous, so sealing is key to protecting it from stains and moisture. We recommend sealing your St. Croix 16x24 Limestone at least once a year, or more often in high-traffic areas. This simple step makes a big difference in maintaining its natural beauty and longevity. You can find high-quality sealers at Surfaces Galore, and we're happy to guide you on the best choice for your project. Investing a little time in sealing now saves a lot of trouble later.
Case Study: The Miller Residence
The Miller family installed St. Croix 16x24 Limestone in their entryway two years ago. Despite heavy foot traffic from kids and pets, their daily sweeping and immediate spill cleanup routine kept the stone looking fresh. They resealed it annually, and even after a red wine spill near the holidays, a quick poultice removed the stain completely, leaving the limestone unharmed. Their entryway remains a stunning focal point, a testament to consistent, simple care.
Case Study: The Chen Project
For a commercial lobby, the Chens chose St. Croix 16x24 Limestone for its sophisticated look. They implemented a strict cleaning schedule using only approved pH-neutral cleaners. After 18 months, they noticed a slight dullness in high-traffic zones. A professional resealing session restored the stone's luster and enhanced its stain resistance, proving that regular maintenance, including resealing, is vital for preserving the stone's elegance in demanding environments.
Proper care isn't just about cleaning; it's about protecting your investment. Regular maintenance ensures your limestone remains a beautiful, durable feature for years to come. Think of it as a spa day for your floors!
| Maintenance Task | Frequency | Recommended Product/Method |
|---|---|---|
| Daily Cleaning | As needed | Sweep or vacuum |
| Spill Cleanup | Immediately | Blot with a clean cloth |
| Deep Cleaning | Weekly/Bi-weekly | pH-neutral stone cleaner |
| Stain Removal | As needed | Poultice (e.g., baking soda & water) |
| Re-sealing | Annually | High-quality natural stone sealer (e.g., Miracle Sealants) |
Ready to keep your St. Croix 16x24 Limestone looking its absolute best? Explore our selection of premium cleaning and sealing products at Surfaces Galore, or visit us online at www.surfacesgalore.com. We also offer a wide range of beautiful limestone tiles if you're planning a new project or need replacements. You can even buy marble tiles online USA from our curated collection.
Addressing Common Installation Challenges
Even with the best planning, natural stone projects can hit a few snags. Don't let that stop you from achieving that stunning look you're after. We're here to help you tackle the most common issues head-on, so your St. Croix 16x24 Limestone installation is a success.
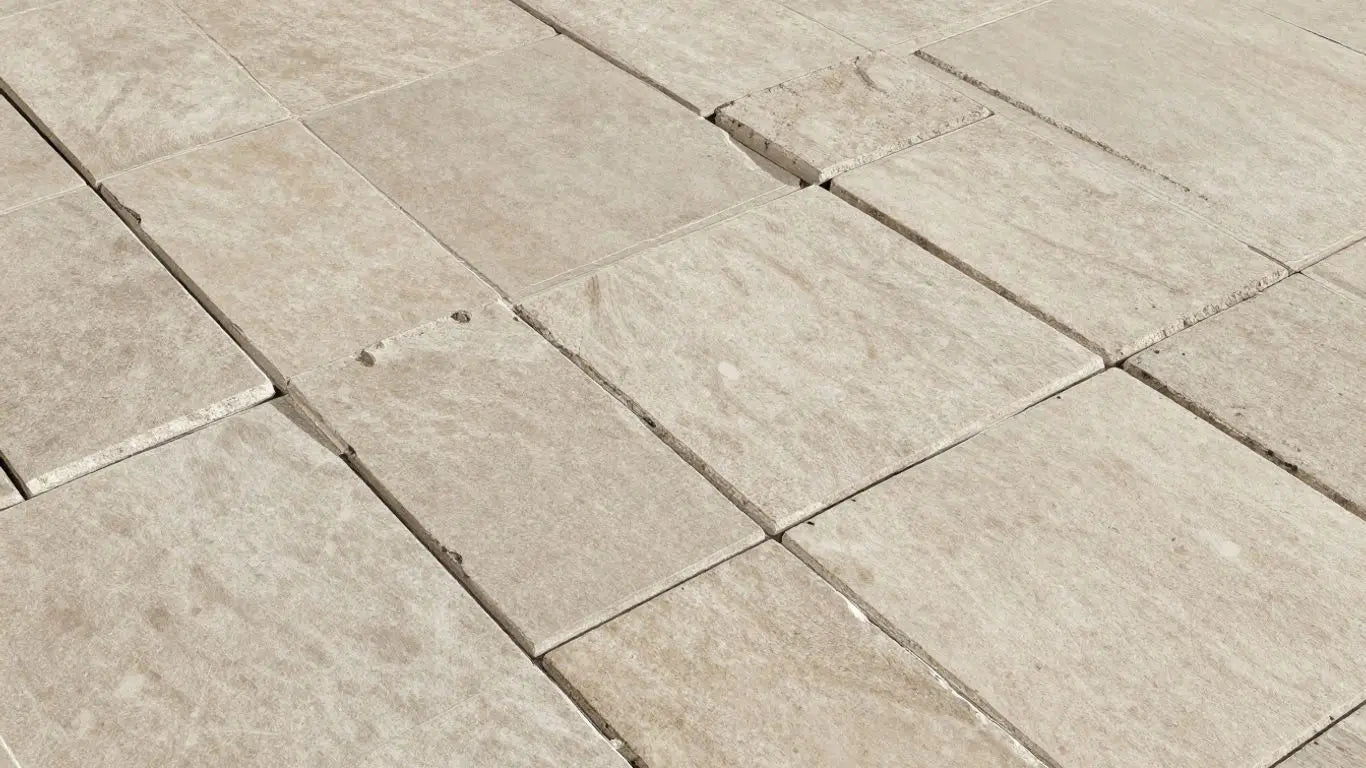
Managing Natural Stone Variations
Natural stone is beautiful because it's unique. That means no two St. Croix 16x24 Limestone tiles are exactly alike. You'll see variations in color, pattern, and texture. This is a sign of authenticity, not a defect!
- Inspect Before You Install: Always lay out your tiles before setting them. This lets you see the natural variations and plan the best arrangement for a cohesive look. Mix tiles from different boxes to blend colors evenly.
- Embrace the Uniqueness: Think of these variations as adding character. A well-planned layout can turn potential inconsistencies into a beautiful, organic design.
- Case Study: The Miller Residence: The Millers were initially concerned about the slight color differences in their limestone tiles. After a dry lay, they realized that by mixing the tiles strategically, they created a dynamic, rich floor that looked far more interesting than a uniform surface ever could. They now love the unique character it brings to their living room.
Dealing with Imperfect Substrates
Your subfloor or wall needs to be clean, level, and stable for a perfect installation. If it's not quite right, here's how to fix it:
- Leveling is Key: Uneven surfaces can lead to cracked tiles or loose grout. Use a self-leveling compound for floors or a leveling mortar for walls to create a smooth base.
- Moisture Check: Always check for moisture issues. A damp substrate can ruin your adhesive and grout. Use a moisture barrier if necessary.
- Case Study: The Chen Project: The Chens discovered their bathroom subfloor had a slight dip. Instead of risking tile failure, they used a high-quality leveling compound. The result? A perfectly flat surface that allowed for even adhesive application and a flawless tile installation, preventing future headaches.
Ensuring Proper Adhesion and Grout Fill
Good adhesion means your tiles stay put. Proper grout fill means a strong, water-resistant finish.
- Use the Right Adhesive: Always use a high-quality thin-set mortar specifically designed for natural stone. Follow the manufacturer's instructions for mixing and application.
- Comb it Right: Use the correct trowel size to apply the adhesive. You want full coverage on the back of each tile – no voids!
- Grout Thoroughly: When grouting, use a grout float to push the grout deep into the joints. Ensure there are no air pockets. For St. Croix 16x24 Limestone, a slightly wider grout line (e.g., 1/8 inch) can help accommodate natural variations and provide a robust finish.
Tackling installation challenges might seem daunting, but with the right approach and materials, you can achieve a professional-quality finish. Remember, patience and attention to detail are your best tools. If you're looking to buy limestone tiles online in the USA, Surfaces Galore offers premium options and resources to support your project.
Enhancing Your Space with St. Croix Limestone
Design Versatility of Limestone
Limestone isn't just a building material; it's a design statement. St. Croix 16x24 Limestone brings a natural, earthy elegance that works with almost any style. Think modern minimalist, rustic farmhouse, or classic traditional – limestone fits right in. Its subtle variations in color and texture mean each tile is unique, adding character that manufactured materials just can't match. It's a material that ages gracefully, developing a patina over time that only adds to its charm. If you're looking to buy limestone tiles online USA, you're investing in a look that stays in style for years. It's perfect for creating a serene bathroom retreat, a warm and inviting living area, or a sophisticated entryway. The possibilities are truly endless.
Complementary Design Elements
To really make your St. Croix Limestone shine, think about what you pair it with. Natural wood tones create a warm, grounded feel, perfect for kitchens or dining rooms. For a touch of luxury, consider metallic accents like brushed brass or matte black fixtures. Soft, natural fabrics – think linen or cotton – will echo the stone's organic feel. Even plants can bring out the limestone's natural beauty, adding a splash of vibrant green against its neutral backdrop. It’s about creating a cohesive look where the limestone is the star, supported by elements that complement its inherent beauty. You can find beautiful complementary pieces when you buy marble tiles online USA, as many suppliers offer a range of coordinating decor items.
Achieving a Timeless Aesthetic
What's the secret to a timeless design? It's often about choosing materials that have stood the test of time. Limestone is one of those materials. Its enduring appeal comes from its natural origin and its ability to blend seamlessly into various design schemes. Unlike trendy materials that quickly go out of fashion, limestone offers a classic foundation that remains relevant decade after decade. It adds a sense of permanence and quality to your home. Imagine a space that feels both current and classic, a place that will be admired for generations. That's the power of St. Croix 16x24 Limestone. It's an investment in lasting beauty and a design that truly transcends trends. For those seeking enduring elegance, exploring options like buying marble tiles online USA can also lead to timeless choices that pair well with limestone's natural charm.
Make your home shine with the natural beauty of St. Croix Limestone. This amazing stone brings a touch of elegance and warmth to any room, creating a space you'll love. Ready to transform your home? Visit our website today to explore our collection and find the perfect limestone for your project!
Wrapping Up Your St. Croix Limestone Project
So, you've made it through the installation of your St. Croix 16x24 Limestone. Nice job! Taking the time to get the prep work right and following the steps carefully really pays off in the end. Remember, this stone is tough, but a little ongoing care goes a long way in keeping it looking great for years. Think about giving it a good clean now and then, and don't forget to reseal it when the time comes. If you ever need more stone or have questions, Surfaces Galore is there to help you out. Enjoy your beautiful new space!
Frequently Asked Questions
What exactly is St. Croix 16x24 Limestone?
St. Croix 16x24 Limestone is a type of natural stone tile that's 16 inches wide and 24 inches long. Limestone is a stone formed over millions of years, and this specific type has a beautiful, natural look that can make any room feel more special.
Is limestone a good choice for my floors?
Yes, limestone can be a great choice for floors, especially in areas that don't get a lot of heavy foot traffic, like bedrooms or living rooms. It has a natural beauty that's hard to beat. However, since it's a softer stone, it might get scratched more easily in busy spots like kitchens or entryways.
How do I clean my limestone tiles?
Keeping your limestone clean is pretty simple! For everyday messes, just use a soft mop with some warm water and a cleaner made for natural stone. Avoid using harsh chemicals or acidic cleaners, as these can damage the stone. Wiping up spills right away is also super important to prevent stains.
Do I need to seal my limestone tiles?
Absolutely! Limestone is naturally a bit porous, meaning it can soak up liquids. Sealing the tiles creates a protective barrier that helps stop stains and moisture from getting in. You'll usually want to seal them when they're first installed and then maybe once a year after that, depending on how much they're used.
What's the best way to prepare the area before installing limestone?
Before you start laying down those beautiful limestone tiles, make sure the floor or wall surface is super clean, flat, and dry. Any bumps or dirt underneath can cause problems later on. It’s also a good idea to plan out where each tile will go and even do a 'dry lay' – placing them down without glue – to see how they look together.
Can I use St. Croix 16x24 Limestone outside?
Limestone can be used outdoors, but you need to be careful. It's best to use types specifically made for exterior use and make sure it's sealed really well to handle weather changes. For St. Croix 16x24 Limestone, it's generally recommended for indoor spaces to keep its beauty lasting longer.
What happens if a tile breaks or I need to replace one later?
It's always smart to buy a little extra tile when you first get your St. Croix 16x24 Limestone – maybe about 10% more. This extra bit is perfect for any tiles that might break during installation or for future repairs if a tile gets damaged down the road. It also helps make sure any replacement tiles match the color and pattern of your existing ones.
How do I deal with the natural color differences in limestone tiles?
Limestone is a natural material, so each tile can have slight variations in color and pattern. This is actually part of its charm! To get the best overall look, mix tiles from different boxes when you're installing them. Doing a 'dry lay' first, as mentioned before, helps you see how the colors blend together before you glue them down.
Leave a comment