
Step-by-step travertine tiling: A DIY guide for homeowners

Cracked tiles, loose sections, and grout that crumbles within a year are not bad luck. They are the direct result of skipped steps. Travertine is a naturally beautiful stone, but it demands respect during installation. Rush the prep, use the wrong mortar, or skip sealing, and you will be redoing the whole job within a few years. This guide walks you through every stage of a travertine tile installation, from gathering your tools to the final seal coat, with the kind of detail that keeps your floor or wall looking stunning for decades. Follow it closely and you will avoid the most common and costly mistakes.
Table of Contents
- What you’ll need: Tools, materials, and site assessment
- Subfloor preparation: The foundation of lasting results
- Step-by-step: Mixing mortar and setting travertine tiles
- Finishing strong: Grouting, sealing, and avoiding installation mistakes
- The tile pro’s take: What most guides miss (and why it matters)
- Turn your vision into reality with expert resources
- Frequently asked questions
Key Takeaways
| Point | Details |
|---|---|
| Prep is everything | Proper cleaning, leveling, and assessment ensures tiles stay flat and secure for decades. |
| Right tools matter | Use the correct trowel, spacers, and mortar for flawless results and easier installation. |
| Moisture control critical | Bathrooms and wet areas require waterproofing and sealing to prevent costly tile damage. |
| Back-buttering required | Always back-butter tiles for better adhesion and to eliminate air pockets beneath tiles. |
| Seal before grout | Sealing before and after grouting prevents stains and keeps your travertine beautiful longer. |
What you’ll need: Tools, materials, and site assessment
Now that you know what can go wrong if steps are skipped, let’s set you up for success by gathering everything you need.
Before you touch a single tile, you need the right equipment on hand. Running out mid-project or using the wrong tool creates delays and errors that are hard to fix. The essential tools for travertine installation include:
- Notched trowel (1/4 to 1/2 inch): spreads mortar evenly across the substrate
- Rubber mallet: seats tiles firmly without cracking the stone
- Wet saw: cuts travertine cleanly without chipping edges
- Tile spacers: maintain consistent grout joint width
- 4-foot level: checks flatness across multiple tiles
- Mixing drill with paddle: blends thinset to the right consistency
- Grout float: pushes grout into joints without scratching the surface
- Safety gear: gloves, knee pads, and eye protection
For materials, white modified thinset mortar is the standard choice for travertine because it does not show through lighter stone. Tile size matters more than most people realize. Larger format tiles (18x18 inches or bigger) require a flatter subfloor and more back-buttering. Smaller tiles are more forgiving on uneven surfaces.
| Space | Recommended underlayment | Reason |
|---|---|---|
| Kitchen floor | Cement backer board | Rigid, moisture-resistant base |
| Bathroom floor | Waterproof membrane over backer | Prevents water intrusion |
| Shower walls | Waterproof membrane | Full moisture protection |
| Dry living area | Existing concrete slab | Stable and ready if level |
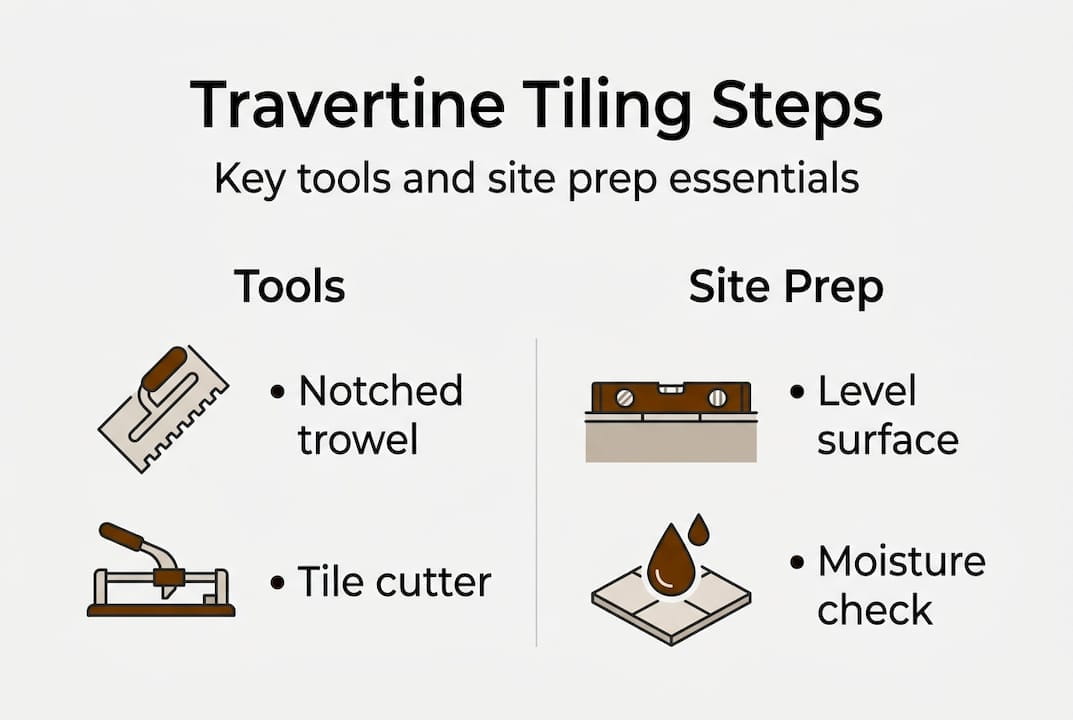
For site assessment, check your subfloor for soft spots, squeaks, and moisture. A subfloor that flexes under foot traffic will crack your grout and eventually your tiles. If you are exploring travertine application ideas for different rooms, keep in mind that each space has its own prep requirements.
Pro Tip: Buy 10 to 15 percent more tile than your square footage calculation. Cuts, breakage, and pattern matching will eat into your supply faster than you expect.
Subfloor preparation: The foundation of lasting results
With your materials ready, the next crucial stage is getting the surface perfectly prepared before a single tile is laid.
This is the stage most DIYers rush, and it is the single biggest reason tile projects fail. A clean, level, stable subfloor is not optional. It is the entire foundation of your project.
Start by removing all furniture, baseboards, and existing flooring. Sweep and vacuum thoroughly, then check for any grease, adhesive residue, or paint. These contaminants prevent thinset from bonding. Use a floor scraper and appropriate cleaner to get down to a bare, clean surface.
Next, use your 4-foot level to identify high and low spots. Any variation greater than 3/16 of an inch over 10 feet needs to be corrected. Low spots get filled with self-leveling compound, a pourable material that flows into dips and dries hard. High spots on concrete can be ground down. Do not skip this step:
- Lippage (tiles sitting at different heights) is almost always caused by an uneven subfloor
- Grout cracks within months when tiles flex over soft or uneven areas
- Large format travertine tiles are especially unforgiving of surface imperfections
For wet areas like bathrooms and showers, the travertine tiling process requires an extra layer of protection. Install a sheet or liquid waterproof membrane over your backer board before tiling. Shower floors also need a slope of at least 1/4 inch per foot toward the drain so water does not pool. For detailed travertine bathroom waterproofing tips, make sure your membrane overlaps at corners and seams.
“The quality of your tile installation is determined before the first tile is ever set. Prep is everything.”
Allow all compounds and membranes to cure fully before moving on. Rushing this stage is the most expensive shortcut in tiling.
Step-by-step: Mixing mortar and setting travertine tiles
With your foundation perfected, it’s finally time for hands-on tile setting. Here’s how to do it right.
Mixing your thinset correctly is more important than most people think. Too much water makes it weak. Too little makes it unworkable. Add water to the bucket first, then slowly add the dry thinset powder while mixing with your drill and paddle attachment. Aim for a peanut butter consistency. Let it slake (rest) for 10 minutes, then mix again briefly before use.
Here is the step-by-step process for setting your travertine:
- Snap chalk lines to find the center of your room. Start laying from the center outward so cuts fall at the edges, not in high-visibility areas.
- Spread thinset with the flat side of your notched trowel, then comb it with the notched side to create ridges. Use a 1/4 to 1/2 inch notch depending on tile size.
- Back-butter each tile by applying a thin layer of thinset to the back of the tile before setting it. This ensures full contact and eliminates voids beneath the tile.
- Set the tile firmly into the mortar bed, pressing and twisting slightly to collapse the ridges and achieve full coverage.
- Use spacers for consistent 1/8 inch joints and tap each tile level with your rubber mallet.
- Check alignment with your level every 3 to 4 tiles. Catching problems early is far easier than pulling set tiles.
- Clean excess mortar from joints and tile faces before it dries. Dried thinset in the joints makes grouting much harder.
| Mistake | Consequence | Fix |
|---|---|---|
| Thinset skinning over | Poor bond, tile pops loose | Work in small sections, 4-6 sq ft at a time |
| Skipping back-butter | Voids under tile, cracking | Always back-butter large format tiles |
| Uneven spacers | Inconsistent grout lines | Use uniform plastic spacers throughout |
For pattern planning, tile pattern matching tips can help you avoid awkward cuts and visual breaks. If you run into problems mid-install, troubleshooting travertine tiling resources can save the project.
Pro Tip: Never work yourself into a corner. Plan your exit path before you start spreading mortar so you are not stepping on freshly set tiles.
Finishing strong: Grouting, sealing, and avoiding installation mistakes
After laying your final tile, don’t let small finishing errors undo all your hard work. Here’s how to wrap up your project the right way.
Wait at least 24 hours after setting your last tile before grouting. The thinset needs to cure fully so tiles do not shift when you apply pressure during grouting. Remove all spacers before you begin.
Here is how to grout correctly:
- Mix grout to a smooth, lump-free consistency. Unsanded grout works for joints under 1/8 inch. Sanded grout is better for wider joints.
- Apply grout with a rubber float held at a 45-degree angle, pressing it firmly into the joints.
- Wipe diagonally across the tiles with a damp sponge to remove surface grout without pulling it out of the joints.
- Buff away haze with a dry cloth once the grout has set for about an hour. Do not wait too long or the haze hardens.
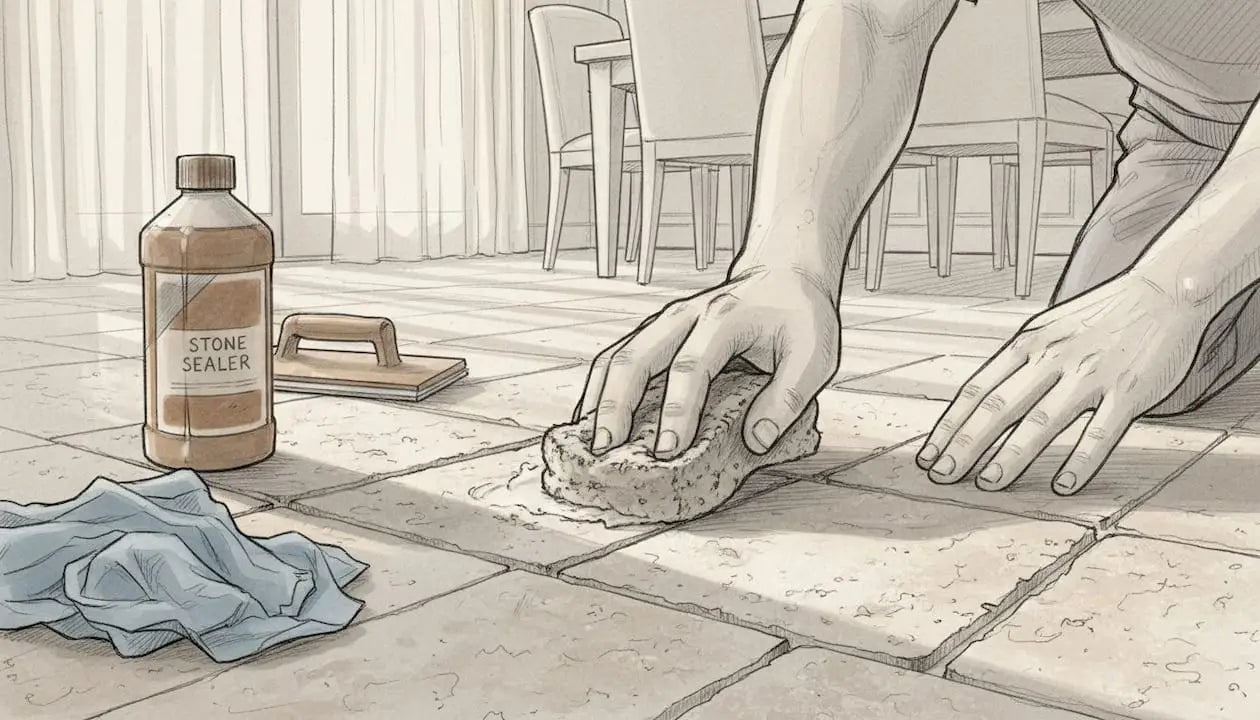
- Seal the grout lines after full cure (usually 72 hours) to protect against moisture and staining.
Sealing travertine itself is non-negotiable. The common pitfalls that ruin projects include grout haze on unsealed tiles and inadequate sealing that leads to deep staining. Apply a penetrating stone sealer before grouting to protect the tile face, and again after grouting to lock everything in.
The long-term payoff is real. Poor installation can reduce your floor’s lifespan by 20 to 50 percent. A properly installed and maintained travertine floor lasts for decades. For ongoing care, learn about sealing travertine regularly and explore polishing travertine tips to keep the surface looking its best year after year.
Pro Tip: Do a final inspection by walking slowly across the floor and pressing on each tile. Any hollow sound or movement means the tile did not bond properly and needs to be reset before the grout cures.
The tile pro’s take: What most guides miss (and why it matters)
Here is something most installation guides will not tell you directly: the steps that feel the least exciting are the ones that determine whether your project succeeds or fails. Nobody gets excited about mixing leveling compound or waiting 24 hours for a membrane to cure. But skipping those steps is exactly why so many travertine floors look rough after just a few years.
In our experience, the majority of DIYers skip at least one critical step, whether it is the dry layout, the waterproof membrane, or the pre-grout seal. Each skipped step compounds the risk. Rushing prep to get to the “real” work is the most common and most expensive mistake in any tile project.
The other thing guides gloss over is patience during tile placement. Setting 10 tiles slowly and correctly beats setting 30 tiles quickly and having to pull half of them up. Travertine is a natural stone with real variation in thickness, which means you need to check your level constantly, not just occasionally.
If you want results that hold up and look beautiful for decades, treat designing with travertine as a long game. The homeowners who get the best outcomes are the ones who respect every stage of the process, not just the glamorous parts.
Turn your vision into reality with expert resources
Armed with the right knowledge, you’re almost ready to begin. Here’s where to go for hands-on support and supplies.
At Surfaces Galore, we have helped thousands of homeowners and contractors source the right travertine for their specific projects. Whether you are tiling a kitchen floor, a master bathroom, or a shower surround, we carry premium natural stone that is built to last.

Beyond the stone itself, our blog is packed with expert-backed guidance. The complete tiling process guide covers everything from substrate prep to final sealing in detail. Browse our full collection, connect with our team for personalized recommendations, or dive deeper into our resources to make sure your project starts and finishes on solid ground.
Frequently asked questions
What size notched trowel should I use for travertine tiles?
For most travertine tiles, a 1/4 to 1/2 inch notch is recommended to achieve proper mortar coverage and a strong bond. Larger format tiles generally need the deeper notch size.
Can travertine tiles be used in showers and wet areas?
Yes, but you must install a waterproof membrane and proper slope toward the drain, and seal the tiles thoroughly for lasting performance in wet conditions.
Do I need to seal travertine before grouting?
Sealing before grouting is strongly recommended because grout haze on unsealed tiles can permanently stain the stone and is very difficult to remove after the fact.
How long does a travertine tile floor last if installed correctly?
With careful installation and regular maintenance, travertine can last for decades. Poor installation reduces that lifespan by 20 to 50 percent, which is why every step in this guide matters.
What’s the best way to avoid cracked or loose travertine tiles?
Thorough subfloor preparation is the key. Leveling compound for dips and quality thinset with proper back-buttering prevents the flex and voids that cause cracking and loose tiles over time.
Leave a comment