
Substrate & Prep: The Critical Step for Installing Marble, Limestone, or Travertine

So, you're thinking about putting in some marble, limestone, or travertine? Nice choice! These stones look amazing, but getting them to stay that way for years to come really comes down to one thing: the prep work. It's not the most glamorous part of the job, sure, but skipping it is like building a house on sand. This article is all about making sure your beautiful natural stone installation starts off on the right foot, covering everything from checking your subfloor to picking the right glue. Get this part right, and you're halfway to a stunning, lasting finish. Let's get into it.
Key Takeaways
- Always start with a solid, level subfloor. Any bumps or dips will cause problems later, especially with thinner natural stone tiles.
- Clean your subfloor thoroughly. Dirt, dust, or old adhesive can stop your new stone from sticking properly.
- Use the right setting materials. Make sure your mortar and grout are made for natural stone, and use white mortar for light-colored stones to avoid discoloration.
- Inspect each tile before you lay it. Look for chips or cracks, and do a dry layout to plan your pattern and mix up colors from different boxes.
- Proper preparation of the substrate and careful installation are the most important steps for a beautiful and long-lasting marble, limestone, or travertine floor.
Understanding The Substrate For Natural Stone
Before you even think about laying down those gorgeous marble or travertine tiles, let's talk about what's underneath. The foundation of your beautiful new floor or wall is the substrate. Get this wrong, and you're setting yourself up for problems down the road. We're talking cracked tiles, loose stones, and a whole lot of frustration. But get it right, and you've got a stunning, long-lasting surface that will impress for years.
Ensuring A Solid, Level Substrate
Think of your substrate like the stage for a performance. It needs to be perfectly flat, stable, and ready to support the star of the show – your natural stone. Any bumps, dips, or wobbles will show through, and worse, they can cause your tiles to crack under pressure. We need a surface that's clean, sound, and dry. That means getting rid of old adhesive, dust, grease, or anything else that might get in the way of a strong bond. For floors, if you find any low spots, now's the time to fix them with a patch or a self-leveling underlayment. Natural stone tiles are often thinner than ceramic, so they need a truly level surface to avoid damage. A solid base is non-negotiable for a flawless finish.
The Importance Of Substrate Stiffness
This might sound a bit technical, but it's super important. Your subfloor needs to be stiff. What does that mean? It means it shouldn't flex or bend much when you walk on it. Natural stone, especially marble and travertine, is heavier than other flooring materials. If the subfloor is too flexible, the stone can crack or break over time. For wood subfloors, this often means adding an extra layer of support, like a cement backer board or an uncoupling membrane. It’s about building a strong, rigid platform that can handle the weight and traffic without giving way. Don't skimp here; a stiff substrate is key to preventing future tile failures. You can find great options for subfloor preparation when you buy marble tiles online USA.
Preparing Concrete And Wood Subfloors
Both concrete and wood subfloors need specific attention. For concrete, make sure it's clean and free of any contaminants. If there's a chance of cracks in the slab, you'll want to install a crack isolation membrane. This acts like a buffer, stopping any movement in the concrete from traveling up to your beautiful stone tiles. For wood subfloors, the goal is to create a stable, rigid surface. This usually involves installing a cement board or a specialized underlayment. Always follow industry standards for your specific situation. Proper preparation here means your stone installation will be secure and last for ages. It's the difference between a floor that looks great for a year or two and one that remains a showstopper for decades. If you're looking for guidance on preparing your surface, check out this step-by-step guide.
Critical Substrate Preparation Steps
Don't skip this part! Getting your subfloor ready is like building a strong foundation for a house. If it's not right, your beautiful marble or travertine tiles could end up cracked or loose. We're talking about making sure the surface is solid, level, and clean. It might seem like a lot of work, but trust me, it saves you headaches later.
Thoroughly Cleaning The Substrate
First things first: get rid of everything that shouldn't be there. We're talking dust, dirt, grease, old adhesive, paint splatters – you name it. Anything clinging to the subfloor can mess with how well your thin-set mortar sticks. Think of it like trying to glue two pieces of paper together when one is covered in sand. It just won't hold.
- Sweep and Vacuum: Get all the loose debris off.
- Scrape Away Residue: Use a putty knife or scraper for stubborn old adhesives.
- Degrease: If there's any oil or grease, use an appropriate cleaner to remove it.
- Final Wipe: A damp cloth can pick up any lingering fine dust.
Addressing Uneven Surfaces With Underlayment
Natural stone tiles, especially marble and travertine, are often thinner than ceramic tiles. This means they need a super flat surface to sit on. If your subfloor has low spots or high spots, you'll need to fix them. For floors, a self-leveling underlayment is your best friend here. It flows into the low areas and creates a perfectly smooth surface. For walls, you might use a leveling compound. This step is key to preventing your tiles from cracking under pressure or creating an uneven finish. You can find great underlayment options when you buy marble tiles online USA.
Implementing Crack Isolation Membranes
Concrete slabs can develop tiny cracks over time. These little fissures might not be visible now, but they can travel up through your tile installation, causing cracks in your beautiful stone. That's where a crack isolation membrane comes in. It acts like a flexible barrier, absorbing the movement of the substrate so it doesn't transfer to your tiles. It’s a smart move, especially for larger floor areas or if you know your concrete has some history.
Case Study: The Foundation Flaw
Sarah wanted a stunning marble floor in her entryway. She hired a contractor who rushed the prep work, skipping the crack isolation membrane on the existing concrete slab. Within six months, hairline cracks started appearing in her gorgeous marble tiles, right along the lines of the original concrete cracks. The contractor had to come back and replace the damaged tiles, a costly and time-consuming fix that could have been avoided with proper substrate prep.
Proper substrate preparation isn't just a step; it's the bedrock of a successful natural stone installation. Investing time and the right materials here prevents costly repairs and ensures your stone's longevity and beauty for years to come.
Material Compatibility For Natural Stone
Selecting Appropriate Setting Materials
Choosing the right mortar and grout is absolutely key for a lasting natural stone installation. You can't just grab any old adhesive; it needs to be specifically formulated for stone. We recommend a high-quality thin-set mortar, often available in white or gray. For lighter colored marble or travertine, always opt for a white thin-set mortar. This prevents any discoloration or "bleed-through" from the gray mortar showing up in your beautiful, translucent stone. Always follow the manufacturer's instructions to the letter – they know their products best and how they interact with natural stone. If you're mixing stone with other materials like metal trim or glass, double-check that your chosen setting materials will bond well with everything.
Choosing The Right Mortar For Light-Colored Stone
This is a big one, folks. When you're working with stunning light-colored stones like Carrara marble or certain types of travertine, the color of your mortar matters. A gray thin-set can actually tint the stone, making it look dull or discolored. That's why a white thin-set mortar is your best friend here. It ensures the true color and veining of your stone shines through without any unwanted interference. It’s a small detail that makes a massive difference in the final look. You can buy marble tiles online USA and ensure they look their best by using the right mortar.
Verifying Adhesion With Adjacent Finishes
Think about the whole picture. If your natural stone installation is next to other materials – maybe a metal accent piece, a glass tile border, or even just painted drywall – you need to be sure your adhesive will stick to all of them. Most good quality thin-set mortars designed for natural stone will handle this, but it’s always worth a quick check of the product specs or a call to the manufacturer if you're unsure. A little bit of planning here saves a lot of headaches down the road. We want everything to look perfect and stay put!
Case Study: The Discolored Marble Shower
A homeowner in Florida decided to tile their shower with beautiful white Thassos marble. They hired a contractor who used a standard gray thin-set mortar, thinking it would be fine. A few weeks after installation, the homeowner noticed a distinct gray haze appearing through the marble, especially in the areas where the mortar was thickest. The shower looked dull and lifeless, not the bright, airy space they had envisioned. The issue was the gray mortar bleeding through the porous marble. A simple switch to a white thin-set mortar during the initial installation would have completely avoided this costly and time-consuming problem. This highlights why material compatibility, especially mortar color for light stones, is so critical.
Pre-Installation Tile Inspection And Layout
Before you even think about mixing mortar, let's talk about what happens before the tiles hit the floor. This is where you catch problems before they become permanent headaches. It’s like proofreading your work before you submit it – saves a lot of embarrassment later.
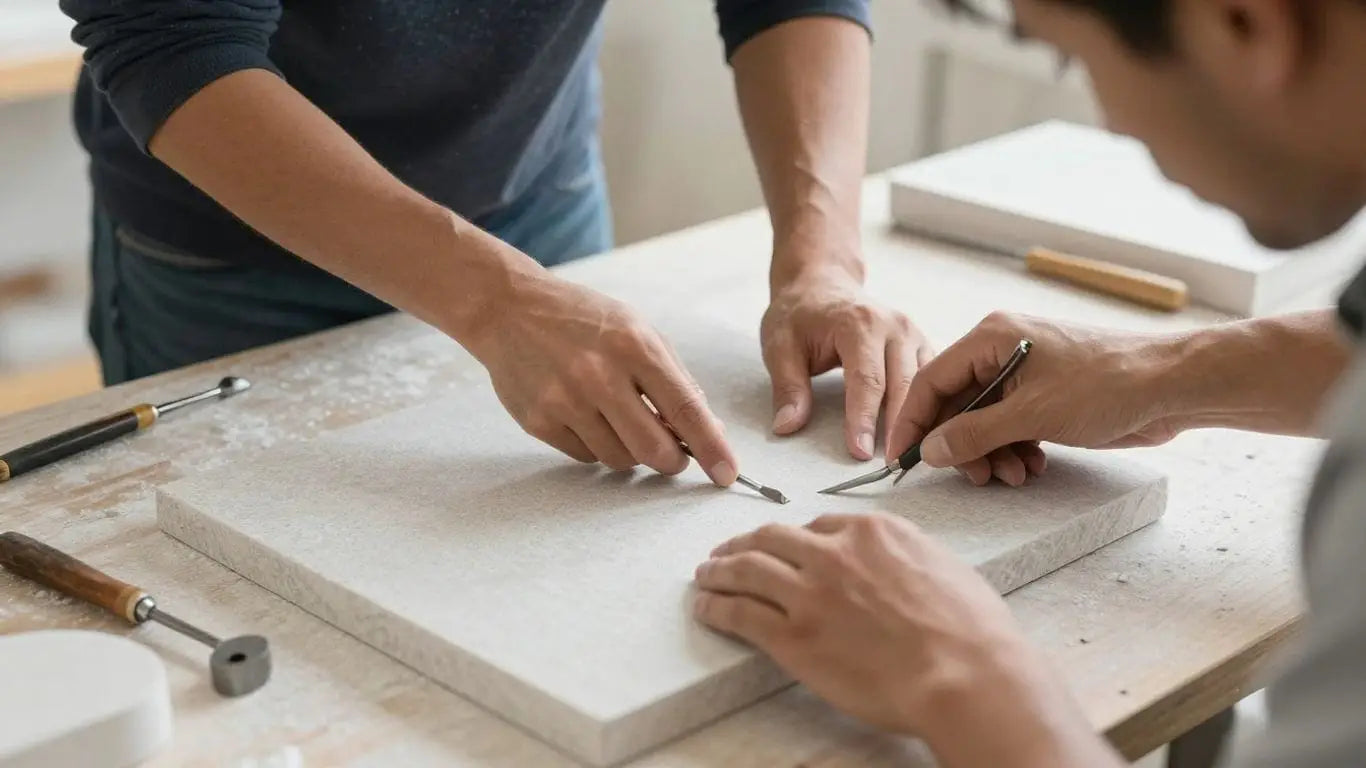
Inspecting Each Tile for Defects
Seriously, don't skip this. You're working with natural stone, and that means each piece is unique. Some might have a tiny chip on the edge, a hairline crack, or maybe a slight warp. You can find great deals on marble tiles online USA, but you still need to check them. Every single tile needs a once-over. If you find a dud, set it aside. It’s way easier to swap out a tile before it’s glued down than after. You don't want to be staring at a flaw every day, do you?
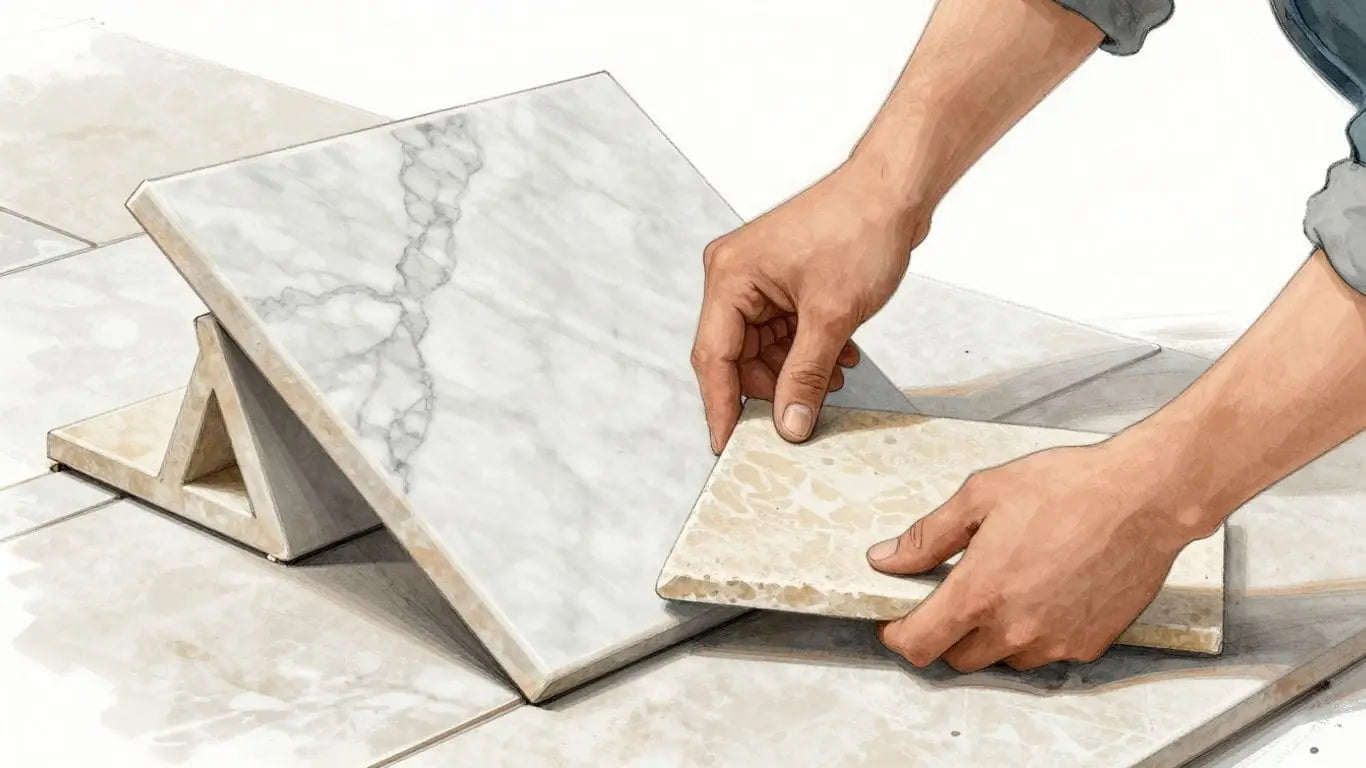
Planning Your Layout with a Dry Lay
This is where the magic happens before the mortar does. Lay out your tiles without any adhesive. This is called a dry lay. It lets you see how the colors and patterns play together. Marble and travertine have natural variations, so mixing tiles from different boxes during this stage helps blend everything for a cohesive look. You can also figure out where your cuts will fall. Nobody wants a tiny sliver of tile in a prominent spot. This step is also where you decide on your grout joint spacing. For a really clean look, many people opt for tight joints, around 1/16 to 1/8 inch, but always check the manufacturer's recommendations.
Case Study: The Kitchen Nightmare Avoided
Sarah was installing a beautiful travertine tile floor in her kitchen. She was excited to get started and skipped the dry lay, thinking it was an unnecessary step. Big mistake. Halfway through, she realized a large section had a concentration of darker tiles, and a few tiles had noticeable pits that weren't filled. She had to pull up a significant portion of the already-set tiles, costing her time and extra materials. If she had done a dry lay, she could have rearranged the tiles for a better flow and identified the pit issue before it was too late.
Determining Optimal Grout Joint Spacing
Your grout joints are more than just the space between tiles; they're part of the overall design. For marble and limestone, a tighter grout joint (1/16" to 1/8") often creates a more seamless, elegant look, letting the stone itself be the star. However, always check the tile manufacturer's recommendations. Some tiles, especially those with a tumbled finish, might require wider joints to accommodate their irregular edges. Getting this right contributes to the final aesthetic and can even affect how the floor wears over time. It’s a small detail that makes a big difference.
Remember, natural stone is a product of nature. Variations in color, veining, and texture are not defects; they are part of its inherent beauty. Embrace these unique characteristics by inspecting and planning your layout carefully before installation begins. This attention to detail is what separates a good job from a truly stunning one.
Achieving A Flawless Stone Installation
Using The Correct Trowel Size
Getting the trowel size right is more important than you might think. Too small, and you won't get enough mortar down. Too big, and you'll have a mess and potentially weak spots. For marble and travertine, you generally want a trowel that creates consistent ridges. A common recommendation is a 1/4-inch by 1/4-inch square-notched trowel, but always check the thin-set manufacturer's instructions. They know their product best.
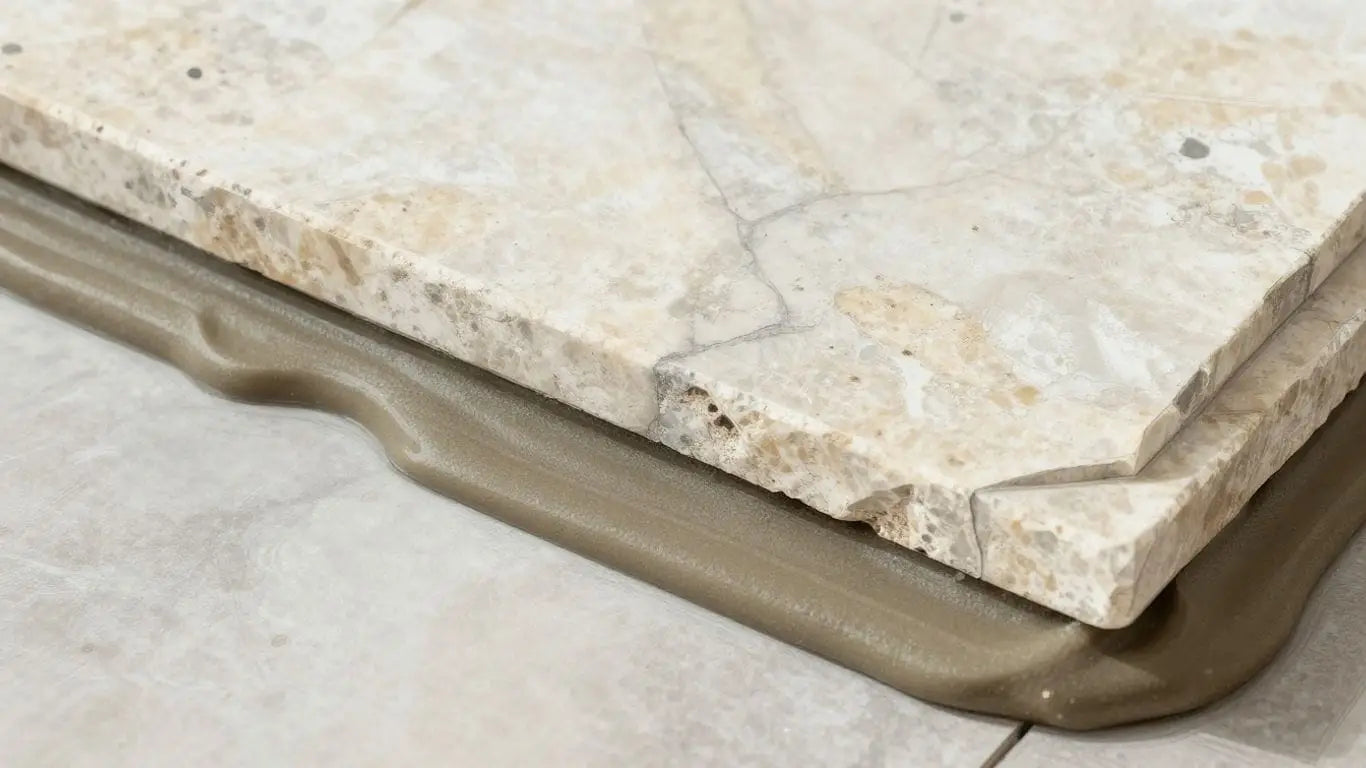
Ensuring Full Mortar Coverage
This is where the magic happens – or doesn't, if you mess it up. Full mortar coverage means every single bit of the back of your tile is touching adhesive. This is non-negotiable for natural stone. Why? Because stone is heavy and can crack if it's not fully supported. You'll want to comb the mortar onto a small section of the subfloor, then press each tile in with a slight wiggle. Periodically lift a tile to check. If you see bare spots, you've got a problem. This is also why using the right trowel is so key; it helps create those ridges that collapse to give you full coverage.
Maintaining Level Surfaces And Minimizing Lippage
Lippage is that annoying unevenness where one tile edge sits higher than the next. It's a tripping hazard and looks terrible. With natural stone, especially larger formats, you need to be vigilant. Using a level across multiple tiles is a must. For bigger tiles, consider investing in a tile leveling system. These clips and wedges help pull tiles flush with each other as the mortar sets. It takes a little extra effort, but the result is a smooth, professional finish that you'll admire for years. It’s the difference between a good job and a great one. If you're looking for guidance on laying out your stone, check out these expert tile ideas and layout tips.
Case Study: The Grand Foyer Project
A high-end residential project in New York City faced a challenge with a large marble foyer installation. The client demanded a perfectly flat, seamless look. Initially, the installers used a standard trowel and relied on visual checks. However, after a few days, minor lippage began to appear in some areas, particularly with the 24x24 inch marble tiles. The contractor brought in a specialist who implemented a tile leveling system. This system, combined with a slightly larger trowel to account for the stone's porosity, corrected the issue. The final result was a stunning, perfectly level marble floor that met the client's exacting standards. This highlights how critical the right tools and techniques are for achieving a flawless finish, especially with premium materials like marble. You can find quality marble tiles online in the USA for your own projects.
Techniques For Cutting Natural Stone
Cutting natural stone like marble and travertine requires precision and the right approach. It's not like cutting drywall; you need to be careful to get clean edges and avoid waste. Using the correct tools and techniques is key to a professional finish.
Utilizing A Wet Saw With A Diamond Blade
For clean, accurate cuts on marble, limestone, and travertine, a wet saw is your best friend. These saws use a continuous water supply to keep the blade cool and reduce dust, which is important for both safety and the quality of the cut. The blade itself needs to be a diamond blade specifically designed for cutting stone. A dull or inappropriate blade will chip the stone, leaving you with a messy edge that's hard to fix. We recommend using a blade that can achieve remarkable precision, like those capable of ±0.2mm accuracy, to maximize material yield to 97%. If you're looking to buy marble tiles online in the USA, make sure you also have the right cutting tools ready.
Cutting Slowly To Prevent Chipping
This is where patience really pays off. Rushing the cut is the most common mistake people make, and it almost always leads to chipped edges or even a cracked tile. Let the saw do the work. Guide the stone slowly and steadily through the blade. Think of it as a controlled process, not a race. This careful approach helps maintain the integrity of the stone and ensures the edges will look clean and professional once installed. It’s a small step that makes a huge difference in the final appearance of your project.
Implementing Safety Precautions During Cutting
Safety first, always. When you're cutting stone, you're dealing with dust and sharp edges. You absolutely need to wear safety glasses to protect your eyes from flying debris. Gloves are also a good idea to protect your hands. Make sure your wet saw has a functioning water feed – this not only cools the blade but also significantly cuts down on airborne dust, which can be harmful to breathe. If you're unsure about the process or don't have the right equipment, consider our custom cutting services. We can handle those precise cuts for you, ensuring a perfect fit and finish for your project. You can explore options for custom cuts for shower shelves, thresholds, and unique designs on our site.
Case Study: The Kitchen Backsplash Project
Sarah wanted a stunning marble backsplash for her kitchen. She bought beautiful Carrara marble tiles online but decided to cut them herself to save money. She used a standard circular saw with a regular blade, thinking it would be faster. The result? Many chipped tiles and a lot of frustration. After wasting several tiles, she realized her mistake and ordered a proper wet saw with a diamond blade. The second attempt, using the right tools and cutting slowly, yielded perfect results. The backsplash now looks incredibly professional, a testament to using the right techniques for cutting natural stone.
The Grouting Process For Marble And Limestone
Now that your stunning marble or limestone tiles are perfectly set, it’s time for the grout. This step is more than just filling gaps; it’s about locking in your beautiful work and adding that final polish. Getting it right means a cohesive, professional look that lasts. We’ll walk you through the best way to grout your natural stone.
Applying Grout Diagonally
This is where the magic happens. You’ve got your high-quality grout mixed and ready. Grab a grout float – a tool with a firm rubber base that’s perfect for the job. Hold it at about a 45-degree angle to the tile surface. Now, spread the grout across the tiles, working it into the joints. The key here is to move the float diagonally across the tiles. Why diagonal? It helps push the grout deep into the joints without digging it out. It also helps to avoid scratching the stone surface. Work in small sections so the grout doesn’t start to dry out before you can clean it up. You want to fill every single joint completely. Once a section is filled, use the edge of the float to scrape off the excess grout, again, moving diagonally. This initial scrape gets the bulk of the excess off, leaving just a thin film on the tile surface.
Cleaning Excess Grout With A Damp Sponge
This is a critical step for a clean finish. After you’ve removed the excess grout with the float, you’ll need a damp sponge and a bucket of clean water. It’s important to use a sponge specifically designed for grout cleanup – they’re usually denser and hold water well. Rinse your sponge frequently in the clean water, wringing it out so it’s just damp, not soaking wet. Wipe the tile surfaces diagonally across the grout lines. The goal here is to remove the thin film of grout left behind by the float, without pulling grout out of the joints. You’ll need to change your rinse water often; dirty water will just spread grout haze. You might need to go over the tiles a couple of times to get them perfectly clean. For those stubborn bits or if you notice a haze forming later, a clean, dry microfiber cloth can buff it out once the grout has set a bit.
Allowing Adequate Grout Curing Time
Patience is a virtue, especially when it comes to grout. Once you’ve finished cleaning, you need to let the grout cure properly. This isn't just about it looking dry; it's a chemical process where the grout hardens and reaches its full strength. Most cementitious grouts need at least 48 to 72 hours to cure. Some specialized grouts might have different timelines, so always check the manufacturer's instructions. During this curing period, avoid walking on the floor or putting any heavy items on it. You also want to keep the area dry. Don't wash the floor with water or any cleaning solutions until the grout has fully cured. Rushing this step can lead to weak grout lines that might crack or crumble later, which is the last thing you want after all your hard work. Once cured, you can then apply a high-quality stone sealer, like those available from Surfaces Galore, to protect your beautiful marble or limestone.
Case Study: The Grand Foyer Refresh
A client in New York wanted to update their grand foyer with classic marble tiles. They had meticulously chosen a beautiful Italian marble and prepared the subfloor perfectly. However, they were nervous about the grouting process, fearing they might damage the delicate stone or leave an uneven finish. We advised them to follow the diagonal application and damp sponge cleaning method precisely. They took their time, changed their rinse water frequently, and allowed the grout to cure for the full 72 hours before sealing. The result? A flawless, seamless marble floor that looked like it was professionally installed, proving that with the right technique and a little patience, anyone can achieve stunning results. They were so pleased they later decided to buy marble tiles online USA for their master bathroom renovation.
Essential Sealing And Final Touches
Applying A High-Quality Stone Sealer
Alright, you've put in the work, and your beautiful marble, limestone, or travertine is finally in place. But we're not quite done yet. The last step before you can really start enjoying your new stone surfaces is sealing. Think of it like giving your stone a protective shield. Natural stones are porous, meaning they can soak up spills and stains if you're not careful. A good quality sealer fills those tiny pores, making it much harder for liquids to penetrate.
This step is non-negotiable for keeping your stone looking its best for years to come.
When you buy marble tiles online in the USA, or anywhere for that matter, you'll want to pick up a sealer specifically made for natural stone. There are different types, some that enhance the color and some that keep the natural look. For lighter stones, like many marbles and limestones, a sealer that doesn't add color is often preferred to avoid any unwanted darkening. Always follow the manufacturer's instructions to the letter – how to apply it, how long to let it sit, and how to wipe off the excess. It usually involves applying it evenly with a cloth or applicator, letting it soak in for a bit, and then buffing off any residue.
Performing A Final Cleaning
Once the sealer has had time to cure properly – and this can take anywhere from a few hours to a couple of days depending on the product – it's time for a good clean. You want to get rid of any dust, smudges, or stray bits of grout or adhesive that might have survived the installation process. Use a pH-neutral cleaner designed for natural stone. Avoid anything harsh or acidic, as these can damage the sealer you just applied or even etch the stone itself.
This final clean isn't just about tidiness; it's about revealing the true beauty of your stone. A clean surface makes the colors pop and the veining stand out. It's that satisfying moment when you see the finished product in its full glory.
Conducting A Thorough Installation Inspection
Before you call the job done and start moving furniture back, do one last walk-through. Look at every tile, every grout line. Check for any chips you might have missed, any unevenness between tiles (lippage), or any grout that didn't quite cure right. It's also a good time to check the sealer application – does it look even? Are there any spots that seem to be absorbing water more quickly than others (indicating a need for a second coat)?
This inspection is your last chance to catch any minor issues and fix them before they become bigger problems. It’s about ensuring the quality of your work and the longevity of your beautiful new stone surface. If you bought your tiles from a reputable supplier like Surfaces Galore, and followed the installation steps carefully, this inspection should be a breeze, confirming a job well done.
Case Study: The Miller Residence
The Miller family was installing Calacatta marble in their master bathroom. They meticulously followed all prep and installation steps. After grouting, they applied a high-quality penetrating sealer. A week later, during their final inspection, they noticed a small water ring forming on one of the tiles near the vanity. Upon closer inspection, they realized a tiny section of grout hadn't been fully sealed. They quickly reapplied the sealer to that specific spot, let it cure, and the issue was resolved. This small, easily fixable problem highlights the importance of that final inspection and proper sealing.
Case Study: The Chen Project
For a high-traffic entryway using Noce Travertine, the Chens opted for a color-enhancing sealer to bring out the rich tones. After the initial sealing and a 24-hour cure, they performed their final cleaning. They noticed the finish was a bit uneven in one corner. They buffed the entire floor again with a clean microfiber cloth, which evened out the sealer application beautifully, giving the travertine a consistent, warm glow that perfectly complemented their entryway.
Remember, the sealing and final touches aren't just afterthoughts; they are integral parts of the installation process that protect your investment and ensure the lasting beauty of your natural stone.
Understanding Natural Stone Characteristics
Natural stone is a gift from the earth, and like any natural wonder, it comes with its own unique personality. Marble, limestone, and travertine aren't mass-produced tiles; they're pieces of history, formed over millennia. This means each slab and tile tells a different story, showcasing variations in color, pattern, and texture that simply can't be replicated by man-made materials. Embracing these natural characteristics is key to a stunning installation.
Variations In Color And Pattern
When you buy marble tiles online in the USA, or any natural stone for that matter, expect the unexpected – in the best way possible! Veining in marble can range from subtle wisps to bold, dramatic streaks. Travertine might have more holes and pits than you initially saw in a sample. Limestone often presents a softer, more muted palette. These aren't flaws; they're hallmarks of authenticity.
- Marble: Known for its luxurious veining, marble can range from pure white to deep blacks, with countless shades and patterns in between. Think of the classic Carrara with its soft gray veining or the dramatic Calacatta Gold.
- Limestone: Generally softer and more porous than marble, limestone offers a range of earthy tones, from creamy whites to warm beiges and grays. It has a more uniform, subtle appearance. Limestone is a sedimentary stone, often found in beautiful neutral colors.
- Travertine: This stone has a distinctive, natural pitted surface and comes in earthy hues like beige, cream, and walnut. The holes can be filled or left unfilled for a more rustic look.
Case Study: A homeowner in Scottsdale, Arizona, wanted a timeless kitchen backsplash. They chose a tumbled travertine, loving how its natural pits and earthy tones gave a warm, rustic feel. Even though some tiles had more prominent holes than others, it added to the unique character of their kitchen, making it truly one-of-a-kind.
The Importance Of Sealing Porous Stones
Because marble, limestone, and travertine are natural and porous, they can absorb liquids. This is where sealing comes in. A good quality stone sealer acts like a shield, protecting your beautiful stone from stains and etching. It doesn't make the stone waterproof, but it significantly slows down absorption, giving you more time to clean up spills.
- Why Seal? Prevents staining from common household liquids like wine, oil, and juice.
- When to Seal? After installation and periodically thereafter (typically annually, but check your sealer's recommendations).
- What to Use? Opt for a high-quality impregnating sealer designed specifically for natural stone.
Sealing is not a one-time job. It's an ongoing commitment to preserving the natural beauty and integrity of your stone surfaces. Think of it as a spa treatment for your floors and countertops.
Assessing Durability For Specific Applications
Not all natural stones are created equal when it comes to toughness. Understanding the durability of marble, limestone, and travertine helps you choose the right stone for the right place.
- High-Traffic Areas (Floors, Kitchens): While marble is beautiful, its softness means it can scratch or etch more easily. Granite or quartzite are often better choices here. However, if you love marble, consider it for less trafficked areas like bathrooms or decorative accents. Travertine can also work well for flooring, especially if you opt for a honed or tumbled finish that hides wear better.
- Low-Traffic Areas (Bathrooms, Fireplaces, Accent Walls): Marble truly shines here, showcasing its elegance without the risk of heavy wear and tear. Limestone is also a great option for walls or low-traffic floors.
- Countertops: Marble and limestone can be used, but they require diligent sealing and immediate cleanup of spills. Travertine is also a popular choice for countertops, offering a unique look.
Case Study: A busy family in Chicago chose a polished marble for their master bathroom vanity. They understood its delicate nature and committed to wiping it down immediately after use and sealing it regularly. The result? A stunning, luxurious bathroom that has held up beautifully for years, proving that with the right care, even softer stones can perform well in demanding environments.
Choosing The Right Materials For Your Project
Picking the perfect natural stone is more than just picking a pretty slab. It’s about finding the right fit for your life and your home. Think about where it’s going, how much wear and tear it’ll see, and what kind of vibe you’re after. We’re here to help you make that choice easy.
Selecting Stone Based On Area Of Installation
Every space in your home has different demands. A busy kitchen floor needs something tough, while a quiet bathroom might prioritize elegance. Granite and slate are workhorses, great for high-traffic zones. Marble, on the other hand, brings a touch of luxury but is better suited for areas with less foot traffic or where it can be admired, like a fireplace surround. Travertine offers a beautiful, natural look that works well for floors and walls, giving a warm, earthy feel. When you buy marble tiles online in the USA, consider its placement carefully.
The right stone in the right place means lasting beauty and less worry.
Considering Aesthetic Preferences And Finishes
Natural stone is all about unique character. You’ve got colors, patterns, and finishes to play with. Do you love the deep, swirling veins of marble, or the earthy, pitted texture of travertine? Finishes matter too. A polished surface gleams, but a honed or tumbled finish offers a softer, more rustic look. These details can totally change the feel of a room. We have a huge selection, from classic Italian marble to rustic travertine, so you can find exactly what speaks to you.
Evaluating Maintenance Requirements
Let’s be real, some stones need a bit more TLC than others. Granite and slate are pretty low-maintenance, usually just needing a yearly seal. Marble and limestone are more porous and might need sealing more often to ward off stains and etching. It’s not hard work, but it’s good to know what you’re getting into. Think about how much time you want to spend on upkeep. We can guide you to stones that match your lifestyle, whether you’re a low-maintenance person or don’t mind a little extra care for that stunning look.
Case Study: The Miller Residence
The Millers wanted a kitchen that felt both luxurious and practical. They chose a durable granite for their countertops, knowing it could handle daily cooking and spills without much fuss. For their adjacent dining area floor, they opted for travertine tiles. They loved the natural variation and the slightly softer feel underfoot compared to granite. By selecting stones suited to each area's needs, they achieved a beautiful, functional space that's easy to live with.
Case Study: The Chen Project
For a master bathroom renovation, the Chens were drawn to the timeless elegance of marble. They selected a honed marble for the floor, which offered a less slippery surface than polished marble, and a beautiful marble tile for the shower walls. They understood marble requires careful sealing and cleaning, and they were committed to the maintenance. The result is a spa-like retreat that perfectly matches their aesthetic vision. They found exactly what they needed to buy marble tiles online for this project.
| Stone Type | Best For | Maintenance Level | Aesthetic |
|---|---|---|---|
| Granite | Countertops, High-Traffic Floors | Low | Durable, Varied Colors |
| Marble | Bathrooms, Fireplaces, Low-Traffic Areas | Medium | Luxurious, Elegant Veining |
| Limestone | Walls, Low-Traffic Floors | Medium | Soft, Earthy Tones |
| Travertine | Floors, Walls, Patios | Medium | Natural Pits, Rustic Charm |
| Slate | Floors, Outdoor Areas | Low | Textured, Slip-Resistant |
Choosing the right stone is the first step to a beautiful, lasting installation. We’re here to help you every step of the way.
Picking the right stuff for your project is super important. You want things that look good and last a long time. Think about what you're building and what will work best. We have tons of great options to help you make the perfect choice. Visit our website today to explore all the possibilities and find exactly what you need!
Wrapping Up Your Stone Project
So, we've talked a lot about getting the base ready for your marble, limestone, or travertine. It might seem like a lot of detail, but honestly, taking the time to prep the surface right is what makes the difference between a floor that looks amazing for years and one that starts giving you trouble down the road. Think of it like building a house – a strong foundation is everything. When you get the substrate solid, level, and clean, you're setting yourself up for a beautiful, long-lasting installation. And hey, if you're looking for top-notch natural stone for your project, Surfaces Galore has a huge selection. They can ship all over the country, so check them out when you're ready to order.
Frequently Asked Questions
Why is the base surface so important for marble and travertine?
Think of the base surface like the foundation of a house. If it's not strong, flat, and steady, your beautiful marble or travertine tiles could crack or come loose later. It needs to be super solid and level to give the stone a good home.
What's the deal with stiffness for the base surface?
Natural stone tiles, especially marble and travertine, are a bit heavier and can be more delicate than regular tiles. They need a really stiff base that doesn't bend or flex much. If the base bends, it can put stress on the stone and cause it to break.
Can I put marble or travertine over any old floor?
Not quite! You need to make sure the old floor is super clean, dry, and completely flat. Any dirt, old glue, or bumps can mess with how well the new stone sticks. Sometimes, you might need to add a special leveling layer.
What kind of glue or cement should I use for marble?
You can't just use any old sticky stuff. You need special glues, called thin-set mortar, that are made specifically for natural stone. If your stone is light-colored, it's best to use white thin-set so the color of the glue doesn't show through.
Do I need to check the tiles before I start laying them?
Absolutely! Natural stones are like fingerprints – no two are exactly alike. Look at each tile for any cracks, chips, or weird shapes. It's also a good idea to mix tiles from different boxes to blend the colors and patterns nicely.
How do I make sure the tiles look good together?
Before you use any glue, lay out your tiles on the floor without sticking them down. This is called a 'dry lay.' It helps you see how the colors and patterns look together and plan where to make cuts so they aren't too obvious.
What's the best way to cut marble or travertine?
You'll need a special saw called a wet saw that uses a diamond blade. Cut slowly and carefully to avoid chipping the edges. Always wear safety glasses and gloves when cutting stone!
Why do I need to seal my marble or travertine?
Marble and travertine are porous, meaning they can soak up liquids. Sealing them creates a protective barrier that helps prevent stains from spills like wine or oil. It keeps your beautiful stone looking its best for longer.
Leave a comment