
How to grout stone tiles: marble & travertine guide

TL;DR:
- Proper preparation and technique prevent damage and ensure long-lasting grout results on natural stone.
- Selecting the correct grout type and applying pre-sealant are crucial steps often overlooked by DIYers.
- Following curing, sealing, and maintenance schedules preserves the beauty and integrity of marble and travertine surfaces.
Grouting marble or travertine might look like the easy part of a tile installation, but it’s actually where most projects go wrong. One rushed application, a skipped pre-seal, or the wrong grout type can leave your stone scratched, stained, or clouded with haze that’s nearly impossible to remove. The good news is that with the right preparation and method, you can grout natural stone safely and get results that last for decades. This guide walks you through every step, from choosing your grout to sealing and maintaining your finished surface.
Table of Contents
- Gathering tools and preparing stone tiles
- Mixing grout and applying it correctly
- Choosing the right grout for your project
- Curing, sealing, and maintaining your grout and tiles
- Smart shortcuts and the lessons experts wish they knew sooner
- Enhance your stone tile project with expert support
- Frequently asked questions
Key Takeaways
| Point | Details |
|---|---|
| Always pre-seal stone | Sealing marble or travertine before grouting prevents stains and makes cleanup easier. |
| Choose grout type carefully | Unsanded grout works best for narrow joints, sanded or epoxy for wider or high-traffic areas. |
| Mix grout to correct thickness | Mix grout to peanut butter consistency for easiest application and best finish. |
| Follow curing and sealing steps | Wait at least 24 hours before walking and 48–72 hours before applying sealer for lasting durability. |
| Work in small sections | Applying grout to small areas at a time reduces mistakes and ensures even coverage. |
Gathering tools and preparing stone tiles
Now that you know why proper technique matters, let’s start with what you’ll need and how to prepare your tiles.
Before you mix a single batch of grout, having the right tools on hand makes the entire process smoother and safer for your stone. Missing even one item mid-job can force you to rush, and rushing is how damage happens.
Essential tools and materials:
- Hard rubber grout float
- Bucket and mixing paddle (or drill attachment)
- Large grout sponge and clean water bucket
- Painter’s tape
- Penetrating stone sealer
- Grout of the correct type (more on this below)
- Soft cloths for buffing
- Knee pads and gloves
One of the most important decisions you’ll make before grouting is choosing between sanded and unsanded grout. For narrow joints under 1/8 inch on polished marble and travertine, always use unsanded grout. The fine sand particles in sanded grout can scratch delicate polished surfaces. Sanded grout is the right call for joints 1/8 inch or wider, where it adds strength and resists shrinkage.
For mosaics and smaller format tiles, check out mosaic grout options to find the best match for your specific layout.
Pre-sealing is the step most DIYers skip, and it’s the one that causes the most regret. Seal the face of porous travertine and marble before grouting to prevent grout haze, pigment absorption, and staining. The sealer creates a temporary barrier so grout residue wipes off cleanly instead of soaking into the stone.
Pro Tip: Apply sealer only to the tile face, never to the edges or back. Sealed edges can prevent grout from bonding properly to the joint walls, which leads to cracking and separation over time.
Also prep the room itself. Lay painter’s tape along baseboards, cabinet edges, and any surfaces adjacent to the tile field. Grout is surprisingly easy to smear onto surfaces you didn’t intend to touch, and it dries fast.
If you’re new to the full travertine tiling process, reviewing the installation steps before grouting will help you understand why each prep step connects to the next.
| Material | Purpose | Notes |
|---|---|---|
| Unsanded grout | Joints under 1/8 inch | Won’t scratch polished stone |
| Sanded grout | Joints 1/8 inch or wider | Stronger, resists shrinkage |
| Epoxy grout | Wet or high-traffic areas | No sealing needed, harder to apply |
| Penetrating sealer | Pre-seal tile face | Apply before grouting |
| Rubber float | Apply and press grout | Minimizes surface scratching |
Mixing grout and applying it correctly
With tools and tiles prepared, let’s walk through mixing and applying grout safely and effectively.
Getting the mix right is more important than most people realize. Grout that’s too wet shrinks and cracks as it cures. Grout that’s too dry won’t press into joints properly and leaves voids that trap moisture and dirt.
Step-by-step mixing and application:
- Pour the dry grout into a clean bucket first, then add water gradually.
- Mix slowly until the consistency matches thick peanut butter. No lumps, no pooling liquid.
- Let the mix rest (called “slaking”) for 5 to 10 minutes, then stir once more before use.
- Scoop a manageable amount onto the tile surface. Don’t dump the whole bucket.
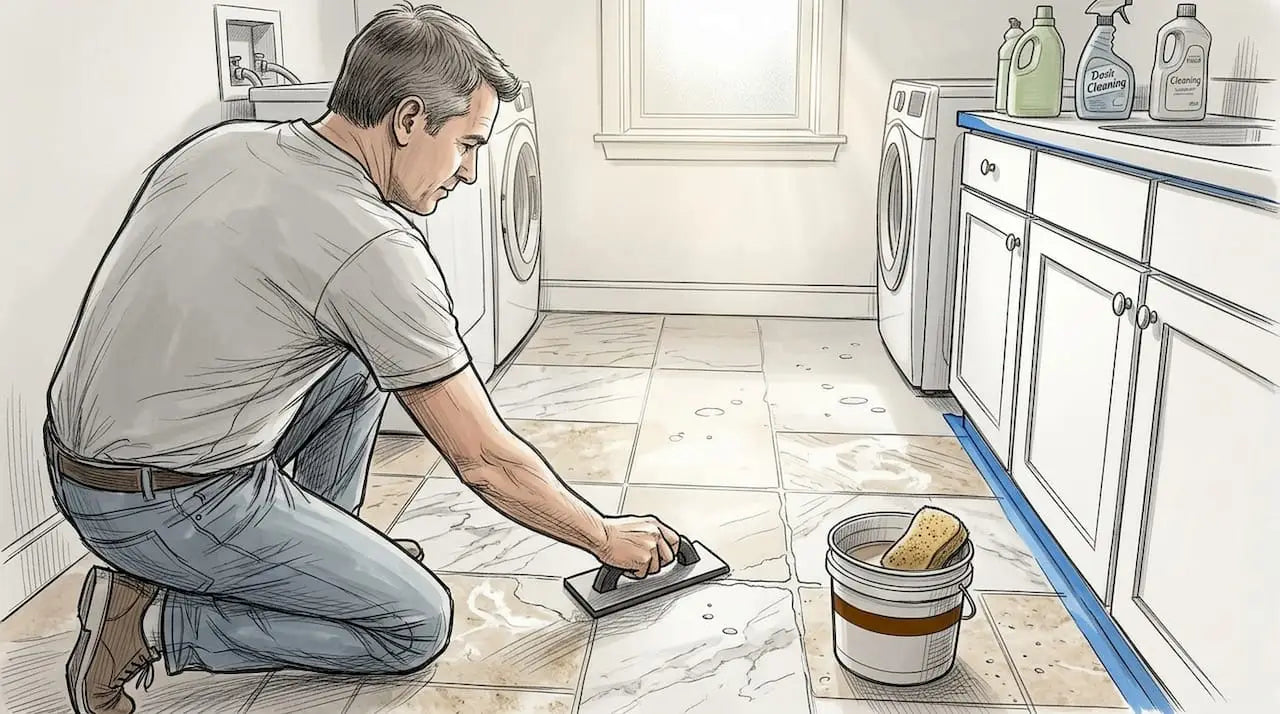
- Hold the rubber float at a 45-degree angle and press grout firmly into joints using diagonal strokes.
- Work in sections of about 3 square feet. Larger areas dry before you can clean them properly.
- After filling the joints, hold the float nearly flat and sweep off excess grout from the tile surface.
- Wait 15 to 20 minutes, then use a damp (not wet) sponge to wipe the surface in circular motions.
- Rinse the sponge frequently. Dirty sponge water redeposits grout onto the stone.
Pro Tip: Use a hard rubber float rather than a foam float for marble and travertine. Foam floats can flex and skip over joints, leaving voids. A hard rubber float gives you consistent pressure across the entire surface.
The 45-degree angle technique isn’t just a preference. Pressing diagonally across the joints forces grout into the full depth of the gap and eliminates air pockets. Air pockets weaken the joint and create spots where water can get in.
For detailed guidance on applying grout to complex layouts, the stone mosaic installation workflow covers the same principles applied to intricate patterns. If you’re working on a backsplash, stone backsplash grouting offers surface-specific tips worth reviewing.
Epoxy grout requires a slightly different approach since it sets faster and is stickier. Always work in even smaller sections with epoxy and keep a bucket of warm water nearby for tool cleanup.
Choosing the right grout for your project
The type of grout you use can make or break your project, so let’s compare your options for stone tile jobs.
Not all grout performs the same way on natural stone. The three main types you’ll encounter are sanded, unsanded, and epoxy. Each has a specific role depending on your joint width, surface type, and the environment the tile will live in.
When to use each grout type:
- Unsanded grout: Joints under 1/8 inch wide, polished marble, polished travertine, vertical surfaces
- Sanded grout: Joints 1/8 inch or wider, honed or tumbled travertine, floor tiles with wider spacing
- Epoxy grout: Showers, pool surrounds, kitchen floors, any wet or high-traffic area regardless of joint width
Epoxy grout is non-porous and stain-proof, which means it never needs sealing. Its compressive strength exceeds 5,000 psi compared to 1,500 to 3,000 psi for standard cement-based grout. That’s a significant durability advantage in demanding environments. The trade-off is that epoxy sets quickly, requires precise mixing of two components, and is harder to clean off stone surfaces during application.
| Grout type | Joint width | Best use | Sealing needed | Durability |
|---|---|---|---|---|
| Unsanded | Under 1/8 inch | Polished marble, travertine | Yes | Moderate |
| Sanded | 1/8 inch or wider | Honed/tumbled stone, floors | Yes | Good |
| Epoxy | Any width | Wet areas, high traffic | No | Excellent |

For homeowners planning a full renovation, the home tile renovation guide covers grout selection alongside other material decisions. If you’re still in the planning phase, tile project planning helps you map out your choices before purchasing.
Color matters too. Grout color affects the overall look of your installation more than most people expect. Light grout on white marble keeps the surface feeling airy and seamless. A contrasting grout color on travertine can highlight the pattern but will also show dirt faster. Think about maintenance when you choose color, not just aesthetics.
Curing, sealing, and maintaining your grout and tiles
Once the grout is in place, following the correct curing and maintenance steps is key to lasting results.
Grout isn’t fully set the moment it looks dry. Rushing the curing process is one of the most common mistakes homeowners make, and it leads to cracked joints and compromised strength.
Step-by-step curing and sealing schedule:
- Keep foot traffic off the freshly grouted surface for at least 24 hours.
- Avoid wet mopping or heavy cleaning for the first 48 hours.
- At the 48 to 72-hour mark, apply a penetrating sealer to both the grout lines and the stone surface.
- Let the sealer absorb for the time specified on the product label, then wipe off any excess.
- Allow the sealer to cure fully before exposing the surface to water or cleaning products.
- Reapply sealer every 1 to 2 years depending on traffic and use.
Wait a full 72 hours before sealing in humid climates or thick grout joints. Sealing too early traps moisture inside the grout, which weakens the joint from the inside out.
For routine maintenance, sweep or vacuum regularly to remove grit that can scratch polished stone. Use a pH-neutral cleaner specifically formulated for natural stone. Avoid vinegar, bleach, or any acidic cleaner. These products etch marble and travertine surfaces quickly.
If you notice grout haze after curing, a diluted solution of warm water and a stone-safe cleaner applied with a soft brush can lift light residue. For heavier haze, a commercial haze remover designed for natural stone is your safest option.
For long-term stone care, the travertine polishing guide covers restoration techniques that bring dull surfaces back to life. If you’re dealing with specific floor issues, marble floor troubleshooting addresses common problems with practical fixes.
Smart shortcuts and the lessons experts wish they knew sooner
Step-by-step guides give you the process, but they rarely tell you what separates a clean, professional result from a frustrating one. After working with marble and travertine across hundreds of installations, the biggest lesson is simple: most problems come from skipping prep, not from grouting itself.
Pre-sealing is the clearest example. Removing grout haze from unsealed stone can take hours of careful work and sometimes causes more damage. Preventing it takes 20 minutes. That math is obvious, but under time pressure, it’s the first step people cut.
Another shortcut that pays off: run painter’s tape along the outermost row of tiles before you start. Cleanup at the edges is always the messiest part, and tape makes it effortless.
Working in small sections isn’t just a beginner’s safety net. Experienced installers do it every time because grout consistency changes as it sits, and controlling a small area means you can adjust your technique without waste.
For a full walkthrough of the installation process from start to finish, the DIY travertine guide is a practical companion to this grouting guide.
The unconventional truth is that grouting well is mostly about patience. The technique itself isn’t complicated. What separates great results from mediocre ones is the willingness to slow down at every stage.
Enhance your stone tile project with expert support
You now have the knowledge to grout marble and travertine with confidence. The next step is making sure you’re working with stone that’s worth the effort.

At Surfaces Galore, we import premium marble and travertine tiles directly, which means you get authentic natural stone at prices that don’t require a contractor’s budget. Whether you’re tiling a bathroom floor, a kitchen backsplash, or an outdoor patio, our team can help you find the right stone and the right grout to match. Browse our full collection online, request samples, or reach out to our team for personalized guidance on your next project. We ship nationwide and love helping homeowners get it right the first time.
Frequently asked questions
Why do marble and travertine require unsanded grout in narrow joints?
Unsanded grout prevents scratching delicate polished stone surfaces and provides a smooth finish for joints under 1/8 inch wide. The fine sand particles in sanded grout are abrasive enough to damage polished finishes during application.
What happens if you skip pre-sealing stone tiles before grouting?
Skipping pre-sealing leads to grout haze and pigment absorption that bonds stubbornly to the stone surface. Removing it afterward is time-consuming and risks scratching or dulling the tile finish.
How long should grout cure before sealing and using stone tiles?
Allow 24 hours before walking on freshly grouted stone and wait 48 to 72 hours before applying sealer or exposing the surface to water and heavy use.
Is epoxy grout necessary for wet areas or high-traffic floors?
Epoxy grout is the best choice for these environments because it’s non-porous and stain-proof and never needs sealing. The trade-off is that it sets faster and requires more careful application than cement-based grout.
Leave a comment